How to Fix Scratched Corian Sinks: Easy DIY Steps to Restore a Like-New Finish
To fix scratched Corian sinks, you can restore them at home using cleaning, sanding, and polishing techniques. Start by degreasing the area and marking the scratches. For light surface scratches, sand using progressively finer grits from 600 to 1200 to blend the scratches without creating dips. For deeper gouges, apply a color-matched Corian filler or epoxy, let it cure, and then sand and polish to achieve a seamless finish. To prevent future scratches, use nonabrasive cleaners and mats. Follow these steps for a comprehensive guide and troubleshooting tips.
What Causes Scratches in Corian Sinks and When to Repair
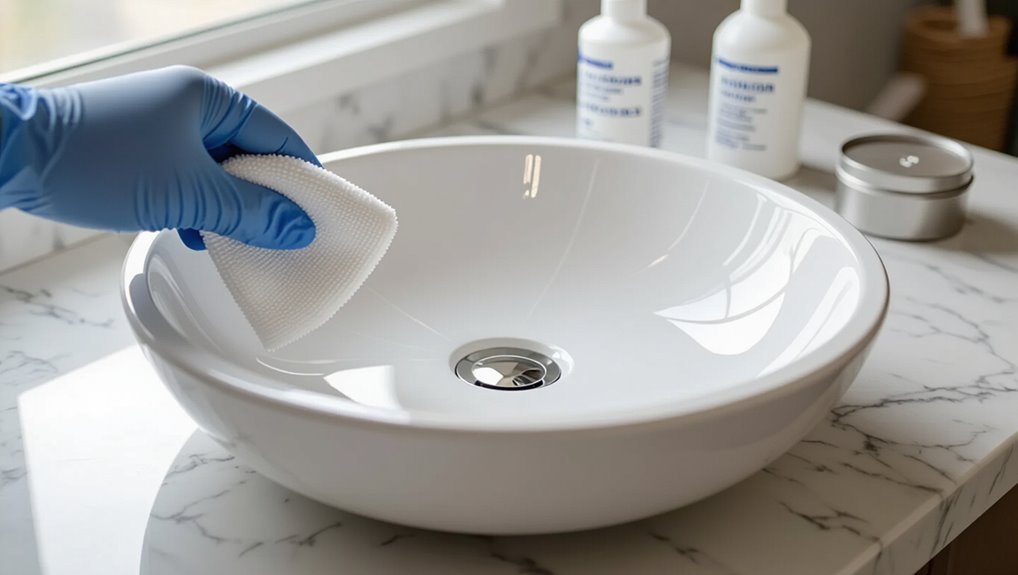
Everyday use—cutting with utensils, abrasive cleaning pads, and dropped cookware—accounts for most scratches on Corian sinks.
Surface damage ranges from light, polishable scratches to deep gouges that may require filling or professional repair.
A simple home test—rubbing a soft cloth and mild abrasive over the mark to see if it fades—helps determine whether a DIY fix is feasible.
Common sources of scratches (daily use, utensils, cleaning tools)
Many scratches on Corian sinks stem from routine kitchen activities: utensils dragged across the surface, abrasive scouring pads used for stubborn stains, and the occasional impact from heavy pots or pans.
Other common sources include metal cookware slid across the basin, grit trapped under dishware, and harsh brushes.
Recognizing these causes helps homeowners decide when and how to fix scratched Corian sinks effectively.
Types of surface damage: light scratches vs. deep gouges
Some scratches on Corian sinks appear as faint surface marks that only affect the finish, while others are deep gouges that cut into the material and compromise structural integrity.
Light scratches are shallow, often removable with polishing.
Deep gouges penetrate the substrate, collect dirt, and may require filling or professional repair.
Identification guides repair urgency and method without assuming homeowner testing capability.
How to test if a scratch can be repaired at home
How can a homeowner determine whether a scratch in a Corian sink is a DIY fix or requires professional attention?
Inspect depth: run a fingernail over the mark—if it catches, it’s likely deep and may need professional repair.
Light surface scuffs that don’t catch and disappear with a damp cloth or mild abrasive can be sanded and buffed at home following manufacturer guidelines.
Quick Summary: Can You Restore a Like-New Finish?
A brief assessment indicates that light scratches can usually be removed at home to restore a near-original appearance.
Medium scratches often require sanding and polishing for good results.
Deep gouges may need professional repair or section replacement to fully match the original finish.
Home repairs can achieve excellent results for minor to moderate damage but will be time-consuming and require proper tools and patience.
A professional should be contacted when scratches penetrate the material, when attempts to repair worsen the appearance, or when a guaranteed color and texture match is required.
Fast answer and expected results for light, medium, and deep scratches
Assess repairability quickly: light surface scratches can usually be buffed out to near-original sheen with mild abrasives and polish.
Medium scratches will often require sanding through progressively finer grits and careful retexturing—yielding a good, noticeable improvement though rarely perfect invisibility.
Deep gouges may need filler and professional refinishing to approach a like-new appearance but typically cannot be restored to an indistinguishable original without complete resurfacing.
Expect results: light—near invisible; medium—clearly improved; deep—visible repair.
When to call a professional
When scratches penetrate beyond the surface sheen or cover large areas, calling a professional is the prudent choice.
A trained technician assesses substrate damage, color-matches repairs, and uses industrial abrasives and fillers to restore uniform finish.
Engage a pro for deep gouges, structural cracks, extensive staining, or if DIY efforts fail.
Expect warranty-safe results, faster turnaround, and reduced risk of permanent damage.
Tools and Materials You’ll Need
A concise list of cleaning supplies and safety gear is presented first, since proper prep prevents contamination and protects the user.
Next, the necessary abrasives and polishing compounds are outlined, including recommended sandpaper grits (e.g., 220, 400, 800, 1200) and suitable polishing products for Corian.
Finally, optional power tools that speed the job—such as an electric sander and a buffing pad—are noted along with when their use is appropriate.
Cleaning supplies and safety gear
Several basic cleaning supplies and simple safety gear are essential before attempting to repair a scratched Corian sink.
A mild, nonabrasive cleanser and warm water remove grime; isopropyl alcohol helps degrease.
Microfiber cloths and soft sponges prevent additional marring.
Protective gloves, safety glasses, and a dust mask protect skin, eyes, and lungs during sanding or buffing.
A well-ventilated workspace is recommended.
Abrasives and polishing compounds (list of grits and products)
Select abrasives and polishing compounds that match the depth of the damage and the Corian color to guarantee an even, durable finish.
Use progressive grits for sanding and a finishing polish to restore sheen. Choose non-gel compounds made for acrylic solid surfaces.
- 320–400 grit sandpaper or pads for deep scratches
- 800–1200 grit for smoothing
- Fine polishing compound (e.g., Novus, Solid Surface Polish)
Optional tools for faster results (electric sander, buffing pad)
After choosing sandpaper grits and a finishing polish appropriate to the scratch depth and Corian color, optional power tools can greatly speed the repair and produce more uniform results.
An electric sander (orbital or random‑orbit) reduces manual effort and levels scratches evenly; use low pressure and fine pads.
A soft buffing pad on a drill or polisher yields consistent shine.
Always test and protect surrounding areas.
Step-by-Step Repair for Light Surface Scratches
First, the surface is thoroughly cleaned and dried to remove residue and mark the scratch.
Next, light scratches are addressed by hand-sanding in a sequence from fine to finer abrasives, followed by polishing to restore the sink’s sheen.
Finally, the area is cleaned again and a manufacturer-recommended sealer or conditioner is applied to protect the repair.
Pre-cleaning and prepping the sink
Begin by clearing the sink and surrounding area of dishes, soap residues, and loose debris to guarantee an unobstructed workspace.
Wear nitrile gloves and eye protection.
Rinse the sink, then clean with a mild, nonabrasive cleanser and a soft cloth to remove oils and stains.
Dry thoroughly with a lint-free towel.
Tape off adjacent countertops and fixtures to protect finishes.
Hand-sanding method with fine-grit abrasives (step sequence)
When addressing light surface scratches, the hand-sanding method with fine-grit abrasives provides controlled abrasion to blend and diminish marks without removing excessive material.
Using 400–600 grit, sand along the scratch with even pressure, then progress to 800–1000 grit to refine edges.
Wipe clean between stages, inspect under good light, and repeat until scratches are barely visible before moving to final polishing.
Polishing to restore sheen
Restore the sink’s gloss by progressively polishing the sanded area to match the surrounding finish.
Using a soft cloth or foam pad, apply a nonabrasive polishing compound in small circular motions.
Increase speed and pressure gently until the sheen aligns.
Wipe residue, inspect under good light, and repeat brief polishing passes as needed to achieve a uniform, original-looking luster without overworking the surface.
Final cleaning and sealing recommendations
After achieving an even sheen through polishing, the repair process concludes with a thorough cleaning and optional sealing to protect the surface.
Residual dust and polish should be removed with a mild, nonabrasive cleaner and a soft cloth.
If extra protection is desired, apply a manufacturer-approved acrylic sealer sparingly, buff lightly, and allow full cure before regular use to maintain appearance and durability.
Step-by-Step Repair for Medium Scratches
The technician first evaluates scratch depth and marks the repair area to guide work.
They follow a progressive sanding sequence from coarse to fine grits (for example 320 → 600 → 800 → 1200) to remove material, then apply polishing compounds with appropriate pads to restore smoothness.
Finally, edges are feathered and blended to match the surrounding finish for an inconspicuous repair.
Assessing scratch depth and marking repair area
Begin by closely inspecting the scratch under good lighting to determine its depth and extent: surface scuffs that disappear with a fingernail are light, while grooves that catch a nail or show a change in texture are medium or deeper.
For medium scratches, outline the affected area with removable painter’s tape, include a small margin of undamaged surface, and photograph for reference before proceeding.
Progressive sanding technique (coarse to fine grits, exact grit progression)
Start sanding with a methodical progression of grits, moving from coarser to finer abrasives to remove the gouge and blend the repair into the surrounding surface.
Begin with 120–150 grit to shape, follow with 220, then 320.
Finish sanding with 400, then 600 grit for final feathering.
Keep strokes even, check frequently, and clean debris between steps.
Using polishing compounds and pads for smoothing
Proceed to polishing once the sanding progression has removed visible gouges and the surface feels smooth to the touch.
Apply a small amount of fine polishing compound to a foam pad on a low-speed polisher or by hand. Work in overlapping passes, keeping the pad flat and cool.
Wipe residue, inspect sheen, and repeat with finer compound until the surface achieves an even, satin finish.
Blending edges to match surrounding finish
After polishing has removed visible scratches and produced a uniform satin surface, attention turns to blending the repair edges so the fixed area matches the surrounding finish.
Using fine-grit pads, the technician feather-sands the perimeter with light, overlapping strokes. Directional polishing aligns texture.
Clean the area, compare visually, and repeat subtle sanding and polishing until connections disappear and sheen matches uniformly across the sink.
Repairing Deep Gouges or Chips
For deep gouges or chips, a color-matched Corian filler or epoxy is typically required to rebuild the damaged area.
The technician mixes the filler to match the sink hue, applies it to the void, and allows it to cure before sanding and finishing.
Careful sanding, feathering, and texturing are used to remove seams and blend the repair so the surface color and finish are uniform.
When filler or epoxy is required
When scratches penetrate the Corian surface and expose a deep gouge or chip, a simple sanding routine is insufficient and a filler or epoxy becomes necessary to restore structural integrity and a smooth finish.
Deep damage that catches a fingernail, exposes substrate, or compromises sink strength requires filling.
Epoxy or resin fills rebuild volume, bond edges, and permit subsequent sanding and finishing to match surrounding material.
How to mix and apply color-matched Corian filler
If sanding and shaping cannot restore the damaged area without loss of material, a color-matched Corian filler restores volume and blends the repair into the surrounding surface.
Mix resin and powdered pigment per manufacturer ratios, achieving a smooth, lump-free consistency.
Apply with a small spatula, slightly overfilling the gouge. Remove excess immediately with a solvent-dampened cloth and allow the filler to cure fully.
Sanding and finishing after filler cures
Begin by confirming the filler has fully cured to the manufacturer’s specified time and hardness before any abrasion begins.
Use progressive grits—220, 400, 600—keeping sanding even and feathering into surrounding surface. Clean frequently to inspect progress.
Finish with a 1000–1500 grit wet sand, then buff with a non-abrasive pad and a polishing compound designed for solid surface to restore uniform sheen.
Avoiding visible seams and matching texture
Mask edges and work outward from the repair to blend the filled area seamlessly into the surrounding Corian.
Feather sanding changes with fine grit, matching the original sheen. Use a small stipple or scuff pad to replicate texture, then polish gradually.
Compare under good light, making micro-adjustments until seams vanish and texture aligns, ensuring a uniform, professional-looking finish.
Using Power Tools Safely and Effectively
Recommended tools include random-orbit sanders and low-speed rotary tools with fine-grit pads, used at manufacturer-recommended RPMs to match grit and avoid aggressive cuts.
Operators should monitor temperature, pause frequently, and use light pressure to prevent heat buildup and over-sanding that can warp or dull the finish.
Power tools can speed large or deep repairs when controlled, but hand-sanding remains safer for final blending and delicate areas.
Recommended tools and RPM/settings
Select tools and set RPMs that match the scratch depth and the Corian manufacturer’s guidelines to avoid heat buildup or surface melting.
Use a variable-speed orbital sander for light scratches (2,000–6,000 OPM equivalent) and a low-speed rotary with backing pad for deeper gouges, starting around 800–1,200 RPM.
Employ fine-grit sanding pads (400–1,200) and replace abrasives as they clog.
Preventing heat damage and over-sanding
Exercise steady control when sanding to prevent heat buildup and avoid removing more material than necessary; excessive speed, prolonged contact, or aggressive abrasives can melt Corian’s surface or create low spots that are hard to correct.
Maintain light pressure, keep the pad moving, use progressively finer grits, and pause to cool.
Inspect frequently and switch to hand sanding near edges or shallow scratches.
When power tools speed up vs. harm the repair
Power tools can dramatically speed up sanding and blending on Corian sinks, but they demand disciplined technique to avoid overheating, gouging, or creating uneven surfaces.
Operators should use low-speed random-orbit sanders, light pressure, and fresh abrasive discs; pause frequently to check progress and temperature.
Reserve rotary tools for tiny spots, practice on scrap, and finish by hand for uniform texture and sheen.
Restoring Matte vs. Glossy Corian Finishes
The author explains that the first step is confirming whether the sink originally had a matte or glossy Corian finish, since each requires different care.
Matte surfaces typically need gentle abrasives and light buffing to blend scratches, while glossy finishes call for finer polishing compounds to restore shine without altering reflectivity.
Recommended products and techniques are then matched to each finish to preserve appearance and longevity.
Identifying your sink’s original finish
A careful inspection will reveal whether a Corian sink originally had a matte or glossy finish, because each displays distinct light behavior: matte surfaces diffuse light and hide minor imperfections, while glossy finishes reflect sharply and show scratches more readily.
Examine under direct and angled light, note reflection clarity, run a dry fingertip across the surface for tactile differences, and compare to any remaining untouched edges or manufacturer documentation.
Different polishing approaches for matte and glossy surfaces
Once the finish type is confirmed, different polishing methods are required for matte versus glossy Corian to match the original appearance and avoid overworking the surface.
Matte surfaces need gentle, uniform abrasion with fine-grit pads to blend scratches without adding sheen.
Glossy surfaces require progressive sanding and high‑speed buffing with polishing compounds to restore shine, followed by careful inspection to guarantee consistent luster.
Products that preserve each finish type
Two distinct product categories are recommended for maintaining Corian finishes: low‑abrasion restorative pads and maintenance cleaners for matte surfaces, and progressive abrasives plus high‑grade polishing compounds and pads for glossy surfaces.
Matte care uses non‑abrasive cleaners, microfibre cloths, and fine restorative pads to remove scuffs without sheen change.
Glossy care employs graded sandpapers, polishing compounds, and buffing pads to rebuild mirror-like luster.
Common Mistakes and How to Avoid Them
Common errors when repairing Corian sinks include over-sanding that creates visible dips, using incorrect abrasives or chemicals that damage the surface, and poor color matching that leaves noticeable repair lines.
The consequences of each mistake are predictable and avoidable with proper technique and materials.
Clear guidance on sanding depth, suitable abrasives/cleaners, and color blending prevents these common problems.
Over-sanding and creating visible dips
Sand aggressively only when necessary; over-sanding a Corian sink can remove more material than planned and leave shallow depressions that are visible when wet or under light.
Work incrementally, checking progress frequently and blending outward from the scratch.
Use light, even pressure and finish with finer grits to restore uniform texture.
Stop as soon as the surface reads flat and consistent under varied lighting.
Using incorrect abrasives or chemicals
Select abrasives and chemicals that match Corian’s acrylic-resin composition and the severity of the damage; using overly coarse grits, insoluble powders, or harsh solvents can etch, dull, or chemically attack the surface.
Professionals recommend graded sandpaper, nonabrasive cleaners, and manufacturer-approved polishes. Test materials on an inconspicuous area first.
Avoid improvised compounds and household solvents to prevent irreversible surface degradation.
Poor color matching and visible repair lines
After using appropriate abrasives and cleaners, attention shifts to color matching and blending—the most visible indicators of a DIY or botched repair.
Improper pigment selection or uneven application leaves noticeable seams and mismatched patches.
Professionals recommend testing small samples, using manufacturer-matched repair kits, and feathering edges carefully.
Blend gradually, cure fully, then lightly sand and polish to erase repair lines and achieve a uniform appearance.
Maintenance Tips to Prevent Future Scratches
The section outlines practical cleaning methods and recommends nonabrasive products suited for Corian.
It also covers protective accessories like sink mats and grids, with tips on proper placement and use.
Finally, a simple routine care schedule is proposed to preserve the finish and reduce the risk of future scratches.
Best cleaning practices and safe products
A few simple routines and the right supplies greatly reduce the risk of scratches on Corian sinks.
Use gentle cleaners, soft cloths, and nonabrasive pads; avoid bleach and scouring powders. Rinse residues promptly and dry to prevent mineral spots.
Regular light cleaning preserves finish and reduces need for repair.
- Mild dish soap and warm water
- Microfiber cloths or soft sponges
- Nonabrasive, pH-neutral cleaner
Protective accessories (mats, grids) and usage tips
Building on routine cleaning habits, protective accessories and smart use greatly reduce wear on Corian sinks.
Soft rubber or silicone mats cushion dishes; stainless steel or polymer grids prevent direct contact with sharp cookware while allowing drainage.
Use nonabrasive pads and lift heavy items instead of dragging.
Replace worn mats promptly and avoid adhesive-backed products that can trap moisture or stain the surface.
Routine care schedule to maintain finish
Establishes a simple, regular maintenance schedule to preserve Corian’s finish and prevent small scuffs from developing into visible scratches.
Weekly gentle cleaning with a nonabrasive cleaner removes grit; monthly inspection identifies wear spots.
Address minor blemishes promptly with fine-grit pads and polishing compound.
Use cutting-board and pan protectors consistently.
Record dates of deep cleans and repairs to track surface condition and avoid cumulative damage.
Cost, Time, and When to Replace Instead of Repairing
Typical DIY repairs of minor Corian scratches usually take an hour or two and require inexpensive materials like fine sandpaper, polishing compound, and a microfiber cloth.
If scratches are deep, widespread, or accompanied by chips, discoloration, or structural issues, professional repair costs may exceed replacement value.
Full sink replacement is recommended when damage compromises function or aesthetics beyond reasonable repair or when ongoing repairs would be more costly than a new unit.
Estimated DIY time and material costs
A straightforward DIY repair for light surface scratches on a Corian sink typically requires 30–90 minutes and only a few basic supplies—sandpaper of progressively finer grits, a non-abrasive scrub pad, a polishing compound, and clean cloths.
While deeper gouges increase both time and material needs, sometimes requiring epoxy or color-matching kits and several hours spread over drying and curing periods.
Estimated costs range from $10–$60 for supplies; professional repair can run $150–$400.
Signs repair is not cost-effective
When damage is extensive, deep, or widespread enough that repair time, materials, and the likelihood of a satisfactory finish approach or exceed the cost of replacement, replacement becomes the more practical choice.
Other signs repair is not cost-effective include multiple separated cracks, structural delamination, recurring faults after prior fixes, and situations where labor hours, specialty tools, or professional restoration quotes exceed reasonable replacement estimates.
When full sink replacement is recommended
Under what circumstances does a full Corian sink replacement become the clear choice?
When damage is structural—deep gouges, extensive cracking, undermined mounting or persistent leaks—replacement outperforms repair.
Consider cost versus remaining lifespan: repairs cost time and materials; replacement solves recurring issues and restores warranty.
If repair approaches half the price of a new sink or if aesthetic integrity is irreparably lost, replace.
Before-and-After Care Checklist
After completing a repair, the technician inspects the surface, removes residue, and confirms water-tightness and finish match.
The owner is advised on immediate care steps such as waiting periods before use and gentle cleaning methods.
A schedule for long-term monitoring and periodic touch-ups is recommended to catch wear early and maintain appearance.
Immediate steps after finishing a repair
Several key tasks should be completed immediately once the scratch repair is finished to guarantee a durable, consistent finish.
Allow the repaired area to cure per product instructions. Remove residue with a soft, lint-free cloth, and avoid water or abrasive contact.
Inspect for texture and color match under natural light. Lightly buff if needed, and document the repair date and materials used for reference.
Long-term monitoring and touch-up intervals
Establish a routine inspection schedule to catch wear early: visually examine the repaired area and surrounding surface monthly for the first three months, then quarterly thereafter, noting changes in gloss, color match, or the appearance of new micro-scratches.
The owner should document findings, perform light touch-ups when dulling appears, and schedule professional resurfacing if damage progresses beyond repairable scope.
- Photo-log each inspection
- Keep touch-up kit handy
- Note cleaning agents used
Conclusion
Investigating whether minor scratches in Corian sinks truly signify inevitable decline reveals a subtler reality: many blemishes are reversible with simple, careful restoration. This understanding reframes damage not as permanent loss but as an invitation to maintenance and skillful repair. Embracing repairability reinforces stewardship of household materials, reduces waste, and empowers owners. Ultimately, the capacity to restore a like-new finish underscores that attention and technique often matter more than replacement, encouraging deliberate, sustainable choices.