How to Install a Double Sink With Garbage Disposal: Step-By-Step DIY Guide
To install a double kitchen sink with a garbage disposal, start by planning your layout and confirming plumbing and electrical requirements. Gather essential tools such as wrenches, sealant, and mounting hardware. The installation process includes removing the old sink, securing the new basins, installing faucets, mounting the disposal, connecting the dishwasher and trap assemblies, and finally testing for leaks and functionality. Make sure to follow manufacturer instructions and adhere to local codes for a successful installation. Continue reading for a detailed step-by-step guide.
Overview of Installing a Double Sink with Garbage Disposal
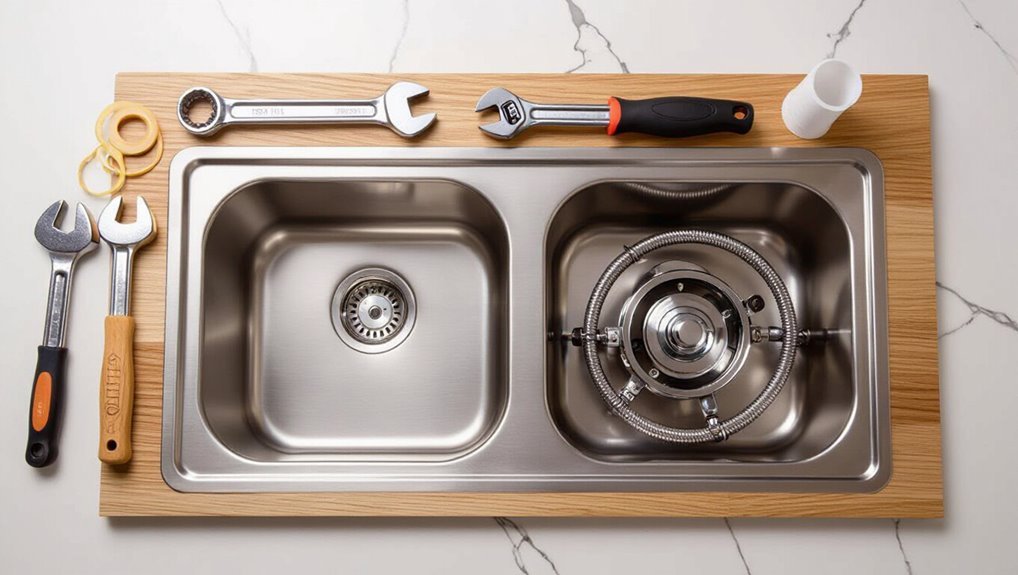
This section summarizes what the guide covers and who will benefit, focusing on installing a double sink with a garbage disposal.
It lists estimated time, required skill level, and the essential tools and materials.
Readers will learn whether the project suits a DIYer or requires a professional.
What this guide covers and who it’s for
While tackling a kitchen upgrade that combines functionality and efficiency, the guide explains step-by-step how to install a double sink with a garbage disposal, covering tools, materials, plumbing and electrical connections, and common troubleshooting.
It targets confident DIYers, homeowners replacing fixtures, and handy renters seeking guidance.
Content focuses on procedure, safety reminders, and decision points—not professional certification or permitting specifics.
Estimated time, skill level, tools, and materials needed
Because the project combines basic carpentry, standard plumbing, and simple electrical work, a competent DIYer should budget roughly 4–8 hours for a single-sink swap to double-sink conversion with one garbage disposal—or a full weekend (8–12 hours) if fabricating a new countertop cutout, relocating plumbing, or installing two disposals.
- Skill: intermediate DIY; basic plumbing and wiring knowledge.
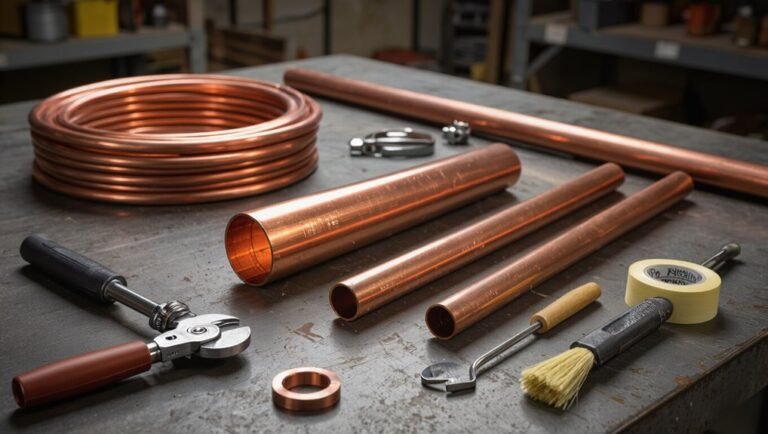
- Tools: drill, jigsaw, pipe wrench, plumber’s putty, screwdriver set.
- Materials: sinks, mounting hardware, P-trap, disposal unit, supply lines, sealant.
Preparing Before You Start
Before beginning work, the installer measures the counter and plans the double sink layout to guarantee proper fit and faucet clearance.
They select a sink style, garbage disposal model, and mounting method that match the countertop material and household needs.
Finally, they verify plumbing and electrical requirements, check for necessary permits, and confirm that rough‑in locations and circuit capacity are compatible.
Measuring and planning the double sink layout
Accurate measurements and a clear layout plan are essential when preparing to install a double sink; they determine cabinet modifications, countertop cutouts, plumbing placement, and faucet spacing.
Measure cabinet width, depth, and available underside clearance. Mark countertop centerline, sink basins, and drain locations.
Verify distance to existing water lines, trap arm alignment, and garbage disposal positioning. Note obstructions and appliance clearances before cutting.
Choosing the right sink type, garbage disposal model, and mounting style
Selecting the right sink type, garbage disposal, and mounting style shapes functionality and longevity for a double-sink installation.
Choose sink materials (stainless steel, composite, cast iron) based on durability and sound; basin configuration (equal or offset) for workflow; disposal size and horsepower for household needs and noise reduction; and mounting style (top-mount, under-mount, farmhouse) for countertop compatibility and ease of installation.
Verifying plumbing and electrical requirements and permits
When preparing to install a double sink, the homeowner should confirm that existing plumbing and electrical systems meet local codes and the project’s specific requirements.
Verify drain and vent capacity, pipe sizes, and clearances for disposals.
Confirm dedicated GFCI-protected outlets, wiring gauge, and breaker capacity.
Check permit requirements with local authorities and schedule inspections to guarantee compliance before beginning work.
Tools and Materials Checklist
A concise list of required tools, materials, and replacement parts sets the foundation for a smooth double sink installation.
The checklist should specify essentials like wrenches, plumbers’ putty, supply lines, and trap assemblies, plus any expected replacement components.
It can also note optional upgrades and accessories such as deck plates, water filtration fittings, or sound-deadening pads.
Required tools
Several essential tools and materials are required to install a double sink safely and efficiently.
The installer should have proper tools to cut, fasten, seal, and test connections.
Typical required tools include:
- Adjustable wrench, pipe wrench, basin wrench
- Plumber’s putty, silicone gun, plumber’s tape
- Hacksaw, drill with bits, screwdriver set
Required materials and replacement parts
With the tool list in place, attention shifts to the specific materials and replacement parts required to complete a double-sink installation.
Essential items include sink basins, mounting hardware, gaskets, and disposal flange kits. Plumbing connections and seals must be new or inspected.
- Sink, mounting clips, silicone sealant
- Garbage disposal unit, flange, gasket kit
- P-traps, tailpieces, dishwasher connector hoses
Optional upgrades and accessories
Although not required for a functioning double sink, optional upgrades and accessories can improve usability, durability, and aesthetics; typical additions include high‑arc faucets, soap dispensers, water filters, air gaps, and sound‑deadening pads.
Recommended items streamline use and reduce noise or leaks.
- High‑arc faucet for clearance and spray.
- Built‑in soap dispenser and filter.
- Sound‑deadening pads and mounting hardware.
Step-by-Step Installation Process
The installation begins with shutting off water and power and clearing the workspace to guarantee safety and access.
Next, the old sink and plumbing are removed and the cabinet and countertop openings are inspected and repaired as needed.
Finally, the new basins are set and secured, followed by installation of faucets, sprayers, and deck components.
Step 1 Turn off water and power; prepare workspace
Shut off both the main water supply and the circuit breaker feeding the sink’s outlet before any tools are brought to the area; then clear the countertop and under-sink cabinet of all items to create an unobstructed, well-lit workspace.
Verify water is off by testing faucets, label and cap visible supply lines, unplug or lock out the disposal circuit, and gather hand tools, towels, bucket, flashlight, and safety gear.
Step 2 Remove existing sink and disconnect plumbing
Begin by clearing any remaining items from under the sink and positioning a bucket and towels to catch water.
Shut off water valves, then disconnect supply lines and drain trap with wrench.
Remove dishwasher and disposal connections if present.
Detach mounting clips and sealant, loosen sink from countertop, and lift out old sink.
Label and set aside reusable fittings for reinstallation.
Step 3 Inspect and repair cabinet and countertop openings
Once the old sink is removed, inspect the cabinet and countertop openings for water damage, rot, or uneven edges that could prevent a proper fit.
Measure opening dimensions and check framing, shelf supports, and particleboard for softness.
Replace or reinforce damaged cabinet parts, trim uneven countertop cutouts, and seal exposed wood.
Confirm a clean, level, and dry opening before proceeding to sink installation.
Step 4 Install sink basins and secure to countertop
Fit each basin into the countertop opening to confirm alignment and clearance before permanent fastening.
Apply a continuous bead of plumber’s putty or silicone sealant beneath the rim, set the sink, and press evenly.
From below, attach mounting clips and tighten progressively to avoid warping.
Wipe excess sealant, check level, and allow sealant to cure per manufacturer instructions before proceeding.
Step 5 Install faucets, sprayers, and deck components
With the sink basins set and sealant curing, attention turns to installing the faucets, sprayers, and deck-mounted accessories.
Mount fixture shanks through countertop holes, secure with provided nuts and gaskets, then connect supply lines to shutoff valves.
Install sprayer and soap dispenser per manufacturer instructions.
Tighten connections, check mounting alignment, and clean excess sealant.
Restore water and test for proper operation and leaks.
Step 6 Install garbage disposal unit to primary sink
Begin by positioning the garbage disposal beneath the primary sink and aligning its mounting flange with the sink drain opening.
Rotate and engage the unit with the sink flange per manufacturer instructions, securing the mounting ring.
Tighten retaining bolts evenly.
Connect the discharge elbow to the disposal outlet and the drain tailpiece.
Reinstall trap components, check for proper alignment, then hand-tighten clamps and test for leaks.
Step 7 Connect dishwasher to disposal (if applicable)
Next, connect the dishwasher’s drain hose to the garbage disposal’s dishwasher inlet (if the disposal has one) or to the sink drain line using an adapter.
Secure the hose with its clamp, trim excess hose for a smooth run, and guarantee no kinks.
Tighten connections hand‑firm then quarter‑turn with a screwdriver.
Test for leaks by running the dishwasher and disposal briefly.
Step 8 Assemble and connect drainpipes, tailpieces, P-trap, and crossover drain between sinks
Assemble the drain components beneath the sinks, starting with the tailpieces and working toward the P‑trap and crossover connection between basins.
Install slip nuts and washers on each tailpiece, align the crossover tee between drains, and secure with hand-tightened nuts plus a quarter turn.
Attach the P‑trap to the tee and wall stub, check for proper slope, then test for leaks and adjust couplings as needed.
Step 9 Make electrical connections for disposal (hardwired or plug-in)
With the drain assembly in place and checked for leaks, attention shifts to powering the garbage disposal—either by hardwiring it into the house electrical system or using a cord-and-plug connection if the unit supports one.
The installer isolates power, follows local code, connects ground, hot and neutral per manufacturer instructions, secures junction box or cord, and restores power to complete the electrical hookup.
Step 10 Test for leaks, proper drainage, and disposal operation
Begin by restoring water and power, then systematically inspecting every connection for leaks while running water through both basins. This includes filling each sink, letting it drain, and observing the trap, tailpiece, dishwasher connection, and disposal flange for dripping or seepage.
Operate the disposal with cold water, listen for unusual sounds, confirm rapid drainage, and recheck seals while under load to detect slow leaks.
Step 11 Final sealing, insulation, and cabinet cleanup
Finish the installation by sealing all exterior joints, insulating exposed pipes, and tidying the cabinet interior to protect against moisture, pests, and heat loss.
Apply silicone around sink perimeter, foam or pipe insulation on cold and hot lines, and weatherstrip any gaps.
Replace or install a drip tray and vapor barrier, secure fasteners, remove debris, and organize tools to guarantee a clean, durable under-sink space.
Common Installation Scenarios and Variations
The guide next outlines typical layout choices and their practical effects on plumbing and use.
It compares one disposal versus two, noting installation complexity, cost, and trap/junction differences.
It also contrasts undermount and top-mount sinks and addresses retrofitting a disposal into an existing double sink versus installing both units during a new setup.
One disposal vs two disposals: pros, cons, and plumbing differences
When deciding between one disposal and two, homeowners should weigh efficiency, cost, and plumbing complexity: A single unit saves money and simplifies piping but limits simultaneous use. Dual units increase capacity and convenience at higher cost and require extra wiring, switches, and a revised T-connector layout.
| Option | Notes |
|---|---|
| Single | Lower cost |
| Dual | Higher capacity |
| Plumbing | T-connector differences |
| Electrical | One vs two circuits |
Undermount vs top-mount sink installation considerations
Choice between one or two disposals can influence countertop and sink selection, since disposal placement and access differ between undermount and top-mount installations.
Undermount sinks require support and precise cutouts; mounting hardware limits disposal space.
Top-mount sinks offer easier installation and gasketed seals but raise rim height.
Plumbers should consider cabinet depth, countertop material, and future maintenance access when choosing.
Retrofit disposal into an existing double sink vs new installation
Assess whether to retrofit a garbage disposal into an existing double sink or install disposals during a new sink build by comparing space, plumbing layout, and mounting compatibility.
Retrofit often requires adapting trap, drain lines, and cabinet clearance; electrical and switch placement may be limiting.
New installations allow planned drains, dedicated electrical runs, and ideal disposer size.
Cost, disruption, and timeline influence the chosen approach.
Troubleshooting Common Problems
When problems arise after installing a double sink, the installer should methodically check each system component.
Common issues include a disposal that won’t power on (verify electrical supply and try the reset), persistent leaks (inspect seals, slip nuts, and mounting gaskets), slow drainage or recurring clogs (examine trap crossover and venting), and vibration, noise, or misalignment (tighten mounts and realign connections).
A systematic approach helps isolate the cause and determine whether simple adjustments or professional help are required.
Disposal won’t turn on electrical and reset steps
If the garbage disposal fails to power on, the most likely causes are a tripped internal reset, a blown fuse or tripped breaker, or a loose or disconnected wiring connection.
Troubleshooting should proceed from the simplest reset button check to inspecting the circuit and then verifying wiring at the unit and switch.
Press reset, test the wall switch, check breaker/fuse, then confirm secure wiring connections and proper grounding.
Persistent leaks where to check and how to fix
After checking electrical causes for a nonworking disposal, attention should shift to persistent leaks that commonly plague double-sink installations.
Inspect sink flange, mounting ring, and putty seal; retighten or reseat with plumber’s putty.
Check disposal inlet gasket, hose clamps on dishwasher/overflow lines, and tailpiece slip nuts for hand-tight plus quarter turn with wrench.
Replace damaged gaskets or cracked pipes.
Slow drainage or frequent clogs diagnosing crossover and venting issues
Diagnose slow drainage and recurring clogs by isolating whether the problem stems from the disposal crossover, the shared drain line between sinks, or poor venting that allows airlocks.
Inspect P-traps and crossover connections for debris or improper slopes. Run each sink independently and test flow while disconnecting the crossover if safe.
Check vent pipe access for blockages or inadequate venting causing intermittent slow drainage.
Vibration, noise, or misalignment mechanical fixes
Begin by identifying the source: vibration, rattling, or misalignment in a double-sink assembly typically originates from loose mounting hardware, unsecured plumbing connections, or contact between the sink and cabinet framing.
Tighten mounting bolts, secure hangers and brackets, brace or pad cabinet contact points, and use threadlocker on fasteners if needed.
Check and realign disposal flange and tighten plumbing couplings to eliminate noise and movement.
Safety, Code, and Maintenance Guidance
The section outlines essential electrical and plumbing code requirements to guarantee the double sink installation meets local standards.
It also covers safe handling and disposal of trapped objects, a routine maintenance checklist with cleaning tips, and clear signs that indicate professional help is needed.
Readers are advised to follow codes and safety practices to prevent hazards and prolong system lifespan.
Electrical and plumbing code highlights to follow
Several essential electrical and plumbing code considerations must be observed when installing a double sink to guarantee safety, functionality, and long-term compliance.
Ground-fault circuit interrupter protection, dedicated circuit sizing for disposals, and secure wiring methods are required.
Drainage must include proper trap installation, accessible cleanouts, correct venting, and slope.
Use approved materials, follow local permits, and schedule inspections as mandated.
Safe handling and disposal of trapped objects
When retrieving items trapped in a double sink, prioritize personal safety and system integrity by using proper tools, turning off water and disposal power, and avoiding chemical drain cleaners that can harm pipes and create hazards.
Use pliers, a flashlight, and a drain wrench; wear gloves and eye protection.
Dispose of removed debris per local waste rules; document damage and call a plumber for complex or jammed disposals.
Routine maintenance checklist and cleaning tips
After removing trapped items and confirming the disposal or plumbing is functioning, attention turns to routine maintenance to prevent future clogs and prolong fixture life.
- Run cold water and disposal for 30 seconds after each use; grind citrus peels monthly to freshen.
- Flush drains weekly with baking soda and vinegar, then hot water.
- Inspect seals, mounting bolts, and P-trap quarterly; tighten or replace as needed.
Signs you need professional help
Recognize persistent leaks, recurring clogs, strong sewer odors, visible water damage, or electrical issues around the sink as signals to contact a licensed plumber or electrician.
These conditions can indicate failing seals, hidden pipe breaks, venting problems, or code violations that DIY fixes will not reliably resolve and may worsen safety or property damage.
Seek professionals for gas hookups, major remodels, structural concerns, or permit-required work.
Cost Estimate and Time Breakdown
Typical material and labor costs are presented as ranges to help plan a double sink installation budget.
Time estimates for each step—demolition, plumbing rough‑in, cabinet and sink installation, and finishing—are listed along with a projected total project duration.
This section enables quick comparison of cost scenarios and scheduling expectations.
Typical material and labor cost ranges
Cost estimates for installing a double sink vary widely based on sink type, countertop modification, faucet and plumbing fixtures, and labor rates.
Homeowners can expect basic installations to run toward the lower end while custom or complicated installs increase costs substantially.
Typical material ranges:
- $150–$800 for sinks
- $100–$600 for faucets and disposals
- $50–$400 for fittings and sealants.
Labor commonly adds $200–$1,200.
Time estimate per step and total project duration
A straightforward double-sink installation generally breaks down into discrete tasks—site preparation, sink and faucet removal, countertop modification (if needed), plumbing rough-in, fixture installation, sealing and cleanup—with each step carrying its own time range depending on complexity and contractor experience.
Typical DIY timing: prep 30–60 min, removal 30–90 min, cuts/mods 1–3 hr, rough-in 1–4 hr, install 1–2 hr, seal/cleanup 30–60 min; total 4–11 hours.
Helpful Tips and Best Practices
Practical tips can streamline the double-sink installation and help avoid common errors like misaligned drains or loose connections.
Recommended products—such as stainless steel drains, quality P-traps, and silicone sealants—extend longevity and reduce maintenance.
Consider a few targeted upgrades, like reinforced mounting brackets and water hammer arrestors, to improve durability and performance.
Tips to simplify installation and avoid common mistakes
Plan carefully before cutting into existing countertops or plumbing: measure twice, confirm clearances for faucets, drains, and cabinet storage, and verify that supply lines and the drain configuration will reach the new sink positions.
Follow concise steps to avoid leaks and misfits:
- Dry-fit assemblies before sealing.
- Use thread sealant and tighten firmly, not excessively.
- Label and route supply lines for easy service.
Recommended products and upgrades for longevity
Choosing durable fixtures and quality materials considerably reduces maintenance and extends the life of a double sink installation.
Recommend stainless steel sinks, brass or stainless faucets, and high-grade PVC or ABS drains.
Opt for insulated dishwasher and disposal mounts, stainless mounting hardware, and an oil-resistant plumber’s putty.
Consider a water hammer arrestor and a corrosion-resistant garbage disposal with stainless grinding components for longevity.
Visual Aids and Reference Diagrams
Clear diagrams improve understanding of the double sink installation by showing the plumbing layout for a shared drain and single disposal.
A separate schematic should present wiring options and suggested switch placement for the disposal and any under-sink lighting.
These reference visuals help installers confirm connections and avoid common layout errors.
Diagram: plumbing layout for double sink with single disposal
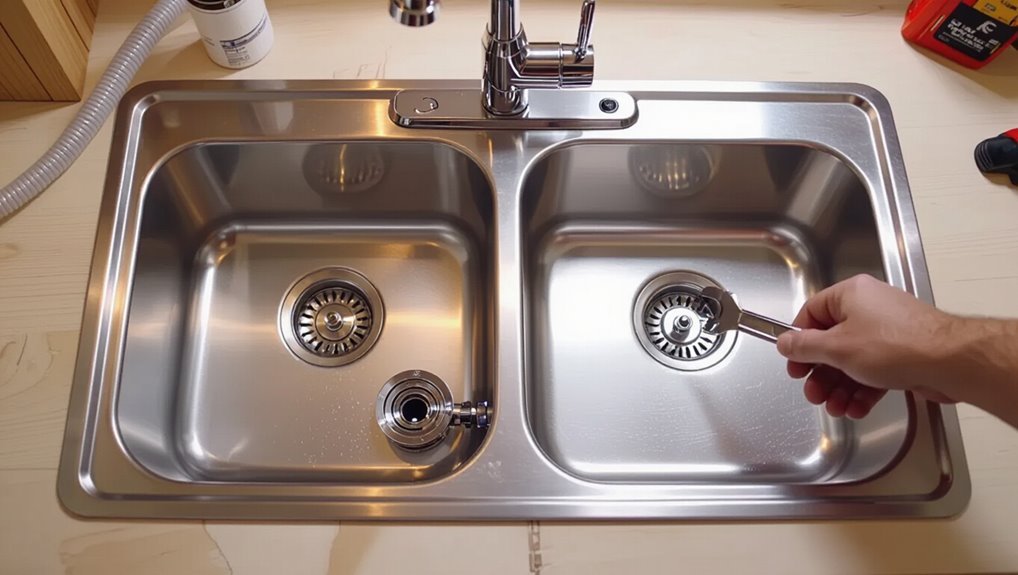
A labeled diagram clarifies how a double-bowl sink shares a single garbage disposal by showing the waste lines, trap configuration, venting, and connection points between the left and right basins.
It should indicate which sink ties directly into the disposal, the knockout plug location on the non-disposal side, the direction of flow, and recommended pipe diameters and slope to guarantee proper drainage and venting.
The diagram also denotes P-trap placement, a sanitary tee or wye for branch connection, air admittance or vent stack position, cleanouts, and typical 1¼–1½-inch pipe sizes with 1/4-inch per foot slope.
Diagram: wiring options and switch placement
Several compact wiring diagrams illustrate common options for powering a single garbage disposal from a double sink, showing dedicated circuits, shared circuits, hardwired versus cord-and-plug configurations, and typical switch locations.
The diagrams label breaker sizes, conduit or cable routes, switch types (single-pole, wall-mounted, or countertop), and knockout locations on the disposal.
Notes include GFCI requirements, local code reminders, and grounding details.
Conclusion
After the final wrench turn, silence hangs for a breath—then water whispers through gleaming bowls and the disposal hums to life. Hands step back, tools resting like faithful witnesses; the countertop catches late light, edges sealed, drains aligned. A small drip that might have been missed holds its secret for now. Pride settles in the quiet kitchen, and the faint, promising rumble from below hints that tomorrow will reveal whether the work truly holds.