How to Install a Stove Gas Line Safely: Step-by-Step Guide for Homeowners
To safely install a stove gas line, homeowners must first assess their skills, confirm the fuel type, and check local codes. Start by shutting off the main gas supply and planning a straight route from the shutoff to the appliance. Use approved materials such as black iron or CSST for the installation. Carefully cut, thread, and fit the pipes, applying the proper sealants. Attach a gas-rated flex connector, then pressurize and test every joint using a detector or soapy water. Schedule necessary inspections and keep documentation handy for reference on detailed steps and safety precautions.
How to Install a Stove Gas Line Safely: Quick Overview and Key Considerations
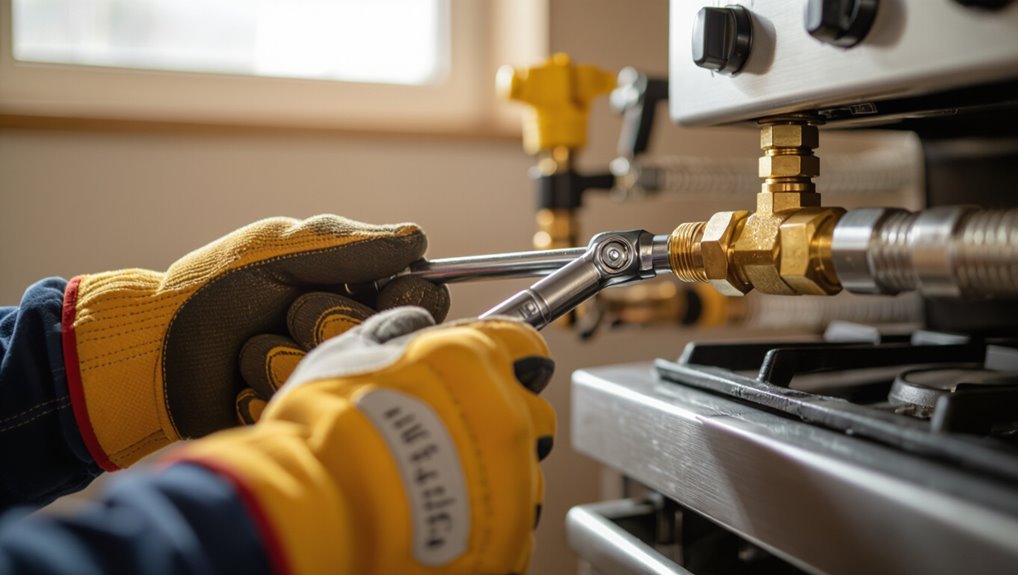
A concise assessment determines whether a stove gas line is a suitable DIY task or requires a licensed professional, based on the installer’s experience and local codes.
If uncertainties, complex routing, or permitting is involved, a licensed technician should be engaged to guarantee compliance and safe operation.
Legal, safety, and insurance consequences for improper installation can be significant, making informed decisions essential.
Short answer: is DIY installation appropriate?
Is DIY installation appropriate for a stove gas line? A homeowner evaluating how to install stove gas line should weigh skill, tools, and local code.
Simple tasks may seem doable, but small mistakes risk leaks, fire, or carbon monoxide.
If confidence, proper materials, testing knowledge, and permit awareness are lacking, DIY is generally not advisable; safety and compliance must guide the decision.
When to hire a licensed professional
When should a homeowner call a licensed professional for stove gas line work?
A licensed professional is recommended for new meter connections, rerouting mains, multi-appliance setups, complex fittings, confined-space runs, unknown piping materials, or any work beyond basic appliance flex line replacement.
Hire a pro if gas odors, prior amateur modifications, or lack of proper tools and testing equipment are present to guarantee safe, code-compliant results.
Legal, safety, and insurance implications
Because fuel gas work intersects building codes, safety standards, and insurance provisions, homeowners must understand legal, safety, and insurance implications before altering or installing a stove gas line.
Compliance with local codes and permits, use of licensed contractors where required, adherence to inspection and testing protocols, and notification to the insurer preserve safety and coverage.
Noncompliance risks fines, voided policies, and liability for damages.
Basic Concepts Every Homeowner Should Know
Homeowners should first recognize the difference between natural gas and propane and confirm which fuel their stove requires.
Common delivery methods—flex line, black iron, CSST, and corrugated stainless—have distinct installation and compatibility considerations, as do typical connection points and appliance fittings.
Basic required tools and safety equipment, including pipe wrenches, thread sealant rated for gas, gas detectors, and shutoff valves, should be identified before any work begins.
Types of gas used for stoves (natural gas vs. propane)
Although both natural gas and propane serve the same purpose of fueling kitchen stoves, they differ in composition, energy content, and delivery method.
These differences affect appliance compatibility, installation requirements, and cost. Natural gas is lighter, delivered via utility mains, often cheaper per BTU but lower energy density.
Propane is stored in tanks, yields more heat per volume, and may require conversion or different regulators.
Common fuel delivery methods (flex line, black iron, CSST, corrugated stainless)
Fuel delivery to a kitchen stove can be accomplished with several widely used types of piping—each with distinct flexibility, installation practices, and suitability for natural gas or propane.
Flexible stainless steel connectors offer easy appliance hookups; black iron pipe is rigid and durable for permanent runs.
CSST is flexible tubing requiring bonding and protected routing; corrugated stainless provides flexibility for tight spaces but needs proper fittings and support.
Typical connection points and appliance fittings
Several common connection points and fittings join a stove to a gas supply, and understanding their purposes helps secure a safe installation.
Typical points include the shutoff valve, supply stub, flexible connector, and appliance inlet.
Common fittings are flare, compression, and NPT threaded joints plus unions and adapters.
Proper seals, correct thread types, and approved materials guarantee leak-free, code-compliant connections.
Required tools and safety equipment
After identifying the connection points and fittings for a stove gas line, attention turns to the tools and safety equipment required to perform the work correctly.
Essential tools include pipe wrenches, tubing cutters, flaring tools, adjustable wrenches, thread sealant or approved tape, and a torque wrench.
Safety gear: gas detector, leak solution, safety goggles, gloves, and a fire extinguisher.
Pre-Installation Planning and Preparation
Before any work begins, the installer should verify local codes, obtain required permits, and schedule inspections.
They must evaluate the home’s gas supply and line sizing, select appropriate materials and fittings, and identify shutoff valves and emergency procedures.
The work area should be prepared with clear access and adequate ventilation to guarantee a safe installation.
Verifying local codes, permits, and inspections
Local building and gas codes, along with permit and inspection requirements, must be confirmed before any stove gas line work begins.
Homeowners should contact the local building department or gas utility to determine required permits, approved materials, and licensed installer rules.
Schedule mandatory inspections and obtain written permit approval.
Compliance prevents fines, guarantees safety, and documents that installations meet jurisdictional standards.
Assessing existing gas supply capacity and line sizing
Evaluate the home’s existing gas supply capacity and determine correct pipe sizing to guarantee the stove will operate safely and efficiently.
Inspect meter pressure, main supply line size, and appliance total BTU demand.
Calculate pressure drop over distance and fittings, compare to allowable limits, and identify need for service upgrade or parallel runs.
Document measurements for installer and permitting; consult a qualified gas technician as required.
Choosing the correct materials and fittings
Selecting appropriate materials and fittings is critical to guarantee a safe, code-compliant gas connection for a stove.
Use approved piping (black steel, CSST, or rigid copper where allowed) and listed flexible connectors. Choose correct diameters and pressure-rated valves, fittings, and connectors.
Avoid incompatible materials (galvanized steel for gas). All components must meet local codes and manufacturer specifications and be certified for residential natural gas.
Locating shutoff valves and emergency procedures
After confirming materials and fittings meet code and manufacturer requirements, identification of shutoff valves and emergency procedures must be addressed before any gas work begins.
The installer locates main and appliance shutoffs, verifies operability, and labels valves.
Emergency actions—evacuation, abandoning ignition sources, and contacting gas utility and emergency services—are reviewed and documented.
Access routes remain clear for rapid response.
Preparing the work area and ventilation
Before work begins, the installer secures the immediate area by removing flammable materials, providing clear access to exits and shutoffs, and establishing a defined boundary to keep bystanders at a safe distance.
They then guarantee adequate ventilation by opening windows, using exhaust fans, and positioning portable blowers if needed.
Lighting, footing, and tool staging are checked to prevent trips and ignition sources.
Step-by-Step Installation Process
The installation proceeds in a clear sequence of safety checks and mechanical tasks.
First, the main gas supply is shut off and verified, the old appliance is removed and connections inspected, and the route for the new line is measured and planned.
Next, the chosen pipe is cut, threaded or routed as needed, and fittings, valves and branch connections are installed.
Step 1 Shut off the main gas supply and verify
One clear, decisive action launches the installation: shut off the main gas supply and confirm it is fully isolated.
The installer locates the shutoff valve, turns it off, and tags it if possible. They open a nearby pilot or appliance valve to relieve residual pressure.
Next, they use a gas detector or soapy water to verify no flow and guarantee no odor before proceeding.
Step 2 Remove the old appliance and inspect connections
Disconnect and remove the existing stove, then inspect all fittings and the supply line for wear, corrosion, or damage.
The technician checks flexible connectors, shutoff valve, and pipe joints for leaks, pitting, or loose threads.
Any compromised components are documented and removed.
Clean mating surfaces, cap unused openings, and note required replacement parts before proceeding to measure and plan the new line installation.
Step 3 Measure and plan the route for the new line
Measure the space and visualize the most direct, code-compliant route from the shutoff valve to the stove connection.
Note required clearances, wall studs, joists, and obstructions. Identify entry and exit points, supports, and protection needs (e.g., sleeves, grommets).
Measure twice to confirm lengths and fitting locations. Mark the path clearly on walls or floors and verify compliance with local codes and appliance specifications.
Step 4 Cutting, threading, or routing the chosen pipe type
With the route marked and clearances confirmed, attention shifts to preparing the pipe: cutting, threading, or routing must match the selected material and the planned path.
Appropriate tools—pipe cutter for copper, threading die for black iron, conduit bender for flexible gas tubing—are used. Cuts must be square, threads clean, and burrs removed.
Maintain alignment to prevent stress and guarantee safe final connections.
Step 5 Installing fittings, valves, and branch connections
Begin by laying out all required fittings, shutoff valves, and branch components in the order they will be installed so each connection can be made cleanly and inspected as work progresses.
Install valves with thread sealant or approved tape, hand-tighten then torque per manufacturer.
Fit branches with appropriate adapters, support fittings, and hangers.
Verify alignment, accessibility, and clearances before final tightening and pressure testing.
Step 6 Connecting the flexible appliance connector
After the shutoff valves and branch connections are secured and inspected, attention shifts to attaching the flexible appliance connector that will link the stove to the distribution line.
The connector is sized and rated for the fuel type, threaded or quick-connect fittings aligned, and sealant or approved tape applied.
Connections are hand-tightened, then snugged with a wrench to manufacturer torque specifications, avoiding overtightening.
Step 7 Pressure testing and leak detection procedures
Proceed to pressurize the stove gas line and conduct systematic leak detection before placing the appliance into service.
Isolate appliance valves, cap fittings, and apply test pressure per code using an approved gauge and regulator.
Allow stabilizing dwell time, then inspect all joints with a soapy solution or electronic gas detector.
Record readings, correct any leaks, and re-test until pressure holds and no leaks are detected.
Step 8 Final connection to the stove and appliance-specific checks
Reconnect the stove to the pressurized gas line using approved fittings and a flexible connector rated for the fuel type and local code.
Tighten connections to manufacturer torque specs, apply thread sealant where required, and open the gas slowly.
Verify burners, oven ignition, and pilot functions; inspect for vibrations or rubbing on hoses.
Confirm appliance-specific ventilation and combustion clearances before leaving.
Step 9 Scheduling inspection and reactivating service
With the appliance confirmed sealed, functioning, and free of leaks, the installer arranges the required municipal or utility inspection and submits any necessary permits or paperwork.
The homeowner is informed of inspection timing and service reactivation procedures.
After a successful inspection, the utility officially restores gas service, documentation is filed, and the installer provides usage and safety guidance plus copies of inspection reports for records.
Safety Checks, Leak Testing, and Troubleshooting
The section outlines practical procedures for verifying gas-line integrity, including pressure testing with a manometer and simple soapy-water checks.
It describes how to recognize leaks or gas odors, the immediate actions and safety protocols to follow if a leak or malfunction is suspected, and steps for isolating the supply.
Common installation errors are summarized with corrective measures to restore a safe, code-compliant connection.
How to perform a pressure test (manometer and soapy water methods)
Begin by isolating the new gas line and pressurizing it with the appropriate test medium. Then verify integrity using a manometer for quantitative measurement and soapy water for quick visual detection.
Both methods must follow local code pressure limits, include capped fittings at endpoints, and be performed only after purging air and confirming all appliances are disconnected.
Record manometer readings, inspect all joints with solution, and wait specified dwell time.
Recognizing signs of leaks and gas odor protocols
When a gas leak occurs, prompt recognition and a clear response protocol are essential to prevent injury and property damage.
Homeowners should note rotten-egg odor, hissing sounds, dead vegetation near outdoors lines, and persistent pilot outage.
Verify by smelling near fittings and using a combustible gas detector—avoid ignition sources.
Log location, time, and detector readings for professionals; evacuate if concentrations increase.
What to do if you detect a leak or malfunction
Immediately stop appliance use and isolate the gas supply by turning off the shutoff valve if a leak or malfunction is suspected; then ventilate the area by opening windows and doors while keeping all ignition sources and electrical switches untouched.
Evacuate occupants and call emergency services or the gas utility. Do not re-enter until cleared.
Arrange qualified technician inspection, document findings, and follow repair or replacement recommendations.
Common installation errors and how to fix them
After a suspected leak is addressed and the appliance is secured, attention shifts to common installation errors that often cause safety or performance issues.
Methodical safety checks, proper leak testing, and straightforward troubleshooting catch most problems before they become emergencies.
Inspect fittings for loose or cross-threaded connections, replace damaged connectors, verify correct pipe sizing and support, retest with soapy water, and correct regulator or venting faults promptly.
Materials, Tools, and Cost Considerations
A clear cost breakdown should compare materials, permit fees, and professional labor to help homeowners budget accurately.
Recommended brands and durable materials—such as approved flexible stainless steel connectors and certified fittings—reduce long‑term risk.
An essential tools checklist, including pipe cutters, thread sealant rated for gas, and a combustible gas detector, prepares installers for a safe, compliant job.
Cost breakdown: materials, permits, and professional labor
Three main cost categories determine the overall expense of installing a stove gas line: materials, permits/inspections, and professional labor.
Materials include pipe, fittings, valves, and connectors.
Permit fees vary by jurisdiction and may require inspection charges.
Labor reflects plumber or certified gas fitter hourly rates and complexity.
Contingency for unforeseen issues (routing, access) should be budgeted.
Recommended brands and materials for durability
Durable stove gas installations rely on high-quality materials and trusted brands that meet code and resist corrosion, wear, and leaks.
Recommended materials include black iron pipe for concealed runs, corrugated stainless steel tubing (CSST) for flexible connections, brass fittings, and approved pipe thread sealants.
Preferred manufacturers often cited by professionals are Mueller, Gastite, Viega, and Anvil for consistent certification, durability, and warranty support.
Essential tools checklist
Checklist-minded preparation guarantees every installation proceeds safely and efficiently. A concise tools and materials roster reduces risk and unexpected costs. Necessary items include fittings, sealant, and pressure test gear. Typical cost estimates vary by quality and region.
- Pipe wrench, tubing cutter, adjustable wrench
- Gas-rated flexible connector, thread sealant, gas leak detector
- Manometer or pressure gauge, Teflon tape, safety gloves
Differences Between Natural Gas and Propane Installations
The article distinguishes natural gas and propane installations by highlighting their different pressure and regulator requirements.
It notes variations in connector types and required safety components for each fuel.
It also addresses conversion considerations and necessary adjustments when switching fuel types.
Pressure and regulator requirements
Because natural gas and propane operate at different pressures and combustion characteristics, their installation demands distinct regulator setups and piping considerations.
Natural gas typically runs at lower pressure (around 6–7 inches of water column for residential appliances) while propane is stored and delivered at much higher pressures and must be reduced by a regulator to the appliance-rated pressure.
Appropriate regulators, pressure testing, correct sizing, and certified adjustment guarantee safe, efficient operation.
Connector types and safety components
Several distinct connector types and safety components are required for gas ranges and other appliances, and their selection depends on whether the system uses natural gas or propane.
Natural gas systems often use larger-diameter rigid piping and approved flexible stainless connectors, while propane installations require regulators sized for higher pressure, POL fittings, and vibration-resistant hoses.
In both, CSA/UL-rated shutoff valves and leak-detection devices are essential.
Conversion considerations if switching fuel types
Any conversion between natural gas and propane requires careful attention to pressure, fittings, and appliance adjustments to guarantee safe, efficient operation. Technicians must verify regulator settings, replace orifices, and use correct connectors. Permits and inspections are mandatory. Incorrect conversion risks leaks, carbon monoxide, and fire.
| Safety | Cost | Peace |
|---|---|---|
| Critical | Variable | Restored |
| Urgent | Necessary | Priceless |
Maintenance and Long-Term Safety Practices
A regular inspection schedule for gas lines and connectors helps detect wear, corrosion, and leaks before they become hazardous.
Proper care of flexible connectors and valves—keeping them clean, untwisted, and switched off when not in use—extends service life and reduces risk.
Lines showing cracks, persistent leaks, or age-related deterioration should be replaced or evaluated by a licensed professional immediately.
Routine inspection schedule for gas lines and connectors
Routine inspections of stove gas lines and connectors should occur at fixed intervals to detect wear, corrosion, or leaks before they become hazards.
A practical schedule: visual checks monthly, hands-on pressure and connection assessments annually, and professional leak testing every 3–5 years or after renovations.
Records of findings, actions taken, and dates guarantee continuity and prompt remediation when issues arise.
How to care for flexible connectors and valves
Monthly visual inspections and the scheduled professional checks described previously set the stage for focused care of flexible connectors and valves.
Clean around fittings with a soft cloth, avoid harsh chemicals, and guarantee connectors remain free from kinks, corrosion, or paint.
Operate valves periodically to prevent seizing, confirm fittings stay tight, and document observations for each inspection cycle.
When to replace lines or call a professional
When should aging or damaged gas lines prompt replacement or professional intervention? Signs include visible corrosion, persistent leaks, brittle or cracked flexible connectors, repeated odor reports, altered burner performance, or after significant appliance relocation.
If lines are over 20–30 years old, have undergone physical damage, or if DIY confidence is lacking, a licensed gas technician should inspect, repair, or replace lines to guarantee code compliance and safety.
Common Scenarios and Solutions
Common installation scenarios present distinct challenges and require tailored solutions.
Examples include running a new line where none exists, moving a stove to a new location, converting from electric to gas, and arranging temporary connections for short-term use.
Each case demands specific planning, code compliance, and safety checks before proceeding.
Installing a new stove where no gas line exists
Several typical situations arise when a homeowner wants to install a gas stove but no supply line exists: new construction or additions, relocating a kitchen within an existing home, converting from electric to gas, and bringing gas service into a previously non-gasified property.
Options include extending a meter feed, installing underground service, running interior piping with shutoff valves, and obtaining permits and utility coordination.
Relocating a stove to a different kitchen position
Although relocating a stove often seems straightforward, it presents a range of practical and code-driven challenges that must be addressed up front.
The process requires measuring distances for existing gas, rerouting or extending piping, ensuring proper shutoffs and support, verifying venting and clearances, and obtaining permits.
A licensed plumber or gas fitter should assess structural access, appliance position, and local code compliance before work begins.
Upgrading from electric to gas stove
Moving a gas stove to a new location naturally raises questions for homeowners considering a switch from electric to gas, since the two jobs often overlap where gas piping, clearances, and code approvals are concerned.
Assessment should confirm gas supply capacity, venting requirements, and floor or wall penetration feasibility.
Permits, professional installation, and appliance-specific clearances guarantee safety and code compliance before conversion proceeds.
Temporary connections for short-term appliance use
When a gas stove must be used temporarily—during kitchen renovations, while testing a new appliance, or at a rental unit between tenants—short-term connections can provide a safe, code-compliant solution if handled properly.
Use approved flexible connectors, proper shutoff valves, and gas-rated fittings. Confirm leak testing, ventilation, and local code compliance.
Hire a licensed professional for installation, inspection, and timely disconnection.
Practical Tips to Ensure a Safe Installation
Before restoring gas service, a concise checklist should confirm leak tests, shutoff access, and appliance connections.
Clear documentation of permits, inspections, and as-built notes protects both compliance and future buyers.
When homeowners attempt DIY work, adherence to code, use of proper tools, and conservative testing procedures minimize risk.
Checklist to follow before turning gas back on
A concise checklist guarantees every safety-critical item is verified before restoring gas to a newly installed stove line.
Technicians or homeowners should confirm completed tasks and safety checks methodically:
- Verify all fittings are tight, thread sealant used, and pressure tested with soapy solution for leaks.
- Ascertain ventilation and shutoff valve accessibility.
- Confirm pilot/ignition operation and secondary appliance isolation before full supply restoration.
How to document work for permits and future buyers
Following the checklist and final safety checks, documentation consolidates the work for permit approval and for future owners.
Photographs of fittings, diagrams of routings, permit forms, inspection reports, and receipts should be organized and retained.
Include installer contact details, dates, materials, and pressure test results.
Provide copies to local permitting office and keep a homeowner file for resale transparency and liability clarity.
Best practices to minimize risks during DIY work
Minimize risk by planning each step, using the correct tools and materials, and recognizing when professional help is required.
Use appropriate fittings, leak detectors, and pressure tests; shut off gas and ventilate work areas. Follow codes, double-check measurements, and avoid makeshift solutions.
Wear PPE, work with a helper, document changes, and stop if uncertain—hire a licensed pro for inspections or complex issues.
Resources and Where to Get Professional Help
The section points readers to how to verify a gas fitter’s license and insurance through state licensing boards and insurance certificates.
It also lists relevant codes and standards (such as NFPA 54 and local plumbing or mechanical codes) with guidance on where to find official links.
Finally, it summarizes emergency steps and utility company procedures to follow if a leak or other urgent issue arises.
How to verify a gas fitter’s license and insurance
Because gas work carries significant risk, confirming a gas fitter’s license and insurance is an essential step before hiring.
Check licensing with the state or local licensing board online or by phone. Verify active status, classifications, and disciplinary history.
Request proof of liability and worker’s compensation insurance, note provider and policy numbers, and contact insurers to confirm coverage limits and effective dates before contracting services.
Useful codes and standards references (NFPA, local code links)
Codes and standards form the backbone of safe gas-line installation, guiding materials, clearances, pipe sizing, testing, and venting requirements.
Consult NFPA 54 (National Fuel Gas Code), local building codes, and manufacturer’s installation instructions.
Link to municipal code offices or state plumbing boards for jurisdictional variations.
Use referenced standards during permit application and inspections; retain copies for contractors and inspectors to guarantee compliance and accountability.
Emergency contact steps and utility company procedures
After reviewing applicable codes and securing permits, attention should turn to emergency contact steps and the utility company’s procedures so homeowners and contractors know who to call and what to expect during a suspected gas incident.
Include local utility emergency numbers, shutoff protocols, and response times. Advise evacuating, avoiding ignition sources, and meeting responders at a safe location.
Keep meter and account info accessible.
Conclusion
In sum, installing a stove gas line calls for prudent discretion and measured care; homeowners are reminded that working with gas benefits from a gentle deference to expertise. Through thoughtful planning, careful adherence to codes, and routine inspections, risks are quietly minimized and comfort preserved. When uncertainty lingers, engaging a licensed professional is a tasteful safeguard—an unobtrusive investment that guarantees both household ease and the subtle dignity of doing the job right.