How to Install a Gas Geyser in Your Bathroom: Step-by-Step Safety Guide
To safely install a gas geyser in your bathroom, follow these essential steps: choose the appropriate indoor or outdoor-rated unit, verify the flow rate and ensure proper ventilation, and comply with local regulations. It’s crucial to hire a licensed gas plumber for the installation of the gas line, shutoff valve, and venting, as well as to connect water fittings according to the manufacturer’s instructions. Be sure to conduct pressure and leak tests, confirm carbon-monoxide safety measures, and document the installation for warranty purposes. After installation, adhere to maintenance schedules for long-term safety. Detailed guidance on each step and checklist is provided to ensure a successful installation.
Overview of Installing a Gas Geyser in Your Bathroom
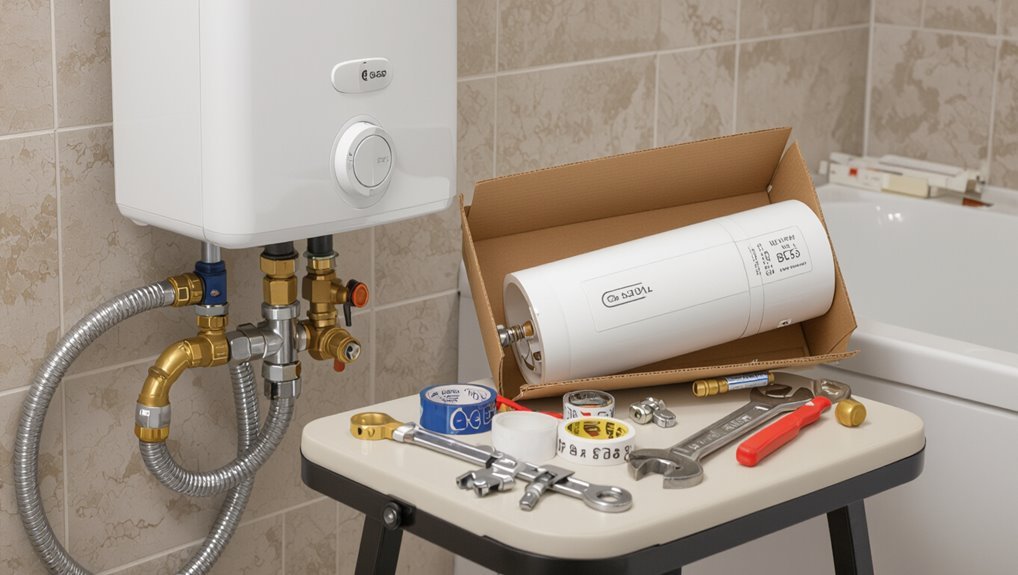
A gas geyser is a tankless water heater that ignites gas to heat water on demand, using a burner, heat exchanger, and flow sensor to regulate temperature.
Common configurations include wall-mounted instantaneous models and larger units with varying BTU ratings and safety features like flame failure and pressure relief valves.
Compared with electric heaters, gas geysers typically offer faster recovery and lower operating costs but require proper ventilation, gas supply, and stricter safety precautions.
What a gas geyser is and how it works
Gas geysers are compact, wall-mounted water heaters that heat water on demand using natural gas or LPG, providing hot water without a storage tank.
They draw cold water, pass it through a heat exchanger heated by a controlled burner, and deliver warmed water instantly.
Understanding this operation is essential when planning how to install a gas geyser in bathroom safely and efficiently.
Typical components and models available
Following the basic operating principles, the next consideration is the array of components and models available for bathroom gas geyser installations.
Typical components include burner assembly, heat exchanger, thermostat, flow sensor, gas valve, exhaust flue, and safety devices (overheat and flame failure).
Models vary by capacity, ignition type (pilot or electronic), mounting (wall/compact), and fuel compatibility (natural gas or LPG).
Benefits and limitations of gas geysers versus electric heaters
Several key factors distinguish gas geysers from electric heaters when evaluating bathroom installations: energy efficiency and running cost, hot water delivery speed, installation and venting requirements, and safety considerations.
Gas models heat faster and cost less per unit energy but require gas supply, combustion ventilation, and CO precautions.
Electric heaters are simpler to install, safer indoors, but often slower and costlier to operate long-term.
Safety and Legal Requirements Before Installation
Before beginning installation, the installer should verify local codes, required permits, and whether a certified professional must perform the work.
They must assess carbon monoxide risks and ventilation standards, confirm gas supply regulations and appliance certification, and review insurance and warranty implications.
Compliance with these legal and safety requirements protects occupants and guarantees the geyser functions lawfully and safely.
Local codes, permits, and certified installer requirements
Complying with local building codes and permit requirements is essential when planning a gas geyser installation.
Authorities often require permits, inspections, and adherence to specific venting, gas line, and placement standards.
Many jurisdictions mandate installation by licensed or certified gas plumbers to guarantee safety and code compliance.
Verify local agency procedures, obtain permits before work begins, and retain inspection documentation for legal and warranty purposes.
Carbon monoxide risks and ventilation standards
After confirming permits and installer qualifications, attention turns to carbon monoxide (CO) hazards and required ventilation for gas geysers.
The installer assesses combustion air, exhaust flues, and room ventilation rates to prevent CO buildup. Mandatory CO detectors, minimum vent sizing, and clearances are verified per code.
Proper mechanical or natural ventilation and regular maintenance mitigate poisoning risk and guarantee safe operation.
Gas supply regulations and appliance certification
Any installation must align with national and local gas supply regulations and use appliances bearing approved certification marks; this guarantees fuel compatibility, pressure requirements, meter capacity, and safety shutoffs are adequate.
Installers should verify local permitting, pipeline capacity, and approved venting materials. Only certified geysers with clear serial numbers and compliance labels should be used, and installation must follow manufacturer instructions and regulatory codes.
Insurance and warranty considerations
Beyond verifying regulations and certified appliances, installers and owners must confirm that insurance and warranty conditions are met before work begins.
Policies should cover installation, accidental damage, gas leaks, and liability for contractors.
Warranties require certified installation and recorded service dates; noncompliance can void coverage.
Confirm limits, excesses, and claim procedures, and obtain written confirmation from insurer and manufacturer prior to installation.
Tools, Materials, and Pre-Installation Checklist
Before beginning installation, the preparatory phase requires confirming tools, materials, site conditions, and fuel type to avoid delays and safety issues.
The installer should verify that all recommended tools and safety gear are available, gather necessary spare parts, inspect the site for adequate space, ventilation, exhaust routing and clearances, and confirm whether the supply is natural gas or LPG.
A clear checklist reduces on-site guesswork and guarantees compliance with manufacturer and regulatory requirements.
- Required tools and safety equipment
- Materials and spare parts to have on hand
- Site assessment checklist (space, ventilation, exhaust path, clearances)
- Fuel type confirmation: natural gas vs LPG
Required tools and safety equipment
A concise inventory of tools, materials, and safety equipment is essential to guarantee a safe, code-compliant gas geyser installation.
Required tools include adjustable wrench, pipe wrench, tubing cutter, drill with masonry bits, spirit level, torque screwdriver, leak detector solution, and manifold gauge.
Safety equipment: gas-rated shutoff keys, respirator, safety glasses, gloves, flame-resistant clothing, and a carbon monoxide detector for post-installation testing.
Materials and spare parts to have on hand
Checklist items should be organized into categories—gas line components, water fittings, venting parts, electrical accessories, and consumables—to guarantee the installation proceeds without delays.
Include gas shutoff valve, flexible connector, pipe sealant, isolation valves, pressure relief valve, compression fittings, vent pipe sections, flashing, terminal cap, junction box, grounding wire, cable connectors, wire nuts, silicone, PTFE tape, spare filters and mounting hardware.
Site assessment checklist (space, ventilation, exhaust path, clearances)
With materials and spare parts organized and on hand, the installer should next assess the proposed location for the gas geyser, confirming adequate space, ventilation, exhaust routing, and required clearances.
Inspect mounting surface, measure clearances to combustibles and service access, verify natural or mechanical ventilation capacity, identify unobstructed exhaust path to outside, and mark locations for flue, gas inlet, water connections, and condensate drainage.
Fuel type confirmation: natural gas vs LPG
Why confirm the fuel type before connecting supply?
Installers must verify whether the property uses natural gas (mains) or LPG (bottled) because burners, pressure settings, regulators, and fittings differ.
Using incorrect fuel risks poor combustion, damage, leaks, or explosion.
Check meter, cylinder presence, appliance rating plate, and local supply documentation.
Fit correct regulator, jets, and certification before commissioning.
Selecting the Right Gas Geyser for Your Bathroom
Choosing an appropriate gas geyser begins with calculating required flow rate and temperature rise to guarantee consistent hot water delivery.
Consideration of energy efficiency, estimated operating costs, and whether the unit is rated for indoor or outdoor installation helps narrow suitable models for the bathroom layout.
Finally, compare brands, specific features and warranty terms to balance reliability, upfront cost and long-term value.
Sizing the unit for flow rate and temperature rise
Determine required flow rate and temperature rise before selecting a gas geyser; this guarantees the unit can deliver enough hot water at the desired temperature for the bathroom’s fixtures.
Calculate peak simultaneous fixture flow (liters per minute) and desired outlet temperature. Subtract incoming cold-water temperature to find temperature rise.
Choose a geyser with rated flow at that rise, allowing a small safety margin for reliable performance.
Energy efficiency and operating cost considerations
Evaluate energy efficiency and operating costs early in the selection process, since a geyser’s rated efficiency, burner type, and control features directly affect long-term expenses.
Compare energy factor, annual fuel utilization efficiency (AFUE) where available, and pilot versus electronic ignition.
Consider modulation, standby losses, and maintenance frequency.
Estimate fuel consumption based on local gas prices and expected hot-water demand to project realistic operating costs.
Matching unit features to bathroom layout (indoor vs outdoor-rated)
Match the geyser’s enclosure and venting features to the bathroom’s location and layout to guarantee safe, efficient operation.
Indoor installations require sealed-combustion or direct-vent units, adequate clearances, and routeable fluework to exhaust gases outside.
Outdoor-rated models tolerate exposure and often need minimal venting but still require weather protection and secure mounting.
Consider placement, ventilation paths, and local codes when choosing.
Brand, model comparison and warranty factors
When choosing a gas geyser, comparing brands and models alongside warranty terms clarifies long-term value and reliability; performance specs, materials, service networks, and warranty scope should all inform the decision. Evaluate efficiency, safety features, local service availability, and warranty inclusions—parts, labor, and duration—against price and reviews to pick the best fit.
| Criterion | Consideration |
|---|---|
| Efficiency | Energy rating, flow rate |
| Safety | Flame failure, sensors |
| Service | Local technicians, parts |
| Warranty | Duration, coverage |
Step-by-Step Installation Process
The installer begins by preparing the area, shutting off gas and water supplies, and confirming clearances.
The unit is then mounted securely and connected to the gas line, with water inlet and outlet piping fitted using appropriate connectors and seals.
Finally, the exhaust flue or venting is installed to meet clearance and draft requirements before testing for leaks and proper operation.
Preparing the installation area and shutting off supplies
Begin by clearing the work area around the chosen installation point and ensuring clear access to gas, water, and venting lines.
Verify adequate ventilation and remove combustible materials.
Turn off the main water shutoff and isolate the cold-water feed to the geyser location.
Close the gas supply at the service valve and bleed residual pressure per local code.
Label valves and inform household members.
Mounting the unit securely to wall or bracket
Secure the mounting bracket or mark wall anchor points before lifting the gas geyser, ensuring the support aligns with manufacturer hole patterns and local clearance requirements.
Use appropriate anchors for substrate, level the bracket, and torque fasteners to specified values.
With two people, lift the unit, engage mounting slots, verify vertical plumb, and confirm secure engagement.
Inspect for wobble before proceeding.
Connecting the gas supply line safely
Proceed to connect the gas supply line only after confirming the service is shut off and all fittings and materials match the appliance’s fuel type and pressure ratings.
Use approved flex connectors or rigid piping, apply appropriate thread sealant for gas, torque fittings to manufacturer specs, and install a shutoff valve accessible outside the unit.
Perform a leak test with soapy solution and pressure or electronic detector.
Installing water inlet and outlet piping with appropriate fittings
Before attaching any fittings, the installer verifies the cold-water shutoff is closed, the supply is drained, and the water pressure matches the geyser’s specifications.
They fit isolation valves, pressure-relief connections, and inlet strainers using compatible materials and thread sealant.
All joints are tightened to torque specs, checked for alignment, and tested for leaks at working pressure before proceeding to final mounting and insulation.
Installing exhaust flue/venting to comply with clearance and draft requirements
Begin by identifying the manufacturer’s venting diagram and the local code requirements.
Then plan the flue route to maintain required clearances, proper rise, and minimal bends to guarantee adequate draft.
Select listed vent materials and correct diameter; secure joints with approved seals.
Maintain recommended vertical rise, install supports, flash roof penetrations, extend termination above roofline per code, and verify unobstructed exhaust.
Installing combustion air intake and ensuring adequate ventilation
After completing the flue installation and confirming clearances and draft, attention turns to providing adequate combustion air and room ventilation.
The installer sizes intake openings per local code, locates vents to draw fresh air (external louvers or dedicated ducts), seals unintended leaks, and guarantees cross-ventilation.
Mechanical ventilation or permanent openings are added where required, avoiding obstruction and maintaining clear airflow to prevent CO buildup.
Electrical connections for ignition and controls (if applicable)
Connect the electrical system only after confirming gas and flue components are secure and power is isolated; the installer mounts and wires ignition modules, thermostats, and control boards per the manufacturer’s schematic, using appropriately sized conductors, proper grounding, and listed connectors to guarantee safe, reliable operation.
Verify polarity, protective devices, and cable routing; secure connections with strain relief, label circuits, and test controls and safety interlocks before restoring full power.
Leak testing gas joints and pressure checks
With electrical components verified and power isolated, attention turns to verifying the integrity of gas joints and system pressures.
A soapy solution is applied to all fittings to detect bubbles; threaded seals and soldered joints receive visual inspection.
Supply valve is opened slowly, pressure gauge monitors inlet pressure against manufacturer specs.
Any leak or pressure deviation mandates immediate shutoff and remedial tightening or replacement.
First ignition, flame adjustment, and performance test
The installer initiates the unit by opening the manual gas valve gradually, energizing the ignition system, and engaging the pilot sequence according to the manufacturer’s procedure; observation of a steady, blue pilot flame indicates successful ignition.
They adjust the main burner for stable combustion, verify flame pattern and color, monitor water temperature rise under flow, check for combustion odors, and document operational readings for performance validation.
Final sealing, insulation, and finishing touches
Having confirmed steady ignition and correct burner performance, the installer proceeds to final sealing, insulation, and finishing touches to guarantee safety, efficiency, and longevity.
Joints are sealed with appropriate gas-rated sealant, vent connections secured, and pipe insulation applied to prevent heat loss and condensation.
Mounting hardware is checked, combustion air pathways verified, and a final leak and operational check documented before returning the bathroom to use.
Common Installation Scenarios and Solutions
Common installation scenarios pose distinct challenges and require tailored solutions.
Examples include fitting units into small or enclosed bathrooms, retrofitting into existing plumbing and gas systems, mounting on balconies or outdoors, and managing shared flues or multiple-unit setups.
Each situation demands specific safety, ventilation, and connection considerations to guarantee reliable and compliant operation.
Installing in small or enclosed bathrooms
Fit a gas geyser in a small or enclosed bathroom requires careful planning to confirm safety, compliance, and functionality.
Position unit near exterior wall or under skylight for direct flue routing. Confirm minimum clearances, install approved ventilation (mechanical if natural inadequate), fit carbon monoxide detector, and maintain accessible service space.
Verify local codes and use certified installers to prevent hazards and confirm proper exhaust.
Retrofitting into existing plumbing and gas systems
After addressing ventilation and clearances for compact bathrooms, attention turns to integrating a gas geyser with existing plumbing and gas supplies—an often more complex task than new installations.
Assess pipe sizes, pressure, and material compatibility; isolate and upgrade corroded lines; fit approved shutoffs, flexible connectors, and pressure regulators; confirm adequate gas capacity; and document modifications for code compliance and future maintenance.
Outdoor or balcony-mounted installations
Many installations place gas geysers outdoors or on balconies to meet ventilation and exhaust requirements while minimizing indoor space impacts.
Installers must guarantee secure, weatherproof mounting, proper clearances from windows and doors, and compliant flue routing.
Gas and water connections require protected piping and freeze protection where needed.
Local codes and neighbor safety dictate placement, noise mitigation, and routine inspection access.
Installations with shared flues or multiple units
Several common configurations require one or more gas geysers to share a flue or to be installed in close proximity, each presenting distinct venting, combustion air, and safety challenges that must be addressed through careful design and compliance with manufacturer and code requirements.
Shared flue systems need proper draft balancing, individual termination requirements, and corrosion-resistant liners.
Installations require inter-unit clearance, dedicated air supplies, and professional verification.
Troubleshooting Post-Installation Issues
Following installation, common post-installation problems are addressed, including causes and remedies for no ignition or a weak flame and solutions for poor flow or fluctuating temperature.
The section outlines immediate actions for suspected gas leaks or odors, and diagnostics for excessive exhaust condensation or backdrafting.
Clear, stepwise checks and safety precautions are provided to help identify and rectify these issues.
No ignition or weak flame causes and fixes
When a gas geyser fails to ignite or produces a weak flame, the problem usually stems from issues with fuel supply, air mixture, ignition components, or safety interlocks.
Diagnosing these areas methodically helps isolate the cause and determine whether a user-level fix (cleaning, adjustment, battery replacement) or professional service is required.
Check gas valve, supply pressure, pilot/igniter cleanliness, electrode gap, and venting.
Replace batteries or call a technician if unsafe.
Poor hot water flow or inconsistent temperature
Inspecting poor hot water flow or inconsistent temperature after installing a gas geyser requires checking both supply and unit-specific factors that affect delivery and regulation.
Verify inlet water pressure, clogged aerators or showerheads, and closed or partially closed valves.
Inspect the unit’s flow sensor, temperature selector, and scale buildup on heat exchangers.
Confirm correct gas pressure and proper venting; schedule professional servicing for persistent issues.
Gas odor or suspected leaks: immediate actions
After checking flow and temperature issues, attention should immediately shift to any gas odor or suspected leak, as this poses a direct safety hazard.
The installer should stop appliance use, ventilate the area, avoid flames or sparks, and evacuate occupants.
Notify the gas supplier and a licensed technician; do not attempt repairs.
Secure the gas shutoff and wait outdoors for professional assessment.
Excessive exhaust condensation or backdrafting
If exhaust gases cool too rapidly or combustion air is obstructed, condensation can form in the flue and cause sputtering, corrosion, or wet odors.
Backdrafting can draw combustion products into the living space. Inspect vent slope, insulation, and termination; verify adequate combustion air and correct flue sizing.
Repair damaged venting, add insulation or a condensate trap, and consult a qualified technician.
Maintenance, Safety Checks, and Routine Inspections
Routine maintenance and periodic safety checks keep a gas geyser operating efficiently and reduce risk.
The following list outlines key tasks, timing, and indicators for professional service or seasonal preparation. Regular attention to these items helps prevent failures and safety hazards.
- Recommended maintenance schedule and tasks (monthly visual checks, annual service).
- Cleaning burners, checking thermocouples, and inspecting vents for blockages or corrosion.
- When to call a professional for service (persistent faults, gas smells, pilot or ignition issues).
- Seasonal checks and winterizing tips (insulate pipes, drain if unused, verify freeze protection).
Recommended maintenance schedule and tasks
Because consistent care extends appliance life and reduces hazards, a clear maintenance schedule for a gas geyser should specify tasks, frequencies, and responsible parties.
It should include monthly visual inspections for leaks and corrosion, quarterly operational checks and pilot verification by a competent person, annual professional servicing for gas connections, pressure relief and combustion safety systems, and prompt documentation of all actions and any repairs.
Cleaning burners, checking thermocouples, and vents
After outlining the schedule and responsibilities for inspections and service, attention shifts to the specific components that most affect performance and safety: burners, thermocouples, and vents.
Burners require gentle brushing and nozzle clearing; thermocouples need visual inspection and secure connections; vents must be free of blockage, corrosion, and leaks.
Record findings, clean with manufacturer-approved tools, and retest operation.
When to call a professional for service
When should a professional be contacted for gas geyser service depends on the nature and severity of observed issues; any signs of gas odor, persistent pilot light failure, visible corrosion on gas lines or venting, unexplained water temperature fluctuations, or repeated ignition problems warrant immediate expert evaluation.
Additionally, technicians should be called for suspected gas leaks, carbon monoxide alarms, major component failure, or after any amateur repair attempts to guarantee safe, code-compliant operation.
Seasonal checks and winterizing tips
Prepare the gas geyser for seasonal shifts by performing targeted checks and simple winterizing steps that prevent freeze damage and maintain safe operation.
Inspect flue, venting, and combustion air paths; clear debris.
Drain or insulate exposed pipes and the unit if temperatures drop below freezing.
Test pressure relief valve, leak-test gas connections, and verify pilot ignition.
Schedule professional service before winter onset.
Common Mistakes to Avoid During Installation
Common installation errors include improper ventilation and incorrect flue routing, which can lead to dangerous combustion byproducts.
Other frequent mistakes are choosing the wrong unit size and using incorrect gas line sizing or unsecured fittings.
Failure to follow manufacturer instructions and local code requirements further increases risk and liability.
Improper ventilation and flue routing
Although often overlooked, improper ventilation and flue routing poses serious risks including carbon monoxide buildup, inefficient combustion, and premature appliance failure.
Installers must guarantee correct flue diameter, straight runs, adequate rise, and secure seals.
Avoid shared or obstructed vents, backdrafts, and proximity to windows or openings.
Follow manufacturer specifications and local codes; verify draft and exhaust flow after installation.
Undersizing or oversizing the unit
When a gas geyser is sized incorrectly—either too small to meet peak demand or excessively large for actual usage—it can lead to frequent recovery shortfalls, wasted fuel, shortened equipment life, and higher operating costs.
Proper sizing requires evaluating household peak flow, temperature rise, and usage patterns.
Consulting manufacturer capacity charts and a qualified installer prevents mismatch, guarantees efficient performance, and avoids costly replacements.
Incorrect gas line sizing and unsecured fittings
Mistakes in gas line sizing and unsecured fittings compound the problems caused by an improperly sized geyser, turning performance issues into safety hazards.
Incorrect pipe diameter, excessive length, or insufficient pressure loss calculations restrict flow, causing burner instability.
Loose or improper fittings permit leaks and vibration-induced failures.
Properly sized lines, secure connections, and pressure verification prevent carbon monoxide risk, flameouts, and frequent service calls.
Ignoring manufacturer instructions and code requirements
If installers bypass manufacturer instructions or applicable codes, they risk creating unsafe and noncompliant systems that void warranties and may fail inspections.
Ignoring specified clearances, venting, pressure settings, or approved materials compromises performance and safety. Inspectors may require costly corrections.
Adherence guarantees lawful installation, preserves warranty coverage, and minimizes leak, fire, and carbon monoxide hazards.
Consult manuals and local regulations before proceeding.
Cost Breakdown and Time Estimates
A concise cost overview covers typical materials, labor, and permit ranges so readers can budget the project accurately.
Estimated time varies widely — a DIY install may take a weekend while a professional can often complete the job in a few hours.
The discussion should also note long-term operating costs such as gas consumption, maintenance, and efficiency-related savings.
Typical materials, labor, and permit cost ranges
Installing a gas geyser typically involves predictable cost components: the unit itself, gas and water fittings, venting or flue materials, safety devices (shutoff valves, pressure relief), and any necessary piping adjustments or insulation.
Typical material costs range from modest to higher-end units; labor varies by region and complexity; permit fees are usually small to moderate.
Total project estimates commonly span low to several thousand dollars.
Time required for DIY vs professional installation
How long the job takes depends on skill level, site conditions, and whether the installer follows a straightforward replacement or a more involved retrofit.
A competent DIYer might spend 6–12 hours including plumbing, gas hookups, venting, and testing; novices require more time.
A licensed professional typically completes standard installs in 2–4 hours, with complex retrofits taking half a day to a full day.
Long-term operating cost considerations
Evaluate long-term operating costs by breaking them into predictable components: fuel (gas) consumption, electricity for ignition and pumps, routine maintenance, and occasional repairs or parts replacement.
Estimate monthly gas based on usage patterns and unit efficiency (kW output vs consumption). Add small electrical costs, schedule annual servicing to prevent major failures, and allocate a reserve for parts or unexpected repairs to calculate realistic yearly and lifetime expenses.
Safety Checklist to Complete After Installation
A post-installation safety checklist guarantees the new gas geyser operates safely and complies with regulations.
Technicians and homeowners should confirm ventilation and carbon monoxide detector placement, verify gas tightness and shutoff accessibility, receive a clear user briefing on operation and emergencies, and record all permits and warranty details.
Completing these steps reduces risk and provides a clear record for future service.
- Validate ventilation paths and CO detector placement.
- Confirm gas leak test results and mark emergency shutoff location.
- Provide user briefing on operation, safe use, and emergency procedures.
- File documentation: permits, warranty registration, and service records.
Validation of ventilation and CO detector placement
Once installation is complete, confirm that room ventilation meets code requirements and that carbon monoxide (CO) detectors are correctly located and functioning.
Inspect airflow paths, inlet and exhaust clearances, and vent terminations for obstruction.
Verify detector placement per manufacturer and local code—typically outside sleeping areas and at breathing height—test alarms, replace batteries if needed, and document compliance for records and inspector review.
Gas leak test confirmation and emergency shutoff location
With ventilation and CO detection confirmed, attention shifts to verifying gas tightness and ensuring the emergency shutoff is accessible and clearly marked.
A qualified tester performs pressured leak checks and soap-solution inspections at all joints. Any leak triggers immediate repair and retest.
The shutoff valve is located near the heater, unobstructed, labeled prominently, and its operation verified by authorized personnel.
User briefing: operation, safe use, and emergency steps
Begin by briefing the user on basic operation, routine safety practices, and emergency procedures for the gas geyser, ensuring understanding of controls, indicators, and required ventilation.
The technician demonstrates ignition, shutdown, carbon monoxide signs, and ventilation checks.
Users are instructed on daily visual inspections, avoiding obstruction, what to do if smell of gas appears, emergency shutoff steps, and when to evacuate and call professionals.
Documentation: permits, warranty registration, and service records
After the technician completes hands-on demonstrations and the user confirms understanding of operation and emergency procedures, attention should shift to documentation: securing permits, registering the warranty, and maintaining service records.
Confirm local permits are filed and retained, the manufacturer warranty is registered with proof of purchase and installation date, and a chronological service log records inspections, repairs, and technician details for compliance and future claims.
Conclusion
Installation concludes with triumphant precision: the bathroom now boasts a gas geyser so impeccably fitted it could single-handedly host a plumbing awards ceremony. All safety checks, legal verifications, and maintenance plans are dutifully logged as if the appliance were royalty. Routine inspections will be treated like pampering sessions, and even common mistakes quiver in fear. Ultimately, adherence to rules guarantees warm showers and peace of mind, transforming a technical task into domestic heroism.