How to Repair a Leaking Sillcock: Step-by-Step Fixes for Indoor & Outdoor Faucets
To repair a leaking sillcock, start by isolating the water supply and relieving pressure. Inspect components like the stem, washer, packing nut, and wall connection to identify the leak. Depending on the issue, you may need to replace worn washers, tighten the packing nut, or swap out the valve stem. For frost-free models, access the interior shutoff and long stem. If corrosion or persistent leaks persist, replacing the entire sillcock may be necessary. Follow the step-by-step instructions below for detailed guidance and cost estimates.
What a sillcock is and why leaks matter
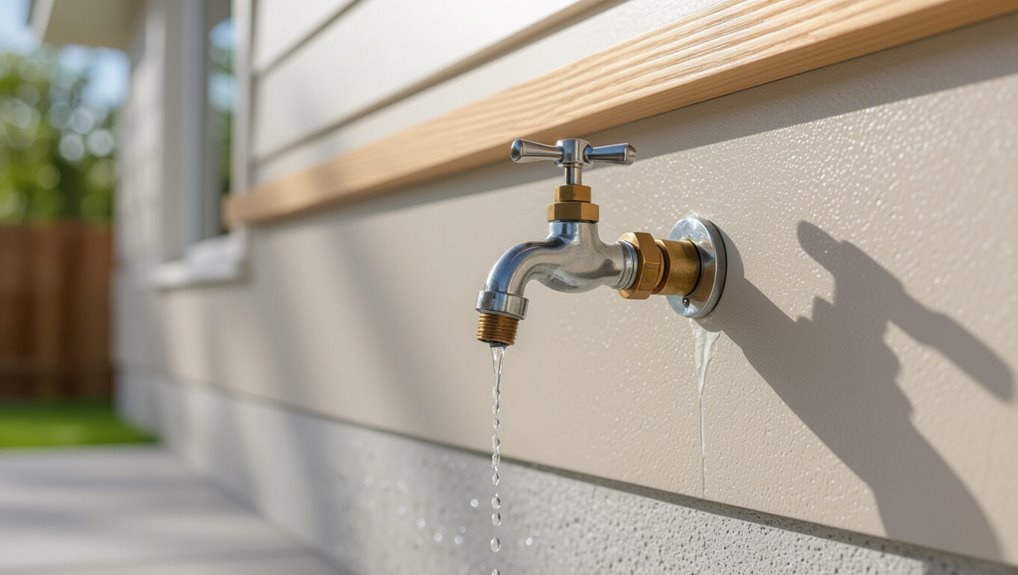
A sillcock—also called a hose bibb or spigot—is the valve that connects household plumbing to an outdoor or sometimes indoor hose connection.
They come in standard and frost‑free designs and are typically mounted on exterior walls, though some homes have indoor utility valves.
Even a small leak from a sillcock can cause water damage, mold growth, higher utility bills, and increased risk of freezing in cold weather.
Definition and common names (sillcock, hose bibb, spigot)
Outdoor water outlet fixtures—commonly called sillcocks, hose bibbs, or spigots—are wall-mounted valves that provide a threaded connection for garden hoses and control exterior water flow.
These fixtures, subject to wear, can drip at the stem, handle, or connection. Understanding nomenclature helps homeowners locate parts and follow guidance on how to repair a leaking sillcock safely and efficiently.
Typical locations and types (indoor vs outdoor, frost-free vs standard)
Having clarified the names and common failure points, the discussion now turns to where sillcocks are found and the variations in their design.
Sillcocks typically mount on exterior walls, basements, garages, or utility rooms.
Indoor shutoff-accessible versions and outdoor hose bibbs differ.
Frost-free sillcocks extend into heated space to prevent freezing; standard sillcocks sit near the wall and require winterization.
Risks of a leaking sillcock (water damage, mold, higher bills, freezing)
Several common problems can arise from a leaking sillcock, and each carries distinct risks to a home’s structure, health, and expenses.
Persistent leaks cause water damage to siding, sheathing, and framing, promoting rot. Elevated moisture fosters mold growth and indoor air issues.
Continuous flow increases water bills. In cold climates, standing water risks pipe freezing and rupture, amplifying repair costs and hazards.
Quick diagnosis: How to identify the leak source
A quick diagnosis begins with a focused visual inspection checklist that notes drips, corrosion, loose fittings, and water stains around the sillcock and surrounding wall.
Simple tests—such as shutting the interior shutoff, watching for continued external dripping, and pressurizing the line—help distinguish internal valve failures from external packing or connection leaks.
Before starting, a basic toolkit (adjustable wrench, replacement packing or washers, plumber’s tape, rags, and a bucket) should be assembled for immediate troubleshooting.
Visual inspection checklist
Begin the visual inspection by examining the sillcock area from both inside and outside to pinpoint where water appears or stains originate.
Note visible clues and document findings.
- Rust on mounting flange, flaky orange streaks
- Wet insulation or damp drywall patches
- Corrosion or mineral buildup around valve body
- Puddles or wet soil beneath exterior spout indicating active seepage
How to test for internal vs external leaks
Isolate the source by systematically toggling water flow and observing both sides of the wall: shut off the exterior supply, open the sillcock inside, and watch for dripping or dampness to determine if water is entering from outdoor fittings or backing up through interior plumbing.
Then reverse steps: restore exterior supply, close interior valve, and note whether leaks appear externally, indicating a sillcock seal failure, or internally, suggesting pipe or fitting issues.
Tools and materials to have ready before repair
Preparation reduces surprises: before attempting any sillcock repair, gather specific tools and materials that enable quick diagnosis of whether the leak originates inside the wall or at the exterior spigot. A compact kit speeds inspection and limits wall damage.
- Flashlight and mirror for cavity inspection
- Adjustable wrench and pliers
- Leak detector dye or food coloring
- Towels, bucket, and pipe tape
Step-by-step repair for an outdoor sillcock that drips from the spout
Before beginning work, the homeowner should shut off the water supply and follow basic safety precautions such as draining the line and wearing gloves.
The repair proceeds by removing the handle, exposing the valve stem, and inspecting the seat and washer for wear to determine whether replacement is needed.
After installing new components, the sillcock is reassembled and tested under normal water pressure to confirm the drip has stopped.
Safety precautions and shutting off water
Any work on an outdoor sillcock should begin with safety measures and shutting off the water to prevent injury and property damage.
Confirm supply shutoff at the home’s main valve or the isolation stop, relieve line pressure by opening a nearby faucet, wear gloves and eye protection, and clear the area of trip hazards.
Verify no residual flow before proceeding.
Removing the handle and accessing the valve stem
With the supply shut off, pressure relieved, and the work area cleared, the next step is to remove the exterior handle and gain access to the valve stem.
Unscrew any visible cap or set screw, lift off the handle, and extract the packing nut with an adjustable wrench.
Pull the valve stem straight out, noting orientation and any retaining clips for correct reassembly.
Replacing a worn seat or washer
Begin by inspecting the removed valve stem and the interior of the sillcock body to determine whether the leak is caused by a worn rubber washer on the stem or by a damaged seat inside the body.
If the washer is flattened or cracked, replace it with a matching-size neoprene washer.
For a damaged seat, use a seat wrench to remove and install a new brass seat, then verify proper fit.
Reassembling and testing the sillcock
Reassemble the sillcock by installing the repaired valve stem and any replaced components in the reverse order of disassembly, ensuring each part seats squarely and seals are correctly oriented.
Tighten packing nut and bonnet to manufacturer torque, reinstall handle and spout cover.
Turn water on slowly, observe for leaks, operate handle through full cycle, and recheck joints.
Make final adjustments as needed.
Step-by-step repair for leaks at the sillcock packing or where it meets the wall
The guide next distinguishes leaks at the packing nut from those occurring where the sillcock meets the wall to determine the correct repair path.
For packing nut leaks, the recommended steps include tightening the nut, replacing the packing material, or installing a new packing nut with plumber’s tape or sealant.
For wall connection leaks, the instructions cover evaluating whether the joint is soldered or threaded and then repairing or replacing the pipe connection accordingly.
Identifying packing nut leaks vs wall connection leaks
When a sillcock leaks, diagnosing whether the problem lies at the packing nut or where the pipe meets the wall directs the repair approach.
Visually inspect for water tracking, feel for moisture while operating the valve, and note whether dripping occurs only around the stem area (suggesting packing) or at the pipe-to-wall joint (indicating a connection failure or deteriorated sealant/weep hole).
Confirm leak location by drying area, cycling valve, and observing.
Tightening or replacing packing material
If leaks are confirmed at the packing nut or stem area, begin by shutting off the water supply and draining the sillcock to prevent mess and pressure while working.
Loosen the nut slightly, tighten incrementally to test. If leaking persists, remove nut, extract old packing, clean stem, and install new graphite or PTFE packing.
Reassemble, open water, and test for leaks.
Replacing the packing nut and using plumber’s tape or sealant
Begin by isolating the water supply and fully draining the sillcock to create a dry, pressure-free workspace before replacing the packing nut or applying tape/sealant.
Loosen and remove the old packing nut, extract deteriorated packing, insert new graphite or PTFE packing evenly, then hand-tighten the nut.
For threaded stem sections, wrap PTFE tape or apply pipe thread sealant sparingly before reassembly and test for leaks.
Repairing or replacing the pipe connection at the wall (soldered vs threaded)
Determine whether the sillcock’s connection at the wall is threaded or soldered before attempting repairs, because the required tools and techniques differ considerably.
For threaded joints, shut water, remove sillcock, apply new pipe thread sealant or replace the male/female fitting.
For soldered joints, cut back copper, clean, flux, and sweat on a new fitting or install a threaded adapter; test and inspect for leaks.
Repairing frost-free sillcocks and backflow considerations
Frost-free sillcocks differ from standard units by locating the shutoff and drain point inside the heated wall, which changes common failure points and repair methods.
Repairs often focus on replacing the long stem or addressing interior seals rather than just the exterior packing, and serviceability can be limited by how the unit is mounted.
Additionally, backflow prevention devices—subject to local code—may require repair or replacement by a qualified technician to guarantee compliance and protect potable water.
How frost-free sillcocks differ from standard units
When compared with standard sillcocks, frost-free models place the valve several inches inside the heated portion of a building so the packing and shutoff are protected from freezing.
This internal valve location changes how repairs are approached and raises specific backflow considerations. Repairs require access through the wall, attention to valve length and angle, and awareness that backflow prevention placement and testing differ from exposed exterior faucets.
Fixes specific to frost-free valves (stem replacement, interior seals)
Accessing the valve stem and interior seals through the wall cavity is the first step in repairing frost‑free sillcocks. Since the working components sit several inches inside the heated space, this means stem replacement, packing adjustments, and seal swaps are performed from the interior side.
This requires careful measurement of the valve length and angle to guarantee the exterior spout seats correctly. Replace worn stems, renew packing, and test for leaks.
Backflow prevention devices: repair, replacement, and code requirements
Consider backflow prevention as an integral part of repairing or replacing sillcocks, since improperly protected fixtures can allow contaminated water to flow back into the potable supply.
Inspect vacuum breakers or double-check assemblies for damage, test per local standards, and replace failed units.
Follow municipal codes for device type, installation height, and annual testing; document repairs and obtain permits when required.
Replacing the entire sillcock
When repair cannot stop leaks or the valve is corroded, replacing the entire sillcock is preferable.
The homeowner should select a replacement that matches the pipe size and considers frost-free design and backflow protection before removing the old unit, preparing the fitting, installing the new sillcock, and testing for leaks.
If the replacement requires soldering, complex fittings, or the leak persists, a professional plumber should be contacted.
When replacement is preferable to repair
Replace the sillcock if corrosion, multiple leaks, or extensive internal damage make repairs unreliable or unsafe.
Replacement is also preferable when threads, valve seats, or packing surfaces are compromised beyond economical repair.
Consider replacement if repeated fixes fail, if water intrusion has damaged surrounding structure, or if the fixture no longer meets usage demands.
Professional assessment can confirm when repair is impractical.
How to choose the correct replacement sillcock (size, frost-free, backflow)
If replacement is the chosen route, selecting the correct sillcock guarantees a durable, code-compliant install.
Measure inlet diameter and sleeve length to match wall thickness and piping. Choose frost‑free models where freezing risk exists.
Confirm integrated backflow prevention or add an approved vacuum breaker to meet local code.
Verify material (brass/stainless) for corrosion resistance and thread type for proper fitment.
Step-by-step replacement: remove old, prepare fitting, install new, test
Begin by shutting off the water supply to the sillcock at the interior shutoff or main valve and opening the outdoor spigot to relieve pressure; then gather the necessary tools, a replacement sillcock that matches dimensions and thread type, plumber’s tape, pipe dope, and any new mounting hardware.
Remove the old sillcock, clean threads and wall opening, apply sealant, install and secure the new unit, reconnect supply, and test for leaks.
When to call a professional plumber
When should a homeowner call a professional plumber to replace an entire sillcock?
A professional is advised if the sillcock is severely corroded, embedded in damaged siding or foundation, leaking internally at the wall, or if previous repairs failed.
Complex pipe configurations, inaccessible shutoffs, or local code requirements also justify hiring a licensed plumber to guarantee proper removal, replacement, sealing, and inspection.
Common problems and troubleshooting tips
The section outlines typical sillcock failures and how to diagnose them.
It contrasts leaks that occur only with the handle on versus leaks when the valve is off, addresses intermittent and seasonal seepage, and highlights signs of corrosion, freeze damage, and concealed deterioration.
Practical troubleshooting steps for isolating these conditions and deciding between repair and replacement are then presented.
Sillcock only leaks when handle is on vs when off
A sillcock that only leaks while the handle is turned on typically indicates wear or failure in internal packing, the seat, or the valve washer rather than a problem with the shutoff upstream.
Flow-activated leaks point to worn seals or a damaged washer seated improperly.
Repair focuses on replacing packing, the washer, or the valve seat; inspect stem and bonnet for corrosion or scoring.
Intermittent leaks and seasonal issues
Although intermittent sillcock leaks often appear random, they typically follow patterns tied to temperature changes, freeze-thaw cycles, or seasonal pressure variations.
Homeowners should note timing, weather, and water use to correlate leaks. Common causes include expanding seals, loose packing, or pressure spikes.
Simple troubleshooting: tighten fittings, replace worn washers/packing, install a pressure reducer, and monitor performance across seasons for recurrence.
Corrosion, frozen pipes, and hidden damage diagnosis
When corrosion, freezing, or concealed damage affects a sillcock, symptoms can range from green or pitted metal and stiff operation to sudden bursts or unseen wet spots inside walls.
Diagnosing these issues requires systematic inspection of visible piping, the valve stem and packing, and surrounding structures for signs of moisture, rust, and material deformation.
Use thermal imaging, moisture meters, and gentle probing to locate hidden leaks, assess insulation, and determine whether repair or replacement is necessary.
Materials, tools, and estimated costs
A concise list of recommended tools—adjustable wrench, pliers, pipe tape, screwdriver, and replacement washers or a new sillcock—helps readers prepare for the repair.
Typical parts and materials are presented with price ranges (washers $2–10, packing tape $3–8, replacement sillcock $20–80) to set budget expectations.
Time estimates compare a straightforward DIY (30–90 minutes) with professional service (1–2 hours plus travel), noting labor costs can considerably increase total expense.
Recommended tools list
Several basic tools and a few consumable materials are typically sufficient to repair a leaking sillcock. A compact kit speeds work and reduces trips.
Essential items include hand tools, sealants, and safety gear. Suggested list:
- Adjustable wrench and channel locks
- Screwdrivers (flat and Phillips)
- Plumber’s tape and silicone sealant
- Utility knife and rag for cleanup
Typical parts and materials with price ranges
Many common sillcock repairs require only a handful of replacement parts and a few consumables, each available at hardware stores or online for modest prices. Typical items: replacement stems, packing, washers, O-rings, hose bibs, thread sealant, and basic fasteners. Estimated ranges vary by material and brand.
| Item | Typical Price | Notes |
|---|---|---|
| O-rings/Washer | $1–$5 | Small kits |
| Packing | $5–$15 | Graphite or PTFE |
| Replacement stem | $10–$40 | Brass vs zinc |
| Hose bib (full) | $15–$60 | Outdoor rated |
| Sealant/Tape | $2–$8 | PTFE tape, paste |
Time estimates for DIY repairs vs professional service
Most routine sillcock fixes—replacing a packing gland, O-ring, or stem washer—can be completed by a competent DIYer in 30–90 minutes with common hand tools and parts.
Full hose-bib replacement or corroded-valve work may take 1–3 hours and require some additional supplies.
DIY parts typically cost $5–50; tools may already be owned.
Professional service adds labor, commonly $75–200 per hour plus parts.
Preventive maintenance to avoid future leaks
Preventive maintenance can considerably reduce sillcock failures by addressing seasonal and wear-related risks.
Proper winterizing and removal of hoses before freezing temperatures, routine inspections with lubrication of stems and packing, and timely replacement of corroded or worn hardware each help prevent leaks.
Regularly scheduled, simple actions save on repairs and extend faucet service life.
Winterizing outdoor faucets and hose removal
A simple winterizing routine greatly reduces the risk of sillcock damage from freezing: shut off the indoor supply valve, open the outdoor faucet to drain remaining water, and remove any attached hoses.
After draining, leave the spigot slightly open or install a frost-proof cover. Store hoses indoors and insulate exposed piping to prevent residual moisture from freezing and splitting fittings.
Regular inspections and lubrication of moving parts
When performed every few months, routine inspections and light lubrication keep sillcock components moving smoothly and reveal wear before it becomes a leak.
The process includes checking handles, stems, packing nuts and escutcheons for corrosion or stiffness, wiping debris, and applying a plumber-approved silicone or lithium grease to moving metal and rubber interfaces.
Document findings and schedule follow-ups to monitor deterioration.
Replacing worn hardware proactively
Replace corroded or loose components before they fail to minimize downtime and water damage.
The homeowner inspects packing nuts, washers, stems, and mounting hardware regularly, replacing parts showing wear, stiffness, or corrosion.
Using matching replacement pieces and proper torque prevents leaks and stress.
Scheduled swaps during off-season reduce emergency repairs and extend sillcock service life while maintaining reliable operation.
Regional code and safety considerations
Local regulations on backflow prevention and frost protection can dictate specific sillcock types or installation methods.
The article notes that some jurisdictions require permits or inspections for exterior plumbing work.
Homeowners are advised to verify local codes before beginning repairs.
Local backflow and frost protection regulations
Although municipal codes vary, homeowners must comply with backflow prevention and frost protection requirements to avoid contamination and pipe damage.
Required measures often include vacuum breakers, air gaps, and insulated or self-draining sillcocks. Local ordinances specify approved devices, installation standards, and seasonal shutoff practices.
Compliance protects potable water and prevents burst pipes; homeowners should consult municipal code or a licensed plumber for exact requirements.
When permits or inspections may be required
Building code and safety rules can dictate when a permit or inspection is required for sillcock work, especially when installations involve backflow devices, alterations to supply piping, or freeze-protection modifications that affect the potable water system.
Homeowners should check local jurisdictions for permit thresholds, required licensed contractors, and inspection timing; failure to comply can result in fines, mandated corrections, or compromised water safety.
Visual aids and step references
The article includes a labeled diagram of a sillcock showing the spout, packing nut, valve stem, and mounting hardware to clarify component locations.
A concise photo sequence documents typical repair steps: removal, packing replacement, and reinstallation, with each image matched to a brief caption.
These visual aids are referenced at each procedural step to reduce confusion and confirm correct assembly.
Diagram of a sillcock and main components

A labeled diagram clarifies the sillcock’s layout by showing the spout, handle/valve stem, packing nut, washer/seat, hose bib threads, and the through-wall pipe connection in relation to the exterior wall and interior shutoff valve.
Annotations identify fasteners, packing material, and orientation relative to freeze protection.
Numbered callouts correspond to repair steps, aiding part identification and ensuring correct disassembly order.
Photo sequence for common repairs (removal, packing replacement, reinstallation)

Several clear, sequential photos guide the repair process from sillcock removal through packing replacement to reinstallation, each image paired with a brief caption and step number.
Images show tools laid out, valve isolation, handle removal, stem extraction, packing removal, new packing insertion, stem reseating, and final tightening.
Close-ups highlight wear points and orientation. Captions reference torque, seal seating, and leak tests.
Conclusion
Like a steady heartbeat for a house, a properly functioning sillcock keeps water flowing only where meant. Timely diagnosis and the right fix—whether replacing a worn washer, tightening packing, or swapping a frost‑free unit—stop leaks before they cause rot or higher bills. With basic tools, appropriate parts, and attention to local codes and backflow protection, homeowners can restore reliable outdoor and indoor faucet performance and prevent recurring problems through simple seasonal maintenance.