How to Make a Hot Water Shower at Home: Step-by-Step Guide for Safe DIY Installation
To create a safe hot water shower at home, start by selecting the right heater type—options include tankless, storage, electric instant, gas, or heat pump. Next, plan for necessary plumbing, electrical or gas supply, and obtain any required permits. Installers should isolate utilities, connect inlet and outlet lines, and ensure the installation includes pressure relief valves, shutoffs, and mixing valves. It’s crucial to verify correct wiring, breakers, grounding, and GFCI protection. Finally, flush the system, test for leaks, set the maximum temperature, and implement anti-scald controls. Follow this guide for comprehensive step-by-step instructions and safety tips.
Simple Overview of Making a Hot Water Shower at Home
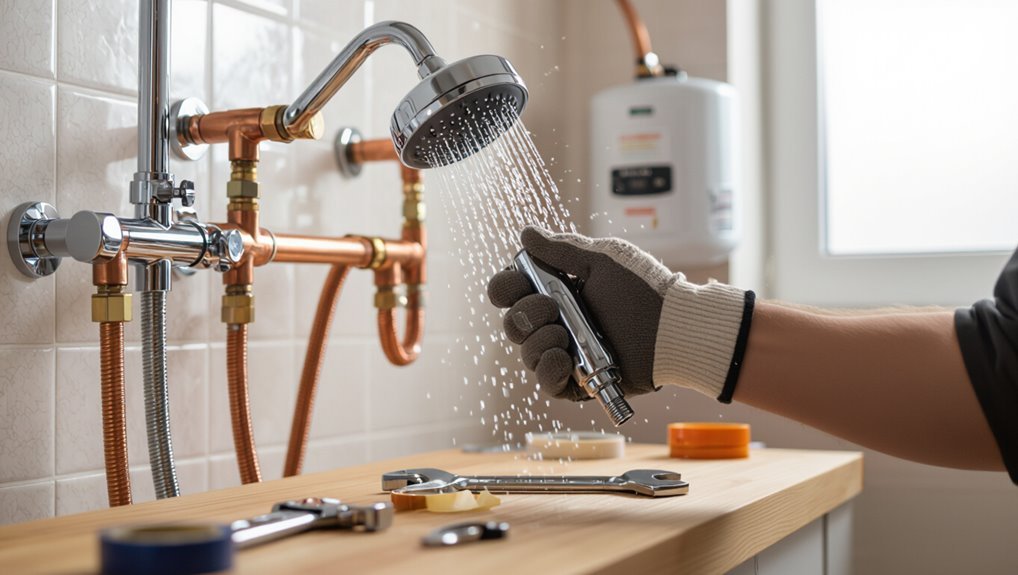
A DIY hot water shower system is a homeowner-installed setup that heats and delivers hot water using tank or tankless units, basic plumbing, and electrical or gas connections. It is best suited for those with moderate plumbing and electrical experience.
Safety considerations—gas leaks, electrical hazards, pressure issues, and local code compliance—are critical and can complicate seemingly simple projects.
When installations involve gas lines, major electrical work, roof-mounted tanks, or unclear local regulations, a licensed professional should be hired.
What a DIY hot water shower system is and who should attempt it
Installers and handy homeowners considering a DIY hot water shower should understand it involves creating a safe, reliable hot-water supply—typically by adapting a tankless heater, storage tank, or improvised coil system—to deliver consistent temperature and flow.
A DIY system suits experienced DIYers comfortable with plumbing, gas or electrical work, and local codes.
For novices, researching how to make hot water shower at home clarifies scope.
Quick safety-first verdict: when to hire a professional
Consider professional help whenever the project involves gas connections, complicated electrical work, mains-pressure modifications, or structural changes to plumbing that could cause leaks or unsafe venting.
A qualified plumber or electrician reduces risk of fire, carbon monoxide, flooding, and code violations.
Hire pros for uncertain diagnostics, permit-required alterations, complex installations, or when local regulations demand certified work to guarantee safety and insurance compliance.
Essential Basics: Types of Home Hot Water Systems
A clear understanding of common home hot water systems helps homeowners choose the right setup for showers, whether prioritizing continuous flow, stored capacity, or energy efficiency.
Options include tankless (on-demand) and storage tank heaters with distinct operation, advantages, and limitations, plus electric, gas, and heat-pump variations that affect cost and performance.
Shower-specific components—mixer valves, thermostatic valves, and instant shower units—determine temperature control and safety at the fixture.
Tankless (on-demand) water heaters how they work and pros/cons
When water flow is detected, tankless (on-demand) heaters heat it instantly using high-power gas burners or electric elements rather than storing hot water in a tank.
This delivers continuous hot water while minimizing standby heat loss. They save energy, occupy less space, and offer long lifespans.
Drawbacks include higher upfront cost, limited simultaneous flow without proper sizing, and potential need for upgraded gas lines or electrical service.
Storage tank heaters how they work and pros/cons
Unlike tankless units that heat water on demand, storage tank heaters keep a reserve of hot water ready by maintaining a heated volume inside an insulated tank.
They provide consistent supply for multiple simultaneous uses and simpler installation.
Downsides include standby heat losses, larger space requirements, limited recovery after depletion, and potential for sediment buildup and corrosion requiring periodic maintenance or replacement.
Electric instant heaters vs gas heaters vs heat-pump options
How do electric instant, gas-fired, and heat-pump water heaters differ in performance, cost, and installation needs? Electric instant units deliver on-demand heat, compact and quick to install but require high electrical capacity. Gas offers strong flow rates, venting needs, and fuel costs. Heat-pump models are highly efficient, bulkier, and need space and higher upfront expense.
| Type | Key trade-off |
|---|---|
| Electric instant | Installation simplicity vs electrical load |
| Gas | Power and running cost vs venting/safety |
Shower-specific systems: mixer valves, thermostatic valves, and instant shower units
Shower-specific systems control temperature and flow at the point of use, each offering distinct safety, comfort, and installation implications.
Mixer valves blend hot and cold but can allow temperature swings if supply pressures vary.
Thermostatic valves maintain set temperature, preventing scalding and requiring priority hot supply.
Instant shower units heat water on demand, saving space but needing electrical/gas capacity and appropriate protection.
Pre-Installation Planning and Requirements
Before beginning installation, a clear assessment of existing plumbing, water pressure, and the available electrical or gas supply is required to determine compatible unit types and placement.
The installer must verify circuit capacity, gas line sizing and venting options, and comply with local codes, permits, and inspection requirements.
A concise checklist of required tools, materials, and replacement parts should be prepared to guarantee a smooth, code-compliant installation.
Assessing existing plumbing and water pressure
A quick, systematic evaluation of the home’s plumbing layout and incoming water pressure is essential before installing a hot water shower.
Inspect pipe materials, diameters, and valve locations; identify branch lines and distance to the proposed unit.
Measure static and flow pressure with a gauge, noting fluctuations during peak use.
Confirm sufficient supply and compatible fittings to prevent cavitation and poor performance.
Electrical supply needs and circuit considerations
When planning the electrical supply for a hot water shower, the homeowner must verify available service capacity, dedicated circuit requirements, and grounding provisions to secure safe, reliable operation.
Determine amperage and voltage needs of the heater, confirm breaker sizing and wire gauge, ascertain GFCI protection, and plan routing and junction locations.
Permits and inspection by a licensed electrician are recommended.
Gas supply and venting requirements for gas units
Following electrical considerations, attention must shift to gas-fired heaters, where proper fuel supply and venting determine safe operation and appliance longevity.
Confirm correct gas line size, pressure, and shutoff valve placement per manufacturer. Use approved fittings and flexible connectors.
Design venting for combustion air, draft control, and exhaust termination clearances. Maintain proper clearances from combustibles and install carbon monoxide detection nearby.
Local codes, permits, and inspection checklist
Before any installation begins, adherence to local codes, permit requirements, and inspection processes must be verified to secure legal compliance and occupant safety.
Review municipal plumbing and electrical codes, obtain required permits, and schedule inspections.
Confirm licensure or homeowner allowance for work, note permit fees and timelines, prepare documentation (plans, equipment specs), and confirm final inspection and certificate of compliance before using the system.
Tools, materials, and parts checklist
A concise inventory of tools, materials, and parts guarantees smooth installation and reduces delays; it should list every item needed for plumbing, electrical, mounting, and safety so installers can verify availability and compatibility before work begins.
Essential checklist includes:
- Pipework, fittings, valves, connectors
- Water heater unit, thermostat, pressure relief valve
- Electrical wiring, breakers, junction box, conduit
- Mounting brackets, fasteners, sealants, PPE
Budget estimate and cost factors
Budgeting requires balancing upfront costs, ongoing expenses, and contingencies to produce a realistic estimate for a hot water shower installation.
The estimate should itemize heater type, plumbing, fixtures, insulation, permits, and tools. Include labor if hiring professionals, energy costs, and maintenance.
Add a contingency of 10–20% for unexpected repairs or code upgrades.
Compare supplier quotes to control costs.
Step-by-Step Installation: Electric Tankless/Instant Heater
The installation sequence for an electric tankless heater begins with choosing an appropriate site and securely mounting the unit.
Next, isolate the water and electrical supply for safety.
Attention must be paid to proper plumbing—correct inlet and outlet connections, a pressure relief device, and accessible shutoff valves.
Additionally, consider the electrical requirements including dedicated breakers, correct wire sizing, and reliable grounding and bonding.
Compliance with local codes for GFCI protection and professional verification of wiring and plumbing connections is recommended.
Site selection and mounting the unit
Choose a location that balances access to the main water line, proximity to electrical supply, and user convenience, while keeping the unit dry and well-ventilated.
Mount on a sturdy, noncombustible surface at recommended height, allowing clearance for piping, wiring, and service access.
Use manufacturer-specified anchors, level the unit, and verify wall capacity.
Mark and drill precisely, then secure per instructions.
Shutting off water and power safely
After the heater is mounted and secured, attention turns to isolating its water and electrical supply before any connections are made.
The installer locates and shuts the household water supply and the branch supplying the heater, then verifies zero flow.
For electricity, the installer switches off and locks out the relevant circuit breaker, tags it, and confirms de-energized conductors with a tester before proceeding.
Plumbing connections: inlet/outlet, pressure relief, and shutoff valves
Plumb the inlet and outlet to the heater with appropriately sized, code-compliant fittings, ensuring cold supply connects to the designated inlet and hot delivery to the outlet;
install a pressure relief valve on the heater’s relief port, orient it to drain safely, and fit accessible shutoff valves on both inlet and outlet lines to permit servicing and isolation.
Use unions or isolation fittings for easy removal, and slope discharge piping to a safe drain.
Electrical wiring and breaker installation guidelines
Begin by verifying the heater’s electrical requirements—voltage, continuous amperage, and phase—against the home’s service capacity and the manufacturer’s label to determine necessary conductor size, breaker rating, and whether single- or three-phase supply is required.
Route dedicated circuits from the main panel, size copper or aluminum conductors per NEC tables, install appropriately rated breakers with proper trip characteristics, and label circuits clearly.
Grounding, bonding, and GFCI requirements
When installing an electric tankless water heater, proper grounding and bonding plus appropriate GFCI protection are essential to guarantee user safety and compliance with code; grounding provides a path for fault current, bonding equalizes potential between exposed conductive and extraneous metal parts, and GFCI devices protect against ground-fault shock hazards where water and electricity may contact.
Install equipment grounding conductor, bond nearby metal piping, and mount GFCI breakers or protected receptacles per local code.
Initial system purge, leak check, and commissioning
With grounding, bonding, and GFCI protection in place, the installer proceeds to purge the system, perform a thorough leak check, and commission the unit to verify safe operation.
Air and debris are flushed until steady, clear flow appears.
All fittings, valves, and connections are inspected under pressure for leaks.
Electrical connections are verified, startup tests run, and operation documented before final handover.
Adjusting temperature, flow limits, and safety settings
Proceed to set the unit’s temperature, flow limits, and safety controls methodically to guarantee consistent performance and code-compliant protection.
Technicians verify maximum temperature (typically 120°F/49°C), adjust flow sensors to match demand, enable anti-scald and thermal cutoffs, and program eco or boost modes per manufacturer.
Record settings, label controls, and test under realistic flow conditions to confirm stable temperature and fail-safe operation.
Step-by-Step Installation: Storage Tank Water Heater for Shower
The section outlines the practical steps for installing a storage tank water heater for a shower, starting with proper positioning and required clearances.
It covers plumbing connections—cold and hot inlets/outlets, T&P valve and expansion tank placement, mixing valve installation—and basic electrical or gas hook-up and venting.
Finally, it describes filling the tank, purging air, performing a leak test, and the startup procedure.
Positioning the tank and required clearances
Position the storage tank where it will be stable, accessible for maintenance, and compliant with local codes, ensuring the chosen spot provides the clearances specified by the manufacturer for ventilation, service access, and combustible materials.
Maintain required distances from walls, ceilings, and other equipment; allow floor-level access for drains; provide sufficient overhead clearance for lifts or removal; and avoid confined, damp, or freezing-prone locations.
Water inlet/outlet, T&P valve, and expansion tank fitment
Several clear connections must be made before energizing the storage tank: cold-water inlet, hot-water outlet, temperature-and-pressure (T&P) relief valve, and any required expansion tank.
Install inlet/outlet fittings per manufacturer, use proper dielectric unions, and apply thread sealant or tape.
Fit the T&P valve to its designated port with correct discharge piping.
Mount expansion tank on cold supply using a rated bracket and isolation valve.
Connecting cold/hot supply lines and mixing valve installation
Begin by confirming system isolation and verifying that all fittings fitted in the previous step are tight and leak-free.
Next, attach labeled cold and hot supply lines to their respective inlets using appropriate connectors and pipe dope or tape.
Install a thermostatic mixing valve near the shower riser, set desired temperature, and secure check valves and isolation shutoffs.
Test for leaks and proper flow.
Electrical or gas hook-up basics and venting (if gas)
Before any connections are made, verify the water heater is fully isolated, power or gas supply is shut off at the service point, and local codes and manufacturer instructions are at hand.
For electric units, match circuit ampacity, wire gauge, and a dedicated breaker; bond and ground per code.
For gas, install correct gas line size, shutoff valve, and proper venting materials and clearances; follow combustion air requirements.
Filling, venting air, leak test, and startup procedure
Open the main cold-water supply and slowly fill the tank while monitoring the pressure relief valve, inlet and outlet fittings, and any newly soldered or threaded joints for leaks.
Simultaneously open a nearby hot faucet to vent trapped air until a steady stream of water flows, then close the faucet and recheck all connections before proceeding to energize the unit.
Inspect for leaks, tighten as needed, then follow manufacturer startup: power or gas ignition, observe for proper operation, and confirm normal water flow and absence of leaks.
Setting safe maximum temperature and anti-scald measures
With the tank filled, vented, and verified leak-free, attention turns to configuring temperature limits and anti-scald protections to protect users.
Set the heater thermostat to a safe maximum—typically 120°F (49°C)—and install a thermostatic mixing valve at the outlet.
Add pressure-balanced or thermostatic shower controls, test with a thermometer, and label controls.
Periodically inspect and recalibrate for consistent safety.
Installing Thermostatic Mixing and Anti-Scald Devices
The section outlines common types of mixing valves—thermostatic, pressure-balancing, and tempering—and recommends typical installation locations near the water heater or at the shower manifold.
It then presents a concise step-by-step procedure for fitting a thermostatic mixing valve, including connections, mounting, and leak checks.
Finally, it covers calibrating the valve to a safe shower temperature and testing its response to sudden pressure or temperature changes to verify anti-scald performance.
Types of mixing valves and where to install them
When selecting and locating mixing valves for a home hot water shower, homeowners should consider thermostatic mixing valves (TMVs) and pressure-balancing valves as the primary options:
TMVs maintain set temperature and are often installed at the shower control or whole-house water heater.
Pressure-balancing valves protect against cold shock and fit within the shower valve body.
Anti-scald devices may be added at fixtures or main distribution points.
Step-by-step thermostatic valve installation
Having chosen between a thermostatic mixing valve (TMV) and other anti-scald options, the installation procedure focuses on correct placement, secure connections, and calibration to guarantee reliable temperature control.
The technician isolates water, mounts the TMV on accessible straight-run piping, fits approved fittings and unions, applies thread sealant, checks orientation and flow arrows, pressures-tests for leaks, and reinstates service for final verification.
Calibrating to safe shower temperatures
Why set a safe maximum temperature? A thermostatic mixing valve prevents scalding by blending hot and cold to a preset limit.
Installers should calibrate per manufacturer instructions, typically 38–49°C (100–120°F), and lock settings.
Add anti-scald devices at fixtures for vulnerable users. Document settings and label controls.
Regular maintenance guarantees continued accuracy and safety.
Testing response to pressure/temperature fluctuation
Several simple tests verify that thermostatic mixing and anti-scald devices respond correctly to sudden pressure or temperature changes.
The installer simulates cold or hot supply loss, rapidly opens and closes upstream fixtures, and records outlet temperature and response time. Devices should shut or adjust within seconds, maintaining safe output.
Any delay, overshoot, or failure mandates repair or replacement before regular use.
Common Problems During DIY Installation and How to Fix Them
Common DIY installation problems include low hot water flow or inconsistent temperature, leaks at fittings, electrical tripping or undersized breakers, and venting or combustion safety issues with gas heaters.
Each issue typically has straightforward diagnostics—checking supply lines and thermostatic settings for flow/temperature, inspecting and reseating or replacing seals for leaks, verifying breaker ratings and wiring for electrical faults, and confirming correct venting and clearance on gas units.
Addressing these systematically reduces risk and improves performance.
Low hot water flow or inconsistent temperature
When flow is weak or the temperature swings during a DIY hot-water shower installation, the issue typically stems from obstruction, improper valve settings, or supply mismatches; diagnosing the cause quickly prevents wasted time and potential damage.
Inspect aerators, showerheads, and inline filters for debris, verify mixing and shutoff valves positions, confirm adequate hot-water supply and pressure, and test after each adjustment to isolate the fault.
Leaks at fittings and how to troubleshoot seals
A fluctuating flow or temperature can sometimes point away from supply issues and toward loose or failing fittings that leak under pressure. Identifying and repairing these seals prevents water damage and restores system integrity.
Inspect joints, shower valves, and hose connections for dampness. Tighten fittings, replace worn O-rings or compression rings, and reseat or reapply PTFE tape to threaded joints. Retest under normal pressure.
Electrical tripping or insufficient breaker size
Check the home’s electrical capacity before powering the unit: undersized breakers or faulty wiring often cause nuisance trips or prevent an electric shower from drawing sufficient current.
Verify circuit amperage, matching the shower’s rating, and use dedicated breakers and appropriately sized cable.
Inspect connections for loose terminals and heat damage.
If trips persist, consult a licensed electrician to upgrade the breaker or correct wiring faults.
Venting issues and combustion safety for gas heaters
Because gas water heaters produce combustion gases and rely on proper airflow, venting mistakes or blocked flues can quickly create dangerous conditions such as carbon monoxide buildup, backdrafting, or inefficient combustion.
Inspect vents for obstructions, maintain correct clearances, seal joints, and guarantee proper terminus height.
Install carbon monoxide detectors, verify combustion air supply, and consult a certified technician for complex venting or combustion-safety concerns.
Maintenance and Seasonal Care for Long-Term Safety
Regular maintenance keeps hot water systems safe and efficient, so owners should flush and descale both tank and tankless units on schedule.
Periodic inspection and replacement of anode rods, filters, and seals prevents corrosion and leaks, while winterizing outdoor lines and adding freeze protection avoids burst pipes.
A clear, seasonal maintenance schedule helps prioritize these tasks and extend system life.
Flushing and descaling tank and tankless units
Flushing and descaling both tank and tankless hot water systems remove mineral buildup that reduces efficiency and shortens equipment life.
Procedures differ: tanks require draining and vinegar or descaling solution circulation; tankless units need pump-assisted vinegar flush through service ports.
Regular descaling restores flow, heat transfer, and energy efficiency.
Follow manufacturer instructions, use appropriate cleaners, and guarantee power and water supplies are safely isolated before servicing.
Inspecting and replacing anode rods, filters, and seals
After descaling, attention turns to sacrificial anode rods, inlet filters, and seals, components whose wear directly affects corrosion control, water quality, and leak prevention.
Inspect rods for heavy pitting and replace every 3–7 years or when depleted.
Clean or replace inlet filters regularly.
Check rubber seals and O-rings for cracking; lubricate or replace to prevent leaks.
Record service dates and parts used.
Winterizing outdoor components and freeze protection
Several simple steps can prevent costly freeze damage to outdoor components by ensuring water is drained, insulated, and monitored before temperatures drop.
Exposed pipes, valves, and fittings should be drained and blown out, insulated with foam sleeves or heat tape, and housed in weatherproof enclosures.
Install a temperature sensor and automatic shutoff or recirculation to avoid freezing while maintaining safe winter operation.
Recommended maintenance schedule
A simple, regular maintenance schedule keeps a home hot water shower system safe and reliable over time.
Recommended tasks include inspections, flushing, filter and anode replacement, and seasonal checks.
Suggested cadence:
- Monthly: visual leak and pressure checks.
- Every 6 months: flush sediment, clean filters.
- Annually: test pressure-relief valve, inspect fittings.
- Every 3–5 years: replace sacrificial anode and professional inspection.
Safety Checklist Before First Use
Before using a newly installed hot water shower, a thorough safety checklist should be completed, including checks for leaks, proper gas connections, and signs of carbon monoxide.
Electrical safety and correct grounding must be verified, and temperature locks and child-safety features should be set to prevent scalding.
Clear instructions for actions to take if a gas leak or electrical fault is suspected—such as shutting off supply, evacuating, and contacting professionals—should be confirmed and understood.
Leak, gas, and carbon monoxide checks
One critical step is to inspect all gas lines, fittings, and vents for leaks or damage using approved detection methods and visual checks.
Verify joints, valves, and flexible connectors for odor, soapy-bubble response, or detector alerts.
Make certain venting is unobstructed and properly pitched.
Confirm carbon monoxide detector placement and function; test alarms and replace batteries before first operation.
Electrical safety and proper grounding verification
Having verified gas lines and vents, attention shifts to electrical safety and proper grounding verification for the hot water shower system.
A qualified electrician must confirm circuit integrity, correct breaker sizing, and waterproof GFCI protection.
Ascertain all connections are tight, conduit and cable insulation intact, and the unit is bonded to system ground.
Document tests and labels before energizing.
Temperature lock and child-safety recommendations
Enable the temperature lock and set a conservative maximum to prevent scalding, then verify the control responds consistently across presets.
Install anti-scald devices and test thermostatic mixing valves.
Place clear labels and secure external controls out of children’s reach.
Educate caregivers on safe settings, supervise young users, and schedule regular checks of locks and valves to guarantee continued protection.
What to do if you suspect a gas leak or electrical fault
After setting child-safe locks and confirming temperature limits, attention should turn to signs of gas leaks or electrical faults before first use.
Evacuate occupants if odor of gas or hissing observed. Do not operate switches, appliances, or phones indoors. Ventilate from outside if safe.
Shut main gas valve and circuit breaker. Contact utility company and a licensed professional for inspection and repairs.
Cost Comparison, Energy Efficiency, and Lifespan Considerations
A concise comparison of operating costs, expected equipment lifespan, and simple energy-saving measures helps homeowners choose the most economical hot water setup. The following table presents sample running costs for typical household scenarios alongside practical environmental and efficiency notes. This information frames cost-per-use, annual energy impact, and tips to reduce both bills and emissions.
| Scenario | Cost / Note |
|---|---|
| Electric tank (4 people, daily showers) | Higher monthly electricity; consider timer/insulation |
| Gas tankless (2 people, infrequent use) | Lower per-use cost; high efficiency when demand is intermittent |
| Heat pump water heater (family of 5) | Lowest operating cost; best long-term energy savings |
| Solar-boosted system | Very low emissions; depends on location and initial cost |
Running cost examples for common household scenarios
Running cost examples illustrate how different hot water systems perform under realistic household use, highlighting upfront energy consumption, ongoing utility expenses, and expected component lifespan.
For a two-person household, an electric tank costs about $0.12–$0.25 per shower; gas tankless runs $0.08–$0.18.
Larger families see proportional increases; heat pump water heaters lower per-shower costs but demand higher initial investment and moderate maintenance.
Environmental impact and energy-saving tips
Several factors determine the environmental footprint of a home’s hot water system, including fuel source, system efficiency, standby losses, and component lifespan.
Comparisons favor heat pumps and solar preheat over gas or electric resistance for lower emissions and operating cost.
Efficiency upgrades, insulation, low-flow fixtures, temperature setbacks, and timely replacement optimize energy use and reduce lifecycle impacts.
When to Stop DIY and Call a Licensed Professional
When work involves complex gas lines, venting, or major electrical changes, a licensed professional should take over to prevent safety hazards.
Unresolved permit issues, failed inspections, or potential liability concerns also necessitate stopping DIY efforts and calling a pro.
Homeowners should describe symptoms, recent changes, and any permits or inspection notes when contacting a plumber or electrician to expedite diagnosis and repair.
Complex gas, venting, or major electrical work triggers
Recognize the limits of DIY: projects involving gas lines, ventilation systems, or significant electrical circuits present risks that exceed typical homeowner skills and tools.
Such work can create fire, explosion, carbon monoxide, or electrocution hazards if misapplied.
Any modification to gas piping, flue rerouting, installing gas appliances, or upgrading service panels warrants a licensed plumber, HVAC technician, or electrician for safe, code-compliant execution.
Permit failures, inspection issues, and liability risks
Any homeowner undertaking plumbing or electrical changes should be aware that failing to obtain required permits or to pass inspections can result in costly rework, fines, and invalidated insurance coverage.
Permit lapses, improper sign-offs, or failed inspections expose owners to liability for damages and injuries.
Professional contractors handle codes, documentation, and corrective work; stop DIY if jurisdictional compliance or structural safety is uncertain.
How to communicate needs to a plumber/electrician for fast resolution
Contacting a licensed plumber or electrician promptly speeds problem resolution and limits damage when DIY attempts reach their limits.
Provide clear symptom descriptions, photos, measurements, installation steps taken, and permit/inspection history.
State urgency, accessibility, and preferred times.
Ask for license, insurance, estimated cost, and timeline.
Request written quotes and confirmation of code compliance to avoid surprises and guarantee fast, safe resolution.
Practical Tips to Optimize Shower Performance and Comfort
Practical adjustments can markedly improve shower comfort by balancing flow rate and temperature to maintain consistent warmth.
Selecting the right showerhead and compatible flow restrictors helps preserve hot-water supply while meeting performance needs.
Integrating smart controls, timers, or remote monitoring adds convenience and prevents wasted energy or unexpected cold spells.
Balancing flow rate and temperature for consistent comfort
Balancing flow rate and temperature guarantees a steady, comfortable shower by matching water pressure, heater capacity, and fixture characteristics; adjusting one without the others often causes temperature swings or weak spray.
Evaluate heater output against peak demand, reduce simultaneous draws, and fine-tune pressure regulators or thermostatic mixing valves.
Monitor for lag or fluctuation, then incrementally adjust settings until temperature and spray remain stable under typical household use.
Choosing showerheads and flow restrictors for hot-water systems
Select showerheads and flow restrictors that match the hot-water system’s capacity and the household’s comfort preferences to maintain consistent temperature and sufficient spray.
Choose low-flow heads for limited tank or instantaneous heaters; higher-rated models suit robust systems. Prefer pressure-balanced or thermostatic-compatible designs.
Install adjustable restrictors to fine-tune flow without inducing temperature swings.
Verify materials resist heat and mineral buildup for durable performance.
Smart controls, timers, and remote monitoring options
Many modern hot-water setups benefit from smart controls, timers, and remote monitoring to improve comfort, save energy, and prevent surprises.
Users can schedule heating, adjust temperatures remotely, and receive alerts for leaks or faults.
Recommended options include:
- Wi‑Fi thermostatic controller
- App-enabled tank/boiler timer
- Leak and freeze sensors
- Usage analytics and maintenance reminders
Conclusion
Homeowners who follow proper planning and safety guidelines can successfully install a hot water shower system, whether choosing an electric tankless unit or a conventional storage tank. Significantly, tankless heaters can be up to 34% more energy-efficient than storage units for households using less hot water, making them an attractive option for savings and reduced environmental impact. Ultimately, recognizing limits and calling a licensed professional for complex electrical or plumbing work guarantees safety and reliable performance.