How to Turn Off the Water Faucet Under the Sink Quickly and Safely
To quickly and safely turn off the water faucet under your sink, locate the shutoff valves—either angle stops, straight stops, or quarter-turn ball valves. Clear the area around the valves and any nearby power sources. For wheel valves, turn clockwise until tight; for ball valves, rotate the lever 90° to make it perpendicular. If the valves are stiff, gently use an adjustable wrench. If they still won’t budge, apply penetrating oil, tap lightly, or use two wrenches. If all else fails, close the main shutoff valve. After turning off the water, drain the faucets, dry the cabinet, and check for leaks.
How to Quickly Shut Off the Water Faucet Under the Sink
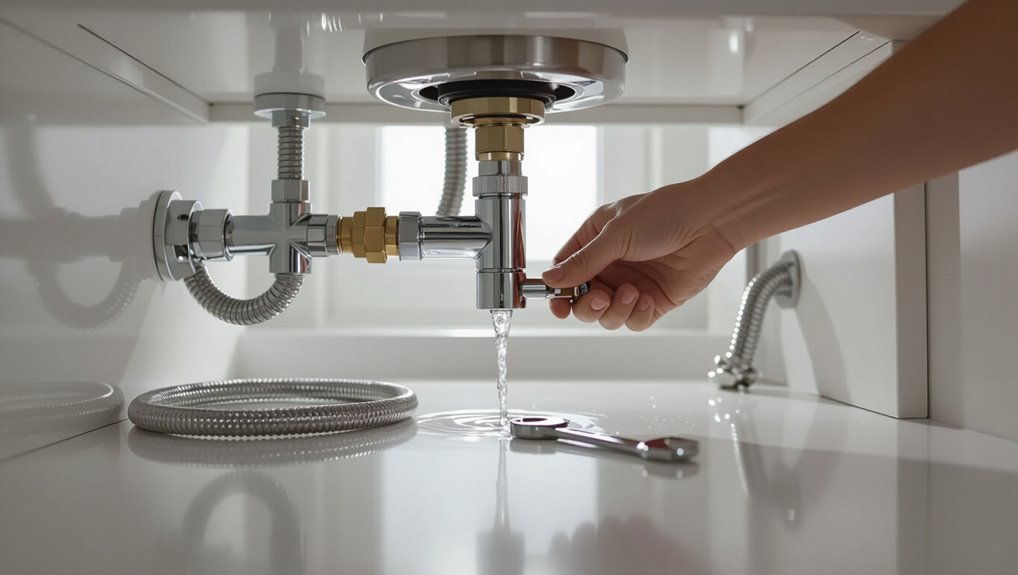
When a leak, burst pipe, or sudden appliance failure occurs, the under-sink shutoff valves should be closed immediately to stop water flow and limit damage.
Before touching any plumbing, the person should cut power to nearby outlets or appliances, gather basic tools, and put on gloves and eye protection.
Quick action paired with these safety precautions reduces risk and makes the shutoff process safer and more effective.
When and why you should shut off the under-sink shutoff valves immediately
Shut off the under-sink shutoff valves immediately at the first sign of a leak, burst supply line, or uncontrolled dripping to prevent water damage, mold growth, and higher repair costs.
Homeowners learning how to turn off water faucet under sink should act without delay when leaks, sudden loss of pressure, or visible corrosion occur.
Immediate closure limits damage, aids assessment, and reduces emergency service needs.
Safety precautions before touching plumbing (tools, electricity, protective gear)
Before touching any plumbing under the sink, a brief safety check prevents accidents and limits damage: verify the area is well-lit, turn off nearby electrical outlets or appliances that could contact water, and have basic tools and protective gear—adjustable wrench, flashlight, gloves, and eye protection—within reach.
Confirm water supply is isolated, clear clutter, use a bucket and towels to catch spills, and avoid metal jewelry.
Identify the Type and Location of Under-Sink Shutoff Valves
Under-sink shutoff valves typically appear as angle stops, straight stops, or ball valves, each with a distinct shape and operation.
The hot and cold valves are usually located beneath the respective faucet supply lines—hot on the left, cold on the right—near the wall or cabinet back.
Visual cues such as corrosion, mineral buildup, leaking joints, or stiff/stuck handles indicate valve condition and potential need for maintenance.
Common valve types (angle stop, straight stop, ball valve)
A quick inspection beneath the sink reveals three common shutoff valve types—angle stop, straight stop, and ball valve—each with distinct shapes and handle styles that indicate how they operate and where they are mounted.
The angle stop turns with a small wheel, the straight stop aligns inline, and the ball valve uses a lever for quarter-turn operation.
- Angle stop: 90° outlet
- Straight stop: inline
- Ball valve: quarter-turn
- Wheel handle: multiple turns
- Lever handle: quick shutoff
How to find the hot and cold shutoff valves under a sink
How can one quickly distinguish the hot and cold shutoff valves beneath a sink? The hot valve is typically on the left and the cold on the right, mirroring faucet handles.
Locate two supply lines from the faucet descending to individual valves near the wall or floor. Tracing copper or braided lines to their fittings identifies which valve controls each water supply.
Visual cues that indicate valve condition (corrosion, leaks, stuck handles)
When inspecting shutoff valves beneath a sink, visual cues like greenish corrosion on copper, mineral buildup on fittings, damp spots or pooling, and stiff or wobbly handles quickly reveal their condition.
Discoloration, crusting, or flaking metal suggests corrosion; fresh moisture or rusty streaks indicates active leaks; hard-to-turn or loose handles signal internal wear or seized stems.
Prompt replacement prevents failure.
Step-by-Step: Turning Off the Under-Sink Faucet Valve Safely
Before beginning, the area should be cleared and basic tools set out to prevent spills and protect the cabinet.
The procedure then covers shutting angle stop valves with round or oval handles, operating lever-style ball valves, and techniques for freeing a seized or very stiff valve without harming pipes.
Finally, the instructions explain how to confirm the supply is off and drain any remaining water.
Prepare the area and gather simple tools
Clear the area under the sink and gather a few basic tools so the valve can be accessed and operated safely.
Remove stored items and wipe up moisture.
Have a flashlight, adjustable wrench or pliers, and a small bucket or towel ready to catch drips.
Wear gloves and eye protection.
Confirm good lighting and unobstructed access before attempting to reach the valve.
How to turn off a round or oval handle angle stop valve
With the area cleared and tools at hand, attention turns to the round or oval handle angle stop valve beneath the sink.
Identify the handle orientation, place a cloth to catch drips, and turn the handle clockwise firmly but gently until it stops.
Test the faucet to confirm water is off. If stiff, use an adjustable wrench with light pressure to avoid damaging the valve.
How to turn off a lever-style ball valve
Locate the lever-style ball valve beneath the sink and verify the lever’s alignment to determine current flow before proceeding.
Grasp the lever firmly and rotate it 90 degrees until perpendicular to the pipe; this indicates the valve is closed.
Verify by turning the faucet briefly to guarantee water stops.
If minor leaks appear at joints, tighten fittings gently; avoid forcing the lever.
How to turn off a seized or extremely stiff valve without damaging pipes
If the lever-style ball valve will not move after being checked and turned as described previously, proceed carefully to free a seized or extremely stiff valve without stressing the pipes.
Apply penetrating lubricant at the stem, allow dwell time, then gently tap the valve body with a soft mallet.
Use two wrenches—one to hold the pipe, one for the valve—turning incrementally.
Stop if resistance persists; call a plumber.
Confirming the water is off and draining residual water
After the shutoff valve is closed, verify that water flow has stopped and remove any remaining water from the lines and faucet components.
Open the faucet handles (hot and cold) to relieve pressure and drain residual water into a bucket.
Disconnect supply lines if necessary, catching trapped water.
Inspect for leaks at the valve and connections before proceeding with repairs or replacement.
Immediate Troubleshooting if Valve Won’t Turn
If the shutoff valve under the sink refuses to turn, simple remedies such as applying a penetrating oil and tapping the stem gently can often free it.
Care should be taken not to force the valve into motion, since excessive torque can shear the stem or damage fittings.
If the valve remains stuck, the homeowner should use temporary alternatives like the main house shutoff or the water meter shutoff to stop the flow before arranging repairs.
Techniques to free a stuck valve (penetrating oil, gentle taps)
When a shutoff valve refuses to budge, apply a targeted approach combining penetrating oil and measured mechanical persuasion:
Spray penetrating oil at the stem, wait per product instructions, then tap the valve body gently with a plastic or wooden mallet to break corrosion.
Attempt slow, steady turns with proper pliers. If resistance persists, reapply oil and repeat cycles.
- Use penetrating oil
- Wait recommended time
- Gentle taps only
- Slow steady turns
- Reapply and repeat
When to avoid forcing the valve to prevent damage
Exercise restraint once a valve resists turning: forcing it can shear the stem, crack fittings, or rupture supply lines, creating a far larger problem than the original stiffness.
If corrosion, visible damage, frozen conditions, or plastic components are present, stop. Continued torque risks leaks and flooding.
Contact a plumber or isolate water by approved means rather than applying excessive force that may worsen damage.
Temporary shutoff alternatives (main house shutoff, shutting off water meter)
Several practical temporary shutoff options exist if the under-sink valve will not budge: use the main house shutoff to stop water to the entire dwelling or turn off service at the water meter to isolate the supply at the property line.
These methods provide immediate isolation. Confirm valve positions, notify occupants, and consider calling a plumber for repairs to the stuck under-sink valve before restoring service.
What to Do After Shutting the Water Off
After the water is shut off, the faucet and nearby fixtures should be tested for any remaining leaks to confirm the shutoff was effective.
Any standing water in the cabinet should be drained and the area dried promptly to prevent damage and mold.
The condition of the shutoff valve should be noted for possible repair or replacement if corrosion, stiffness, or visible wear is observed.
Testing the faucet and adjacent fixtures for leaks
With the shutoff valves closed and water pressure relieved, the next step is to inspect the faucet and nearby fixtures for leaks by operating handles, checking supply lines, and observing joints under the sink for moisture or drips.
Test hot and cold separately, watch connections at shutoff valves and hose ends, feel for dampness, and note any persistent seepage for repair or further tightening.
Draining and drying the cabinet to prevent damage
Begin by removing standing water and soaked materials from the cabinet to prevent mold and wood damage.
Wipe surfaces with absorbent cloths and use a wet/dry vacuum for trapped moisture.
Remove shelf liners and dry or discard saturated items.
Increase airflow with fans and, if available, a dehumidifier.
Inspect for persistent damp spots and allow thorough drying before returning belongings.
Noting valve condition for repair or replacement
Inspect the shutoff valve visually and by feel to determine whether it can be serviced or needs replacement.
Note corrosion, mineral buildup, leaks, loose or seized handles, and damaged stems or packing.
Record valve type (compression, ball, gate), size, and orientation.
Photograph defects and nearby connections.
If wear or persistent leakage exists, recommend replacement with compatible materials and appropriate shutoff style.
When to Call a Professional Plumber
If shutting the under-sink valve reveals a burst pipe, a major leak, or valves that cannot be reached or operated, a professional plumber should be contacted.
The homeowner should note the location of the problem, any visible damage, when the issue began, and whether water is still leaking.
Providing these details and, if possible, photos will help the plumber assess urgency and arrive prepared.
Signs of complex issues requiring pro service (burst pipe, major leak, inaccessible valves)
When visible signs point to a major failure—such as a burst pipe spraying water, a steadily expanding pool beneath the sink, or valves that cannot be accessed or operated—professional plumbing assistance is warranted.
Other indicators include persistent high-volume leaks, water leaking into cabinetry or ceilings, corrosion-eaten fittings, sewage odor, or visible structural damage.
These situations risk significant property harm and require licensed intervention for safe, permanent repair.
What information to provide to the plumber for faster service
What details should be ready before the plumber arrives?
Provide location (address, which sink), problem summary (leak, valve stuck, burst), urgency level, timeline (when noticed), photos or video, visible damage, water shutoff status, any prior repairs, accessibility notes (cabinet contents, pets), preferred contact method, and insurance or warranty information to expedite diagnosis and parts preparation.
Preventive Measures and Maintenance for Under-Sink Valves
A brief preventive routine helps keep under-sink shutoff valves reliable and limits emergency repairs.
The checklist should cover visual inspection for leaks or corrosion, periodic operation and lubrication to prevent seizing, and guidance on when replacement is warranted.
Information on common valve materials, expected lifespans, and approximate replacement costs will aid sensible maintenance decisions.
Routine inspection checklist
Although often overlooked, a concise routine inspection checklist guarantees under-sink shutoff valves remain reliable and leak-free.
The checklist should note visible corrosion, drips, handle tightness, supply-line condition, and access clearance to enable prompt repairs and reduce failure risk.
- Check for corrosion on valve body
- Inspect for active drips
- Test handle operation
- Examine supply lines
- Verify clear access around valve
How to lubricate and exercise valves to prevent seizing
Lubricate and exercise under-sink shutoff valves at least twice a year to keep stems moving freely and reduce the risk of seizure.
Apply a few drops of a plumber-safe silicone or NSF-approved lubricant to the stem, then rotate the valve fully open and closed several times.
Wipe away excess, check for leaks, and note any stiffness or irregular resistance for future inspection.
When and how to replace old shutoff valves (materials and costs)
When shutoff valves show persistent leaks, stiffness, corrosion, or fail to fully stop water flow, replacement should be scheduled rather than delayed. A homeowner assesses valve type (ball, angle, multi-turn), material (brass, chrome, plastic) and estimates cost; professional replacement adds labor. Choose corrosion-resistant materials; expect $20–$150 for parts, $100–$300 installed.
| Valve type | Material | Typical part cost |
|---|---|---|
| Angle | Brass | $20–$60 |
| Ball | Chrome | $30–$90 |
| Multi-turn | Plastic | $10–$40 |
Quick Reference: Emergency Steps to Stop Water Under the Sink
A concise one-sentence checklist lists the immediate actions to stop water under the sink: turn off the shutoff valves, shut the main water if necessary, and contain the leak.
The entry also reminds readers to have emergency contact numbers for a plumber and their water utility readily available.
Clear prompts indicate when to call professional help versus when to proceed with household shutoff steps.
One-sentence quick action checklist
Shut off the nearest shutoff valve, place a bucket under the leak, and wipe up excess water. The one-sentence checklist condenses immediate actions for quick response and minimal damage.
- Turn both hot and cold valves fully clockwise.
- Remove standing water with towels.
- Isolate electrical sources nearby.
- Note leak source and severity.
- Prepare tools and a phone for next steps.
Emergency contact and utility shutoff reminders
Who should be notified and which utilities must be cut are immediate priorities after stopping the flow under a sink.
Emergency contacts and utility shutoffs should be confirmed promptly: contact landlord, plumber, and emergency services if flooding; turn off main water if necessary; shut electrical breakers if water contacts wiring; document damage.
- Landlord or property manager
- Emergency services (if hazardous)
- Licensed plumber
- Main water shutoff
- Circuit breaker off
Conclusion
In urgent situations, one should act promptly and calmly, closing the under‑sink shutoff valves like turning a small, stubborn key. After confirming the flow has stopped, drain any remaining water and inspect for leaks or damage. If valves are seized or leaks persist, contact a professional plumber without delay. Routine checks and occasional exercise of the valves will help prevent emergencies and keep the under‑sink plumbing ready for quick, reliable shutoff when needed.