How to Shut Off Cold Water Supply Quickly: Step-by-Step Guide for Homeowners
To quickly shut off a cold water supply, first close the nearest fixture shutoff valve. If the leak persists, proceed to close the interior main valve, and if necessary, the exterior main valve. Open faucets and flush toilets to drain the lines and confirm that water flow has stopped. Use a shutoff key, adjustable wrench, or pliers to turn the valves clockwise until fully closed, and check for any drips. Always keep a flashlight and towel handy, and avoid forcing any stuck valves. Follow this guide for detailed steps, valve types, and essential safety tips.
How to Shut Off the Cold Water Supply Quickly and Safely
The section outlines immediate steps to stop cold water flow during an emergency, including locating and operating shutoff valves safely.
It also highlights signs that indicate the situation exceeds DIY capabilities, such as persistent leaks, damaged pipes, or complex valve issues.
Guidance is provided on when to call a licensed plumber to prevent further damage and guarantee proper repairs.
Immediate steps to stop water flow in an emergency
Act quickly: locate and turn off the nearest shutoff valve to stop cold water flow at the source.
In an emergency, prioritize shutting fixtures, then isolate the main valve if needed.
Drain lines by opening faucets and flushing toilets.
Use tools for stuck valves with care.
Document valve positions and check for leaks once flow is halted.
Follow clear, safe steps for how to shut off cold water supply.
When to call a professional instead of DIY
When should a homeowner stop and call a professional?
If shutoff valves are seized, leaking, or inaccessible, immediate expert help is advised.
Call a licensed plumber for major pipe bursts, suspected frozen or corroded mains, gas-line proximity, or unclear shutoff locations.
If temporary measures fail or water damage risk is high, professional assessment prevents further harm and guarantees compliant, safe repairs.
Quick Identification: Where the Cold Water Supply Is Located
A quick survey of typical shut-off points helps identify where to stop the water in an emergency.
In single-family homes, valves are often under sinks, in basements, or near the water heater; apartments and condos may have unit shut-offs inside the unit or a building riser room.
Exterior main shut-off and meter valves are commonly located at the property line, in a meter box, or near the foundation.
Common shut-off valve locations in single-family homes
Locating the cold water shut-off valve in a single-family home typically requires checking a few predictable spots: exterior near the front foundation, garage or basement where main enters, utility room or crawlspace, and near the water meter at the street.
Also inspect under kitchen sinks and laundry areas for localized shut-offs. Valves may be ball, gate, or curb types and often show corrosion or tags.
Shut-off points for apartments, condos, and rented units
Multiple small dwellings typically have fewer access points than single-family homes, so residents should first check immediately inside the unit—under sinks, behind laundry hookups, and beside the water heater—for individual shut-offs.
Also inspect bathroom vanities, inside utility closets, and behind appliances.
If none are found, contact building management for per-unit valves or central riser access; document locations for emergencies.
How to locate exterior main shut-off and meter valves
If a unit-level shut-off cannot be found or building management directs attention outside, homeowners and maintenance staff should quickly identify the exterior main shut-off and meter valves that control the cold-water supply.
Check around the property perimeter for a water meter box, usually near the curb, sidewalk, or foundation. Lift the lid, locate the valve stem or wheel, and use the correct tool to turn off supply.
Types of Valves and How They Operate
The article outlines common shutoff hardware—ball, gate, and stop valves—and notes their basic operation and typical locations.
It also identifies compression and service valves often found under sinks and behind toilets, explaining how their quarter-turn or multi-turn actions differ.
Finally, it describes visual and physical signs of trouble, including frozen, corroded, or seized valves, so readers can recognize when replacement or professional help is needed.
Ball valves vs. gate valves vs. stop valves
Valves control flow by different internal mechanisms, and understanding how ball, gate, and stop valves operate clarifies which is best for quickly shutting off a cold water supply.
Ball valves use a quarter-turn solid ball for fast, reliable shutoff.
Gate valves lift a wedge, slower and prone to sticking.
Stop valves (globe/angle) offer fine control but require multiple turns, slower than a ball valve.
Compression and service valves commonly found under sinks and toilets
Locate compression and service valves beneath sinks and behind toilets; these compact shutoffs provide direct control of water to fixtures without cutting off the whole house supply.
Compression valves use a threaded nut compressing tubing to seal; service (angle) stop valves turn a spindle to open or close flow.
They are small, usually brass, and accessed with a wrench or by hand for quick fixture isolation.
How to recognize frozen, corroded, or seized valves
Recognizing a frozen, corroded, or seized shutoff involves looking for clear physical and functional signs: frost or brittle fittings indicate freezing, white or greenish powder and pitting signal corrosion, and a stiff or immovable handle suggests seizure.
Additional indicators include reduced or no water flow when open, creaking or grinding when attempting operation, mineral crusts around joints, and discolored metal that resists moderate hand force.
Step-by-Step Guide to Shutting Off Cold Water Indoors
A concise walkthrough explains how to shut off indoor cold water at common fixtures to prevent leaks and enable repairs.
The steps cover under-sink shutoffs, toilet and appliance valves, and protections for laundry and dishwashing equipment. Clear, ordered actions help minimize water damage and restore service safely.
- Locate and close the under-sink shutoff for bathroom or kitchen fixtures.
- Turn the toilet or appliance angle stop clockwise until fully closed.
- Stop cold water to the washing machine and dishwasher at their dedicated valves.
- Verify isolation by opening the fixture to confirm no flow.
Shutting off a bathroom or kitchen supply under the sink
One common method for stopping indoor cold water quickly is to shut off the dedicated valve beneath the bathroom or kitchen sink; this isolates the fixture without affecting the rest of the house.
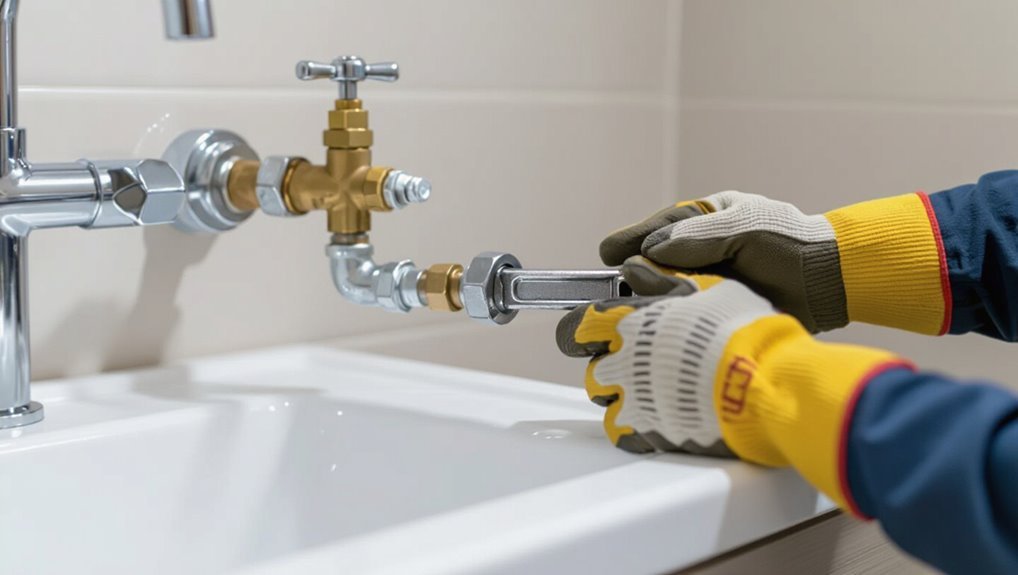
Locate the small shutoff (angle) valve on the cold supply line, turn clockwise until firm, check the faucet to confirm flow stops, and reopen slightly only if needed for repairs—use pliers if stiff.
Turning off the valve to a toilet or appliance
Locate the shutoff valve behind the toilet or on the supply line for the appliance, then turn it clockwise until it stops to cut the cold water flow.
Verify closure by flushing the toilet or running the appliance briefly; residual water may drain.
If the valve is stiff, use an adjustable wrench gently.
Note the valve type for future maintenance and restore slowly when finished.
Stopping cold water to a washing machine or dishwasher
Shut off the water to a washing machine or dishwasher by closing the appliance’s dedicated shutoff valves—typically found where the supply hoses meet the wall—turning each valve clockwise until it stops.
After closing, run a cycle briefly to confirm no refill, or open a nearby faucet to check pressure.
Inspect hoses and connections for leaks; replace damaged hoses and label valves for future quick access.
Shutting Off the Main Cold Water Supply
When a localized shutoff is insufficient, attention turns to the main cold water supply to stop all incoming flow. The procedure covers both interior and exterior valves and simple checks to confirm water is fully off.
Clear, quick steps reduce water damage risk and guarantee safe follow-up repairs.
- Locate and turn the interior main valve (typical types and turning direction).
- Access and operate the exterior/street-side valve if the interior valve is inaccessible.
- Perform quick verification tests (open a faucet, check pressure at outdoor spigot).
- Notes on tools, safety precautions, and when to call the water utility.
Steps to shut the interior main valve
Before turning any handles, the homeowner should confirm the interior main valve’s exact location—commonly found near the water heater, basement wall, or where the main line enters the house—and guarantee access is clear and unobstructed.
Wear gloves if needed, turn the valve clockwise slowly until fully closed, check for resistance or leaks, note valve type for future use, and inform household members when supply is off.
Steps to shut the exterior/main street-side valve
Locate the exterior main shutoff—typically in a covered box at the property line, near the sidewalk, or by a curb stop—clear away debris, lift the cover, and confirm the valve type and access tool required before attempting closure.
Use the appropriate key or wrench, turn clockwise steadily until resistance indicates closure, secure the cover, and notify the utility or neighbors if work affects the street supply.
Verifying the supply is fully off (tests to perform)
Confirm the shutoff by running a series of quick checks that reveal any remaining pressure or flow.
Open a cold faucet on each level briefly; water should stop immediately.
Flush toilets to observe tank refill.
Inspect outdoor spigots and hose bibs.
Listen near the meter for trickling.
If any flow exists, re-seat the valve or contact the water utility before proceeding with repairs.
Tools and Safety Precautions
A compact kit—adjustable wrench, pliers, flashlight, towel, and shutoff key—should be kept near the main valve for rapid action.
The writer notes safety precautions such as turning off nearby electrical sources, watching for slippery floors, and avoiding contaminated water contact with bare skin.
If a valve is stuck or leaking, do not force it or use an open flame; instead, secure the area and call a professional if basic tools and gentle technique fail.
Essential tools to have on hand for quick shut-off
Several basic tools and a few safety items make quick cold-water shut-off efficient and reduce risk: an adjustable wrench sized for common valve nuts, a pair of channel-lock pliers for stubborn fittings, a flashlight, plumber’s tape, and a shut-off key or basin wrench for less accessible valves, plus nitrile gloves and safety glasses to protect hands and eyes.
Also recommended: a small bucket, absorbent towels, and a marker to label valves.
Personal safety precautions (electricity, slippery floors, contamination)
Wear protective gear and assess the area before attempting a shut-off: turn off nearby electrical devices and circuit breakers if water could reach outlets.
Clear or mark wet floors to prevent slips, and use gloves and eye protection to avoid contamination from dirty water or chemicals.
Confirm adequate lighting, ventilate confined spaces, keep bystanders and pets clear, and use nonslip footwear to maintain stable footing.
What to avoid doing when a valve is stuck or leaking
Avoid hammering, forcing, or applying excessive leverage to a stuck or leaking valve, as these actions can break fittings, fracture pipes, or shear off valve stems, creating larger leaks and safety hazards.
Do not use open flames, improvised tools, or chemical sealants as permanent fixes.
Avoid rapid, repeated attempts that stress connections; instead shut main supply, drain lines, and call a licensed plumber.
If a Valve Is Stuck, Leaking, or Broken
When a shut-off valve is stuck, leaking, or broken, the guide outlines safe methods to free or operate it without causing further damage.
It also summarizes temporary fixes that can stop or slow a leak until professional repair is possible.
Finally, it explains clear criteria for when replacement is needed rather than a temporary repair.
Safe methods to free a stuck valve
If a shut-off valve is seized, gentle, methodical techniques can often restore movement without causing damage.
Apply penetrating oil to the stem, allow time to soak, then work the valve back and forth with a wrench using short, controlled motions.
Tap the body lightly to loosen corrosion.
If resistance remains, stop to avoid breakage and consult a plumber for safe replacement.
Temporary fixes for a leaking shut-off valve
Address temporary leaks at a shut-off valve with quick, secure measures that minimize water loss until a permanent repair can be made.
Apply plumber’s tape around threaded joints, tighten packing nuts slightly, or slip a rubber patch and hose clamp over minor weeps.
For larger drips, wrap with a water‑stop bandage or epoxy putty rated for plumbing.
Monitor until professional repair.
When a valve requires replacement vs. temporary repair
Temporary measures can control seepage and slow a leak, but some valve problems demand replacement rather than a patch.
If a valve is corroded, cracks are visible, threads stripped, or the stem won’t move after penetrating corrosion, replacement is safest.
Temporary repairs suit minor drips or emergencies.
When functionality or structural integrity is compromised, a full replacement prevents recurrence and potential water damage.
Managing Water After Shut-Off
After shutting off the cold water supply, remaining water should be drained from pipes and fixtures to prevent leaks, freezing, or contamination.
Appliances and exposed fixtures must be protected or disconnected during extended outages to avoid damage.
When repairs are complete, water should be restored gradually and filters or aerators checked to verify the system is clear and functioning properly.
Draining residual water from pipes and fixtures
Once the main valve is closed, draining residual water from pipes and fixtures prevents trapped water from causing leaks, freezing, or corrosion.
Open all cold taps lowest to highest, flush toilets, and drain exterior hoses.
Use drain valves on appliances and basement floor drains. Collect water in buckets or direct to drains.
Verify faucets run dry and inspect for drips before leaving system off.
Protecting appliances and fixtures during extended shut-off
With residual water removed, attention turns to safeguarding appliances and fixtures during an extended shut-off to prevent damage and guarantee an easy restart.
Disconnect or isolate washing machines, dishwashers, and ice makers; drain small appliances and leave valves slightly open to relieve pressure.
Protect exposed pipes with insulation or heat tape where freezing is possible and label affected fixtures for technicians or occupants.
Steps to restore water safely after repairs
Begin reintroducing water gradually and methodically to avoid pressure surges, dislodge debris, or cause leaks.
Open the main valve slowly, then open cold taps and fixtures one at a time to purge air and sediment.
Check repaired areas and visible joints for leaks.
Flush toilets and run appliances briefly.
Monitor pressure and inspect again after several hours before restoring normal use.
Preventive Maintenance to Ensure Quick Shut-Off in Future
Regular inspections of shut-off valves and supply lines on a semiannual or annual schedule help spot wear before it causes failure.
Homeowners can perform simple tasks like exercising valves, checking for leaks, and tightening fittings to keep controls responsive.
Installing accessible, clearly labeled shut-offs or replacing stiff valves with quarter-turn models speeds emergency closure when time is critical.
Recommended inspection schedule for valves and supply lines
Because valves and supply lines are the first line of defense against leaks and flooding, a clear, consistent inspection schedule is essential to guarantee they can be shut off quickly when needed.
Recommend visual checks quarterly, functional tests (operate valves) biannually, and full professional inspections every 3–5 years.
Record findings, note corrosion or stiffness, and replace components showing deterioration promptly.
Simple maintenance tasks homeowners can perform
Following the inspection schedule, homeowners can take straightforward steps to keep valves and supply lines ready for rapid shut-off.
Periodically operate each valve to prevent sticking, clean visible debris, tighten loose fittings, and replace worn washers or packing.
Check for leaks, corrosion, and moisture stains; apply plumber’s grease to threads as recommended.
Document maintenance dates for consistency and quick reference.
Upgrades that make emergency shut-off faster (accessible valves, labeled shut-offs)
Several practical upgrades can shave precious minutes during a water emergency: relocate shut-off valves to accessible areas, install lever-style or ball valves for quicker operation, and clearly label each shut-off with durable tags or maps.
Homeowners should add shut-off access panels, group isolation valves logically, and use color-coded labels or a simple diagram near the main panel.
Professional installation guarantees reliability and code compliance.
Cost and When to Hire a Plumber
Typical emergency shut-off calls and simple valve replacements carry a clear cost range, often higher for after-hours service and rapid response.
Immediate hiring is warranted for active leaks, loss of water control, or visible pipe damage, while non-urgent valve upgrades or routine replacements can be scheduled competitively.
Homeowners should weigh emergency rates against the severity of the problem to decide between immediate assistance and planned service.
Typical costs for emergency shut-off assistance and valve replacement
Emergency shut-off assistance and valve replacement costs vary by region, urgency, and the type of valve involved. Typical emergency callouts range $100–$300 plus parts; scheduled replacements often run $150–$500 including labor. Basic ball valves cost $10–$40; specialty or main shut-off valves cost more. Example cost overview:
| Service | Typical emergency | Typical scheduled |
|---|---|---|
| Callout + labor | $100–$300 | $50–$150 |
| Valve part | $10–$400 | $10–$300 |
Signs a plumber is needed immediately versus scheduled service
After outlining likely costs for emergency shut-off assistance and valve replacement, it helps to clarify when immediate plumbing intervention is warranted versus when a scheduled service is sufficient.
Immediate response is required for active flooding, burst pipes, contaminated water, no main shut-off, or gas-smelling appliances.
Schedule a plumber for slow leaks, minor drips, noisy valves, routine inspections, or non-urgent replacements.
Real-World Scenarios and Quick Response Plans
The article outlines practical responses for common emergencies: stopping a burst pipe at home, managing leaks discovered while away, and implementing a household shut-off plan.
It emphasizes quick identification of the main and fixture shut-off valves and simple steps to minimize damage.
A concise checklist for families and renters is recommended to guarantee rapid, coordinated action.
Handling a burst pipe while at home
When a pipe bursts inside a home, occupants must act swiftly to limit water damage and protect people and belongings.
They should immediately shut off the main cold water valve, cut power to affected areas if safe, move people and valuables away, contain spreading water with towels or buckets, document damage for insurance, and contact a licensed plumber for emergency repair and pipe replacement.
Responding to leaks while away from home
Away from home, a promptly executed plan can prevent a small leak from becoming a major disaster.
Contacting neighbors or a trusted local contact to inspect and, if necessary, shut the main valve is essential.
Remote water sensors and smart shutoff devices can automatically stop flow.
Notify the water company and document damage; arrange emergency repairs or a licensed plumber to secure the property.
Creating a simple household shut-off plan and checklist
Several clear steps make a household shut-off plan usable under pressure: identify main and localized shut-off valves, label them visibly, note valve types and required tools, and assign roles to household members or emergency contacts.
A concise checklist reduces response time and confusion; include clear locations, tool storage, contact numbers, and drill schedules.
- Valve locations and labels
- Required tools and access
- Assigned responders
- Regular drill dates
Conclusion
Like a lighthouse cutting through fog, the ability to shut off the cold water supply guides homeowners through sudden plumbing storms. The conclusion emphasizes that recognizing valve types, practicing the shut-off steps, and maintaining clear access create a reliable safety routine. When uncertainty, stubborn valves, or complex mains arise, calling a professional prevents damage. With preparation and calm action, household water emergencies become manageable events rather than overwhelming crises.