How to Tell If Your Water Heater Is Broken: 9 Signs and What to Do Next
If you’re wondering how to tell if your water heater is broken, look for these key warning signs: no hot water, discolored or rusty water, loud noises, visible leaks, and a persistent rotten-egg odor. Other indicators include temperature fluctuations, lukewarm water, slow recovery times, low pressure, and unusual sounds caused by sediment buildup. Start by checking the pilot light, power supply, thermostats, and valves. If issues continue, it’s time to consult a professional. This guide will help you understand diagnostics, potential fixes, and when to consider a replacement.
How to Know If Your Water Heater Is Broken: Quick Overview
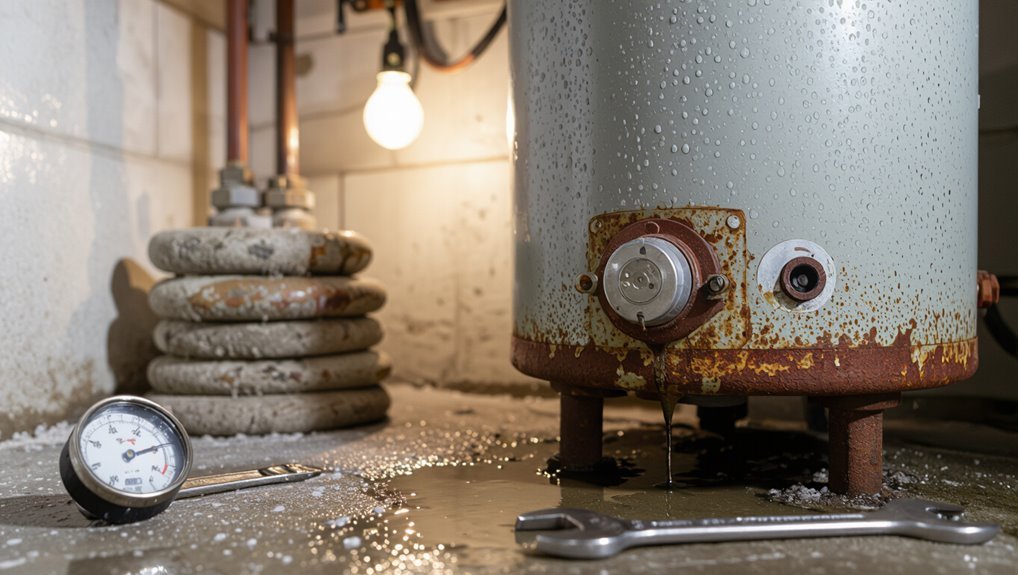
The most obvious indicators of a failing water heater include no hot water, discolored or rusty water, strange noises, and visible leaks.
Minor issues like a tripped breaker, a faulty thermostat, or sediment buildup can often be checked and corrected by a homeowner.
Significant leaks, gas smells, persistent overheating, or unclear electrical faults warrant calling a professional immediately.
Clear, immediate signs that indicate a broken water heater
How can a homeowner quickly tell if a water heater has failed?
Clear, immediate signs include no hot water at all, discolored or rusty water, loud banging or popping noises, visible leaks or pooling near the unit, and a persistent rotten-egg odor.
Sudden temperature fluctuations or frequent pilot light outages also indicate malfunction.
These symptoms signal how to tell if your water heater is broken.
When to call a professional vs. when you can troubleshoot yourself
When should a homeowner attempt basic checks and when is a pro required?
A homeowner can inspect pilot lights, reset breakers, check thermostats, drain sediment, and tighten visible fittings.
Call a professional for gas odor, persistent leaks, no hot water after basic fixes, electrical issues, strange noises indicating failing components, or when tank replacement and permits, safety valves, or soldered gas lines are involved.
Common Symptoms of Water Heater Failure
Common symptoms of a failing water heater include no hot water or intermittent supply, lukewarm or inconsistent temperatures, and slow recovery after use.
Reduced water pressure or flow and unusual noises such as popping or banging can also indicate internal issues.
Recognizing these signs early helps determine whether repair or replacement is needed.
No hot water or intermittent hot water
A sudden absence of hot water or showers that alternate between scalding and cold are clear indicators that a water heater may be failing.
This symptom often signals ignition, thermostat, or element failure in gas or electric units, or fuel supply and pilot issues in gas models.
Immediate checks should include power, pilot light, circuit breakers, and visible leaks before contacting a technician.
Lukewarm or inconsistent temperature
Many households experience lukewarm or fluctuating water temperatures, which often point to underlying water heater issues rather than routine thermostat adjustments.
Common causes include sediment build-up, failing heating elements, or a malfunctioning thermostat.
Signs to note:
- Sudden temperature drops during use.
- Water that never reaches set temperature.
- Variability between taps suggesting uneven heating or a crossover.
Seek professional diagnosis.
Water is taking too long to reheat
Several households notice that hot water takes much longer than expected to return after heavy use, which can signal a failing water heater.
Slow recovery often indicates sediment buildup, a degraded heating element, or insufficient burner/element performance.
The symptom appears when successive showers or appliance cycles exhaust stored hot water and the unit cannot reheat quickly; professional inspection and targeted repairs are advised.
Low water pressure or reduced flow
When hot water takes longer to recover after heavy use, homeowners may also notice that faucets and showers produce weaker streams than before.
Reduced flow can indicate sediment buildup in the tank or mineral-clogged pipes and valves restricting hot-water passage. It may also signal a failing dip tube or corroded internal components.
Prompt inspection prevents worsening performance and potential costly repairs.
Unusual noises coming from the heater (popping, banging)
Rumbling, popping, or banging from a water heater often signals sediment accumulating on the tank bottom that traps steam bubbles and releases them explosively as water heats.
These noises indicate reduced heating efficiency and possible tank overheating.
Routine flushing can remove sediment; persistent sounds suggest advanced buildup or failing components requiring professional inspection.
Address promptly to prevent element burnout or premature unit failure.
Visible leaks or pooling water around the unit
After addressing internal noises that often signal sediment or overheating, attention should turn to visible leaks or pooling around the water heater, a clear outward sign of failure.
Puddles, dripping connections, or corroded tank seams indicate compromised seals, valves, or tank integrity. Immediate isolation of power and water and prompt professional inspection are advised to prevent water damage and potential system collapse.
Rusty, discolored, or foul-smelling hot water
If hot water runs brown, orange, or leaves reddish stains, or if it carries a metallic or rotten-egg odor, these are strong indicators that the water heater or its anode rod is deteriorating or that corrosion and bacterial growth are present in the tank.
Discolored or smelly hot water warrants flushing the tank, testing water chemistry, inspecting the anode rod, and contacting a professional for repair or replacement to prevent contamination.
Pilot light issues or burner failures (gas heaters)
How can a water heater reveal burner trouble? A gas water heater may show a weak or absent pilot light, yellow or flickering flame, frequent ignition attempts, or no hot water despite normal controls.
Soot, sulfur odor, or unusual noises at the combustion chamber indicate burner failure or gas flow issues.
Prompt inspection by a qualified technician is recommended to guarantee safe repair.
Frequent cycling or overheating
Problems with the burner can also lead to temperature control issues that cause a water heater to cycle frequently or overheat.
Rapid on/off cycling, fluctuating water temperature, or scalding outputs indicate a failing thermostat, faulty gas valve, sediment buildup, or incorrect settings.
Left unchecked, repeated cycling shortens component life and raises energy costs.
Professional diagnosis and timely repair or thermostat replacement are advised.
How to Diagnose Each Symptom
The guide now moves into practical diagnosis of each symptom, beginning with separate procedures for no hot water on electric versus gas units.
It outlines how to test thermostats and heating elements on electric heaters and how to check the pilot light, thermocouple, and gas supply on gas models.
Additional steps cover inspecting for leaks to locate their source and evaluating sediment buildup and tank corrosion.
Troubleshooting no hot water (electric vs. gas)
When a water heater stops producing hot water, identifying whether the unit is electric or gas is the first step toward pinpointing the cause; each type shows distinct failure modes (heating element or breaker trips for electric, pilot light or gas control issues for gas).
For electric units, check power supply, breakers, and visible wiring.
For gas units, inspect pilot status, venting, and odors; consult a pro if unsafe.
Testing thermostat and heating elements on electric heaters
Start by shutting off power to the electric water heater and removing the access panels and insulation to expose the thermostat and heating elements.
Use a multimeter to check continuity and voltage at each thermostat and element.
Replace a thermostat showing no voltage or inconsistent readings.
Test elements for continuity; a failed element shows open circuit and should be replaced to restore heating performance.
Checking the pilot light, thermocouple, and gas supply on gas heaters
If a gas water heater fails to produce hot water or cycles erratically, checking the pilot light, thermocouple, and gas supply pinpoints the most common causes; each component produces distinct symptoms that guide troubleshooting.
Confirm the pilot is lit and steady. Test thermocouple function or replace if flame extinguishes when pilot knob is released.
Verify gas valve is open and supply pressure is adequate before calling a professional.
Inspecting for leaks and identifying source (tank, valves, connections)
Several simple inspections can quickly reveal whether a water heater leak originates from the tank, a valve, or a pipe connection.
Check the floor around the heater for pooled water, then dry and watch to pinpoint drip location.
Inspect pressure-relief and drain valves for seepage, fittings and unions for wetness, and inlet/outlet connections for loose or corroded joints indicating repair or replacement.
Assessing sediment buildup and tank corrosion
Examine the tank and water output for clear signs that sediment or corrosion is affecting performance: rattling or popping noises during heating, reduced hot water capacity, rusty or discolored water at taps, and visible rust flakes from the drain valve all point to sediment buildup or internal corrosion.
Further assessment includes inspecting anode rod condition, checking drain samples for grit, and noting accelerated scale or weakened tank seams.
Measuring water pressure and flow diagnostics
Measuring water pressure and flow helps pinpoint whether reduced hot-water delivery stems from the heater, plumbing restrictions, or supply issues.
Technicians check static and dynamic pressure with a gauge at multiple fixtures, compare hot versus cold flow rates, and inspect shutoff valves, aerators, and mixing valves.
Consistent low pressure indicates supply or restriction; normal pressure with poor heating implicates the water heater.
Evaluating unusual noises and what they mean
Why is the water heater making noise, and what do different sounds signify?
A popping or rumbling often indicates sediment buildup causing uneven heating.
Tapping or humming can signal loose components or thermal expansion.
Continuous high-pitched squeal suggests a failing valve or pump.
Clicking may be ignition or thermostat cycling.
Identify sound source, power down, and call a technician if unsure.
Testing water quality to diagnose discoloration or odor
Noisy water heaters can point to mechanical or thermal issues, but discoloration and odor usually stem from water quality problems that require specific tests.
Collect clear and hot-water samples, note smell and color, then use test strips or lab analysis for iron, hydrogen sulfide, bacteria, pH, and hardness.
Compare results to local standards.
Address findings: flush, disinfect, replace anode, or install treatment.
Immediate Safety Steps to Take If You Suspect a Broken Heater
If a heater appears to be failing, the first steps are to cut power, shut gas if applicable, and stop the water supply to prevent further damage.
The article will explain how to switch off electricity to electric units, how to turn the gas control to pilot or off safely, and how to shut the inlet valve and drain the tank if needed.
It will also outline signs that require immediate evacuation or calling emergency services.
How to shut off power to electric water heaters
Cut power to an electric water heater immediately upon signs of malfunction to prevent shock, fire, or further damage.
Locate the heater’s dedicated circuit breaker in the main panel and switch it to OFF. If unclear, label circuits first.
For additional safety, turn off the heater’s internal switch or disconnect power at a fused safety switch if present.
Contact a qualified electrician before restoring power.
How to shut off gas safely for gas heaters
Shut off the gas supply immediately at the appliance’s shutoff valve and, if accessible, at the home’s main gas meter valve to stop fuel flow and reduce risk of leak or fire.
Ventilate the area, avoid flames or switches, and do not operate electrical devices.
If smell of gas persists, evacuate, call the gas company or emergency services from a safe location, and wait for qualified personnel.
How to turn off the water supply and drain the tank if necessary
Locate the cold-water supply valve feeding the water heater and turn it clockwise to stop incoming water.
Then open a nearby hot faucet to relieve system pressure.
If the tank must be emptied, attach a garden hose to the tank drain valve and direct the other end to a suitable drain or outside area before opening the valve slowly.
Close faucets, monitor flow, and check the pressure-relief valve for leaks.
When to evacuate or call emergency services
If there are strong smells of gas, visible flames, sparking electrical components, or water pouring uncontrollably from the heater, occupants should evacuate the building immediately and call emergency services; these signs indicate an imminent danger that requires professional response.
Once safe, prevent reentry, warn neighbors if applicable, and relay precise details to dispatch. Await trained responders; do not attempt repairs or reopen utilities.
DIY Fixes You Can Try Before Calling a Pro
Before calling a professional, a homeowner can try a few straightforward repairs that often restore function.
Common steps include resetting the breaker or thermostat, relighting and cleaning the pilot assembly, flushing the tank to remove sediment, and replacing accessible heating elements or thermostats.
Minor leaks can sometimes be fixed by tightening or replacing valves and fittings, but safety precautions should be observed.
Resetting the breaker or thermostat
A quick reset of the circuit breaker or the water heater’s thermostat can often restore normal operation after a tripped breaker or an internal safety cutoff.
Before resetting, switch off power at the panel, wait a minute, then flip the breaker back.
For electric heaters, press the red reset button on the thermostat housing after confirming power is off and no burning odors are present.
Relighting the pilot light and cleaning the pilot assembly
Relight the pilot light and inspect the pilot assembly to restore a gas water heater that won’t produce hot water.
Shut gas, wait, follow the manufacturer’s relighting procedure, then reignite.
Examine the pilot tube and thermocouple for soot, debris, or corrosion; gently clean with compressed air or a soft brush.
Replace a damaged thermocouple or call a technician if relighting fails.
Flushing the tank to remove sediment
Flush the tank to remove mineral buildup that reduces heating efficiency and can shorten the water heater’s lifespan.
The homeowner shuts off power and water, attaches a hose to the drain valve, and drains into a safe area until clear.
Flushing clears sediment, improves performance, and prevents noise and corrosion.
Refill slowly, restore power, and check for leaks before normal use.
Replacing heating elements or thermostats (basic guide)
When water remains cold or the heater cycles excessively, homeowners can often resolve the issue by replacing a faulty heating element or thermostat. These parts are accessible, inexpensive, and straightforward to change with basic tools and safety precautions.
Turn off power and water, verify part compatibility, drain enough to access elements, disconnect wiring, swap components, reseal, refill, restore power, and test for proper operation.
Tightening or replacing leaking valves and fittings
Inspect the valves and fittings around the water heater for visible drips, corrosion, or wetness at joints, since many leaks are caused by loose connections or failing washers that can be tightened or replaced without professional help.
Use adjustable wrenches to snug fittings, replace worn washers or valve seals, and test for leaks.
If corrosion or persistent seepage remains, contact a plumber.
When to Call a Professional Plumber or Technician
If warning signs such as gas smells, substantial leaks, rusty water, or no hot water persist, a professional plumber or technician should be contacted immediately.
Complex gas problems, corroded tanks, and major leaks require trained diagnosis and often specialized tools or permits.
Homeowners should ask about licensing, experience with water heaters, estimated costs, and inspection procedures so they know what to expect during a professional assessment.
Signs that require immediate professional attention
How can one recognize problems that demand immediate professional attention?
Sudden loss of hot water with no reset response, hot water that is scalding or uncontrollably fluctuating, visible active leaks pooling beneath the unit, electrical burning smells or tripped breakers tied to the heater, and loud banging or popping accompanied by steam indicate urgent risks.
Call a licensed plumber or technician immediately.
Diagnosing complex gas issues, corroded tanks, or major leaks
When should a homeowner escalate to a professional for complex gas problems, a corroded tank, or major leaks?
A technician should be called immediately for persistent gas odors, pilot or burner malfunctions, visible tank corrosion, seepage around the base, or active large leaks.
Professionals assess gas line integrity, tank failure risk, and necessary repair or replacement, ensuring safety and code-compliant solutions.
Questions to ask a contractor before hiring
Having decided that a professional is needed for complex gas issues, corroded tanks, or major leaks, homeowners should prepare a focused list of questions before contacting contractors.
Ask about licenses, insurance, and bonding; experience with the specific heater type; written estimates and warranty details; timeline and permit handling; diagnostic fees; references and recent reviews; and emergency response availability to guarantee informed hiring decisions.
What to expect during a professional inspection
A professional inspection typically starts with a visual assessment of the heater and surrounding plumbing, followed by functional tests to evaluate pressure, temperature settings, pilot light or ignition, and signs of combustion or leaks.
The technician will check electrical connections, thermostat operation, anode rod and tank condition, drain valve function, and water quality.
A clear written report and repair or replacement estimate follow.
Repair vs. Replace: How to Decide
Determining whether to repair or replace a water heater depends on the specific fault—minor components like thermostats or heating elements are often repairable, while tank corrosion or leaking seams usually require replacement.
Cost comparisons should weigh repair expenses (parts and labor) against the unit’s age and expected remaining life for that type (tankless, conventional tank, or heat pump), plus potential energy savings from a newer, more efficient model.
Replacement becomes more economical when repair costs approach the price of a new unit, the heater is near or past its typical lifespan, or efficiency gains will lower long‑term operating costs.
Typical repairable issues vs. non-repairable tank problems
When deciding between repair and replacement, the critical factor is whether the issue stems from a single serviceable component or from widespread tank deterioration.
Repairable problems include faulty thermostats, heating elements, pressure-relief valves, minor leaks at fittings, and ignition or pilot assembly failures.
Non-repairable signs include extensive corrosion, perforated tanks, large internal rust deposits, or irreparable structural failure indicating replacement.
Cost factors to consider (repairs, parts, labor)
Because repair decisions hinge on total outlay, homeowners should weigh parts, labor, and indirect expenses alongside the unit’s remaining lifespan.
Estimate parts cost, technician rates, diagnostic fees, and potential permit or disposal charges.
Factor downtime, energy inefficiency, and warranty status.
Compare cumulative repair expenses to replacement quotes including installation and upgrade options to determine the most economical, reliable choice.
Average lifespan of different types of water heaters
Repair decisions are more informed when homeowners consider how long different water heater types typically last.
Traditional tank gas or electric units generally last 8–12 years.
Tankless models often reach 15–20 years with proper maintenance.
Heat pump (hybrid) units average about 10–15 years.
Storage tanks with corrosive conditions may fail earlier.
Age benchmarks guide repair versus replacement choices.
Energy efficiency and long-term savings of replacement
Evaluate potential energy savings before deciding to replace a water heater, since newer models often deliver markedly better efficiency that can offset replacement costs over time.
Compare annual operating costs, fuel type, insulation, and standby losses.
Factor in local utility rates, rebates, and expected remaining service life to estimate payback period.
Prioritize measurable reductions in consumption and predictable long-term savings.
When replacement is more economical than repair
When a water heater fails, deciding whether to repair or replace hinges on a few clear criteria: age, extent of the damage, cost of parts and labor, and projected operating efficiency of a replacement. Replacement is often economical if the unit is over 10 years old, repairs exceed 50% of replacement cost, or efficiency gains promise payback.
| Factor | Guideline |
|---|---|
| Age | >10 years favors replace |
| Repair cost | >50% of replacement |
| Efficiency gain | Significant energy savings |
| Frequent failures | Replace recommended |
Choosing a New Water Heater (If Replacement Is Needed)
When replacement is required, the homeowner should assess available water heater types—tank, tankless, hybrid heat pump, and solar—to match comfort and budget priorities.
Sizing must reflect household peak demand, while energy efficiency ratings and projected operating costs determine long-term expense.
Practical choices also hinge on installation constraints, local permit requirements, and contractor availability.
Types of water heaters: tank, tankless, hybrid heat pump, solar
Choosing a replacement begins with understanding the main types of residential water heaters—tank, tankless, hybrid heat pump, and solar—because each uses different technology, installation requirements, and operating costs.
Tank units store heated water; tankless heat on demand and save space; hybrid heat pumps transfer ambient heat for efficiency; solar relies on collectors and often requires backup.
Lifespan, energy source, and local incentives influence choice.
Sizing your new water heater for household needs
Sizing a replacement water heater requires matching capacity and output to a household’s peak demand and recovery needs.
Assess simultaneous fixtures, typical shower length, and laundry/dishwasher cycles to estimate needed first‑hour rating or flow rate for tankless options.
Factor in available fuel type and installation constraints.
Consult manufacturer specifications and a professional to confirm sizing and guarantee reliable hot water during busiest periods.
Energy efficiency ratings and operating costs
Energy efficiency, expressed through standardized ratings and estimated annual operating costs, should be a primary consideration when selecting a replacement water heater.
Compare Uniform Energy Factor (UEF) or Energy Factor (EF) values, fuel type, and standby losses. Higher efficiency units reduce monthly bills despite higher upfront costs.
Review estimated annual operating cost labels and calculate payback periods to determine the most economical option.
Installation considerations and permits
Several practical steps guide the installation of a replacement water heater, including site preparation, venting and combustion clearances, plumbing and gas or electrical connections, and any required permits or inspections.
Local codes determine permit needs and inspection timing. Professional installation guarantees compliance with safety, ventilation, and seismic restraints.
Homeowners should obtain quotes, verify contractor licensing, and keep permits and receipts for warranty and resale documentation.
Maintenance Tips to Prevent Future Breakdowns
Preventive maintenance extends a water heater’s service life and reduces sudden failures.
Recommended tasks include a regular tank flush to remove sediment, periodic anode rod inspection and replacement when heavily corroded, and routine checks for leaks and corrosion.
A simple seasonal checklist—spring and fall inspections, pressure-relief valve testing, and thermostat verification—keeps performance consistent and problems small.
Regular flushing schedule and how to do it
A regular flushing schedule—typically once a year, or every six months in hard-water areas—clears sediment that reduces efficiency and causes early failure.
Technicians recommend documenting dates and results to track tank condition and adjust frequency based on water quality and appliance performance.
Homeowners should shut power/gas, attach a hose to the drain valve, flush until clear, close valve, refill, and restore power while checking for leaks.
Checking anode rods and when to replace them
After flushing the tank, attention should turn to the anode rod, the sacrificial metal that protects the interior from corrosion.
Inspect annually by removing the rod; replace if heavily corroded, coated, or reduced to less than half its original diameter.
Use the correct material (magnesium, aluminum, or zinc) for water chemistry.
Timely replacement extends tank life and prevents premature failure.
Routine inspections for leaks and corrosion
When performing routine inspections, homeowners should scan the water heater and surrounding plumbing for signs of leaks, rust, or calcium buildup at least twice a year.
Early detection of damp spots, mineral deposits, or white corrosion around fittings and the tank base allows for targeted repairs before they escalate into major failures.
Note visible joint seepage, corrosion at valves, and stains on the floor; document findings and arrange prompt repairs.
Seasonal maintenance checklist
Although seasonal checks vary by climate and heater type, a concise checklist covering spring and fall inspections, sediment flushing, temperature-pressure valve testing, insulation assessment, and anode rod evaluation helps prevent most failures.
- Inspect for leaks, corrosion, insulation gaps, and venting issues.
- Flush sediment, test T&P valve, and verify thermostat accuracy.
- Check anode rod wear, tighten connections, and schedule professional service as needed.
Cost Estimates and Budgeting for Repairs or Replacement
Typical repair costs vary by issue—thermostat or heating element replacements tend to be inexpensive, while tank leaks or major component failures can be considerably higher.
Replacement averages depend on type and size, with small tankless or compact electric units usually costing less upfront than large gas or high-capacity tank systems.
Financing options, manufacturer warranties, and available rebates should be factored into budgeting decisions to reduce net outlay.
Typical repair costs by issue
Repair costs for water heaters vary widely depending on the specific fault, parts required, and labor rates, so homeowners should budget for a range rather than a single figure.
Common issues: thermostat or heating element replacement ($100–$300), pressure relief valve or dip tube repair ($75–$250), sediment flushing and minor plumbing ($100–$200), and leak diagnostics with small part fixes ($150–$400).
Average replacement costs by type and size
When budgeting for a replacement, homeowners should consider both the type of water heater and its capacity, as those factors drive the bulk of the cost.
Tank models typically range $500–$1,500 depending on gallons (30–80). Tankless units run $800–$3,000 based on flow rate. Heat pump or hybrid systems often cost $1,200–$4,000.
Installation complexity and local labor affect final price.
Financing options, warranties, and rebates
After estimating replacement costs by type and size, homeowners should evaluate how to cover the expense: financing options, manufacturer warranties, and available rebates can greatly change out-of-pocket totals.
Consider low-interest HVAC or home-improvement loans, credit-card plans, and contractor financing.
Verify warranty length, coverage, transferability, and claim process.
Search local utility or state rebates, tax credits, and energy-efficiency incentives to reduce net cost.
Signs Specific to Different Heater Types
Different heater technologies show distinct failure patterns that can help pinpoint the problem.
Electric units commonly exhibit tripped breakers, heating element burnout, or thermostat faults; gas heaters may show pilot light or burner issues and venting or gas supply problems.
Tankless, heat pump, and hybrid systems each have their own indicators—flow sensor or ignition failures for tankless, reduced efficiency or freezing for heat pumps, and hybrid-specific compressor or refrigerant faults.
Electric water heater specific failures
Identify specific failures in electric water heaters by looking for signs distinct from gas or tankless models.
Common indicators include tripped breakers, no heating despite power, repeatedly cycling elements, burning smells or scorch marks at the access panel, and erratic temperature.
Faulty thermostats, failed heating elements, and corroded connections often cause these issues.
Professional diagnosis and element or thermostat replacement are typical remedies.
Gas water heater specific failures
When troubleshooting gas water heaters, look for signs that distinguish them from electric or tankless units—such as a failing pilot light, yellow or sooty burner flame, persistent gas odors, unusual noises from the combustion chamber, or visible corrosion and leaks around the flue and tank.
Other indicators include inconsistent heating, frequent cycling, and pilot assembly or thermocouple faults; address gas leaks immediately and call a qualified technician.
Tankless water heater specific failures
How can one recognize tankless water heater failures?
Cold water when demand increases, fluctuating temperatures, or low flow indicate scale buildup or undersized unit.
Error codes or blinking indicators signal sensor, ignition, or gas/electrical faults.
Unusual noises, frequent cycling, or reduced hot water output suggest clogged heat exchanger or malfunctioning flow sensor.
Prompt professional diagnosis and descaling are recommended.
Heat pump and hybrid system specific failures
Because heat pump and hybrid water heaters rely on refrigeration cycles and electric backup elements rather than simple combustion or direct electric resistance, their failures present distinct signs:
Frost or ice on the unit, weak or no heat despite compressor noise, unusual hissing or refrigerant odor, frequent switching to electric backup, longer recovery times, error codes related to blower, compressor, or refrigerant, and reduced efficiency indicating refrigerant leaks or compressor wear.
Appendix: Quick Reference Checklists
The appendix provides three concise checklists for quick use: a diagnostic checklist to follow before calling a professional, an emergency shutdown checklist, and a homeowner maintenance schedule.
Each checklist prioritizes clear, actionable steps to confirm common faults, secure the unit, or schedule routine care. The lists are designed for easy reference during troubleshooting, urgent situations, and regular upkeep.
Quick diagnostic checklist to follow before calling a pro
One concise checklist can help homeowners quickly determine whether a water heater problem is simple to fix or requires a professional.
Follow these steps before calling a pro:
- Verify power/gas supply, reset breaker or pilot, and confirm thermostat settings.
- Inspect for visible leaks, corrosion, and unusual noises.
- Check water temperature at faucet, document fluctuations, and note recent maintenance.
Emergency shutdown checklist
If a water heater shows signs of major failure—such as significant leaking, persistent gas smell, or electrical arcing—shutting it down quickly can prevent injury and property damage.
- Turn off power: switch breaker or pilot/gas valve off immediately.
- Stop water: close the cold-water supply valve.
- Evacuate and ventilate: clear occupants, open windows, and call emergency services or a licensed technician.
Maintenance schedule checklist for homeowners
A simple, periodic maintenance schedule helps homeowners keep water heaters safe and efficient while minimizing repair costs.
Recommended checklist items:
- Annually: flush tank, inspect anode rod, test pressure relief valve.
- Biannually: check thermostat accuracy, look for leaks, verify venting and combustion.
- Monthly: inspect area for moisture, confirm set temperature, listen for unusual noises.
Follow intervals and document actions for warranty and safety.
Conclusion
Like a car that once purred but now coughs on cold mornings, a failing water heater signals itself with small compromises that can snowball into expensive failures. One homeowner ignored sputtering and lost hot-water cycles until a sudden leak flooded a basement—repair costs tripled. Recognizing the nine warning signs, taking quick safety steps, and trying simple fixes can prevent that cascade. Routine maintenance and timely replacement keep comfort and budgets afloat.