How to Install a Sewer Pipe: Step-by-Step DIY Guide for Homeowners and Pros (Tools, Materials & Tips)
Installing a sewer pipe can effectively resolve issues like blockages, corrosion, and capacity needs, whether through a spot repair or a full replacement. This process requires obtaining permits, locating utilities, calculating the proper slope, and planning for safety. Essential tools include trenching shovels, cutters, joining tools, and test equipment, while materials can range from PVC to cast iron and HDPE. Follow our step-by-step guide to ensure proper excavation, bedding, accurate cutting, watertight joining, testing, and backfilling. Continue reading for detailed methods, troubleshooting tips, and code compliance advice to successfully complete your sewer pipe installation.
What a sewer pipe installation involves and when you need it
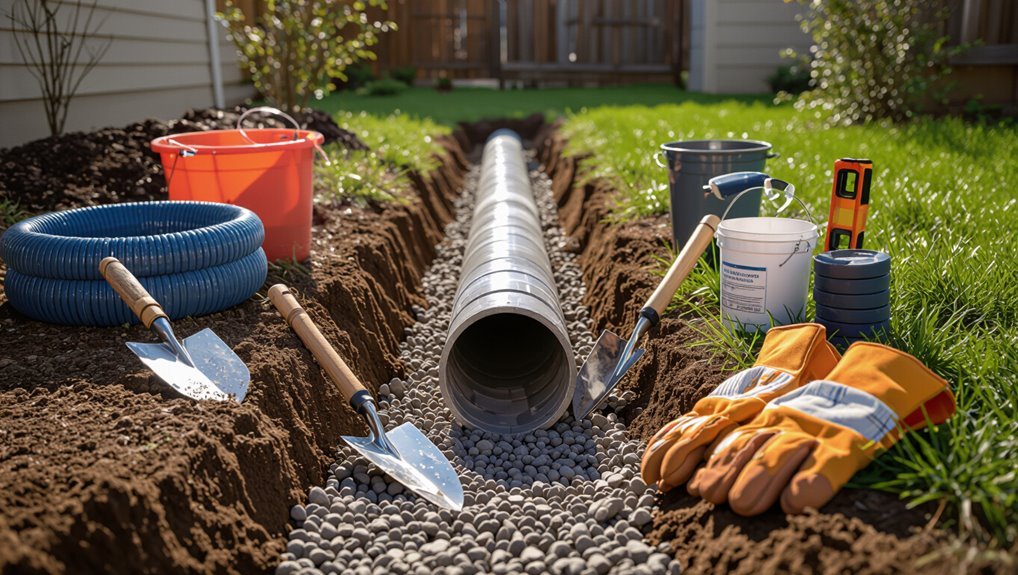
A sewer pipe installation typically responds to blockages, root intrusion, corrosion, settling, or capacity upgrades and can range from spot repairs to full replacement.
The process often requires permits, code compliance, and inspections that vary by jurisdiction.
Guidance on when to hire a licensed plumber versus attempting a DIY repair depends on scope, required equipment, safety risks, and local legal requirements.
Common reasons to install or replace a sewer pipe
When frequent backups, persistent odors, slow drainage, or repeated repairs occur, homeowners and municipalities typically consider installing or replacing a sewer pipe to restore reliable wastewater flow.
Common reasons include collapsed or aging pipes, root intrusion, severe bellied or misaligned sections, corrosion, and grease or debris buildup.
Planning how to install a sewer pipe follows condition assessment, scope definition, and selecting repair versus replacement methods.
Legal, permitting, and inspection requirements overview
After evaluating pipe condition and deciding on repair or replacement, attention shifts to legal, permitting, and inspection requirements that govern sewer work.
Municipal codes, health and environmental regulations, and utility locates dictate scope.
Permits, approved materials and methods, and scheduled inspections guarantee compliance.
Failure to obtain permits can cause fines, required rework, or denied occupancy certificates; confirm local agency procedures before starting.
When to hire a professional vs. DIY suitability checklist
Why should a homeowner consider professional help instead of a DIY approach?
Complex terrain, deep excavations, sewer line relocations, and connections to municipal mains typically require licensed plumbers and heavy equipment.
DIY suits simple repairs, short straight runs, and basic gravity lines when permits allow.
Assess skill level, tools, code familiarity, safety risks, and liability exposure before deciding.
Tools, materials, and safety gear required
The installer prepares a concise inventory of tools, pipe types, consumables, and safety measures before starting work.
Trenching shovels and trenchers, cutters and joining tools, and pressure/test equipment are balanced against choices like PVC, ABS, cast iron, clay, and HDPE.
Consumables, fittings, protective gear, and site/traffic protection complete the checklist.
- Essential tools for trenching, joining, and testing.
- Pipe types and material options (PVC, ABS, cast iron, clay, HDPE).
- Consumables, fittings, safety equipment, and traffic/site protection.
Essential tools for trenching, joining, and testing
Several essential tools, materials, and safety items are required for trenching, joining, and testing sewer pipe to guarantee durability, code compliance, and worker safety.
Required trenching gear includes shovels, trench boxes, and compactors.
Joining demands pipe cutters, deburring tools, solvent or gaskets, and alignment clamps.
Testing requires air/water test plugs, gauges, and leak detection dye.
PPE: hard hats, gloves, boots, eye protection.
Pipe types and material options (PVC, ABS, cast iron, clay, HDPE)
Different projects demand specific pipe materials—PVC, ABS, cast iron, clay, and HDPE—each chosen for strength, corrosion resistance, joint method, and application (sanitary, storm, or pressure). The guide summarizes typical uses, pros, weight, longevity, and handling precautions for selection and safe installation.
| Material | Typical Use |
|---|---|
| PVC | Sanitary drains |
| ABS | Indoor DWV |
| Cast iron | Durable mains |
| HDPE/clay | Pressure/storm |
Consumables and fittings (connectors, glue, gaskets, backfill)
A well-stocked set of consumables and fittings is essential before trenching or rough-in work begins.
Stock PVC/ABS connectors, couplings, wyes, bends, and junction adapters matched to pipe material. Include solvent cement, primer, rubber gaskets, stainless clamps, and thread sealant for metal joints.
Use clean sand or pea gravel for initial bedding and select structural backfill per code to protect piping and guarantee stable cover.
Safety equipment and traffic/site protection
After confirming consumables and fittings are on hand, attention turns to safety equipment and traffic/site protection to safeguard workers and the public during excavation and installation.
Required items include hard hats, safety glasses, high-visibility vests, steel-toe boots, gloves, ear protection, trench boxes, shoring, barricades, cones, warning signage, and temporary fencing.
Guarantee compliance with local regulations and inspect equipment before use.
Site preparation and planning
Before breaking ground, the installer must locate existing utilities by contacting local marking services and confirm the required sewer grade to calculate fall and slope over the run.
The trench route should be marked and staking reference points set to maintain alignment and consistent depth.
Access, workspace, erosion control, and any environmental or permitting constraints must be assessed and documented.
How to locate existing lines and utilities (call before you dig)
When preparing to install a sewer pipe, the contractor must first identify the locations of all underground utilities and service lines to prevent damage, service interruptions, and safety hazards.
Contact local utility notification services, obtain as-built plans, and use professional locating equipment or licensed locators.
Mark verified lines, document clearances, and coordinate permits and inspections before any excavation to guarantee compliance and safety.
Reading grade, slope requirements, and calculating fall
Establishing the correct grade and slope is essential to guarantee gravity-driven sewage flow and avoid blockages or insufficient self-cleansing velocity.
Inspect local code for minimum slopes (typically 1/8″–1/4″ per foot for common diameters).
Use a level, transit, or laser to measure fall between inlet and outlet.
Calculate total drop = slope × run; confirm pipe bedding supports consistent grade.
Marking the trench route and staking reference points
Having confirmed the required fall and established grade lines, the next step is laying out the trench route and staking reference points to guide excavation and pipe placement.
Using spray paint or flags, mark centerline, offsets, and end points. Drive stakes at regular intervals; attach string at grade line height.
Record station measurements and elevation references to guarantee alignment during digging and backfill.
Access, workspace, and environmental considerations
Before excavation begins, site access, workspace layout, and environmental measures must be planned to guarantee safe, efficient trenching and regulatory compliance.
The planner should define equipment routes, material staging, and pedestrian barriers; establish erosion, sediment, and spill controls; preserve tree roots and utilities; schedule work to minimize disturbance; obtain permits; and coordinate neighbors.
Emergency access and waste disposal procedures must be confirmed.
Step-by-step sewer pipe installation (DIY friendly)
The following steps outline a practical, DIY-friendly sequence for sewer pipe installation, beginning with correct excavation to the required trench depth, width, and bedding profile.
It then covers preparing the trench bottom and bedding material, cutting, measuring, and dry-fitting pipe sections, and the appropriate joining methods for common materials—glue or solvent weld for PVC, gaskets for clay or sewer pipe, and welding for HDPE.
The procedure concludes with installing fittings, cleanouts, and connections to fixtures to guarantee a watertight, accessible system.
Step 1 Excavation: proper trench depth, width, and bedding
Excavate a trench that matches local code depths and the pipe’s slope requirements, ensuring it is wide enough for safe access and bedding work.
Verify utility locations, allow room for shoring on deep digs, and maintain consistent slope from house to main.
Remove loose soil and unstable material, creating uniform sidewalls and a smooth invert profile to support subsequent bedding installation.
Step 2 Preparing the trench bottom and bedding material
Once the trench bottom is cleared and graded, workers level and compact a stable bedding layer of clean sand or pea gravel sized and graded per local code to support the pipe evenly and prevent point loads.
Bedding thickness is set to match pipe diameter and manufacturer recommendations, and the invert is rechecked for consistent slope before laying any pipe.
Edge zones receive extra compaction; bedding is tamped smooth and checked with a level and string line to guarantee uniform support and correct grade prior to pipe placement.
Step 3 Cutting, measuring, and dry-fitting pipe sections
Measure and mark each pipe section carefully before cutting, using a tape measure and a square to guarantee true, perpendicular ends.
Cut with the appropriate saw, deburr and chamfer edges, then re-measure from fittings.
Dry-fit each piece in the trench, confirm slope, alignment, and clearances, adjusting bedding as needed.
Record final lengths and positions before proceeding to joining.
Step 4 Joining methods for different pipe materials (glue, solvent weld, gasket, welded HDPE)
Several common joining methods cover the full range of sewer pipe materials, each requiring specific tools, cleaners, and preparation to guarantee watertight, durable connections.
PVC and ABS use solvent welding with primer and cement; PVC push-fit or gasket joints use lubricated seals.
Rubber-gasket clay/ductile connections use proper alignment and clamps; HDPE requires fusion welding (butt or electrofusion) with clean ends and controlled heat.
Step 5 Installing fittings, cleanouts, and transitions to fixtures
Begin by laying out the route for each fitting and cleanout, verifying slopes and access points before cutting or joining any pipe.
Install tees, wyes, and bends to preserve flow, using manufacturer-recommended joints and proper support.
Position accessible cleanouts at grade and changes of direction.
Shift to fixtures with appropriate adapters, maintain slope, and secure connections to prevent movement while leaving access for future maintenance.
Step 6 Testing the assembly for leaks and proper flow (water/air tests)
Pressure- and water-testing the installed sewer run confirms seals, joints, and slopes function before backfilling.
Perform low-pressure air testing per code or a water fill/drop test: cap ends, pressurize or fill to specified head, monitor for loss over required interval.
Inspect visible joints for seepage and confirm proper flow by running water through fixtures.
Record results and remedy leaks before proceeding.
Step 7 Backfilling techniques, compaction, and surface restoration
After testing confirms a watertight, properly sloped run, backfilling restores support and protects the pipe while preparing the surface for final restoration.
Backfill in layers: 6–12 inch lifts of clean, granular material. Compact each lift with a plate compactor or hand tamper to achieve specified density.
Protect fittings with sand bedding, avoid large rocks, and restore topsoil and surface materials to match surroundings.
Step 8 Final inspection and documentation for permits
With backfill completed and the surface restored, the installation must undergo final inspection to confirm compliance with local codes and permit conditions.
An inspector verifies alignment, slopes, connections, cleanouts, and test results.
The installer provides required documentation: permits, inspection reports, as-built notes, and test certificates.
Obtain written approval before covering work.
Retain records for warranties and future maintenance.
Troubleshooting common problems on the job
Common field problems require prompt, practical responses to keep the installation on schedule.
Technicians must verify and correct pipe slope and bedding, replace or repair damaged sections as discovered, and address groundwater or high water table conditions with appropriate dewatering methods.
They should also identify and safely resolve unexpected utility conflicts or other obstacles before proceeding.
Dealing with poor slope or uneven bedding
Identify and correct poor slope or uneven bedding promptly to prevent blockages, structural stress, and premature joint failure.
Inspect grade with a laser level or long spirit level; adjust subbase by adding compacted sand or granular bedding to achieve 1/4″–1/2″ per foot slope.
Re-grade supports, re-seat pipe, and re-check alignment before backfilling.
Record corrections and monitor performance after service connection.
Repairing cracked or damaged pipe sections during install
A cracked or otherwise damaged pipe section discovered during installation must be addressed immediately to maintain system integrity and prevent leaks, infiltration, or joint failure.
The installer should expose the joint, remove the defective segment, and replace it with a matching pipe using approved couplings or solvent welds.
Test the repair with low-pressure water; backfill only after confirming a watertight connection.
Managing groundwater, high water table, and dewatering methods
Encountering groundwater or a high water table during sewer installation requires prompt, methodical dewatering to protect trench stability and guarantee proper pipe bedding and jointing.
Options include sump pumps, well points, deep wells, or surface diversion.
Install filtration and sediment controls, monitor groundwater levels, shore trenches, and schedule work during drier periods.
Follow local regulations and safety protocols to prevent collapse and contamination.
Handling unexpected utility conflicts or obstacles
When unexpected utilities or obstacles appear in a trench, crews must pause work, assess the conflict, and confirm as-built information against utility records and locator marks.
They notify utility owners, secure permits for relocation or protection, and implement temporary supports or reroutes.
All interventions follow safety protocols, documented approvals, and updated as-built drawings to prevent service disruption and liability while restoring planned alignment.
Cost, time estimates, and budgeting tips
A clear comparison of typical DIY versus professional costs helps readers decide whether to hire help or tackle the job themselves.
Time estimates should be presented for small repairs, full replacements, and variable site conditions such as soil type and access constraints.
Practical budgeting tips can then show cost-saving measures—like sourcing materials carefully and obtaining multiple quotes—while stressing that safety and code compliance must not be compromised.
Typical DIY vs. professional cost breakdown
Although some homeowners attempt sewer pipe work to save money, the choice between DIY and hiring professionals hinges on cost, time, and risk tolerance.
DIY material costs often range lower but omit permits, equipment rental, and potential rework.
Professional bids include labor, insurance, warranty and higher upfront fees but reduce contingency risk.
Budget a contingency of 20–35% for unforeseen issues.
Time estimates by project size and site conditions
Project duration varies widely with project scope and site conditions: simple replacement of a short, accessible run can take a day or two, while full lateral replacements, complex alignments, or work under driveways and tree roots commonly extend to several days or a week.
Weather, permitting, utility locates, soil type, and crew experience influence timelines; estimate contingencies of 20–50% for delays.
Ways to reduce costs without compromising safety or code compliance
When homeowners and contractors focus on planning, material selection, and phased work strategies, significant cost reductions are achievable without sacrificing safety or code compliance.
Consolidate permits, compare quotes, and buy certified materials in bulk. Reuse excavated fill where allowed, schedule work in mild weather to avoid delays, and subcontract specialized tasks only.
Maintain inspection-ready documentation to prevent costly rework.
Quality checks, maintenance, and longevity
After installation, inspectors should verify connections and slope with smoke or camera tests and a level to guarantee proper flow and watertight joints.
Regular maintenance—such as periodic camera inspections, root clearing, and grease management—helps extend pipe life and prevent blockages.
Observable warning signs like recurring backups, persistent odors, or visible cracks indicate the need to re-evaluate or repair the system.
How to verify proper connections and slopes after installation
Several simple checks confirm a sewer line will function reliably: visual inspections of joints, measurement of pipe slope, and pressure or water tests to detect leaks.
Inspect fittings for proper seating and sealant, confirm uniform slope (typically 1/4″ per foot for 3″–4″ pipes) with a level or laser, run water to observe flow and bubble tests for airtightness, and document findings for warranty compliance.
Routine maintenance tips to extend sewer pipe life
Once proper connections and slopes are confirmed, routine maintenance preserves performance and prevents costly repairs.
Inspect accessible cleanouts, joints, and traps biannually for leaks, sagging, or root intrusion. Flush lines with water or use a mechanical snake to remove buildup.
Maintain gutters and yard grading to limit inflow. Schedule professional camera inspections and cleaning every 3–5 years for preventative care.
Signs of future failure and when to re-evaluate the system
When slow drains, recurring backups, unusual odors, or wet spots in the yard begin to appear more frequently, they indicate accelerating deterioration that warrants a prompt system re-evaluation.
Inspections should check root intrusion, corrosion, pipe sagging, joint failure, and grease buildup.
Monitor inspection reports, flow rates, and repair recurrence.
Plan targeted repairs or replacement when repair frequency, cost, or risk exceed acceptable thresholds.
Comparisons and choosing the best method for your property
Selecting between trench-and-replace and trenchless methods requires weighing site disruption, cost, and pipe condition, while material choice depends on soil type, expected loads, and budget constraints. The following table summarizes key contrasts and factors to guide the decision. A qualified contractor should confirm suitability for the specific property before proceeding.
| Comparison focus | Notes |
|---|---|
| Trench-and-replace pros | Full replacement, simpler repairs |
| Trenchless pros | Less disruption, faster install |
| Material guidance | PVC for corrosive soils, HDPE for high loads, clay or cast iron for budget/legacy cases |
Trench-and-replace vs. trenchless (pipe bursting, slip-lining) pros and cons
Compare trench-and-replace and trenchless sewer replacement methods by weighing site disruption, cost, longevity, and risk:
Traditional trenching requires extensive excavation but allows full pipe access and is often simpler for complex alignments.
On the other hand, trenchless options like pipe bursting and slip-lining minimize surface disturbance and landscaping damage, typically lower restoration costs, yet may be limited by existing pipe condition, diameter loss, and suitability for bends or laterals.
Trenching suits complex layouts; trenchless favors intact runs, tight schedules, and minimal landscaping impact.
Best pipe material for different soil, load, and budget scenarios
After weighing trench-and-replace against trenchless methods, the next decision is choosing pipe material that matches soil conditions, load demands, and budget constraints.
PVC suits stable, non-corrosive soils and light loads with low cost.
HDPE handles shifting soils, root intrusion, and heavy loads; more expensive but durable.
Cast iron resists crushing and heat, ideal for high loads and urban settings despite higher cost and corrosion risk.
Practical tips, common mistakes to avoid, and professional handoff
A concise list of the top practical tips for a successful DIY sewer install will help homeowners work safely and meet code.
Common rookie mistakes—improper slope, poor jointing, and inadequate bedding—are highlighted with clear avoidance strategies.
Guidance on preparing documentation, site access, and expectations for a professional handoff guarantees a smooth contractor takeover if needed.
Top 10 practical tips for a successful DIY sewer install
Begin by prioritizing planning: assess site conditions, locate existing utilities, verify local codes and permits, and prepare accurate measurements before excavation.
Practical, safety, and quality-focused suggestions follow.
- Use proper slope, bedding, and compaction; verify with a level and measuring rod.
- Choose rated materials and secure watertight joints; test before backfill.
- Document work, retain permits, and schedule professional inspection or handoff.
Frequent rookie mistakes and how to avoid them
Having covered planning, proper slope and bedding, and documentation, the next focus is on common rookie mistakes that can derail a sewer install and how to prevent them.
- Underestimating site prep: poor excavation and compaction cause settlement; verify soil and compact in layers.
- Incorrect slope: use a laser or level; recheck grades frequently.
- Improper jointing: clean, align, and seal each connection per manufacturer specs.
What to prepare for when handing the project to a contractor
When handing the sewer project to a contractor, prepare a concise packet that clearly defines scope, schedule, quality expectations, and responsibilities so both parties share a single reference for decisions and disputes.
Include finalized plans, site photos, utility-locate confirmations, permits, material specifications, and a list of required tests and inspections.
Guarantee the contract specifies payment milestones, warranty terms, and procedures for change orders and unexpected site conditions.
Also list communication protocol, contractor qualifications, insurance certificates, dispute resolution steps, site access rules, environmental safeguards, and final acceptance criteria to avoid misunderstandings and delays.
Quick-reference checklists and measurement guides
A concise set of checklists and measurement guides helps guarantee each phase of sewer pipe installation meets safety, regulatory, and performance standards.
The following quick references summarize permit and safety items, trench and bedding dimensions, and post-installation testing steps for easy on-site use. Use them as a checklist to confirm compliance and catch omissions before backfilling.
- Pre-installation permit and safety checklist
- Trench and bedding measurement cheat-sheet
- Post-installation testing and inspection checklist
Pre-installation permit and safety checklist
Although local regulations vary, a concise pre-installation permit and safety checklist guarantees compliance and reduces risk before any sewer pipe work begins.
Confirm required permits, utility locates, and inspection schedules.
Verify PPE, shoring plans, traffic control, emergency contacts, and confined-space procedures.
Record equipment inspections, soil stability assessments, and erosion controls.
Obtain homeowner signatures and retain copies for site reference and inspector review.
Trench and bedding measurement cheat-sheet
Clear measurements and concise checklists prevent costly rework and guarantee pipe alignment, slope, and bedding stability meet code and manufacturer requirements.
Provide quick-reference items: trench depth, width, minimum bedding thickness, compacted bedding type, invert elevation points every 10 ft, slope per foot, backfill lift heights, pipe embedment zone, and required clearance to utilities.
Use a durable checklist onsite for verification.
Post-installation testing and inspection checklist
Verify all post-installation testing and inspection steps with a concise checklist that documents functional performance, structural integrity, and compliance with plans and codes.
Include vacuum/leak test results, water-fill or air-pressure durations and pass/fail criteria, joint alignment and deflection measurements, grade verification, bedding settlement observations, manhole and cleanout seals, video inspection notes, corrective actions, inspector name, date, and signature for record-keeping.
Conclusion
A well-executed sewer pipe installation is like laying the roots for a healthy home: once properly planned and installed, it quietly supports daily life. Whether DIYing or hiring a pro, following correct safety, materials, and testing steps prevents costly failures and environmental harm. Regular inspections and timely repairs extend system life. With clear planning, attention to slope, joints, and permits, homeowners secure reliable service and peace of mind for years to come.