How to Remove a Utility Sink: Step-by-Step DIY Guide for Safe, Clean Removal
To safely and efficiently remove a utility sink, start by gathering necessary tools and safety gear, identifying the sink type, and checking for any required permits. Begin the process by shutting off the water supply, draining the lines, and labeling the valves. Next, disconnect the faucet, supply lines, drain assembly, and P-trap, then remove the mounting hardware to carefully lift the sink away. Cap exposed pipes, seal any openings, and inspect the area for cleanliness and safety. For detailed guidance on addressing complications, capping methods, and preparing for a replacement sink, continue reading.
How to Prepare Before Removing a Utility Sink
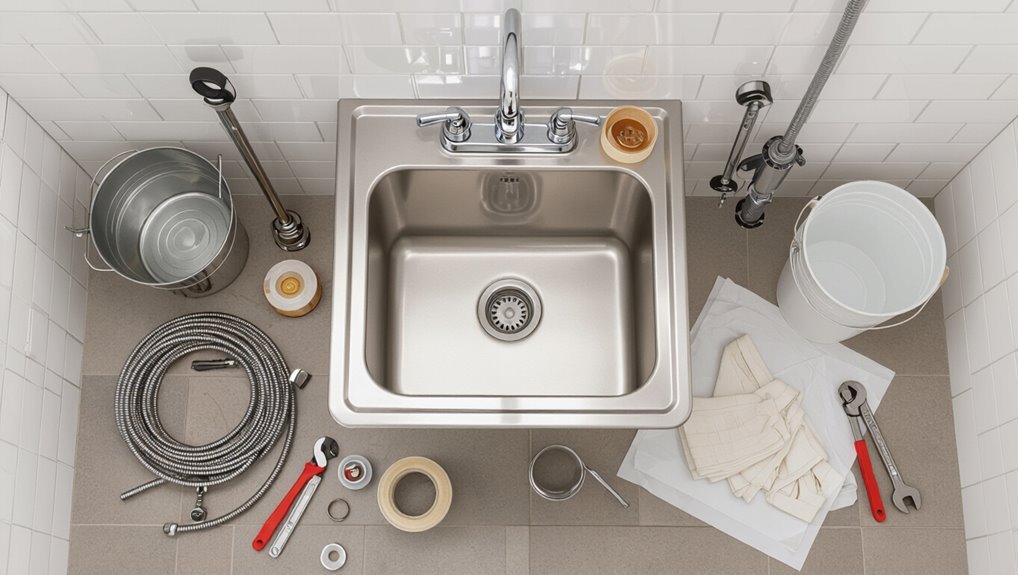
Before beginning removal, gather the necessary tools and materials and put on appropriate safety equipment to prevent injury and protect the work area.
The installer should identify the sink type and mounting method—wall‑mounted, freestanding, or drop‑in—to determine removal steps and potential plumbing adjustments.
If the installation involves complex plumbing, structural anchors, or uncertainty about local codes, a professional should be consulted.
Tools and materials needed
A handful of basic tools and a few plumbing supplies will make removing a utility sink efficient and safe.
The guide outlines essentials for how to remove a utility sink without surprises. Gather durable, common items and plan tasks sequentially.
- Adjustable wrench
- Basin wrench
- Bucket and towels
- Pipe cutter or hacksaw
- Plumber’s tape and sealant
Safety equipment and precautions
Several basic pieces of safety equipment are essential when preparing to remove a utility sink: safety goggles, work gloves, and knee protection to prevent injury from debris, sharp edges, and prolonged kneeling.
Additionally, a dust mask, closed-toe footwear, and long sleeves protect against dust, rust, and chemical residues.
Guarantee adequate ventilation, keep a flashlight handy, and have a first aid kit nearby.
How to assess the sink type and installation (wall-mounted, freestanding, drop-in)
How is the sink attached and what components are visible will determine the removal steps and tools required.
Inspect whether the sink is wall-mounted with brackets and exposed supply/drain, freestanding with legs and floor anchors, or a drop-in seated in a countertop cutout.
Note mounting hardware, trap type, shutoffs, and any sealant or caulking to plan disconnection and protection.
When to call a professional instead
When should a homeowner stop and call a professional instead of proceeding alone?
A professional is advised for complex plumbing, unknown pipe materials, corroded connections, extensive mold, gas lines nearby, or structural wall and floor repairs.
Call a licensed plumber or contractor if permits are required, leaks persist after shutoff, or the homeowner lacks tools or confidence to safely complete removal and restoration.
How to Turn Off and Secure Plumbing Connections
Before disconnecting the sink, the technician locates and shuts off the appropriate water supply valves and confirms isolation of any shared hot-water line.
They then open fixtures to drain and test the lines for residual water and pressure.
Finally, they secure and inspect traps and vents to prevent leaks or sewer-gas entry during removal.
Locating and shutting off the water supply valves
Locate the water supply valves by tracing the sink’s supply lines back to their shutoff points—typically small quarter-turn valves under the sink, a nearby laundry room valve, or the home’s main shutoff near the meter or basement.
Confirm each relevant valve is fully closed, label them if needed, and use an adjustable wrench for stubborn valves.
Verify no audible flow before proceeding.
Draining the lines and testing for residual water
Open the faucet and any nearby fixtures fed by the same lines to relieve pressure and allow remaining water to drain into a bucket; then place a pan under the supply shutoffs and slowly loosen the supply-line nuts to catch residual drips.
After draining, briefly open and close valves to verify no flow; wipe connections dry and inspect for hidden moisture before proceeding with disconnection.
Shutting off and isolating a shared hot water line
Shut off the main hot water supply valve that serves the area, then confirm isolation by turning on a nearby hot faucet until the flow stops and the water in the line cools; this guarantees the shared hot line is depressurized and any trapped water is released before disconnecting fittings.
Next, shut adjacent zone valves and tag them closed; bleed residual pressure with faucet checks and use towels to catch drips.
Dealing with traps and vents safely
Before disconnecting the sink, the technician should secure all traps and vents by turning off nearby shutoff valves, placing a bucket under the P-trap, and loosening fittings slowly to relieve any remaining pressure; this prevents spills and minimizes sewer gas exposure.
The technician should cap or plug vent openings, label removed fittings, inspect for corrosion, and clean sealing surfaces before reinstalling or permanently capping lines.
Step-by-Step Removal Process
The removal proceeds in a logical sequence: first disconnect the faucet and water supply lines, then remove the drain assembly and P-trap.
Next detach any mounting hardware securing the sink to the wall or countertop and lift the basin out safely.
Finally, implement temporary measures to cap or contain exposed plumbing until permanent repairs or replacements are completed.
Disconnecting the faucet and water supply lines
Begin by turning off the water at the supply valves and relieving pressure by opening the faucet to drain remaining water.
Disconnect flexible supply lines with an adjustable wrench, holding the valve body to prevent twisting. Cap or plug the shutoffs to prevent leaks.
Remove mounting nuts securing the faucet from beneath the sink, then lift the faucet assembly free, preserving mounting hardware for reuse or disposal.
Removing the drain assembly and P-trap
Loosen the slip nuts and lower the P-trap to drain residual water, then disconnect the tailpiece and remove the sink strainer to free the entire drain assembly.
Inspect connections for corrosion, loosen any remaining threaded or compression fittings, and lift out the drain body.
Cap or plug the waste line temporarily to prevent sewer gas, collect trapped debris, and clean sealing surfaces before proceeding.
Detaching mounting hardware from wall or countertop
With the drain assembly removed and the water line capped, attention shifts to detaching the mounting hardware that secures the sink to the wall or countertop.
Using appropriate tools, loosen screws, nuts, or bolts on brackets, clips, or cleats.
Cut through old caulk with a utility knife.
Keep removed fasteners organized and inspect anchors; replace damaged anchors before reinstalling or disposing of the sink.
Lifting out and removing the sink safely
Lift the sink straight out using steady, even pressure, keeping fingers clear of sharp edges and ensuring any retained fasteners are removed.
Support the basin’s weight from beneath while a second person steadies it. Angle the sink gently to clear surrounding surfaces and plumbing.
Place the removed unit on a padded, stable surface.
Inspect edges and work area for debris or damage before proceeding.
Temporary measures for exposed plumbing after removal
Begin by capping or plugging any exposed water lines and the drain to prevent leaks, contamination, and pests.
Then insulate exposed pipes with foam sleeves to reduce condensation and freezing risk.
Secure loose pipes to framing to prevent movement.
Temporarily seal wall openings with plastic and tape.
Label capped lines for future work and document locations with photos for contractors.
Handling Common Complications During Removal
Complications during removal often stem from corroded fittings, stubborn caulk, damaged supply or drain lines, or sinks that have been glued in place.
The guide outlines methods for loosening seized hardware, cutting or softening old sealant, evaluating and repairing compromised pipes, and safely separating bonded sinks.
Practical tools and safety precautions are emphasized for each situation.
Removing corroded or seized fittings
When fittings are corroded or seized, careful technique and the right tools are required to avoid damage and leaks.
Apply penetrating oil, allow soak time, then use properly sized wrenches and adjustable pliers with steady, controlled force.
Heat fittings gently with a propane torch if metal-only and safe.
Replace damaged couplings and use new thread sealant.
Inspect nearby pipes for hidden corrosion before reassembly.
Repairing or cutting through old caulk and sealant
Cutting through old caulk and sealant often requires patience and the right tools to prevent damage to surrounding surfaces.
A utility knife, putty knife, or oscillating tool with a scraper blade removes bulk; solvent or caulk softener eases stubborn residues.
Work in small sections, protect adjacent finishes with painter’s tape, then clean remaining residue with a mild solvent and a soft cloth.
Addressing damaged supply lines or drain pipes
Inspect plumbing connections immediately for bends, corrosion, or visible leaks once the sink is freed, because damaged supply lines or drain pipes can worsen rapidly and cause water damage.
Shut off water, drain residual fluid, and cap or plug open lines.
Replace cracked or corroded supply hoses and repair or replace compromised drain sections.
Test all joints under low pressure before final reassembly.
What to do if the sink is glued or bonded
If supply lines or drain pipes show signs of damage, they should be secured and capped before addressing adhesive connections around the basin.
For glued or bonded sinks, inspect adhesive type. Score seams with a utility knife, apply a solvent compatible with the adhesive, and allow dwell time.
Use a putty knife and gentle prying; avoid excessive force to prevent cabinet or pipe damage. Clean residual adhesive thoroughly.
Post-Removal Tasks and Site Cleanup
After removal, the area should be inspected for exposed plumbing and any wall or floor damage that requires repair.
The space must then be cleaned and disinfected, with old sink components sorted for proper disposal or recycling.
Finally, remaining pipes should be temporarily capped and tested for leaks before completing any restoration work.
Inspecting exposed plumbing and wall or floor damage
Carefully examine the exposed plumbing and surrounding surfaces for signs of leaks, corrosion, or structural damage that could require repair.
Document visible issues, including soft drywall, warped flooring, rusted fittings, loose connections, or mold stains.
Verify pipe support and trap integrity.
Measure clearance and note required replacements or patching.
Recommend consulting a plumber or contractor for any compromised structural or plumbing elements.
Cleaning and disinfecting the area
With exposed plumbing inspected and any damaged materials noted, attention turns to cleaning and disinfecting the work area to eliminate contaminants and prepare for repairs or installation.
Remove debris, vacuum dust, and scrub surfaces with detergent. Rinse thoroughly, then apply an appropriate disinfectant, following dwell time.
Allow full drying, ventilate the space, and wear protective gloves and eye protection throughout the process.
Proper disposal or recycling of the old sink and parts
Sort and catalog removed components before disposal to guarantee proper handling and potential reuse: separate metal parts, plastic fittings, fixtures, and any electronic or rubber pieces, and set aside salvageable items such as brass valves or ceramic basins for refurbishment or resale.
Then follow local recycling rules, hazardous-waste guidelines, and donation options.
- Metal recycling
- Plastic sorting
- Hazardous disposal
- Donate usable parts
- Bulk waste pickup
Temporarily capping pipes and testing for leaks
After removal, cap every exposed water or drain line to prevent leaks and debris entry; temporary caps or test plugs of the correct size should be fitted to both supply and waste stubs.
Tighten fittings per manufacturer torque, then restore brief water pressure to test for leaks.
Inspect joints and surrounding areas for drips, tighten or reseal as needed, and document any damaged piping for future repair.
Preparing the Space for Replacement or Alternate Use
Before installing anything new, the space should be measured and the plumbing assessed to determine whether supply and drain lines need to be moved or resized for a replacement sink.
Alternatives such as converting the area to a washer hookup, storage, or shelving require different fittings, mounting supports, or countertop repairs that must be planned and installed accordingly.
Finally, any alterations to plumbing or fixture locations should comply with local codes and may require permits before work proceeds.
Measuring and modifying plumbing for a new sink
One set of precise measurements guides successful plumbing modifications: the distance from wall studs to the centerline of existing drain and supply lines, the height of the trap arm and shutoff valves, and the diameter of pipes.
Record these, then verify clearances for new sink fittings. Mark cut points, slope drain lines at 1/4 inch per foot, and plan for compatible adapters or rerouting before cutting.
Options for converting the space (storage, washer hookup, shelving)
With measurements and pipe locations established, the space can be reimagined for alternative uses such as dedicated storage, a washer hookup, or built-in shelving.
Options include installing a freestanding cabinet or open shelving, capping or rerouting water lines for a washer connection, and adding adjustable shelving tracks for flexible storage.
Guarantee access panels for valves and maintain proper drainage and ventilation.
Installing new mounting supports or countertop repairs
Assess the cabinet cavity and countertop edges to determine where new mounting supports or repairs are required.
Inspect framing for rot or damage, measure load points, and mark anchor locations.
Install cleats, blocking, or metal brackets to reinforce beneath the countertop.
Patch or replace damaged laminate or plywood, seal seams with waterproof adhesive, and guarantee surfaces are level and ready for the chosen replacement or finish.
Permits and code considerations for plumbing changes
After reinforcing the cabinet cavity and countertop, attention should turn to permits and local plumbing codes before altering or removing supply lines and drains.
Research required permits, inspection schedules, and approved materials; verify venting, backflow prevention, and fixture abandonment rules.
Consult municipal plumbing codes or a licensed plumber when in doubt.
Maintain documentation of approvals and inspections for resale and safety compliance.
Cost, Time Estimates, and Project Planning
Estimated time varies by sink type—simple drop-in units may take an hour while cast-iron or wall-mounted sinks can require several hours or more.
Costs range from low for DIY (mostly tools and materials) to substantially higher when hiring a plumber for labor and disposal.
Before starting, a concise checklist should confirm water shutoff, drain disconnection, mounting hardware, necessary permits, and safe disposal or replacement plans.
Typical time required by sink type
Typical removal times vary considerably by sink type: a simple freestanding laundry sink can often be disconnected and removed in 30–60 minutes, while wall-mounted or utility sinks with cabinet surrounds and integrated countertops commonly require 2–4 hours due to faucet, trap, supply line, and mounting hardware work.
Additional factors—corrosion, tight access, adhesive countertops, or required patching—can extend durations accordingly.
Expected costs for DIY vs. hiring a plumber
Compare direct costs and time commitments to decide whether to remove a utility sink personally or hire a plumber. DIY reduces labor expense but may cost more in tools, unexpected parts, and time; a plumber adds predictable labor and warranty. Budget-minded homeowners balance risk tolerance and schedule.
| Option | Feeling |
|---|---|
| DIY | Empowered, anxious |
| Plumber | Relieved, costly |
Checklist to follow before starting the job
Before starting the sink removal, create a concise checklist that captures required parts, tools, permits, and a realistic schedule tied to cost estimates and contingency time.
The planner notes material costs, labor tradeoffs, permit fees, expected hours, and buffer time.
Confirm disposal method, safety gear, and helper availability before work begins.
- Parts list
- Tools & safety
- Permits
- Time estimate
- Contingency funds
Common Mistakes to Avoid
A few recurring mistakes can turn a straightforward sink removal into a costly or unsafe job. These include failing to shut off water and relieve pressure, damaging wall studs or finishes while removing mounts, leaving drains or pipes uncapped overnight, and ignoring permits or local codes.
Awareness of these issues and a careful checklist help prevent delays and extra repairs.
Forgetting to shut off water or relieve pressure
Failing to shut off the water or relieve system pressure is one of the most common and consequential mistakes when removing a utility sink. Ignoring valves or trapped pressure can cause sudden sprays, flooding, and water damage.
The installer should locate and close supply shutoffs, open a faucet to drain residual pressure, and verify zero flow before disconnecting lines to prevent injury and mess.
Damaging wall studs or finish when removing mounts
Take care when detaching the sink from its mounts to avoid gouging wall studs or stripping finished surfaces.
Use proper tools, support the basin, and loosen fasteners slowly. Inspect mounting hardware and backer blocks before pulling.
If paint or drywall is fragile, apply protective padding and work incrementally to prevent tears, splinters, or warped trim.
Repair minor damage promptly to preserve structural and cosmetic integrity.
Leaving open drains or uncapped pipes overnight
After detaching the sink and protecting nearby finishes, attention should turn to the exposed drain lines; leaving open drains or uncapped pipes overnight can invite pests, foul odors, and water damage.
Temporary caps or plugs should be installed immediately, and any standing water drained.
Secure joints with tape or a rag wrapped under a cap to prevent leaks, then schedule permanent capping or reconnection promptly.
Overlooking permits or local code requirements
Although removing a utility sink can seem straightforward, overlooking permits and local code requirements can lead to fines, forced rework, or failed inspections.
Homeowners should verify municipal regulations, required permits, and licensed trades for plumbing or electrical alterations.
Failure to comply may void insurance, complicate resale, or trigger corrective orders.
Consulting authorities or a licensed contractor guarantees lawful, safe, and compliant removal.
Expert Tips for a Smooth, Safe Removal
A concise list of professional tools and methods—adjustable basin wrenches, cartridge pullers, and proper support straps—helps streamline removal and protect surrounding surfaces.
Practical quick fixes, such as using cutting oil on seized fittings or heat to loosen caulk, can save time and minimize damage.
Guidance on when to replace parts (corroded drains, brittle supply lines) versus reuse them guarantees a safe, long-lasting outcome.
Recommended tools and techniques pros use
Professionals prepare a compact toolkit and a clear sequence before starting removal: adjustable wrenches, basin wrenches, pipe cutters, slip-joint pliers, bucket and rags for water, cartridge or utility knife, plumber’s putty or silicone, thread seal tape, and replacement fittings.
They work methodically: isolate water, label connections, loosen fittings counterclockwise, support fixtures while disconnecting, inspect threads, clean mating surfaces, and document parts for reassembly.
Quick fixes to speed removal and reduce damage
With the toolkit and step sequence in place, experienced technicians shave time and prevent damage by applying a handful of targeted tricks: soaking corroded fittings with penetrating oil before loosening, using a strap or chain wrench to avoid marring finishes, sliding a rag into drains to catch small parts, and supporting the sink from below while loosening final nuts.
Label disconnected lines, use magnetic trays, and employ gentle tapping to free seized seals.
When to replace parts versus reuse them
Decide early which components merit replacement and which can be safely reused to avoid delays and hidden failures: replace any rubber seals, corroded supply lines, or mounting hardware that shows pitting, cracking, or deformation, while retaining metal parts in good structural condition after cleaning and inspection.
Prioritize safety and water-tightness: always swap cheap, worn, or nonstandard parts; reuse visible, tested components to save time and cost.
Conclusion
Careful, calculated preparation and cautious cutting culminate in confident completion. Following foundational fixes—shutting supplies, securing seals, and steadying fixtures—simplifies siphoning sinks, solving snags, and sidestepping surprise spills. Methodical maneuvers minimize mess, mitigate mistakes, and make modest maintenance manageable. Post-project polishing preserves the place, preparing plumbing paths for replacement or repurposing. With patience, proper planning, and practiced precision, the simple sink shift becomes a satisfying, safe, and savvy success.