How to Connect PEX Pipe to Fittings: Step-by-Step Guide for Secure, Leak-Free Joints
To securely connect PEX pipe to fittings, you can use crimp rings, stainless-steel clamps, expansion tools, or push-to-connect fittings. Each method requires the appropriate tool and compatible PEX type. Start by measuring and cutting the tubing squarely, then deburr the edges. Slip on the crimp ring or clamp (or expand the tube if using that method), fully insert the fitting, and then crimp, cinch, expand, or push it to the correct depth. Finally, verify the connection with a go/no-go gauge and conduct a pressure test. Always adhere to support, protection, and code practices to ensure durable, leak-free joints. Further sections will provide detailed steps and tips.
Overview of Connecting PEX Pipe to Fittings
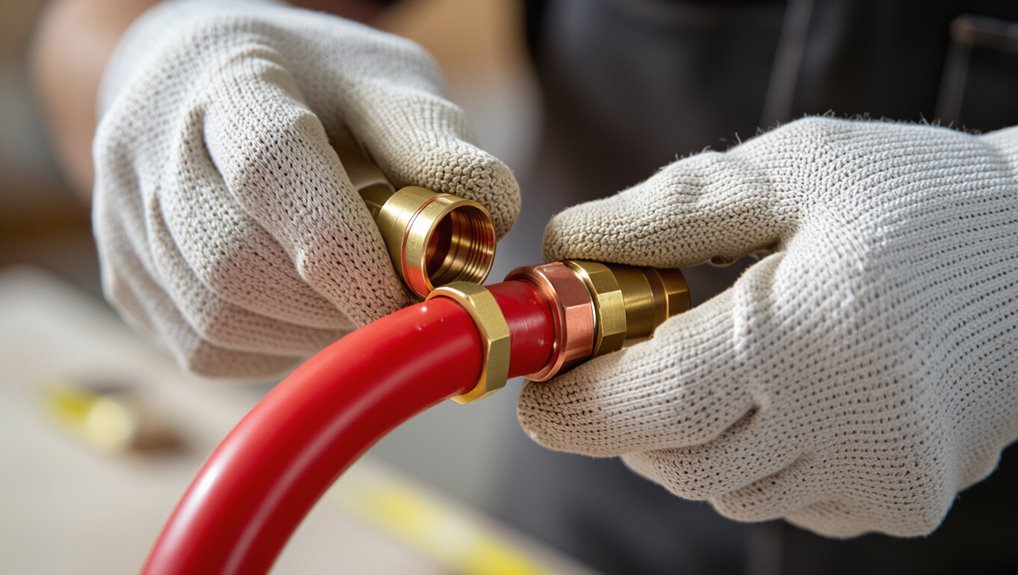
PEX is a flexible plastic piping material commonly used for potable water, radiant heating, and hydronic systems.
Connecting PEX involves several fitting types—such as crimp, clamp, push-to-connect, and expansion—and corresponding connection systems.
Each method requires specific tools and materials, including cutters, rings or sleeves, expander or crimp tools, and appropriate fittings and inserts.
What PEX piping is and common uses
Flexible plastic tubing known as cross-linked polyethylene (PEX) has become a standard choice for residential and light commercial plumbing due to its durability, ease of installation, and resistance to corrosion and scale.
PEX supplies potable water, radiant heating, and hydronic systems, and simplifies retrofits.
Guides on how to connect PEX pipe to fittings focus on secure joints, appropriate routing, and proper support to prevent kinks and stress.
Types of PEX fittings and connection systems
After outlining what cross-linked polyethylene tubing is and where it’s used, the discussion moves to how that tubing joins to valves, manifolds, and other pipes.
Common systems and fittings differ by joint type and material compatibility:
- Crimp rings with copper or stainless fittings.
- Clamp (cinch) systems with stainless clamps.
- Expansion fittings using PEX expansion heads.
- Push-to-connect (quick-connect) multi-material fittings.
Tools and materials required for each connection method
Several distinct toolsets and accessory types are required for each connection method, and selecting the correct items guarantees reliable joints and code compliance.
- Crimp: crimp tool, ring mandrels, stainless steel rings, pipe cutter.
- Clamp/Cinching: cinch tool, stainless clamps, cutter, deburring tool.
- Expansion: expansion tool, scopes, expansion rings, measuring gauge.
- Push-to-connect: compatible fittings, quality cutter, marker, leak tester.
Choosing the Right Connection Method for Your Project
Selecting a connection method requires weighing the pros and cons of crimp, clamp (cinch), push-to-connect, and expansion systems for durability, speed, and tool needs.
The choice should consider the application—residential versus commercial, potable water versus radiant heating—and the specific performance demands.
Compatibility between PEX type (PEX-A, PEX-B, PEX-C) and fitting style must also guide the decision.
Pros and cons of crimp, clamp (cinch), push-to-connect, and expansion systems
Choosing the right PEX connection method hinges on balancing reliability, cost, tool availability, and the specific demands of the plumbing layout; crimp, clamp (cinch), push-to-connect, and expansion systems each present distinct trade-offs in longevity, ease of installation, and suitability for different pipe types and pressures. Crimp/clamp: inexpensive, fast, tool-dependent. Push-to-connect: quickest, costly. Expansion: durable, requires skill.
| Method | Quick summary |
|---|---|
| Crimp | Affordable, reliable |
| Clamp | Similar to crimp |
| Push-to-connect | Fast, expensive |
| Expansion | Long-lasting, skilled |
When to use each method (residential, commercial, potable water, radiant heating)
Project requirements and environment determine which PEX connection method is most appropriate:
Crimp and clamp fittings suit most residential potable and light commercial runs where cost and speed matter;
Push-to-connect excels for quick repairs, retrofits, and situations with limited access;
Expansion systems are preferred for high-demand radiant heating and long continuous runs that benefit from fewer joints;
And for commercial or high-pressure potable applications, installers often favor methods with established code backing and proven long-term performance.
Choose crimp/clamp for standard homes, push-to-connect for service calls and temporary work, expansion for boiler-fed or large-area radiant circuits, and code-approved mechanical or brazed connections where regulations, temperature extremes, or high pressures demand proven, inspectable joints.
Matching PEX type (PEX-A, PEX-B, PEX-C) with fittings
Match the PEX type to compatible fittings to secure joint integrity and system longevity.
PEX-A’s flexibility suits expansion fittings and is forgiving with crimps, clamps, and rings.
PEX-B and PEX-C pair well with crimp, clamp, or threaded brass fittings; some require stiffeners.
Verify manufacturer recommendations and local codes, matching material, connection method, and tool compatibility to prevent leaks and guarantee warranty compliance.
Preparing PEX Pipe and Work Area
Before making connections, the installer measures and plans pipe runs to determine lengths, bends, and fitting locations.
Each PEX section is cut cleanly and squarely with the proper cutter, then deburred and reamed so cut ends are smooth and free of burrs for a reliable seal.
Finally, insertion depths and orientation are marked on the pipe to guarantee fittings are seated correctly during assembly.
Measuring and planning pipe runs
When planning PEX pipe runs, the installer first maps the route and measures each leg precisely, accounting for fixture locations, fittings, and allowances for bends and expansion.
They verify required lengths, plan support spacing, note access points and shutoffs, and identify potential obstructions.
Material lists include pipe, fittings, clamps, and insulation.
Measurements are recorded clearly to minimize waste and guarantee efficient installation.
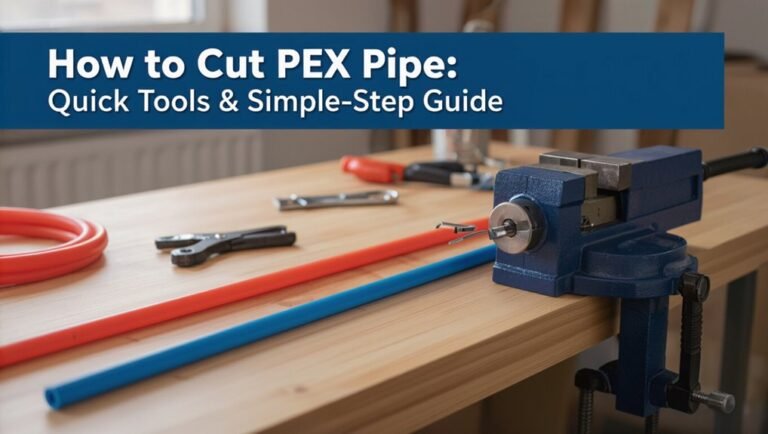
Cutting PEX cleanly and squarely (tool technique)
Starts with a precise, square cut: the integrity of a PEX connection depends on a clean, perpendicular end that seats fully in the fitting and seals without gaps.
Use a sharp PEX tubing cutter held perpendicular, stabilize pipe, squeeze smoothly through one motion.
Avoid twisting or saws that crush or fray.
Reposition and recut rather than force a damaged end.
Deburring, reaming, and inspecting cut ends
Deburr and ream each cut end to remove burrs, sharp edges, and any inward or outward lip that could prevent full seating in the fitting.
After reaming, inspect the pipe end for concentricity, uniform wall thickness, and absence of cracks, splits, or foreign material.
Verify the pipe end is square, clean, and dry; discard or recut any imperfect sections before assembly.
Marking insertion depth and orientation
With the cut end cleaned, reamed, and verified for square, concentric seating, the installer next marks the pipe to confirm correct insertion depth and orientation before assembly.
Using a fitting-specific depth gauge or template, a single visible ring is scored. An alignment mark indicating fitting orientation is added when necessary.
These marks guarantee full engagement, proper crimp position, and consistent, leak-free joints during installation.
Step-by-Step: Crimp Ring Connections
The technician selects the correct copper crimp rings and compatible fittings, then slides a ring onto the PEX, inserts the fitting fully, and positions the ring just behind the fitting shoulder.
A calibrated crimp tool is used to compress the ring evenly, after which each crimp is inspected for proper deformation and alignment.
Finally, a go/no-go gauge verifies fit and the system is pressure-tested to confirm there are no leaks.
Selecting correct copper crimp rings and fittings
Choosing the correct copper crimp rings and matching fittings is essential to guarantee a secure, code-compliant PEX connection.
Rings must match PEX size (1/2″, 3/4″, etc.) and be listed for potable water. Fittings should be compatible with copper crimp systems and made of dezincification-resistant brass.
Verify manufacturer approval, local code acceptance, and use appropriately sized crimp tool dies for consistent compression.
Sliding the ring, inserting fitting, and positioning
After confirming ring size and compatible fittings, slide the copper crimp ring onto the PEX tubing so its barrel end faces the cut, leaving enough room to insert the fitting fully.
Insert the fitting straight into the tubing until the tubing shoulder meets the fitting barb.
Center the crimp ring 1/8″–1/4″ from the tubing end over the fitting barb, ensuring even alignment.
Using a crimp tool correctly and checking crimp quality
Begin by seating the crimp tool squarely over the copper ring so its jaws fully encompass the ring without touching the tubing; then squeeze the handles firmly and evenly until the tool’s ratchet releases to guarantee a consistent, complete crimp.
Inspect the ring visually for uniform compression and correct positioning. Rotate the fitting to confirm the ring remains fixed.
Replace any ring showing gaps, uneven crimps, or deformation.
Verifying crimps with a go/no-go gauge and leak testing
Verify each crimp with a calibrated go/no-go gauge before pressurizing the system.
Then perform a controlled leak test to confirm joint integrity.
Inspect gauge pass/fail for every crimp; reject and redo any out-of-spec connections.
Pressurize gradually to recommended test pressure, hold, and observe fittings, joints, and rings for drops or seepage.
Record results and remediate leaks immediately.
Step-by-Step: Stainless Steel Clamp (Cinch) Connections
The section outlines selection criteria for stainless steel clamps and compatible fittings, emphasizing material grade and correct clamp width.
It then describes the installation sequence and proper tensioning technique to guarantee a secure, leak-free seal.
Finally, it covers inspection steps and pressure-testing procedures to verify connection integrity.
Choosing appropriate clamps and fittings
Selecting the correct stainless steel cinch clamps and compatible fittings is essential for reliable PEX connections, as size, material grade, and clamp profile directly affect seal integrity and long-term corrosion resistance.
Choose clamps sized for pipe OD and fitting barb diameter, grade 304 or 316 stainless, and low-profile, rolled-edge designs to prevent cutting PEX.
Verify manufacturer compatibility and applicable standards before procurement.
Installation sequence and tensioning technique
Begin by preparing the PEX end and fitting: cut squarely, deburr if necessary, and slide the appropriately sized stainless steel cinch clamp onto the pipe with its open side facing the fitting.
Insert the fitting fully, position the clamp 1/8–1/4 inch from the fitting shoulder, and use a calibrated cinch tool to compress evenly until the tool clicks or reaches its preset stop.
Inspecting clamps and pressure-testing connections
Once clamped, each connection should be inspected visually and mechanically to confirm proper seating and compression.
The clamp band must sit evenly in the fitting groove without distortion. Verify tool torque marks or witness slots for consistent tension.
Perform a pressure test per code—apply recommended test pressure, monitor for drops and leaks, then recheck clamps and fittings.
Document results and remedy any failures immediately.
Step-by-Step: Expansion (Expansion Ring) Connections
The expansion method requires the correct expansion tool and matching heads sized to the PEX-A tubing and fittings.
The installer expands the pipe, inserts the fitting and expansion ring, then allows the PEX to recover before inspecting the joint for proper seating.
A pressure test follows, with attention to recovery time, fit alignment, and common errors such as under‑expansion or insertion depth mistakes.
Tools and expansion heads required
Several essential tools and a selection of expansion heads are required to make reliable expansion-ring PEX connections.
Required items include a ratcheting or battery-powered PEX expansion tool, calibrated expansion heads sized for the pipe (e.g., 1/2″, 3/4″), appropriate expander mandrels, a deburring tool or reamer, measuring tools, and safety gear.
Spare heads and calibration checks guarantee consistent, secure fits.
Expanding PEX-A and inserting fittings correctly
Begin by securing the PEX-A pipe and verifying the correct expansion head for the pipe diameter. The installer should mark the insertion depth on the fitting and confirm tool calibration before expanding.
Compress the expansion tool onto the pipe, activate until the pipe wall widens uniformly, then immediately insert the fitting to the marked depth.
Release tool, ensuring straight alignment and no twisting during insertion.
Allowing recovery time and inspecting the joint
After inserting the fitting to the marked depth and releasing the expansion tool, allow the PEX-A to recover undisturbed so the pipe contracts tightly around the fitting and expansion ring.
Wait manufacturer-recommended time before handling.
Visually inspect the joint for uniform beadless seating and full ring engagement.
Feel for snugness and check alignment.
Record installation details and temperature conditions for future reference.
Testing and common pitfalls with expansion method
Perform pressure testing to confirm seal integrity and then inspect for the common failure modes unique to expansion connections.
The practitioner checks for visible gaps, uneven recovery, or ring deformation. Verify correct tool size, proper pipe expansion and full ring engagement.
Test at recommended pressure and duration. Address leaks by re-expanding or replacing damaged rings and rechecking alignment before final insulation and concealment.
Step-by-Step: Push-to-Connect (Quick-Connect) Connections
Push-to-connect fittings compatible with PEX and the correct pipe type should be identified before beginning.
The pipe must be cut square, deburred, and fully inserted to the fitting’s depth to guarantee a secure seal.
After installation, fittings can often be removed and reused depending on manufacturer guidance, and the system should be pressure-tested with attention to cold-weather risks like freezing.
Compatible PEX and fittings for push-fit
When selecting push-fit (quick-connect) fittings for PEX installations, compatibility with the specific PEX type—PEX-A, PEX-B, or PEX-C—and the pipe diameter is essential; not all push-fit brands accept every PEX material or sizing.
Manufacturers list approved PEX types, temperatures, and pressure ratings. Use fittings rated for potable water if required.
Check ASTM/NSF certifications and match O.D. or nominal size to guarantee a reliable seal.
Preparing pipe and ensuring full insertion
Begin by cutting the PEX pipe squarely with a proper PEX cutter and deburring the end to remove any burrs or crushed sections.
Measure insertion depth, mark the pipe, and inspect the fitting’s O-ring for damage or debris.
Align pipe straight, push firmly until the mark contacts the fitting shoulder, then rotate slightly to confirm full engagement and secure, leak-free seating.
Removing and reusing push-fit fittings (if applicable)
After confirming a fitting is fully seated and the pipe marked, the technician can address removal and potential reuse of push-fit connectors.
To remove, depress the collar with a release tool or screwdriver while pulling the pipe straight out.
Inspect O-rings and grab rings for wear; replace the fitting if damaged.
Reuse is acceptable only when seals remain intact and function tested.
Pressure-testing and cold-weather considerations
A thorough pressure test and attention to cold-weather effects are essential to verify push-to-connect joints and prevent winter damage.
After installation, the system should be pressurized to recommended test levels, inspected for leaks, and monitored for the specified hold time.
Insulate exposed PEX, allow room for thermal expansion, and avoid routing through unheated spaces.
Drain and protect lines before freezing conditions occur.
Connecting PEX to Other Pipe Materials
When connecting PEX to copper, PVC, CPVC, or threaded fittings, appropriate conversion methods and compatible adapters must be selected.
Common solutions include using push-fit or compression adapters, unions, and dielectric fittings to prevent corrosion and maintain a secure seal.
Attention should be paid to differing thermal expansion and movement to allow for flexible connections or expansion loops where needed.
Transitioning to copper, PVC, CPVC, and threaded fittings
Modifying PEX to copper, PVC, CPVC, or threaded fittings requires selecting compatible adapters and following proper joining techniques to guarantee leak-free, code-compliant connections.
Installations must match pipe sizes, pressure ratings, and temperature limits.
Clean and deburr mating surfaces, use appropriate solvent cement for plastic, sweat or compression for copper, and thread sealant for metal threads.
Test joints to verify integrity before concealment.
Using adapters, unions, and dielectric fittings
Begin by selecting the correct changeover components—adapters, unions, and dielectric fittings—matched to the PEX material, the joining method, and the mating pipe to guarantee a reliable, code-compliant connection.
Use brass or plastic adapters rated for PEX; solder-free unions for serviceable joints; and dielectric fittings where dissimilar metals meet.
Tighten per manufacturer torque, inspect seals, and pressure-test after installation.
Addressing differences in thermal expansion and movement
Account for PEX’s greater thermal expansion and flexibility compared with copper, CPVC, or threaded steel by incorporating expansion loops, offsets, and properly spaced anchors when connecting to other materials.
Use connector fittings that allow slight movement, isolate with dielectric unions where corrosion risk exists, and avoid rigid restraint at connections.
Anchor rigid pipe segments to control movement while permitting PEX to expand and contract without stressing joints.
Common Installation Mistakes and How to Avoid Them
Common installation mistakes include incorrect cutting, incomplete insertion, and mis-sized rings, as well as over- or under-crimping and clamp errors.
Using the wrong PEX type or incompatible fittings and failing to provide proper support, respect bending radii, or allow for thermal movement can also compromise a system.
The following guidance explains how to identify and prevent these issues.
Incorrect cutting, incomplete insertion, and mis-sized rings
Cutting PEX improperly, failing to fully insert pipes into fittings, and using incorrectly sized crimp or clamp rings are frequent causes of leaks and system failures; each error compromises the seal between pipe and fitting and undermines long-term reliability.
Clean, square cuts, clear visual or tactile confirmation of full insertion, and selecting rings matching pipe and fitting specifications prevent gaps, misalignment, and weak joints.
Over-crimping or under-crimping and clamp errors
Over- or under-crimping and improper clamp placement are frequent causes of PEX joint failure, producing leaks, deformed tubing, and weakened fittings.
Installers should use calibrated tools, match ring or clamp size to tubing, and position clamps 1/8–1/4 inch from the fitting shoulder.
Verify compression visually and with gauge tools; replace rings or clamps showing gaps, crushing, or uneven compression to prevent failures.
Using wrong PEX type or incompatible fittings
When installers select the wrong PEX type or pair incompatible fittings, joints can fail prematurely or not seal at all.
Different PEX variants (A, B, C) and fitting systems (crimp, clamp, expansion, push-fit) require matching materials and tooling.
Compatibility checks, manufacturer guidelines, and labeling prevent mismatches.
Using approved fittings and confirmed system compatibility guarantees reliable, code-compliant connections and reduces leak risk.
Improper support, bending radius violations, and thermal stress
Neglecting proper support, violating minimum bend radii, and overlooking thermal movement are frequent causes of PEX failures that reduce system life and increase leak risk.
Installers should secure runs at specified intervals, use approved clamps and hangers, adhere to manufacturers’ bend-radius limits, and provide expansion loops or slip fittings where temperature changes occur.
Periodic inspection and correct routing prevent stress, kinks, and premature joint failure.
Testing and Verifying Leak-Free Joints
The article now addresses methods for pressure testing PEX installations, including recommended test pressures and procedures to confirm system integrity.
It outlines a concise visual inspection checklist to verify secure fittings, correct crimp/sleeve placement, and absence of deformation or visible leaks.
Guidance for identifying common failure modes and performing targeted repairs completes the discussion.
Pressure testing procedures and recommended pressures
Begin by isolating the new PEX system and filling it with water or air at a controlled rate to displace air pockets.
Then apply the specified test pressure while monitoring for drops or visible leaks.
Maintain recommended pressures: typically 50 psi for residential air tests, 100–150 psi for water tests per local code.
Hold for prescribed duration, record results, and relieve pressure safely.
Visual inspection checklist for secure joints
After pressure testing confirms system integrity, a focused visual inspection of each PEX joint helps verify a leak-free installation.
Inspect for proper seat depth, uniform crimp or clamp spacing, absence of visible deformation, intact O-rings where applicable, and correct alignment without stress or kinks.
Check for sealant residue, scoring, or exposed pipe; document any anomalies for follow-up verification.
Troubleshooting and repairing failed connections
When a joint fails pressure testing or shows signs of leakage during inspection, document the location and symptoms immediately and isolate that section to prevent further system damage.
The technician systematically depressurizes, removes the fitting or clamp, inspects tubing for cuts, burrs, or improper seat depth, replaces faulty components, re-cleans and re-cuts pipe ends, reinstalls per manufacturer specs, then retests to confirm a leak-free repair.
Maintenance, Longevity, and Code Compliance
The section addresses routine care for PEX installations, including recommended support spacing, insulation needs, and precautions against UV exposure.
It notes typical service life estimates, common signs of degradation to watch for, and when proactive replacement may be warranted.
It also summarizes relevant local plumbing code requirements, permit and inspection considerations, and the importance of following authority-approved materials and methods.
Recommended supports, insulation, and protection from UV
Install supports at regular intervals to prevent sagging, reduce stress on fittings, and maintain proper slope for drainage.
Use manufacturer-specified clamps or hangers, avoid overtightening, and secure near fittings and junctions.
Insulate hot and cold lines to prevent heat loss and condensation; use closed-cell foam.
Protect PEX from sunlight with opaque coverings or paint rated for PEX, and shield from mechanical damage.
Expected lifespan and signs of degradation
Durability of PEX plumbing depends on material grade, installation quality, water chemistry, and exposure conditions; under favorable conditions most manufacturers and codes expect a service life of 25–50 years.
Expected failure modes include brittleness, cracking, UV degradation, slow leaks at fittings, and abrasion.
Regular inspections should check for discoloration, hardening, surface crazing, pinhole leaks, and reduced flexibility; replace compromised runs promptly.
Local plumbing codes, permits, and inspector considerations
Most jurisdictions require that PEX installations conform to local plumbing codes and often mandate permits and inspections before concealment or final occupancy approval.
Installers must verify approved PEX types, fittings, support spacing, and protection from UV and heat.
Documentation, accessible shutoffs, and test records facilitate inspector sign-off.
Noncompliance risks required rework, fines, or voided warranties; consult local authority prior to installation.
Practical Tips and Time-Saving Techniques
A concise set of practical tips can streamline PEX installations by organizing fittings, pre-assembling runs, and staging materials before work begins.
Recommended tools and reputable brands for crimping, expansion, and cutting increase reliability and reduce rework.
Attention to safety precautions and strategies for working in tight spaces prevents injuries and speeds completion.
Organizing fittings and pre-assembling runs
Group fittings and pre-assemble PEX runs before entering confined spaces to streamline installation and reduce errors.
The installer prepares segments, verifies measurements, and stages fittings in labeled bags to save trips. Pre-assembled runs cut assembly time and limit rework when space is tight.
- Measure and cut runs precisely
- Label fittings and ends
- Temporarily assemble with clips
- Test fit before final crimp
Recommended tools and brands for reliability
When reliability is essential, selecting the right PEX tools and proven brands prevents rework and reduces leaks.
Recommended tools include a quality tubing cutter, expansion or crimp tool, stainless-steel clamps, gauge, and deburring tool.
Trusted brands such as Viega, Uponor, SharkBite, and Zurn offer durable fittings and compatible tools.
Prioritize calibrated expansion heads and ratcheting crimpers for consistent joints.
Safety precautions and working in tight spaces
Wear appropriate eye protection, gloves, and kneepads before starting, and verify that water lines are depressurized and power to nearby electrical devices is shut off.
Work in tight spaces demands portable lighting, a compact toolset, and measured movements to prevent pipe kinks or joint damage. Use supports or brackets for stability, maintain clear access to shutoffs, and pause to reassess ergonomics when needed.
Example Installation Scenarios
The following examples illustrate common PEX installations and the fitting choices they require.
Scenarios include replacing a damaged section in a wall or slab, roughing in a bathroom supply, and connecting runs to a water heater and manifold.
Each case highlights specific connection methods, access considerations, and code or clearance requirements.
Replacing a section of PEX in a wall or slab repair
Repairing a damaged PEX section in a wall or slab requires evaluating access, isolation of the water supply, and selection of a replacement method that suits the site constraints.
The technician locates the break, drains and isolates the circuit, then chooses between cutting back to accessible pipe, using a long-reach flex connector, or creating access panels.
Connections use approved fittings and pressure testing before closing.
Installing PEX for a bathroom supply rough-in
Begin by laying out the PEX runs from the main supply and branch locations, ensuring clear routing to the sink, toilet, and shower valves while maintaining proper spacing and access for shutoffs.
Mount supply blocks or straps, measure and cut PEX to minimize fittings, install stops and stub-outs at correct heights, secure lines with clamps, test for bends, and pressure-test the assembly before wall closure.
Connecting PEX to a water heater and manifold systems
After completing the bathroom supply rough-in, attention shifts to integrating PEX with the water heater and any manifold systems feeding the branch circuits.
Connections require proper fittings, isolation valves, and expansion considerations. Use manifolds for balanced distribution; label lines and test at system pressure.
Follow manufacturer guidelines and local codes to guarantee safe, efficient hot-water delivery.
- Choose compatible fittings
- Install isolation valves
- Allow thermal expansion
- Pressure-test system
Conclusion
In the end, the PEX runs like a practiced current—flexing, fastening, and folded into place—each crimp and clamp a small pledge against leaks. Knowledge and care thread through the work like steady rope, binding fittings to pipe with quiet certainty. When preparation meets the right tools and tested technique, joints hold firm as a promise. The result: a dependable plumbing chorus, humming under floors and behind walls, steady for years to come.