How to Tell If Your Water Heater Is Venting Properly: 7 Signs and Quick Fixes
To determine if your water heater is venting properly, look for these signs: a yellow or flickering pilot light, soot or corrosion around the flue, strong exhaust or gas odors, excess moisture or backdrafting, unusual vent noises, and decreased hot-water performance. These indicators suggest poor venting, which can lead to dangerous carbon monoxide buildup. To address potential issues, inspect the vents, test for draft and carbon monoxide levels, clear minor blockages, and consult a licensed technician for repairs. Continue reading for practical inspection steps and solutions.
How to Know if Your Water Heater Is Venting Properly Quick Overview
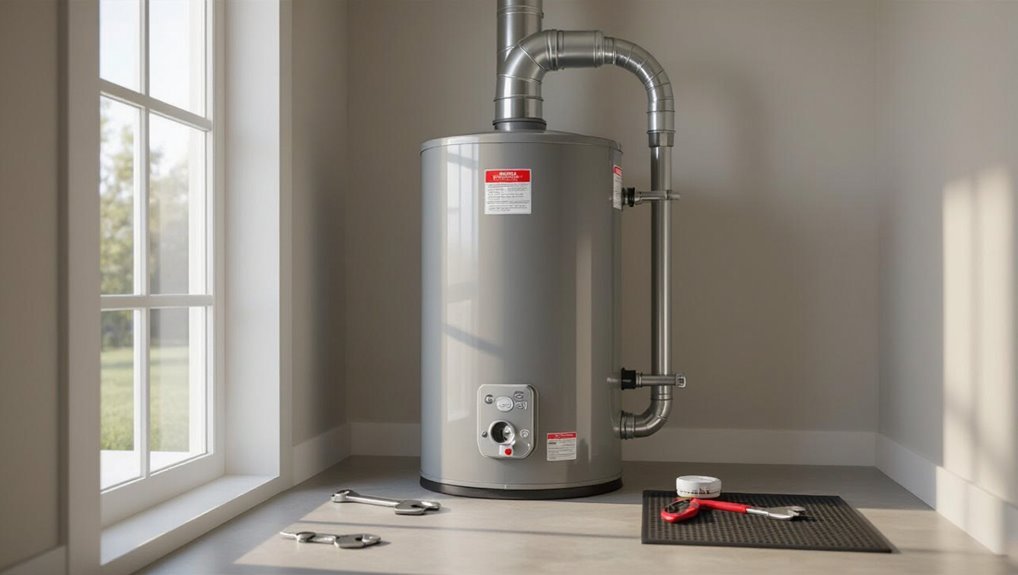
Proper venting for gas water heaters means combustion gases are carried safely outdoors through an unobstructed, correctly sized flue.
Venting affects both household safety—preventing carbon monoxide buildup—and system efficiency by ensuring complete combustion and proper draft.
Owners should inspect venting whenever installing or servicing a unit, after chimney or roof work, and if burners sputter, pilot lights go out, or unusual odors are present.
What proper venting means for gas water heaters
Confirming that a gas water heater vents correctly means ensuring combustion gases are carried safely out of the home and fresh air is available for combustion.
Proper venting uses correctly sized, unobstructed flues or direct-vent systems, sealed connections, and appropriate termination above the roofline.
Routine inspection for leaks, corrosion, and drafts helps homeowners understand how to tell if your water heater is venting properly.
Why venting matters for safety and efficiency
Safety and efficiency depend on effective venting because it removes deadly combustion byproducts and allows the heater to burn fuel as designed.
Proper venting prevents carbon monoxide buildup, reduces corrosion and soot inside the appliance, and maintains combustion efficiency. That lowers fuel consumption, extends component life, and minimizes repair needs.
Poor venting raises safety risks and operating costs, warranting prompt correction.
When to check your water heater venting
When should a homeowner check the water heater venting?
A homeowner should inspect venting after installation, during annual maintenance, following unusual odors, soot, persistent pilot outages, or combustion-smelling air.
Checks are also warranted after storms, renovations, chimney work, or noticing reduced hot-water performance.
Immediate professional evaluation is advised if occupants experience headaches, dizziness, or flu-like symptoms potentially from carbon monoxide exposure.
7 Clear Signs Your Water Heater Is Not Venting Correctly
The following signs indicate a water heater may not be venting correctly and warrant prompt attention.
Common indicators include visual and olfactory cues as well as audible or moisture-related symptoms:
- Yellow or flickering pilot light
- Soot or corrosion around venting components
- Strong exhaust or gas smell near the unit
- Increased condensation or moisture on walls/ceiling
Additional warning can come from unusual noise from the vent or flue.
1. Yellow or Flickering Pilot Light
If a gas water heater’s pilot light burns yellow or flickers instead of showing a steady blue flame, it often indicates incomplete combustion caused by insufficient air supply or flue draft problems.
This symptom signals potential venting issues that reduce efficiency and raise carbon monoxide risk.
Inspect for obstructions, guarantee proper ventilation, and consult a qualified technician to diagnose and correct draft or combustion-air deficiencies.
2. Soot or Corrosion Around the Venting Components
Noticing a yellow or unstable pilot flame often leads to inspecting nearby venting parts for more obvious signs of trouble.
Black soot on the draft hood, flue, or connections indicates incomplete combustion or backdrafting. Rust, pitting, or loose joints suggest corrosion and compromised seals.
Both conditions warrant immediate cleaning, tightening, or professional evaluation to prevent carbon monoxide buildup and system failure.
3. Strong Exhaust or Gas Smell Near the Unit
How can a homeowner tell whether a water heater is failing to vent properly when strong exhaust or a gas odor is present?
A persistent exhaust or rotten-egg smell near the unit signals incomplete combustion or a leak.
Immediate evacuation and shutting off the gas at the appliance are advised.
Contact a qualified technician to check burner operation, vent integrity, and gas line connections before using the heater.
4. Increased Condensation or Moisture on Walls/Ceiling
After addressing fumes or gas odors, attention should turn to moisture issues, since a poorly venting water heater can raise indoor humidity and cause condensation on nearby walls or ceilings.
Persistent damp spots, peeling paint, or mold growth near the unit indicate excessive moisture from incomplete venting or flue blockage.
Prompt inspection and vent cleaning or repair prevent structural damage and health risks.
5. Unusual Noise from the Vent or Flue
Listen for unusual sounds emanating from the vent or flue, as rattling, whistling, popping, or a persistent roar often signals improper venting.
Such noises may indicate loose or damaged baffles, restricted airflow, or combustion irregularities.
Prompt inspection by a qualified technician is advised to tighten fittings, clear obstructions, and verify draft.
Ignoring sounds risks corrosion, soot buildup, or dangerous combustion byproducts accumulating indoors.
6. Poor Hot Water Performance or Frequent Cycling
A decline in hot water delivery or a heater that cycles on and off more frequently than usual can signal venting problems.
Restricted exhaust hinders combustion efficiency, causing inconsistent temperatures and rapid thermostat cycling.
Reduced performance may indicate backdrafting, clogged flue, or improper vent slope.
Inspect vent paths, flue connections, and draft diverters; clear obstructions or consult a technician to restore proper ventilation and stable operation.
7. High Levels of Carbon Monoxide or Triggered CO Alarms
How can one tell if a water heater’s ventilation is failing? Detection of elevated carbon monoxide or repeated CO alarm triggers signals serious venting failure.
Symptoms include dizziness, headaches, nausea among occupants.
Immediate steps involve evacuating, calling emergency services, shutting gas supply if safe, and hiring a qualified technician to inspect flue, combustion air, and vent termination.
Continuous monitoring and repairs prevent fatalities.
How to Inspect Your Water Heater Venting Safely Step-by-Step
Before beginning any work, the inspector outlines required tools and safety precautions, including shutoff procedures and protective equipment.
They then perform a visual check of the vent pipe, connections, and chimney, followed by tests for proper draft, airflow, and combustion gases including carbon monoxide.
If anomalies or unsafe readings appear, the inspector recommends immediate professional diagnostic and repair services.
Tools and safety precautions before inspection
Gather essential tools and establish safety measures before approaching the water heater to inspect venting.
Recommended tools include flashlight, work gloves, safety goggles, adjustable wrench, gas leak detector or soapy water, and a smoke pencil or incense for draft testing.
Confirm power and gas are off, area is well-ventilated, a carbon monoxide alarm is functioning, and a fire extinguisher is nearby.
Visual inspection of vent pipe, connections, and chimney
A thorough visual inspection of the venting system begins at the appliance and works outward, checking the vent pipe, joints, and chimney for signs of corrosion, gaps, improper slopes, or obstructions.
Note loose or missing fasteners, deteriorated seals, rust, soot streaks, creosote, bird nests, or debris.
Verify clearances to combustibles and that chimney caps and flashings are intact and securely attached.
Checking for proper draft and airflow
Several simple checks can confirm whether a water heater is drawing combustion gases up the flue as designed: measure draft with a manometer or smoke test, feel for steady airflow at the draft hood or flue opening, and observe burner behavior for signs of backdrafting such as yellow flames or soot.
Record readings, compare to manufacturer specs, inspect for obstructions, and repeat tests after any corrective action.
Testing for combustion gases and carbon monoxide
After confirming draft and airflow, the next step is to test for combustion gases and carbon monoxide to verify the venting system is actually removing hazardous byproducts.
Use a calibrated CO detector and combustion analyzer at the flue and near the appliance while it runs.
Compare readings to safety thresholds, inspect for elevated CO or spillage, and document results.
Venting defects require correction.
When to call a professional for diagnostics
When should a homeowner call a professional for diagnostics? A professional is needed if testing detects elevated CO, persistent soot, yellow burner flames, unusual odors, backdrafting, or inadequate warm water.
Also call if venting components are corroded, improperly installed, or inaccessible.
Technicians provide calibrated gas detection, draft measurement, pressure testing, and safe corrective actions beyond basic homeowner capability.
Quick Fixes You Can Do Yourself Right Now
A few simple actions can often correct common venting issues without professional help, provided the inspector follows basic safety precautions.
Suggested quick tasks include:
- Clear minor blockages and remove debris from vent terminations
- Tighten loose vent pipe connections and replace worn screws/seals
- Fix small gaps with high-temperature-rated sealant and improve clearance/room ventilation
- Reset the pilot or light and check that the burner flame is steady and properly colored
If problems persist or combustion odor or soot appears, contact a qualified technician immediately.
Clear minor blockages and remove debris from vent terminations
Check the vent termination for visible debris such as leaves, bird nests, or accumulated soot that can restrict airflow.
Wear gloves and use a brush or gloved hand to remove obstructions; avoid pushing material further into the flue.
Inspect inlet screens and clear them gently.
After cleaning, run the water heater briefly and observe exhaust flow and pilot stability to confirm improved ventilation.
Tighten loose vent pipe connections and replace worn screws/seals
Tighten loose vent pipe connections and replace worn screws or seals to restore a secure, gas-tight pathway for combustion exhaust; loose fittings can allow dangerous fumes to leak into living spaces and reduce draft efficiency.
Inspect joints, tighten clamps or screws, and swap corroded fasteners. Confirm proper alignment and support to prevent strain.
Recheck for leaks and secure clearances before restoring normal operation.
Fix small gaps with high-temperature-rated sealant
With fittings secured and alignment confirmed, small gaps or hairline cracks in vent connections can be sealed quickly using a high-temperature-rated silicone or furnace cement.
Wear gloves and eye protection, clean surfaces of soot and debris, apply sealant evenly, and smooth to guarantee full contact.
Allow manufacturer-recommended cure time before restoring operation and inspect for leaks with a smoke pencil or soapy water.
Improve ventilation around the heater and appliance clearance
Although often overlooked, guaranteeing adequate ventilation and proper clearance around a water heater is essential for safe combustion and effective venting; small adjustments can reduce backdrafting and heat buildup.
Maintain manufacturer-recommended clearances, remove stored items, and keep vents unobstructed.
Add louvered vent grilles or increase room ventilation if necessary.
Regularly inspect for dust buildup and guarantee exterior vents are clear of debris.
Resetting the pilot/light and checking burner flame color
After ensuring adequate clearance and airflow around the water heater, homeowners can move on to a few quick checks that often fix common problems: relighting the pilot or electronic ignition and inspecting the burner flame.
Follow manufacturer instructions to shut gas, wait, relight pilot or reset ignition.
Observe flame: steady blue with minimal yellow indicates proper combustion; large yellow or lifting flame requires professional service.
Repairs and Replacements That Require a Pro
Certain venting issues should be handled by a licensed professional to guarantee safety and code compliance.
Common examples include:
- Replacing corroded or improperly sized vent piping
- Repairing or rebuilding a damaged chimney or draft hood
- Installing mechanical venting or power-assisted draft systems
- Addressing backdrafting and combustion-air deficiencies
A pro can assess combustion safety, perform required permits, and test for proper draft and contaminants.
Replacing corroded or improperly sized vent piping
Replacing corroded or improperly sized vent piping requires a qualified technician because incorrect materials, dimensions, or connections can cause dangerous combustion gas buildup and poor draft.
The technician inspects corrosion, measures diameters and slopes, and selects code-compliant stainless or galvanized pipe. They guarantee secure joints, proper supports, and correct termination clearances.
Testing for leaks and draft completes the safe replacement.
Repairing or rebuilding a damaged chimney or draft hood
A damaged chimney or warped draft hood can undermine venting effectiveness and create hazardous flue-gas backdrafts, so repair or rebuilding should be handled by a qualified professional.
A technician inspects masonry, flue liners, cap condition, and draft-hood alignment, then recommends partial rebuilds, relining, or hood replacement.
Permit requirements, combustion air, and code-compliant materials guarantee long-term safety and proper operation.
Installing mechanical venting or power-assisted draft systems
When chimney repair or draft-hood replacement cannot restore reliable natural draft, installers often turn to mechanical venting or power-assisted draft systems to secure safe flue-gas evacuation.
These systems use fans or induced-draft modules to overcome poor stack effect, permit smaller or longer vent runs, and prevent spillage.
Professional assessment guarantees correct sizing, installation, electrical integration, and compliance with codes and manufacturer requirements.
Addressing backdrafting and combustion-air deficiencies
Diagnose backdrafting and combustion-air deficiencies promptly, as they pose immediate safety hazards including carbon monoxide intrusion and inefficient burner performance; resolving them typically requires a qualified technician to assess airflow dynamics, inspect venting integrity, verify room ventilation, and implement repairs or engineered solutions such as sealed-combustion appliances, ducted combustion air, or balanced mechanical ventilation to restore safe, code-compliant operation.
Technicians may replace damaged vents, add makeup-air, or recommend appliance relocation.
Safety Signs That Warrant Immediate Action
Any carbon monoxide alarm activation or symptoms consistent with CO exposure should prompt immediate evacuation and professional response.
Visible gas leaks, persistent strong odors of gas, significant soot buildup, or pronounced rust on venting and appliance components indicate dangerous venting failures that require urgent attention.
These signs merit stopping use of the heater and contacting emergency services or a qualified technician at once.
Carbon monoxide alarm triggers or symptoms of CO exposure
How can a homeowner recognize that a water heater’s venting problem has escalated into a carbon monoxide risk?
Persistent CO alarm activation, especially during or after appliance use, signals danger.
Symptoms include headaches, dizziness, nausea, confusion, fatigue, and flu-like signs that improve when away from home.
Any alarm or symptoms require immediate evacuation, fresh air, and contacting emergency services and a qualified technician.
Visible gas leaks or strong persistent odors
After signs of carbon monoxide exposure or frequent alarm activation, attention should turn immediately to smells or visible leaks that indicate a natural gas or propane release.
Immediate actions include evacuating occupants, avoiding open flames or switches, and calling emergency services and the gas utility from a safe location.
A licensed technician must inspect and repair the appliance and supply lines before reentry.
Significant soot accumulation or structural rust
Significant soot buildup around the flue, burners, or vent hood, or pronounced rust on the tank, jacket, or venting components indicates a serious malfunction or prolonged exposure to combustion byproducts.
Such deterioration impairs airflow, increases carbon monoxide risk, and signals corrosion that may lead to leaks or structural failure.
Immediately stop using the appliance, ventilate the area, and contact a certified technician for inspection and repair.
Preventive Maintenance to Keep Vents Working Well
Preventive maintenance helps guarantee venting remains safe and efficient by pairing regular homeowner checks with occasional professional service.
A basic schedule and a few simple tasks can catch issues early and reduce emergency repairs. Suggested items to review include:
- quarterly visual inspections and seasonal checks
- clearing debris from outdoor vents in fall and spring
- annual homeowner maintenance: check for corrosion, loose fittings, and proper vent attachment
- scheduling professional tune-ups every 1–3 years or when problems are suspected
Recommended inspection schedule and seasonal checks
A practical inspection schedule helps guarantee vents remain clear, secure, and functioning as meant.
Monthly visual checks detect obvious blockages, corrosion, or animal nests.
Quarterly inspections verify roof and termination cap integrity and secure connections.
Before winter and after heavy storms, perform focused seasonal reviews for ice, debris, or wind damage.
Document findings and schedule professional evaluation if irregularities appear.
Simple annual maintenance tasks homeowners can perform
Following the inspection schedule, homeowners can perform a few straightforward annual maintenance tasks to help keep water heater vents functioning properly.
Tasks include clearing debris from vent terminations, checking and tightening vent clamp connections, inspecting vent pipes for corrosion or damage, testing for proper draft with a smoke pencil or similar, and cleaning surrounding combustion air intakes to guarantee unobstructed airflow.
When to schedule professional tune-ups
When should a homeowner book a professional tune-up to keep water heater vents operating safely and efficiently?
A technician should inspect vents annually, or sooner if signs appear: soot, corrosion, unusual odors, pilot or burner irregularities, frequent cycling, or recent renovations altering ventilation.
Additionally, schedule service after storms, chimney work, or suspected carbon monoxide exposure to guarantee clear, properly pitched, and sealed venting.
How Proper Venting Affects Efficiency and Lifespan
Proper venting directly influences a water heater’s fuel consumption and operating costs by ensuring combustion gases are expelled efficiently and heat transfer is optimized.
Restricted or poorly routed vents force the system to run longer or at higher settings, increasing fuel use and monthly expenses.
Chronic vent problems also correlate with premature failure of burners, heat exchangers, and other components due to overheating, corrosion, and soot buildup.
Impact on fuel use and operating costs
If venting is restricted or misaligned, a water heater must work longer and harder to maintain set temperatures, which raises fuel consumption and operating costs.
Reduced draft lowers combustion efficiency, increasing gas or propane use and electric draw during recovery.
Higher cycling accelerates thermostat and burner cycling, boosting utility bills.
Regular vent inspection and prompt correction restore efficiency and trim ongoing energy expenses.
Correlation between vent issues and premature component failure
Beyond higher fuel bills, compromised venting directly shortens the service life of water heater components.
Inadequate draft, backdrafting, or restricted flues cause overheating, condensation, and soot buildup that accelerate corrosion of tanks, burners, and heat exchangers.
Repeated thermal stress and combustion byproduct exposure also degrade seals, valves, and electronic controls, increasing failure rates and prompting earlier, costlier replacements.
Regular vent inspection mitigates these risks.
Comparison of Venting Types and Common Issues
Different venting systems—atmospheric, power, and direct—have distinct airflow mechanisms and typical failure modes that affect safety and performance. The following table summarizes key characteristics and common remedies for each type to guide inspection and troubleshooting. Technicians should match symptoms to the likely venting type before applying corrective measures.
| Venting Type | Typical Issues & Remedies |
|---|---|
| Atmospheric | Backdrafting, rusted or disconnected flue — inspect chimney, seal joints, and correct drafting with proper flue size or baffle. |
| Power | Fan failure, condensate buildup, electrical faults — test/replace blower, clear condensate trap, and check controls and wiring. |
Atmospheric venting vs. power venting vs. direct venting
Many homes use one of three common water-heater venting methods—atmospheric, power, or direct venting—each with distinct airflow paths, installation requirements, and failure modes.
Atmospheric vents rely on buoyant exhaust rising through vertical chimneys.
Power-vent systems use fans to push or pull flue gases through horizontal or long runs.
Direct-vent units draw combustion air from outside, sealing combustion from living spaces.
Typical failure modes and suggested remedies for each type
Assess common failure modes by vent type to prioritize inspections and remedies.
Atmospheric vents: backdrafting, corrosion, blockages—clean flues, repair rusted sections, guarantee proper draft hood clearance.
Power vents: motor failure, clogged intake/exhaust, condensate issues—test and replace fans, clear vents, service condensate traps.
Direct vents: seal failures, cracked coaxial pipes—reseal joints, replace damaged sections, verify termination clearances and airtight connections.
Signs from Other Home Systems That Point to Venting Problems
Interactions with HVAC systems, shared flues, or ductwork can reveal improper water heater venting when drafts or backflow carry combustion byproducts into other rooms.
Odors, unexplained condensation, or staining on ceilings and walls away from the heater may indicate exhaust is escaping or being rerouted.
Recurring respiratory irritation or complaints from occupants should prompt inspection of venting and related home systems.
HVAC interactions and shared flue concerns
Several household systems can reveal a venting problem before the water heater itself shows obvious symptoms.
HVAC systems sharing a flue may experience pilot outages, uneven combustion, or unexpected cycling.
Furnace backdrafting, reduced draft at vents, and abnormal pressure differentials during HVAC operation indicate shared-vent conflicts.
Immediate inspection of flue connections, dampers, and vent sizing is advised to prevent spillage and safety hazards.
Odors, condensation, or staining in other rooms
When shared flue issues or HVAC backdrafting are present, smells, moisture, and discoloration may appear in rooms distant from the water heater and signal a venting fault.
Persistent damp spots, musty or metallic odors, and brownish stains near vents or ceilings suggest combustion gases or excess humidity migrating through ductwork.
Inspect duct connections, flue integrity, and ventilation paths; contact a professional if confirmed.
Chronic respiratory or odor complaints from occupants
Could occupants’ recurring coughs, headaches, or persistent complaints about odors be tracing back to a venting problem with the water heater?
Chronic respiratory symptoms and repeated reports of metallic, musty, or exhaust-like smells can signal combustion gases or volatile byproducts entering living spaces.
Such patterns warrant immediate inspection of flues, seals, and ventilation by a qualified technician to confirm and correct unsafe venting.
Checklist: What to Do When You Suspect Poor Venting
When poor venting is suspected, the homeowner should follow a clear checklist to protect occupants and collect useful information for a technician.
Suggested actions include:
- Shut off the water heater and ventilate the area for safety.
- Note symptoms, odors, and any appliance behavior to report.
- Photograph vent connections, flue pipes, and any soot or corrosion.
- Record dates, times, and any weather or system changes relevant to the problem.
Immediate steps for homeowner safety
Act quickly but calmly: if a homeowner suspects poor water heater venting, they should prioritize immediate safety by shutting off the appliance, ventilating the area, evacuating anyone experiencing symptoms, and contacting a qualified technician or emergency services as needed.
Then, keep occupants clear of the space, avoid using open flames or electrical devices nearby, and alert neighbors if carbon monoxide exposure is possible.
Information to gather for a technician
After ensuring immediate safety, the homeowner should compile clear, specific information to give the technician.
Include appliance make, model, serial number, installation age, recent maintenance, observed symptoms (odors, soot, pilot issues), timing and frequency of problems, location and layout of venting, fuel type, and any recent home changes (new appliances, renovations).
Note occupant health effects and HVAC interactions.
How to document and photograph issues for service calls
Gather clear visual and written evidence before the technician arrives: concise photos, timestamps, and a short written log of symptoms and conditions will help diagnose venting problems more quickly.
Photograph vent connections, flue angles, soot, corrosion, and nearby combustion appliances from multiple distances.
Note odors, sounds, and CO alarm readings with date/time.
Label images, attach to the service request, and retain originals for follow-up.
Resources and Next Steps
The article directs readers to trusted sources for locating certified HVAC and plumbing technicians, including licensing boards and professional directories.
It notes the importance of consulting applicable codes, standards, and manufacturer recommendations when evaluating venting issues.
Typical inspection, repair, and replacement cost ranges are summarized to help homeowners plan next steps.
How to find certified HVAC/plumbing technicians
Where can a homeowner find certified HVAC or plumbing technicians they can trust?
Local trade organizations, state licensing boards, and utility company referral lists provide verified professionals.
Seek NATE-certified HVAC techs or licensed plumbers, check online reviews and Better Business Bureau ratings, confirm insurance and bonds, request written estimates, and ask for references.
Prioritize technicians with relevant experience on water heater venting.
Relevant codes, standards, and manufacturer recommendations
When evaluating venting practices, homeowners should consult the applicable building codes, industry standards, and the water heater manufacturer’s installation instructions to guarantee safety and compliance.
Reference sources include the International Residential Code (IRC), NFPA 54/NFPA 211 where applicable, local amendments, and manufacturer installation manuals and venting diagrams.
Follow specified clearances, vent materials, termination locations, and combustion air requirements to maintain certification and warranty.
Typical costs for inspections, repairs, and replacements
Typical costs for inspections, repairs, and replacements vary by region, appliance type, and the problem’s complexity.
Inspection fees commonly range $75–$200.
Minor repairs (vent cleaning, seal replacement) often cost $100–$400.
Major repairs (flue replacement, burner repair) can be $400–$1,200.
Full water heater replacement typically ranges $800–$3,500 depending on fuel type, capacity, and installation complexity.
Conclusion
A homeowner noticing soot, yellow flame tips, or lingering exhaust odors should act; poor venting risks carbon monoxide, appliance damage, and wasted energy. Can simple checks and fixes be performed safely before calling a pro? Inspecting clearances, vent caps, and flue connections often reveals issues; simple DIY remedies can help, but persistent blockages, corrosion, or improper vent types require a licensed technician. Prompt, informed action protects health and prolongs system life.