How to Turn On Honeywell Water Heater: Step-by-Step Guide for Beginners
To turn on your Honeywell water heater, first identify the model and fuel type. For gas units, open the gas supply, switch the control to “Pilot,” ignite it, and hold for 30–60 seconds before turning it to “On.” For electric units, restore power at the breaker and check the element thermostats, setting them to around 120°F. Always perform safety checks for leaks and ensure proper venting. Follow these steps for a complete startup process, as well as troubleshooting and maintenance tips.
How to Turn On a Honeywell Water Heater: Quick Overview
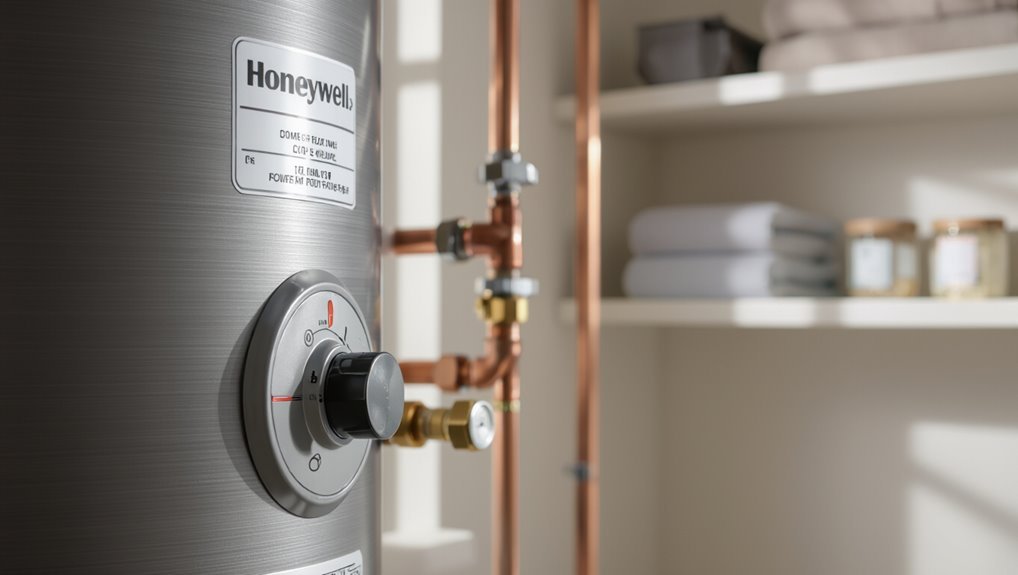
A single clear step: switch the Honeywell water heater’s power source to ON and confirm the thermostat is set to the desired temperature.
Before powering on, verify gas supply (if applicable), check for leaks, guarantee proper ventilation, and confirm all electrical connections are intact and dry.
If any safety concern is found, address it or contact a professional before proceeding.
One-sentence direct answer for immediate action
Turn on the Honeywell water heater by ensuring the gas or power supply is on, setting the thermostat to the desired temperature, and igniting the pilot or activating the control per the model’s instructions.
For immediate action, follow the model-specific startup steps in the manual: confirm supply, select temperature, initiate pilot or electronic ignition, and verify the burner or heating element cycles—this summarizes how to turn on Honeywell water heater.
Safety checks to perform before powering on
Before powering the unit, the operator should complete a concise set of safety checks: verify gas/electric supply is off, confirm correct venting and clearances, inspect for leaks, make certain pressure-relief valve is operational, check wiring and pilot assembly for damage, confirm thermostat settings and water supply valves are open, and have a carbon monoxide detector functioning nearby before initial ignition.
Identify Your Honeywell Water Heater Model and Power Type
The reader should first locate the heater’s model number and consult the manufacturer’s manual to confirm specific startup instructions.
Next, they must note whether the unit is gas, electric, or tankless, since ignition and control steps differ for each type.
Finally, gathering required tools and materials—such as a wrench, screwdriver, and a gas leak detector or multimeter—prepares them for a safe and correct startup.
Finding the model number and manual
When preparing to identify a Honeywell water heater, locating the model number and manual is the essential first step because these details determine the correct startup procedure and power-type requirements.
Inspect the heater’s data plate, label, or stamped panel near the control area. If missing, photograph serials and search Honeywell’s online database or contact support for a PDF manual and specifications.
Gas vs. electric vs. tankless what changes in startup
After locating the model number and manual, the next step is determining whether the Honeywell water heater is gas, electric, or tankless, since each type requires different startup checks and safety procedures.
Gas units need gas supply, pilot/ignition and venting verification.
Electric models require breaker and element checks.
Tankless systems demand flow sensor, proper gas/electrical capacity, and inlet filter inspection before initial power-up.
Required tools and materials
A concise toolkit and checklist guarantee safe, efficient identification of a Honeywell water heater model and its power type.
Required items: flashlight, screwdriver set, adjustable wrench, multimeter, gas leak detector or soapy water, owner’s manual or model photo, camera or phone for documentation, marker and notepad.
Personal protective equipment: gloves and safety glasses.
Pre-startup Safety Preparations
Before powering or firing the unit, the technician first shuts off electrical and gas supplies following a simple step checklist.
A visual inspection for leaks, corrosion, blocked vents, and the positions of the water supply and drain valves is completed next.
Appropriate personal protective equipment—gloves, safety glasses, and a work jacket—is worn throughout the pre-startup checks.
Turn off power and gas supply (step checklist)
Shut off electrical and fuel sources to eliminate ignition and shock hazards before any work on the water heater begins.
Confirm circuit breaker labeled for the heater is switched off; tag or lock out if possible.
Close the gas shutoff valve on the appliance supply line.
Verify power absence with a noncontact tester and confirm gas is off by odor check and listening for leaks before proceeding.
Inspect for leaks, corrosion, and venting obstructions
With power and gas secured, the technician proceeds to a close visual and tactile inspection of the heater and surrounding connections for leaks, corrosion, and venting obstructions.
The examiner checks fittings, valves, and tank seams for moisture or rust.
He inspects flue and vent pipes for blockages, verifies seals and supports, and notes any damage requiring repair before attempting startup.
Verify water supply and drain valve status
Verify that the cold-water supply is open and the tank drain valve is closed to secure proper filling and prevent unintended discharge.
Confirm inlet shutoff feeds water at normal pressure; check visible supply lines and fittings for tightness.
Ascertain the drain valve handle is fully seated and oriented to closed.
If recent maintenance occurred, slowly open supply and observe filling without leaks before proceeding.
Recommended personal protective equipment
Personal protective equipment (PPE) must be selected and worn before any startup activity to reduce risk from hot water, steam, chemicals, and sharp components.
Recommended PPE includes heat-resistant gloves, splash-resistant goggles, long-sleeve flame-retardant clothing, and closed-toe nonslip footwear.
A face shield and chemical-resistant apron are advised for flushing or chemical treatments.
Confirm proper fit, inspection, and secure storage when not in use.
Step-by-Step Guide to Turning On a Honeywell Gas Water Heater
The following steps describe how to relight the pilot, including the exact sequence of controls and safety checks.
Instructions cover setting the gas valve to ON, adjusting the thermostat, and basic ignition troubleshooting if the pilot fails to light.
The procedure concludes with checks for proper combustion and venting to guarantee safe operation.
Relighting the pilot (detailed steps)
Before relighting the pilot, confirm the area is well-ventilated and that the gas supply is on; then locate the control knob and pilot access on the heater.
Turn the knob to “Pilot,” press and hold while depressing the piezo igniter or lighting with a long match.
Continue holding for 30–60 seconds after flame establishes, then release slowly.
Observe stable flame before closing access.
Setting the gas valve to ON and thermostat adjustments
After confirming a steady pilot flame, attention shifts to setting the main gas valve to ON and adjusting the thermostat to the desired temperature.
The valve knob is rotated from PILOT to ON firmly but gently. The thermostat dial is set to the recommended safe range (typically 120°F).
Observe burner ignition and verify temperature after an hour; readjust minimally if needed.
Ignition troubleshooting if pilot won’t light
If the pilot fails to light, follow a systematic troubleshooting sequence to identify and correct common causes such as air in the gas line, a clogged pilot orifice, weak thermocouple connection, or an interrupted gas supply.
Inspect pilot tubing and fittings for leaks, clean the orifice with compressed air, verify thermocouple tightness and continuity, guarantee gas valve operation, and replace faulty components before retrying ignition.
Confirming proper combustion and venting
Verify combustion and venting to confirm the water heater operates safely and efficiently:
Inspect flue, vent pipe, and roof termination for obstructions, corrosion, or loose connections.
Ascertain combustion air openings are clear and intake screens intact.
Observe flame color—steady blue indicates proper combustion; yellow or lifting suggests incomplete combustion.
Measure vent temperature and draft if available.
Stop and call a qualified technician if irregularities appear.
Step-by-Step Guide to Turning On a Honeywell Electric Water Heater
Before restoring power, the technician confirms the circuit breaker and any service disconnect are off and follows lockout/tagout procedures. Then, safely re-energizes the unit.
Next, the thermostat is set to the recommended initial temperature and noted for adjustments. If heating fails, the reset button and elements are inspected, and operation is verified by checking for rising tank temperature and proper hot-water flow.
Restoring electrical power safely (breaker and disconnect)
Restore electrical power only after confirming the water heater installation, thermostat settings, and pressure relief valve procedures are complete. The following steps focus on safely re-energizing the unit at the circuit breaker or local disconnect, minimizing shock and fire risk by using proper sequence and basic protective measures.
Wear insulated gloves, verify breaker labeling, turn off downstream loads, switch the disconnect on, then close the breaker slowly.
Setting the thermostat and initial temperature recommendations
With power re-applied at the breaker or local disconnect, attention turns to setting the Honeywell thermostat and choosing an initial water temperature.
The thermostat dial or digital control should be adjusted to 120°F (49°C) for safety and efficiency.
Confirm settings on both upper and lower thermostats if present.
Allow the tank to stabilize for about 30–60 minutes before testing hot water at a tap.
Reset button and element checks if not heating
If the water remains cold after power and thermostat checks, inspect the thermostat reset button and heating elements next.
Locate the reset (usually red) on the upper thermostat, press firmly to reset. If tripped again, cut power and test elements with a multimeter for continuity; replace any open element.
Document findings and restore power only after secure reassembly and dry connections.
Verifying proper operation after power-up
After resetting the thermostat and confirming element continuity, the technician proceeds to power up the Honeywell electric water heater and verify proper operation.
The technician observes startup sounds, confirms indicator lights, and checks for voltage at terminals.
Temperature rise is measured after a timed run.
Finally, thorough leak inspection and safe grounding verification complete the post-power checklist before returning the unit to service.
Starting a Honeywell Tankless Water Heater
The process begins by powering the tankless unit and opening the water supply to confirm flow.
Next, the installer or homeowner sets the digital controls and selects the desired temperature, with attention to safety limits.
Before regular use, flushing and descaling may be performed and the startup display should be checked for any error codes.
Powering the unit and enabling water flow
Begin by confirming that the electrical supply and gas (if applicable) are connected and that all system valves are in their correct positions.
Then energize the unit via its dedicated circuit breaker and open the main water inlet valve slowly to pressurize the heat exchanger.
Verify no leaks at fittings, guarantee condensate and pressure relief lines are clear, and open hot outlets to purge air until steady flow is achieved.
Configuring digital controls and temperature settings
Power up the control panel and observe the display to confirm the unit has completed its startup self-check and is ready for input.
Use arrow keys or touchscreen to select temperature, set ECO or comfort modes as desired, and lock settings if available.
Verify temperature in degrees Fahrenheit or Celsius, confirm outlet water temperature with a thermometer, and save configurations before exiting.
Flushing and descaling before first use (when needed)
After temperature settings have been confirmed on the control panel, attention should turn to flushing and descaling if the unit sits in an area with hard water or has remained unused for an extended period.
Follow manufacturer instructions: isolate power and water, attach pump and hoses, circulate a descaling solution for the recommended duration, then flush thoroughly with clean water.
Inspect filters and reassemble.
Error codes to watch for on startup
Several common error codes can appear during initial startup of a Honeywell tankless water heater, and recognizing them early helps diagnose issues quickly.
Typical codes include ignition failure, overheating, low water flow, and blocked vent warnings.
Each code corresponds to specific causes—air supply, scale buildup, faulty sensors, or circulation problems—and the manual outlines reset steps and when to call a qualified technician.
Common Problems When Turning On and How to Fix Them
When a Honeywell water heater is started, several common issues can prevent normal operation and require quick troubleshooting.
Typical problems include no hot water, a pilot that won’t stay lit, electrical faults, unusual startup noises, and leaks or pressure irregularities.
The following list highlights the top areas to check and address first:
- Check ignition, pilot assembly, and gas supply for startup heating failures.
- Inspect electrical panel, breakers/fuses, and listen for abnormal sounds during the first cycle.
- Examine fittings, valves, and pressure relief components for leaks or pressure problems.
No hot water after startup
Troubleshooting no hot water after startup requires a systematic approach to identify whether the issue is electrical, gas-related, or caused by controls and sensors.
Check power supply, circuit breakers, and reset switches; verify thermostat settings and temperature rise; inspect gas valve and supply for proper flow; test limit switches, high-temperature cutoffs, and control board error codes; flush sediment from tank to restore heating efficiency.
Pilot light won’t stay lit
Check the pilot assembly for common failures that cause the pilot light to extinguish shortly after lighting.
Inspect and clean the thermocouple, pilot orifice, and pilot tube for dirt or corrosion.
Verify proper alignment and secure connections.
Confirm adequate gas flow and correct flame shape.
If components are damaged or cleaning fails, replace the thermocouple or pilot assembly and retest per manufacturer instructions.
Tripped breaker or blown fuse
Power interruptions or electrical faults can prevent an electric or hybrid Honeywell water heater from powering on by tripping a circuit breaker or blowing a fuse. These protective devices cut power to prevent wiring damage or fire.
Inspect the breaker panel for tripped switches or blown fuses. Reset only after identifying the cause. Check for loose wiring or overloads, and call a qualified electrician if trips recur or damage is suspected.
Unusual noises during first heating cycle
During the initial heating cycle, a Honeywell water heater may emit popping, knocking, or hissing sounds as trapped air, sediment, or thermal expansion settle into normal operation.
These noises are usually harmless but can indicate issues like scale buildup on the element or loose plumbing that merit attention.
Inspect for sediment, flush the tank if needed, tighten fittings, and descale heating elements to reduce recurrence.
Water leaks or pressure issues
Addressing water leaks and pressure problems is essential before or immediately after activating a Honeywell water heater, since small drips or abnormal pressure can quickly escalate into component damage or safety hazards.
Inspect fittings, valves, and tank seams for moisture.
Check relief valve operation and system pressure with a gauge.
Tighten connections, replace faulty valves, or consult a certified plumber if pressure remains abnormal.
Safety Warnings and When to Call a Professional
The section outlines critical safety warnings and clear criteria for professional help when operating a Honeywell water heater.
It summarizes signs of gas leaks and immediate steps to evacuate and shut off the gas.
It identifies electrical risks that mandate an electrician and specifies scenarios requiring a licensed plumber or HVAC technician.
Readers are advised to stop and call qualified help if any of these hazards are present.
Signs of gas leaks and emergency steps
Any suspected gas leak demands immediate attention because even small odors or hissing sounds can indicate a dangerous release of natural gas or propane.
Evacuate occupants, avoid flames, and do not use phones or switches inside.
From a safe location, call emergency services and the gas provider.
If unsure, seek a certified technician for inspection and repair before restoring appliance operation.
Electrical hazards that require an electrician
Recognize that electrical issues pose immediate danger and often fall outside routine homeowner tasks; situations such as exposed wiring, frequent breaker trips, burning smells, or sparks require a licensed electrician to assess and repair.
Other alarm signs include scorching at connections, tripped GFCIs that won’t reset, overheating panels, or incorrect voltage readings.
Do not attempt DIY fixes; hire a qualified professional.
When to contact a licensed plumber or HVAC technician
Electrical hazards often accompany or mask plumbing and HVAC failures, so homeowners should also be alert for non-electrical signs that warrant a licensed plumber or HVAC technician.
Call a professional if there are persistent leaks, discolored or foul-smelling hot water, inadequate heating, strange noises from the heater, visible corrosion, gas odors, repeated pilot light failures, or complex valve and pressure issues beyond basic maintenance.
Maintenance Tips to Ensure Reliable Startups
Regular maintenance keeps Honeywell water heaters starting reliably and extends component life.
Technicians or owners should follow a set schedule for inspections, tank flushing and anode checks, and guarantee vents and combustion air remain clear to prevent startup failures.
Preparations for power loss—such as fresh batteries or alternative power for electronic controls—help avoid missed ignitions during outages.
- Schedule regular inspections and service.
- Flush tank, replace anode per manufacturer guidelines.
- Keep vents/combustion air clear and maintain battery backup.
Regular inspection schedule
A routine inspection schedule keeps a Honeywell water heater operating reliably by catching wear, leaks, and control issues before they cause startup failures.
Inspect visually monthly for leaks, corrosion, and loose connections.
Test safety valves and thermostats quarterly.
Verify pilot assemblies, burners, and electrical connections semiannually.
Record findings, corrective actions, and dates to track trends and prompt timely professional service when needed.
Flushing tank and anode replacement frequency
Several maintenance tasks—chiefly tank flushing and anode replacement—directly determine a Honeywell water heater’s longevity and startup reliability.
Flush the tank annually to remove sediment that impedes heating and sensor function; increase frequency in hard-water areas.
Inspect the sacrificial anode every 1–3 years and replace when heavily corroded to prevent tank corrosion.
Document dates and performed actions for consistent upkeep.
Keeping vents and combustion air clear
Keep vents and combustion-air openings free of obstructions to guarantee consistent ignition and safe operation.
Inspect intake and exhaust vents for debris, bird nests, snow, or vegetation monthly. Clear nearby storage, trash, or insulation that could block airflow.
Confirm vent caps and screens are intact and unobstructed. If corrosion or damage appears, arrange professional repair to maintain combustion efficiency and safety.
Battery backup and power outage preparation for electronic controls
Install and maintain a dedicated battery backup for electronic controls to preserve settings and enable safe shutdowns during power outages.
Inspect batteries biannually, replacing per manufacturer recommendations. Store replacements nearby and test backup function after installation.
Configure alerts for low battery and verify controller clock and ignition parameters post-outage.
Document serial numbers and installation dates for warranty and maintenance records.
Recommended Settings and Energy-Saving Tips
Recommended thermostat settings balance comfort and scald prevention, typically around 120°F for storage models.
For tankless units, programming routines that match household usage patterns can minimize standby energy and provide hot water on demand.
Adding pipe and tank insulation and using timers or smart controls further reduces energy consumption without sacrificing availability.
Optimal thermostat temperatures for comfort and safety
When balancing comfort, safety, and efficiency, the ideal thermostat range for a household water heater is generally 120°F (49°C). This provides adequate hot water while minimizing scald risk and limiting energy use.
Some households may raise it to 130°F (54°C) for dishwasher sanitization, but doing so increases scald potential and energy consumption. Therefore, precautions like anti-scald valves or mixing valves are advised.
Households should set 120°F for daily use, use higher settings only when necessary, and combine temperature control with insulation and regular maintenance to optimize safety and efficiency.
Programming routines for tankless units
How should a tankless water heater be programmed to balance responsiveness, energy savings, and longevity?
Recommended routines set a sensible temperature (e.g., 120°F) with short boost periods for peak demand, enable eco or economy modes, and schedule lower standby activation during predictable low-use hours.
Regular diagnostic cycles and delayed restart limits reduce thermal stress while maintaining prompt hot-water delivery and system durability.
Insulation and timer options to reduce energy use
Having outlined programming routines that balance responsiveness, energy savings, and longevity, attention turns to physical measures and scheduling tools that further cut standby losses and wasted energy.
Insulate tank and exposed pipes with manufacturer-approved blankets and foam to reduce heat loss.
Use programmable timers or smart controllers to limit heating to peak-use windows.
Combine both for measurable energy and cost reductions without compromising safety.
Quick Troubleshooting Reference Table
A compact reference helps users match common symptoms to likely causes and quick fixes, with guidance on when to call a professional. The table below highlights urgent issues and routine problems for fast decision-making. Keeping responses brief reduces anxiety and speeds resolution.
| Symptom / Cause | Action / When to call |
|---|---|
| No hot water / Pilot out | Relight per manual; call pro if it won’t stay lit |
| Strange noises / Sediment buildup | Flush tank; call pro for persistent noise |
Common symptom | Likely cause | Quick fix | When to call pro
Below is a concise troubleshooting table that lists common symptoms, the most likely causes, quick fixes an owner can try safely, and clear indicators for when to contact a licensed technician.
No hot water
| Pilot out, gas supply | Relight pilot, check gas valve | Call pro if gas odor or pilot won’t stay lit. |
|---|---|---|
| Loose fittings, tank failure | Tighten fittings | Replace tank by pro. |
Checklist: First-Time Startup and Post-Startup Verification
A concise checklist guides the initial setup and verification to guarantee the Honeywell water heater operates safely and efficiently from first power-up.
It covers pre-start inspections, key checks during the first 30 minutes of operation, and weekly inspections for the first month to catch any early issues.
Follow the steps below in order to confirm system integrity and performance.
- Pre-start checklist: confirm power/gas supply, water isolation valves, pressure relief valve position, and no visible leaks.
- First 30 minutes verification steps: monitor ignition, listen for abnormal noises, verify temperature rise and proper venting.
- Weekly checks for the first month: inspect for leaks, test pressure relief operation, and recheck thermostat accuracy.
Pre-start checklist
Before initiating the Honeywell water heater for the first time, technicians should complete a concise pre-start checklist that verifies safety, system readiness, and proper configuration.
Confirm fuel/electric supply isolated, venting and combustion air clear, and wiring/controls installed per schematic.
Guarantee pressure relief valve installed, plumbing connections tight, drain valve closed, and thermostat settings correct.
Verify leak-free connections and required permits present.
First 30 minutes verification steps
Once energized and fuel or power is applied, the technician should monitor the water heater continuously for the first 30 minutes to verify safe operation and correct system response.
This includes observing ignition sequence, flame stability, combustion and venting behavior, and control panel indicators while checking for leaks, unusual noises, and proper pressure and temperature rise.
Record readings, confirm thermostat accuracy, guarantee pilot or burner cycles normally, and secure fittings.
Weekly checks for the first month
Perform weekly checks during the first month to confirm sustained safe operation and early detection of developing issues. Each inspection should follow the startup checklist to verify controls, combustion, venting, temperature/pressure readings, and the integrity of all connections.
Note pilot flame stability, burner performance, leaks, unusual noises, and correct thermostat response. Record readings, corrective actions, and notify a licensed technician if abnormalities persist.
Conclusion
The instructions conclude by pairing caution with confidence: after careful safety checks and methodical steps, the simple act of turning on a Honeywell water heater becomes routine yet significant. Cold pipes once inert now warm; the quiet click of ignition contrasts with the steady hum of an electric element. This juxtaposition—risk mitigated beside dependable comfort—highlights that preparedness transforms unfamiliar startup procedures into reliable household reassurance, leaving users ready and reassured.