How to Drain a Flooded Basement Fast: Step-by-Step Emergency Guide
When dealing with a flooded basement, the fastest way to address the situation includes ensuring safety by cutting off power and gas, checking for hazards, and evacuating if necessary. After assessing the water depth and documenting the conditions, remove any valuables from the area. Establish clear flow paths for water drainage and select the appropriate pump—submersible for deep water or utility for debris. Set up hoses to discharge water safely, and use wet/dry vacuums for any residual shallow water. Finally, sanitize the area and dry it out using dehumidifiers and fans. Follow up with necessary repairs, insurance claims, and mold prevention measures to ensure a complete recovery. Detailed instructions for each step are provided below.
Emergency Overview: What to Do First When Your Basement Is Flooded
Before anyone enters, a quick set of safety checks should confirm power is off, hazards are contained, and occupants are accounted for.
A rapid visual estimate of water depth and spread helps prioritize actions and identify areas requiring professional attention.
If electrical risk, structural damage, or rising water is present, emergency services or a qualified flood responder should be contacted immediately.
Immediate safety checks before entering the basement
When water has entered a basement, the first priority is to confirm that the scene is safe to approach: check for downed power lines, gas odors, visible electrical sparks or exposed wiring, and unstable structural elements.
If any of these hazards are present, occupants should stay out and call emergency services.
After hazards are ruled out, note safe entry points, wear PPE, and follow procedures for how to drain a flooded basement.
Quick assessment: how to estimate water depth and extent
How deep and how far the water has spread should be established immediately to prioritize response actions.
From a safe entry point, observe visible markers: stairs, appliances, and wall outlets. Use a stick or tape measure to gauge depth at multiple locations.
Note flow direction, pooled versus moving water, and affected storage areas. Record findings for action planning and documentation.
When to call emergency services or a professional
Having established depth and spread, the next priority is deciding whether to summon emergency responders or a licensed professional.
Call emergency services if occupants face electrical shock, active gas smell, structural collapse, rising water threatening lives, or sewage backup.
Contact licensed water‑removal or restoration contractors for deep, contaminated, or persistent flooding, major equipment losses, insurance documentation needs, or when safe DIY is exceeded.
Fast-Action Step-by-Step Drainage Plan
The fast-action drainage plan begins with immediate safety measures: shut off electricity and gas and remove people, pets, and movable valuables from the affected area.
Next, create clear water flow paths by opening doors and moving obstructions so water can reach pumps and drains.
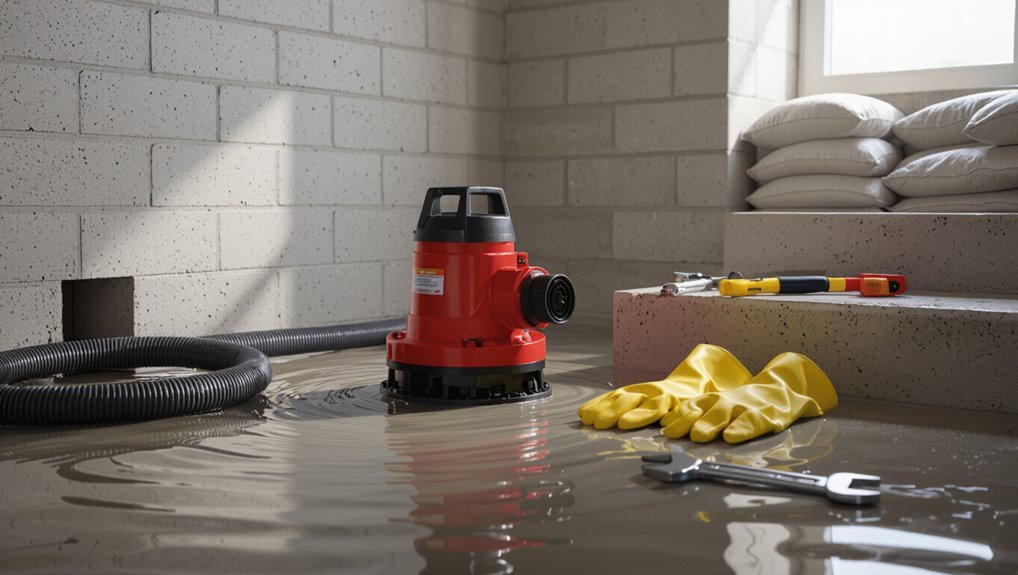
Finally, select and deploy the appropriate equipment—submersible, utility, or sump pump—and set up a submersible pump quickly by placing it on stable ground, attaching a discharge hose, and powering it from a safe, dry source.
Turn off electricity and gas safely
Before any water removal begins, power and gas must be shut off to eliminate electrocution and explosion risks; a trained homeowner or professional should cut the main electrical breaker and close the gas valve only if conditions are safe and dry access to the meter and service panels is possible.
Confirm utilities are off with a noncontact tester; label breakers and notify the utility company before leaving systems disabled.
Remove occupants, pets, and movable valuables
Evacuate all people and animals from the flooded area immediately, prioritizing those with mobility issues or medical needs.
Move pets to safe, dry locations and secure carriers or leashes.
Retrieve easily carried valuables—documents, electronics, medications—and place them above expected waterline.
Avoid entering deep water alone; use assistance and waterproof gloves.
Record items moved for inventory and insurance purposes.
Create water flow paths: open doors, move obstructions
Create clear channels for water to exit by opening interior and exterior doors and sliding or lifting minor obstructions out of the way, ensuring a continuous downhill path toward drains or outside exits.
Inspect thresholds, remove rugs, furniture, and low items obstructing flow, and prop doors open safely.
Direct diverted water away from electrical panels and sensitive areas, maintaining unobstructed routes until pumping or drainage begins.
Use pumps and drains: choosing between submersible pumps, utility pumps, and sump pumps
Select the right pump quickly to move large volumes of water and prevent further damage:
submersible pumps handle deep, continuous flooding and can sit underwater;
utility (trash) pumps clear water with debris and tolerate solids;
sump pumps remove collected water from low points and keep a basement dry long-term.
Choose based on depth, debris load, and permanence; verify compatible hoses and adequate power source.
How to set up and operate a submersible pump quickly
With a submersible pump chosen for depth and debris tolerance, the next step is a rapid, safety-first setup to begin water removal immediately.
Position pump on stable, level surface; attach discharge hose to reach outside or approved drain; secure electrical connection with GFCI-rated extension and dry power source; lower pump into water; verify float switch movement; start pump; monitor flow and debris, adjusting as needed.
Using wet/dry vacuums and buckets for remaining water
Begin by evaluating remaining water levels and accessible areas to determine whether a wet/dry vacuum or manual buckets will be faster and safer for final cleanup.
Use a vac for shallow pooled water, working outward from low spots with appropriate filters and extension hoses.
For tight corners or heavy debris, employ sturdy buckets and a ladle or scoops, emptying to approved discharge points.
How to clear clogged floor drains and outdoor discharge points
Identify and prioritize clogged floor drains and outdoor discharge points by locating visible backups, slow drains, and pooling near downspouts or storm grates; evaluating accessibility, odor, and nearby electrical hazards; then plan the fastest route to clear each obstruction using tools and safe disposal methods.
Use gloves, snake or auger, plunger, and high-pressure hose for outdoor grates; remove debris, flush clear, and check for reflow.
Short-term water removal when pumps are not available
After clearing accessible floor drains and outdoor discharge points, attention turns to rapid water removal when pumps are unavailable.
Personnel should use buckets, mops, wet/dry vacuums on generator power, and siphons to evacuate standing water.
Create channels to drains, work from low to high, and remove water incrementally to prevent structural stress.
Prioritize safety: shut power, wear PPE, and ventilate the area.
Tools, Equipment, and Materials Checklist
The following checklist outlines what is needed to remove water quickly and safely.
- Essential emergency tools and protective gear
- Recommended pumps, hoses, and electrical accessories
- Cleaning, disinfecting, and drying supplies
Each item should be inspected for functionality and matched to the scale of the flood before work begins.
Essential emergency tools and protective gear
One reliable kit of tools and protective gear can make the difference between a controlled, efficient pump-out and unsafe, costly delays.
Include waterproof boots, chemical-resistant gloves, eye protection, N95 or higher respirator, hard hat, and high-visibility vest.
Add heavy-duty flashlights, battery packs, pry bar, submersible pump connectors, duct tape, multi-tool, and a first-aid kit for rapid, safe response.
Recommended pumps, hoses, and electrical accessories
Select pumps and accessories based on water volume, debris load, and available power to guarantee efficient, safe dewatering.
Use submersible trash pumps for heavy solids, utility pumps for clear water, and high-capacity electric or gasoline units when needed.
Include durable discharge hoses, quick-connect fittings, check valves, GFCI-protected extension cords, and adapters.
Keep spare clamps, repair tape, and fuel or power backups.
Cleaning, disinfecting, and drying supplies
A concise inventory of cleaning, disinfecting, and drying supplies guarantees effective remediation and reduces health risks after basement flooding.
Essentials include industrial wet/dry vacuums, mop buckets, stiff brushes, HEPA vacuums, EPA-registered disinfectants, bleach, detergent, disposable gloves, N95 respirators, eye protection, heavy-duty trash bags, dehumidifiers, axial fans, moisture meters, and replacement filters for units.
Proper PPE and ventilation are mandatory.
Containment and Damage-Control Techniques
Containment and damage-control begin with redirecting water away from the foundation and neighboring areas using sandbags, trenches, or temporary barriers.
Immediate steps include sealing visible cracks and gaps with waterproof tape or hydraulic cement and elevating or protecting appliances, the furnace, and electrical panels to reduce hazard.
Priorities for salvage should be set quickly, focusing on safety, then irreplaceable documents, high-value items, and furniture that can be dried and restored.
Diverting water away from foundation and neighboring areas
Begin by creating clear pathways to carry water away from the foundation and adjacent properties, using temporary trenches, sandbag barriers, and portable diversion channels to direct flow toward storm drains or lower ground.
Position barriers uphill of vulnerable areas, slope soil to promote runoff, protect neighboring properties by extending channels across boundaries, and monitor flow to adjust placements until pumps or municipal drains handle excess water.
Temporary sealing of cracks and gaps
Several quick measures can substantially reduce inflow through visible cracks and gaps until permanent repairs are possible.
Apply hydraulic cement to active seepage and use silicone or polyurethane caulk for small gaps.
For wider openings, insert foam backer rod then seal.
Temporarily tape or sandbag exterior joints and use waterproof patching compound inside.
Monitor seals and schedule professional masonry repair promptly.
Protecting appliances, furnace, and electrical panels
Move or elevate vulnerable equipment to minimize water exposure and reduce repair costs.
Disconnect power at the main before handling appliances; tag breakers and confirm de-energized circuits.
Raise washers, dryers, and furnaces on blocks or pallets; seal vents and combustion air openings temporarily.
Protect electrical panels with waterproof covers or tarps above drip lines.
Document conditions for insurance and schedule professional inspection before restart.
Salvage priorities for furniture, documents, and valuables
After ensuring safety and power isolation, prioritize items based on irreplaceability, susceptibility to mold, and structural integrity: paper records and photos first, then upholstered and wood furniture, electronics, and finally bulky, less-damaged pieces.
Salvage by moving to dry, elevated locations, using breathable containers for papers, wiping and airing furniture, documenting damage with photos, and labeling salvaged versus unsalvageable items for insurers.
Drying and Moisture Control After Draining
After water removal, attention shifts to controlling residual moisture with proper equipment placement and ongoing monitoring.
Technicians recommend positioning dehumidifiers and airflow to promote drying, using hygrometers to track progress and guide when to increase ventilation or remove wet materials.
Surfaces should be cleaned and disinfected promptly, and saturated drywall, insulation, or flooring should be removed when moisture persists or mold risk is high.
How to set up dehumidifiers and fans effectively
Several strategically placed dehumidifiers and high-velocity fans accelerate drying and prevent secondary damage by removing residual moisture from air and porous materials.
Position dehumidifiers centrally with unobstructed intake and exhaust; run fans to create cross-ventilation, angling toward walls and wet surfaces.
Elevate units off floors, maintain clear airflow paths, empty condensate regularly, and follow manufacturer runtime and safety guidelines to optimize drying.
Monitoring moisture levels and using hygrometers
Once dehumidifiers and fans are running to evacuate moisture, ongoing measurement guides when drying is complete and where further attention is needed.
Place hygrometers at multiple heights and corners to track relative humidity and temperature.
Record readings periodically, aiming for 30–50% RH depending on materials.
Use data to reposition equipment, extend drying cycles, and document progress for insurance or restoration professionals.
Preventing mold growth: cleaning and disinfecting surfaces
Because damp surfaces provide an ideal environment for mold, thorough cleaning and disinfection are essential to prevent colonization after draining and initial drying.
Remove debris, vacuum with a HEPA-rated unit, and wash hard surfaces with detergent. Rinse, dry, then apply an EPA-registered disinfectant or diluted bleach solution where appropriate.
Ventilate and continue monitoring moisture until surfaces remain consistently dry.
When to tear out drywall, insulation, or flooring
Determining whether to remove drywall, insulation, or flooring hinges on moisture levels, contamination, and drying feasibility: materials soaked above the lower edge of drywall, insulation saturated for more than 24–48 hours, or flooring with trapped wet layers should be torn out because they harbor mold and lose structural integrity, while clean, shallowly damp materials may be salvageable with thorough drying and monitoring.
Professionals recommend removing porous materials exposed to sewage, mold, or persistent moisture; nonporous items can be cleaned and dried.
Health, Safety, and Contamination Risks
The section outlines how to recognize contaminated black and gray water and the specific hazards they pose.
It summarizes required personal protective equipment and essential hygiene practices to reduce infection and chemical exposure.
It also covers safe handling of sewage backups and hazardous materials, including when to call professionals.
Identifying contaminated (black/gray) water and hazards
Many homeowners will encounter three basic categories of floodwater—clean, gray, and black—each carrying distinct health and safety risks.
Gray water (from appliances or seepage) can contain chemicals and pathogens, while black water (sewage, rising river water) poses serious biological hazards and structural contamination.
Visual cues, odor, source, and presence of sewage, oil, or visible debris help distinguish contamination and dictate containment, disposal, and remediation urgency.
Personal protective equipment and hygiene practices
Personal protective equipment (PPE) and strict hygiene procedures are essential when entering or working around a flooded basement because contaminated water and damaged materials present chemical, biological, and physical hazards.
Workers should wear waterproof boots, chemical-resistant gloves, eye protection, N95 or higher respirators, and coveralls.
Decontamination includes washing hands, disinfecting tools, laundering clothing separately, and avoiding touching face or open wounds.
Managing sewage backups and hazardous materials
Address sewage backups and hazardous materials immediately to reduce exposure to pathogens, chemicals, and structural risks; contaminated water can contain fecal bacteria, industrial solvents, gasoline, and sharp debris that pose acute health and environmental hazards.
Professionals should assess contamination, isolate affected areas, ventilate, and remove hazardous substances.
Use certified remediation services for sewage, chemical spills, and disposal; document damage for authorities and insurance claims.
Repair, Restoration, and Insurance Steps
After water is removed, the homeowner should document all damage with time-stamped photos, videos, and a room-by-room inventory to support claims.
They should notify their insurance company promptly, confirm what is covered, and keep records of all communications.
When hiring restorers or contractors, ask for licenses, references, written estimates, and distinguish temporary repairs from permanent solutions.
Documenting damage: photos, videos, and inventories
Begin by thoroughly documenting the damage with clear photos, timestamped videos, and a detailed inventory of affected items to guarantee accurate records for restoration and insurance claims.
Photograph structural damage, soaked materials, and serial numbers. Record locations, dates, and estimated values.
Preserve originals digitally and physically, label files, and back them up. Share copies with contractors and preservation specialists as needed.
Contacting your insurance company and understanding coverage
Notify the insurance company promptly and provide the documented evidence of damage to start the claims process.
The policyholder should quote policy numbers, describe timing and cause, and request claim forms.
Confirm covered perils, deductibles, limits, and whether water removal, structural repair, and contents replacement qualify.
Record claim reference, adjuster contact, deadlines, and any temporary housing or mitigation reimbursement terms.
Working with restorers and contractors: what to ask
Once the claim is filed and initial documentation is provided to the insurer, homeowners typically engage restoration contractors to remove water, dry structures, and repair damage.
Ask about licensing, insurance, and references; scope of work, timeline, and milestones; equipment and drying protocols; containment and mold prevention methods; disposal and documentation for claims; change-order procedures; warranties and post-repair inspection.
Clarify payment terms and lien waivers.
Temporary repairs vs. permanent solutions
Many homeowners must distinguish between temporary repairs that prevent further damage and permanent solutions that restore function and value.
Temporary measures—tarps over openings, pumps to remove standing water, and moisture barriers—stabilize conditions quickly, while permanent repairs—structural reconstruction, waterproofing, and finished interior restoration—address root causes and code compliance.
Professionals document temporary fixes for insurers, prioritize safety, then plan durable remediation and warranty-backed work.
Preventing Future Basement Flooding
Next, the article addresses practical measures to reduce the risk of future basement flooding.
Topics include sump pump maintenance and backup power, exterior solutions such as grading, gutters, downspouts, and French drains, and interior upgrades like waterproofing, sealants, and flood vents.
A concise routine inspection checklist will help homeowners monitor readiness and catch problems early.
Sump pump maintenance and backup power options
Inspecting and maintaining the sump pump regularly is essential to guarantee reliable basement protection, since a malfunctioning or powerless pump is the leading cause of preventable flooding.
Test operation monthly, clear debris, verify float switch movement, and replace worn seals or batteries.
Install battery backup or a generator with automatic transfer, and consider a high-capacity secondary pump for redundancy during storms.
Exterior solutions: grading, gutters, downspouts, and French drains
Exterior grading, gutter systems, downspouts, and French drains form a coordinated defense that directs water away from a foundation before it can seep into a basement.
Proper grading slopes soil away from the house, gutters collect roof runoff, downspouts discharge it well beyond the foundation, and French drains intercept subsurface flow.
Regular inspection, debris clearance, and correct installation guarantee reliable exterior water management.
Interior upgrades: waterproofing, sealants, and flood vents
While proper grading and drainage reduce external water pressure, interior upgrades provide the last line of defense against basement flooding.
Apply crystalline or epoxy waterproofing to walls and floors, seal joints and cracks with hydraulic cement or polyurethane caulk, and install flood vents or backflow preventers to relieve pressure and prevent sewage backup.
Combine measures for durable, code-compliant protection.
Routine inspection checklist for flood readiness
Because routine checks catch small problems before they become failures, a concise inspection checklist focuses on critical items: grading and drainage, foundation and wall cracks, sump pump operation and backup power, window wells and seals, basement floor drains and cleanouts, HVAC and water heater clearances, and basement-access entry points.
Recommended frequency and actions:
- Monthly visual walkaround
- Quarterly functional tests (sump, drains)
- Annual professional inspection
Common Mistakes to Avoid During Emergency Drainage
When addressing emergency drainage, the writer warns that certain errors can escalate harm and costs.
Common pitfalls include:
- Dangerous DIY actions that worsen damage
- Incorrect pump setup and electrical risks
- Delaying drying and mold prevention
The piece will outline how to recognize and avoid these mistakes quickly and safely.
Dangerous DIY actions that worsen damage
Attempting improvised fixes can turn a manageable flood into a costly disaster.
Untrained demolition, cutting walls or floors to hasten drying, and using household sealants on structural cracks can worsen instability and hidden mold growth.
Removing soaked insulation or wiring without assessment can spread contamination.
Relying on inappropriate tools or shortcuts often increases repair scope, expense, and long-term health hazards.
Incorrect pump setup and electrical risks
If pumps are set up incorrectly or electrical hazards are ignored, emergency drainage can quickly become dangerous and ineffective.
Operators must avoid using damaged cords, ungrounded outlets, or submerged electrical equipment. Improper pump placement causes clogging or dry-run damage.
Extension cords and overloaded circuits increase shock and fire risk. Confirm power is off at the breaker before inspecting connections or repositioning pumps.
Delaying drying and mold prevention
Beyond pump setup and electrical hazards, delays in drying create a separate, time-sensitive danger: mold growth and structural deterioration.
Immediate water removal must be followed by thorough drying, dehumidification, and ventilation.
Porous materials, insulation, and wood require inspection and often removal.
Failure to act within 24–48 hours increases remediation costs and health risks; professional assessment is advised for extensive contamination.
Quick Decision Flowchart for Emergency Response
A concise flowchart guides the homeowner through immediate actions after basement flooding, prioritizing safety, utility shutdowns, and water removal steps in a logical sequence. The flowchart shows decision points: assess hazards, cut power/gas, remove standing water, salvage valuables, and call professionals if needed.
| Step | Decision | Action |
|---|---|---|
| 1 | Hazard? | Evacuate/assess |
| 2 | Utilities? | Shut off |
| 3 | Water depth? | Pump/drain |
| 4 | Valuables? | Salvage |
| 5 | Damage extent? | Call pros |
Conclusion
In the aftermath, homeowners should act swiftly yet cautiously: prioritize safety, document damage, and follow the drainage and drying steps to limit loss. Calling professionals for electrical, structural, or mold concerns prevents costly missteps, and prompt insurance notification preserves recovery options. Treat lessons learned as a wake-up call to upgrade prevention measures—sealing, sump pump maintenance, and landscaping changes—so future floods are less likely to catch the household flat-footed.