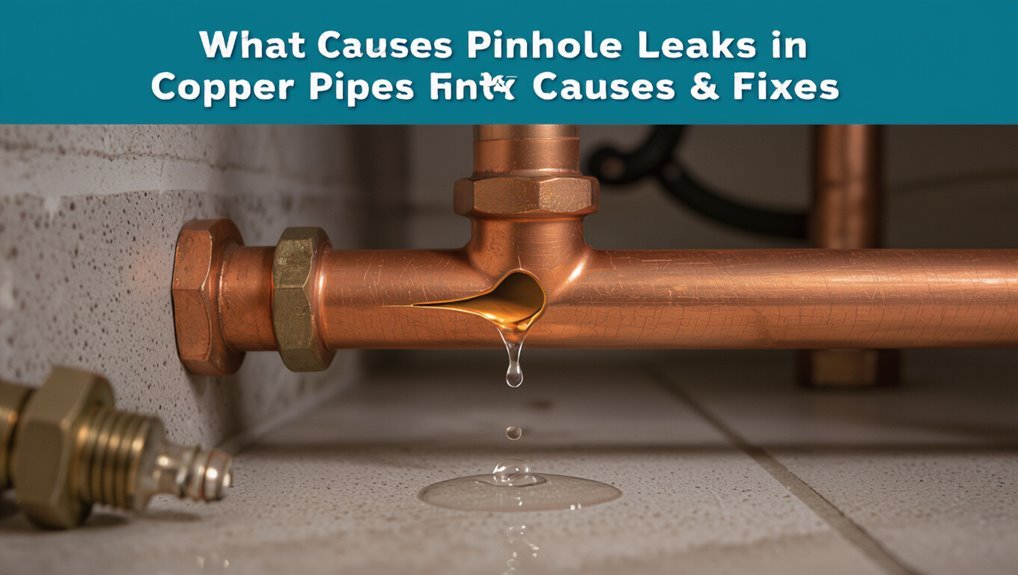
What Causes Pinhole Leaks in Copper Pipes? Causes & Fixes
Pinhole leaks in copper pipes are primarily caused by localized corrosion and mechanical wear that thin the pipe wall, leading to tiny holes. The main contributors to these leaks include aggressive water chemistry (such as low pH and high chloride/sulfate levels), oxygenated water, high-velocity erosion, galvanic corrosion with dissimilar metals, manufacturing defects, and microbiological activity. These leaks typically begin at fittings, areas with trapped moisture, or exposed sections of the piping. To mitigate damage, it is crucial to immediately isolate the affected area and apply temporary patches. Additional guidance is available on how to locate leaks, implement short-term fixes, and plan for permanent repairs.
What Causes Pinhole Leaks in Copper Pipes?
Although often attributed to old age, pinhole leaks in copper pipes typically result from a combination of chemical and mechanical factors: corrosion from aggressive water chemistry (low pH, high dissolved oxygen, or elevated chloride/sulfate levels), erosion from high-velocity flow or cavitation, galvanic corrosion where dissimilar metals are electrically connected, and localized stress or manufacturing defects that create weak points.
Copper surfaces can pit under sustained corrosive conditions, especially where protective films are disrupted. Deposits and microbiological activity exacerbate localized attack.
Thermal cycling and vibration induce fatigue at compromised spots. Identifying contributing factors guides targeted remediation and material selection.
Quick Triage for an Active Pinhole Leak
When a pinhole leak becomes active, the first priority is to locate the exact source to assess flow and potential damage.
Once identified, the water supply should be shut off at the nearest valve or the main to minimize flooding.
Rapid, decisive action limits harm and creates options for temporary or permanent repair.
Locate The Leak Quickly
Act quickly to contain water and identify the source: shut off the main or localized supply, place towels or a bucket to limit damage, and visually inspect accessible copper runs for active spraying, wetness, or white corrosion deposits that mark pinhole locations.
Then proceed methodically to pinpoint the breach and assess repair options.
- Trace wet trails from fittings toward the lowest visible point.
- Look for greenish or white crusts indicating slow weeping.
- Use a flashlight and mirror for concealed runs.
- Dry suspected areas, then recheck for fresh dampness.
- Note sound of hissing or dripping to narrow location.
Shut Off Water Supply
Shut off the water supply immediately to limit flooding and reduce pressure at the pinhole.
The homeowner or responder locates the nearest shutoff: a localized valve, the main house valve, or the building’s service shutoff.
Turn valves clockwise until fully closed; use pliers for stuck handles, applying steady force to avoid damage.
After isolation, open nearby faucets to drain residual water and relieve line pressure.
Notify occupants about water loss and avoid using appliances.
If the main cannot be reached, contact the water utility to halt service.
Record valve positions and prepare for temporary repairs or a professional plumber’s arrival.
Typical Locations Where Pinholes First Appear in Homes
Pinhole leaks most often become noticeable in under-sink cabinets where fittings and trapped moisture accelerate corrosion.
Exposed basement runs are also common initiation points because they face temperature swings and physical contact that wear protective coatings. Homeowners should inspect these areas first when searching for early signs of pinholes.
Under-Sink Areas
Beneath bathroom and kitchen sinks, corrosion often begins in cramped, damp spaces where copper tubing connects to fixtures and traps. These confined zones trap moisture, cleaning residues, and chemical vapors that accelerate pitting and pinhole formation.
Inspection often reveals slow leaks, greenish deposits, or softened solder joints near fittings. Regular maintenance and ventilation reduce risk, as do barrier materials between copper and dissimilar metals.
Common factors to check include:
- Persistent condensation on pipes
- Accumulated cleaning chemicals or acidic residues
- Tight bends causing stress and wear
- Poorly sealed fixture connections
- Contact with dissimilar metals or corrosive materials
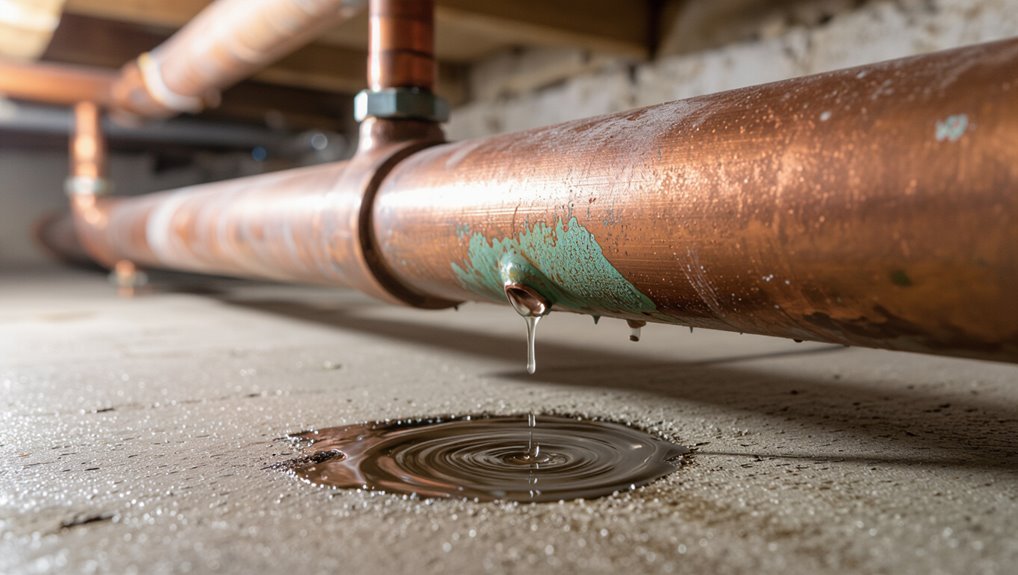
Exposed Basement Runs
In exposed basement runs, copper pipes are vulnerable where they travel along joists, block walls, and open rafters because they are regularly subjected to temperature swings, accidental knocks, and airborne contaminants that promote localized corrosion.
These runs often lack insulation and physical protection, increasing thermal cycling and metal fatigue. Dust, airborne salts, and chemical fumes from stored materials accelerate pitting, especially at hangers and saddle straps where moisture collects.
Mechanical abrasion from moving items or tools removes protective patina. Regular inspection, proper insulation, cushioned supports, and rerouting away from corrosive environments reduce risk. Prompt repair of early pinholes prevents larger failures.
Early Signs Homeowners Often Miss
Often overlooked, tiny green or blue stains near pipe joints and fittings can indicate the earliest stages of a pinhole leak in copper plumbing. Subtle signs precede visible dripping and merit inspection before damage escalates.
- Slightly damp drywall or plaster without obvious source
- Faint, musty odors in cabinets or under sinks
- Periodic unexplained increases in water usage or bills
- Corrosion flakes or powder collecting on pipe surfaces
- Intermittent low water pressure in isolated fixtures
A homeowner noting any combination should arrange a targeted inspection; early detection narrows repair scope and limits hidden water damage.
How to Stop a Leak Temporarily (Short-Term Fixes)
When a pinhole leak appears, the first step is to shut off the water supply to minimize damage.
For a quick repair, epoxy putty can be kneaded and pressed over the hole to seal it temporarily. Alternatively, a compression sleeve or pipe clamp can be fitted around the leak for a short-term stopgap until a permanent repair is made.
Turn Off Water
Shut the main water supply to halt flow immediately and minimize damage while arranging a temporary repair. Then relieve pressure by opening nearby faucets and drain lines to reduce residual flow. Isolate the affected zone if a shutoff valve for that branch exists. Use temporary measures—compression fittings, rubber patches with hose clamps, or pipe repair tape—only until a professional assesses corrosion and long-term solutions. Monitor the area for continued dampness and record leak location for the plumber. Restore water slowly after repairs, watching for pressure changes or new leaks.
- Turn off main promptly
- Open faucets to drain lines
- Isolate branch valve
- Apply temporary clamping
- Monitor and document
Apply Epoxy Putty
Apply a two-part epoxy putty to create a fast, temporary seal over a pinhole leak in copper piping. The area should be clean, dry, and free of corrosion; the putty must be kneaded to uniform color, pressed firmly over the defect, and shaped to cover surrounding metal. Curing time varies; do not pressurize until cured. This is a short-term repair to limit water damage and buy time for a permanent solution. Inspect frequently for continued leakage or bond failure and replace the section or install a proper fitting when convenient.
| Step | Purpose |
|---|---|
| Clean | Remove corrosion and contaminants |
| Mix | Activate adhesive properties |
| Apply | Form seal over hole |
| Cure | Achieve bond strength |
| Inspect | Verify temporary repair |
Use Compression Sleeve
A compression sleeve repair provides a quick, mechanical seal over a pinhole by clamping a rubber-lined metal sleeve around the damaged section of copper pipe. It is a short-term fix useful when immediate professional repair is unavailable.
Installation requires shutting off water, drying the area, sliding the sleeve over the leak, and tightening the clamp evenly to compress the rubber against the pipe.
Benefits include speed and minimal tools; limitations include reduced longevity and unsuitability for corroded or extensively damaged runs.
- Quick to install
- No soldering required
- Works on small pinholes
- Temporary solution only
- Requires proper sizing
When to Call a Plumber vs. DIY Inspection Steps
When should a homeowner call a plumber versus attempting a DIY inspection? A homeowner should attempt a basic inspection for visible pinholes, damp spots, or isolated drips. Call a plumber if leaks are persistent, widespread, near structural elements, or if soldered joints, main shutoff access, or water pressure anomalies are involved.
| DIY Signs | Professional Signs | Priority |
|---|---|---|
| Small localized drip | Multiple leaks or bursts | High |
| Surface corrosion only | Hidden/systemic corrosion | High |
| Accessible section | Complex joints or valves | High |
DIY steps: shut water, dry area, inspect, document, temporary clamp; contact pro if uncertain.
How to Test Water Chemistry for Corrosion Risk
A basic assessment of water chemistry helps determine corrosion risk to copper piping. Technicians recommend checking pH, measuring dissolved minerals such as calcium and magnesium, and testing chloride concentrations.
Results guide whether treatment, filtration, or pipe replacement is the appropriate response.
Check Water pH
How acidic is the water running through copper pipes? Testing pH helps assess corrosion risk: values below about 7 indicate acidity that can accelerate pinhole formation. Routine checks identify trends before damage occurs.
Simple steps: collect sample, use calibrated pH meter or test strips, record results, compare against neutral range, and repeat seasonally.
- Use a hand-held pH meter for accuracy
- Calibrate the meter before each session
- Take samples from multiple fixtures
- Log readings and dates for trend analysis
- Consult a plumber if pH consistently below 7
Adjustments can mitigate corrosion once low pH is confirmed.
Measure Mineral Content
Following pH testing, evaluating mineral content offers further insight into water chemistry that affects copper corrosion and pinhole formation. Hardness, bicarbonate, sulfate and calcium-to-magnesium ratios influence scale formation and protective film stability on copper surfaces.
Water with low alkalinity and low hardness fails to form protective carbonate layers, increasing corrosion susceptibility. Testing uses certified lab analysis or reliable field kits to quantify total dissolved solids and specific ions.
Results guide mitigation: adjust buffering capacity, add corrosion inhibitors, or install water softening where appropriate. Accurate mineral profiles help prioritize treatments that reduce electrochemical attack and extend pipe life.
Test Chloride Levels
Why measure chloride concentrations before prescribing corrosion controls? Chloride ions accelerate pitting and dezincification, so testing quantifies risk and guides mitigation.
Samples should be collected from multiple points — incoming supply, hot and cold taps, and after softeners or filters.
Field kits, lab titration, or ion chromatography provide accuracy levels suited to the system.
Interpreting results considers chloride-to-sulfate ratio, pH, and conductivity.
Remediation may include corrosion inhibitors, source blending, or treatment upgrades.
Clear thresholds help prioritize repairs and prevent pinhole leaks.
- Collect representative samples
- Use appropriate test methods
- Compare against industry thresholds
- Consider water treatment effects
- Document and retest
Simple Home Checks for Stray Electrical Currents
When investigating pinhole leaks in copper pipes, a basic check for stray electrical currents can quickly reveal whether electrochemical corrosion is being driven by unintended grounding or bonding issues.
A homeowner can visually inspect pipe supports, nearby electrical conduit, and appliance grounding to spot contact points. Using a simple multimeter set to AC and DC, measure voltage between the pipe and a known earth ground; consistent readings above a few millivolts suggest stray current.
Check metallic fixtures, water heater connections, and outdoor lighting circuits.
If readings are abnormal, contact a licensed electrician to locate and correct improper bonds or parallel current paths.
How Dissolved Oxygen Affects Copper Corrosion
Dissolved oxygen enters plumbing from supply water, aeration during repairs, and trapped air in system voids.
It acts as a key oxidant in the electrochemical reactions that convert metallic copper to cuprous and cupric compounds, accelerating pitting and pinhole formation.
Controlling oxygen levels through deaeration, corrosion inhibitors, and proper system flushing can markedly reduce corrosion rates.
Dissolved Oxygen Sources
How does oxygen find its way into water systems and influence copper corrosion? Dissolved oxygen enters plumbing through several common pathways, supplying the oxidant that promotes surface attack on copper.
Typical sources include:
- Aeration during system filling and maintenance
- Ambient air ingress via leaks or vents
- Oxygen-rich makeup water from municipal supplies
- Turbulent flows increasing gas dissolution
- Diffusion through permeable materials or seals
Identifying dominant sources helps prioritize fixes: eliminating air entry points, controlling turbulence, and managing supply water chemistry reduce dissolved oxygen exposure and slow corrosion progression that leads to pinhole formation.
Oxygen’s Electrochemical Role
As the primary oxidant in potable-water systems, dissolved oxygen drives the electrochemical reactions that convert metallic copper into soluble and insoluble corrosion products, establishing the cathodic half-reaction that sustains anodic copper dissolution. Dissolved oxygen concentration controls corrosion rate by accepting electrons at cathodic sites, promoting localized anodic copper loss. Flow dynamics, pH, and ionic composition influence oxygen distribution and cathode formation, fostering differential aeration cells. Microenvironments under deposits worsen oxygen gradients, intensifying localized attack. Monitoring oxygen levels and understanding electrochemical gradients clarifies why pinholes develop where oxygen access differs along the pipe.
| Factor | Effect | Result |
|---|---|---|
| O2 level | Increases cathodic rate | Faster corrosion |
| Flow | Alters O2 access | Localized cells |
| Deposits | Create gradients | Pinhole sites |
Mitigation And Control
Controlling oxygen exposure in potable-water systems reduces the driving force for cathodic reactions and thereby limits localized copper dissolution. Effective mitigation focuses on minimizing dissolved oxygen, stabilizing water chemistry, and controlling flow conditions. Operators should combine monitoring and targeted interventions to prevent pinhole initiation.
- Use deaeration, nitrogen purging, or oxygen scavengers where feasible.
- Maintain pH and alkalinity to favor protective oxide films.
- Control stagnation and low-flow zones through system design.
- Monitor dissolved oxygen and corrosion rates routinely.
- Address stray electrical currents and galvanic contacts promptly.
These measures collectively reduce oxygen-driven corrosion and extend copper pipe service life.
Which Water-Chemistry Parameters Drive Pinholes
Among the water-chemistry factors most closely linked to pinhole formation are dissolved oxygen, pH, conductivity (ion content), chloride-to-sulfate mass ratio, and the presence of complexing agents; each influences corrosion electrochemistry and protective film stability on copper.
Elevated dissolved oxygen increases oxidizing potential and accelerates anodic dissolution.
Higher conductivity, from dissolved salts, raises ionic mobility and corrosion current.
A high chloride-to-sulfate ratio promotes localized attack by breaking protective films, while certain complexing organics or ammonia form soluble copper complexes that remove passivating layers.
Temperature and velocity modify these effects by changing reaction kinetics and film transport, affecting pinhole initiation rates.
How Low pH (Acidic Water) Corrodes Copper
While dissolved oxygen, chloride-to-sulfate ratios, and complexing agents modulate film stability on copper, solution acidity directly alters metal thermodynamics and film chemistry, making low pH a primary driver of uniform and localized corrosion.
Acidic water increases hydrogen ion activity, dissolving protective cuprous oxide films and accelerating anodic copper dissolution. Attack progresses from general thinning to focused pits where film repair is impaired. Corrosion rates rise as solubility of copper salts increases and reservoir buffering is overwhelmed.
- Proton-driven breakdown of Cu2O films
- Enhanced copper ion solubility
- Faster anodic reaction kinetics
- Impaired passive film reformation
- Localized pit initiation and growth
Why Soft Water Raises Pinhole Risk
By removing calcium and magnesium ions that normally form protective scale, softened water leaves copper surfaces exposed to more aggressive aqueous chemistry. Soft water is less likely to deposit a protective carbonate layer, increasing direct metal-water contact and promoting localized corrosion that leads to pinholes. Ion-exchange softeners also raise sodium content and can change water chemistry, accelerating corrosive attack on soldered joints and thin areas. Routine monitoring, controlled reintroduction of calcium or corrosion inhibitors, and careful plumbing material selection reduce risk. Attention to water treatment settings and periodic inspection helps detect early corrosion before leaks develop.
| Fear | Loss |
|---|---|
| Drip | Damage |
| Cost | Disruption |
How High Alkalinity and Dissolved Solids Influence Corrosion
In systems with elevated alkalinity and high concentrations of dissolved solids, the chemistry of the bulk water and the character of surface films shift in ways that can either inhibit or accelerate copper corrosion.
Higher alkalinity raises pH, promoting more stable carbonate films that can protect copper, but excessive dissolved solids change conductivity and scaling dynamics. The balance determines whether protective layers form, detach, or become porous.
Key considerations include:
- Increased ionic strength raising solution conductivity
- Formation of carbonate or mixed mineral scales
- Film porosity influenced by suspended solids
- Altered cathodic/anodic reaction rates
- Deposition-driven differential aeration cells
Chlorides, Sulfates, and Other Aggressive Ions to Watch For
Chloride ions are highlighted for their ability to breach protective films on copper, accelerating localized pitting and pinhole formation.
Sulfates can promote stress corrosion cracking under certain flow and mechanical conditions, particularly when combined with tensile stress.
Other aggressive anions and their concentrations influence the rate and mechanism of copper attack and warrant targeted monitoring.
Chloride-Induced Corrosion
Recognize that certain dissolved ions—particularly chlorides and sulfates—accelerate localized corrosion in copper piping by breaking down protective films and promoting pitting. Chloride-induced corrosion focuses on chloride ions attacking passive copper oxides, creating pits that grow into pinholes.
Risk increases with higher chloride concentration, elevated temperature, low pH, and stagnant flow. Prevention centers on controlling water chemistry and minimizing chloride exposure.
- Sources: seawater intrusion, softened water, industrial effluent
- Mechanism: chloride adsorption, oxide breakdown, pit initiation
- Conditions: warm, acidic, low-oxygen environments
- Monitoring: chloride concentration and conductivity
- Mitigation: filtration, corrosion inhibitors, material selection
Sulfate-Related Stress Corrosion
Frequently, sulfates and other aggressive anions act alongside chlorides to induce stress corrosion in copper systems, promoting crack initiation and propagation under tensile stress.
Sulfate ions can alter electrochemical conditions at microstructural sites, destabilizing passive films and enabling localized attack where stress concentrates.
In combination with tensile loading, fluctuating chemistry and oxygen levels accelerate intergranular and transgranular cracking.
Sources include sulfate-rich water, industrial discharge, and chemical additives.
Mitigation requires water chemistry control, reducing dissolved sulfate and chloride, cathodic protection where applicable, stress relief of installations, proper material selection, and routine monitoring to detect early corrosion indicators.
How Water Velocity and Turbulence Wear Copper Interiors
High water velocity and turbulent flow accelerate mechanical and chemical wear on copper pipe interiors, as fast-moving water increases frictional forces and promotes more aggressive interactions between the metal surface and dissolved or suspended species.
Flow dynamics strip protective films, expose fresh metal, and increase particulate abrasion.
Repeated cycles of high shear worsen thinning and create localized weak points.
Control of hydraulic conditions reduces risk by limiting exposure to damaging regimes.
- High shear removes oxide layers
- Turbulence increases contact with particulates
- Rapid flow amplifies adhesive detachment
- Pulsing flows cause fatigue-like damage
- Localized eddies focus wear
Erosion-Corrosion: When Flow and Chemistry Combine
When aggressive flow regimes intersect with corrosive chemistry, erosion-corrosion emerges as a synergistic process in which mechanical wear and electrochemical attack reinforce one another.
Copper surfaces subjected to high-velocity, turbulent streams lose protective oxide films faster, exposing fresh metal to corrosive agents like dissolved oxygen, chlorides, and acidic water.
Abrasive particles and cavitation accelerate film disruption, increasing localized anodic dissolution and thinning walls.
Resulting pits grow rapidly into pinholes where flow concentrates.
Mitigation focuses on controlling flow profiles, removing particulates, stabilizing water chemistry, and applying corrosion inhibitors or protective linings to preserve film integrity and reduce metal loss.
How Galvanic Corrosion Creates Pinholes at Fittings
Galvanic corrosion at copper fittings occurs when dissimilar metals contact each other in the presence of an electrolyte, setting up an electrochemical cell that accelerates copper dissolution at anodic sites.
The concentration of current focuses at joints, soldered areas, and crevices, producing localized thinning that can evolve into pinholes.
Moisture, flux residue, and stagnant water increase conductivity and accelerate attack. Inspection often reveals pitting near fittings before through‑wall leaks form. Mitigation targets breaking electrical continuity, controlling electrolytes, and isolating vulnerable joints.
- Current concentration at contact points
- Electrolyte presence (moisture, salts)
- Crevice and flux residues
- Stagnant water pockets
- Localized pitting progression
Metal Pairings That Cause Galvanic Corrosion
In contact with copper, certain metals create electrochemical couples that drive accelerated corrosion at the more anodic member of the pair. Common problematic pairings include copper with galvanized steel, aluminum, and iron; these metals are more anodic and corrode preferentially when electrically connected and exposed to an electrolyte.
Brass with higher zinc content can also set up local galvanic cells against copper. Stainless steel is generally compatible, but passive film damage changes behavior.
Mechanical bridging, mixed-metal fittings, and improper dielectric isolation increase risk. Selecting compatible materials, using proper dielectric fittings, and avoiding direct metal-to-metal contact mitigate galvanic pinhole formation.
Why Do Stray Electrical Currents Accelerate Pinhole Formation?
Beyond incompatible metal pairings, external electrical currents introduce a separate, often faster, pathway for copper deterioration.
Stray currents, from faulty wiring or nearby electrical systems, force ionic movement and enhance anodic dissolution at weak spots.
This accelerates thinning and creates localized pits that evolve into pinholes.
- Stray AC or DC currents increase corrosion rates by driving metal loss.
- Current concentration occurs at defects, joints, or stressed areas.
- Protective oxide layers break down under electrochemical attack.
- Isolation from grounding faults reduces risk markedly.
- Detection via clamp meters and corrosion surveys pinpoints problem sources.
Manufacturing Defects and Thin-Walled Pipe Risks
When produced with inconsistent wall thickness or microstructural flaws, copper tubing becomes inherently vulnerable to accelerated wear and pinhole formation.
Manufacturing defects such as voids, inclusions, or uneven cold working create weak zones where corrosion initiates more rapidly.
Thin-walled pipe, designed marginally to save material, lacks the reserve thickness to tolerate localized attack or mechanical abrasion, so small defects breakthrough sooner.
Quality control lapses during drawing, annealing, or extrusion increase variability in grain structure and residual stress, raising failure probability.
Specifying proper wall gauge, reputable suppliers, and inspecting for visible imperfections reduce the risk of premature pinhole leaks.
Why Poor Soldering or Flux Leads to Localized Corrosion
Frequently, inadequate soldering or improper flux application creates localized electrochemical cells and trapped corrosive residues at joints, which accelerate pinhole formation. Poor technique leaves gaps, flux remnants, or excessive solder that change local chemistry and promote anodic sites. Moisture and contaminants trapped under joints sustain corrosion. Consequences include weakened walls and focused perforation.
- Residual acid flux eating copper base metal
- Incomplete wetting creating crevices for corrosion
- Solder beads shielding cathodic areas, concentrating anodic attack
- Dissimilar metals introduced at joints forming galvanic couples
- Thermal stress cracking accelerating corrosive penetration
Proper soldering and clean flux use prevent these failures.
How Improper Storage and Handling Introduce Damage
During storage and handling, mechanical damage, contamination, and environmental exposure create conditions that promote pinhole formation in copper pipe.
Scratches, dents, and crushed areas remove protective oxide films and create stress concentrators where corrosion initiates.
Contact with dissimilar metals, oily residues, or acidic cleaning agents leaves contaminants that accelerate localized attack.
Prolonged outdoor storage exposes tubing to moisture, salt, and temperature cycling, encouraging pitting.
Improper stacking causes bending and work-hardening, increasing susceptibility.
Handling without protective caps allows debris into interiors, creating crevice sites.
Proper packaging, indoor storage, gentle handling, and cleanliness reduce these avoidable contributors to pinhole leaks.
The Impact of Water Heaters on Downstream Copper
Often a residential water heater markedly alters the chemistry and temperature of water delivered to downstream copper piping, affecting corrosion rates and deposit formation.
Water heaters concentrate dissolved minerals, shift pH, and change oxygen content; these shifts accelerate localized corrosion and scale that encourage pinhole initiation.
Sediment and anode rod degradation create particulates that abrade protective films.
Thermal cycling stresses joints and coatings, promoting fatigue.
Maintenance, temperature settings, and tank condition influence downstream effects.
- Elevated temperature increases corrosion kinetics
- Lowered dissolved oxygen below tank then reintroduced downstream
- Mineral precipitation forms insulating scale
- Anode consumption releases metal ions
- Sediment causes mechanical erosion
Microbiologically Influenced Corrosion (MIC) and Pinholes
Microbiologically influenced corrosion (MIC) can initiate pinhole leaks when bacterial biofilms establish on copper surfaces and alter local chemistry.
Sulfate-reducing bacteria are often implicated, producing sulfides and creating highly corrosive microenvironments at the metal–biofilm interface.
These localized electrochemical and chemical mechanisms can accelerate metal loss and produce the focused attack that leads to pinholes.
Bacterial Biofilm Formation
Forming a slimy, adherent film on pipe interiors, bacterial biofilms create localized chemical conditions that can accelerate corrosion of copper and lead to pinhole leaks. Biofilms concentrate metabolites, trap ions, and produce microscale acidity and differential oxygen cells that destabilize protective copper oxides. They adhere to crevices, solder joints, and low-flow zones, remaining resistant to shear and routine flushing. Detection is difficult without microbiological testing. Control focuses on cleaning, disinfecting, maintaining disinfectant residuals, and correcting hydraulic conditions to prevent establishment.
- Surface attachment encourages localized attack
- Metabolic byproducts alter pH locally
- Physical shelter from flow and disinfectants
- Difficult visual detection
- Management requires monitoring and cleaning
Sulfate-Reducing Bacteria
Recognizing the role of sulfate-reducing bacteria (SRB) is essential to understanding a specific, aggressive form of MIC that commonly produces pinhole leaks in copper piping. SRB thrive in low-oxygen, organic-rich environments where they reduce sulfates to sulfide, creating localized sulfide-rich microenvironments at metal surfaces. Their metabolic products promote localized attack and undermine protective films, concentrating damage into small perforations. Detection relies on microbiological sampling and chemical indicators rather than visual inspection. Mitigation includes eliminating stagnation, controlling nutrients, improving disinfection, and targeted biocide treatments. Long-term prevention requires system-wide hygiene and monitoring to suppress SRB colonization and activity.
Corrosion Mechanisms Explained
Following the discussion of sulfate-reducing bacteria and their role in localized sulfide attack, the mechanisms by which microbial activity produces pinhole leaks can be outlined more broadly.
Microbiologically influenced corrosion (MIC) accelerates localized metal loss through biofilm formation, metabolic byproducts, and differential aeration. Microbes alter local chemistry, creating acidic or sulfide-rich microenvironments that break down copper passivity. Pitting initiates where deposits concentrate stress and electrochemical gradients, progressing to perforation under continuous microbial activity.
- Biofilm-induced differential aeration cells
- Production of sulfides and acids
- Enzymatic metal depassivation
- Particle and deposit retention
- Localized pH shifts
External Corrosion: Soil Chemistry, Moisture, and Insulation
When buried copper piping encounters certain soil chemistries and persistent moisture, localized loss of metal can initiate from the outside surface. Soil electrolytes, sulfates, chlorides, and acidic conditions accelerate external corrosion by promoting anodic reactions at contact points.
Constant moisture maintains conductive paths, enabling differential aeration and galvanic coupling with dissimilar metals. Poor backfill, organic matter, and stray electrical currents exacerbate attack.
Insulation or coatings that trap moisture or degrade can create occluded cells, concentrating corrosion beneath protective layers. Regular inspection, proper bedding materials, dielectric isolation, and suitable coatings mitigate external deterioration and reduce the risk of pinhole formation.
How Buried Copper Reacts to Different Soils
External corrosion mechanisms are shaped directly by the chemical and physical properties of the surrounding soil. Buried copper responds differently to acidic, alkaline, saline, compacted, or organic-rich soils, affecting protective patina stability and corrosion rates. Electrochemical interactions and moisture availability control localized attack, while soluble ions and microbial activity accelerate pitting.
Key factors include:
- Soil pH influencing oxide film solubility and dissolution rates
- Chloride and sulfate concentrations promoting aggressive corrosion
- Redox potential and groundwater flow altering electrochemical gradients
- Organic content and microbes facilitating microbiologically influenced corrosion
- Texture and drainage affecting moisture retention and aeration
Common Installation Mistakes That Promote External Corrosion
In many installations, avoidable workmanship errors create conditions that accelerate corrosion of buried copper.
Improper backfill with acidic or conductive materials, failure to remove sharp stones, and packing that traps moisture all increase localized attack.
Damaged or missing protective coatings expose metal to soil chemistry and stray currents.
Direct contact with dissimilar metals without dielectric fittings sets up galvanic couples.
Poor routing that places pipes through vibratory zones causes abrasion and coating breach.
Inadequate bedding and lack of root barriers allow biological activity to concentrate corrosive agents.
Adhering to proper materials, handling, and separation practices prevents many external corrosion problems.
How to Prioritize Tests and Diagnosis After You Find a Leak
After identifying a pinhole leak, the investigator should quickly establish a diagnostic priority based on safety, containment, and likely cause. The initial focus is on eliminating hazards, stopping water migration, and preserving evidence for root-cause analysis.
Testing follows a logical sequence: visual inspection, pressure testing, water chemistry, and corrosion mapping where applicable. Prioritize non-destructive methods first, then targeted invasive sampling if needed. Document findings and photos before any repair.
- Confirm safety and isolate affected zone
- Photograph and note leak characteristics
- Perform localized pressure/leak detection testing
- Sample water for pH and chloride analysis
- Map adjacent pipe condition and fittings
Short-Term Fixes for Pinhole Leaks (Patches, Clamps, Epoxy)
Temporary measures can stop a pinhole leak long enough to plan a permanent repair.
Common options include pipe repair clamps that mechanically seal the hole, epoxy putty patches that harden over the damaged area, and rubber sleeve repairs that wrap and compress around the leak.
Each method has limits in durability and suitability depending on pipe condition and water pressure.
Pipe Repair Clamps
A pipe repair clamp provides a quick, mechanical way to stop a pinhole leak without replacing the section of copper pipe. It clamps around the pipe, compressing a rubber gasket over the leak to create a temporary seal.
Installation requires basic tools and can often be completed without shutting off the main water supply for small household lines. Clamps are meant as interim solutions until permanent repair or replacement is performed.
Considerations include proper sizing, corrosion compatibility, and pressure rating. Benefits and limitations are:
- Rapid installation
- Minimal tools required
- Reversible and removable
- Not a long-term fix
- Requires correct sizing
Epoxy Putty Patches
For small pinhole leaks, epoxy putty offers a fast, hands-on patch that hardens into a waterproof seal when mixed and applied over the damaged area. It bonds to clean, dry copper and cures in minutes to hours depending on formulation.
Application requires removing corrosion, roughening the metal, and pressing the putty firmly over the hole, extending past the defect for overlap. Epoxy resists water pressure and can restore temporary service until permanent repair.
Limitations include reduced effectiveness on active leaks, under high pressure, or on wet surfaces; it is a stopgap, not a guaranteed long-term solution.
Rubber Sleeve Repairs
When epoxy putty is impractical—such as when leaks remain active or surfaces cannot be fully cleaned—rubber sleeve repairs provide a straightforward, field-ready alternative.
A rubber sleeve with hose clamps or a metal repair clamp isolates the pinhole, resisting pressure and vibration until a permanent replacement is scheduled.
Installation requires minimal tools and can often be completed without shutting off main service for small leaks.
Performance depends on proper sleeve sizing and clamp torque; sleeves are inherently temporary and degrade with age, heat, or chemical exposure.
Consider them emergency stopgaps, not long-term solutions.
- Quick to install
- Works on damp or corroded surfaces
- Minimal tools required
- Handles moderate pressure
- Designed as temporary repair
Permanent Repair Options: Soldering, Couplings, Re-Routing
Repairing pinhole leaks permanently requires selecting a technique that matches the pipe condition, accessibility, and water system demands.
Soldering suits clean, nearby copper with no active pressure; the area is drained, flux applied, and solder flowed to seal small holes.
Compression or repair couplings provide reliable seals when soldering is impractical or for slightly larger defects; they clamp or compress rubber linings over the breach.
Re-routing bypasses severely corroded sections or inaccessible runs, installing new piping along a different path.
Each option demands correct sizing, proper joint techniques, and pressure testing to confirm a durable, code-compliant repair.
When Replacing Sections Is the Best Long-Term Fix
If soldering, couplings, or rerouting prove inadequate because of widespread corrosion, multiple pinholes, or inaccessible fittings, replacing the affected section of copper becomes the most reliable long-term solution.
The approach removes compromised metal, restores flow integrity, and reduces repeat failures when performed to code. Properly sized replacement, clean cuts, and correct joining methods guarantee durability.
Considerations include access, isolation of water, and minimizing disturbance to surrounding materials.
- Assess extent of damage before cutting
- Verify shutoff and drain procedures
- Use appropriate joining techniques and flux
- Inspect for hidden corrosion beyond visible areas
- Pressure-test after replacement
Material Choices for Replacement: Copper vs. PEX vs. CPVC
The discussion turns to choosing replacement materials—copper, PEX, or CPVC—with attention to longevity and durability differences across each option.
Installation complexity and upfront cost vary markedly and influence both immediate budget and long-term value. Comparing expected lifespan, resistance to corrosion, labor requirements, and material price helps determine the most practical choice for a given situation.
Longevity And Durability
Often overlooked, material choice fundamentally determines a replacement piping system’s longevity and durability; copper, PEX, and CPVC each offer distinct lifespan expectations, resistance profiles, and failure modes that influence long-term performance and maintenance needs.
Copper resists sunlight and high temperatures, with decades-long service if corrosion is controlled. PEX tolerates freeze‑thaw cycling and resists scale but can degrade with UV and certain chemicals. CPVC resists many corrosive water chemistries but is brittle with repeated thermal stress. Decisions hinge on environmental exposure and service demands.
- Copper: proven longevity, corrosion risk in aggressive water
- PEX: flexible, fatigue resistant, UV-sensitive
- CPVC: chemical resistance, thermal brittleness
- Life expectancy: copper > PEX ≈ CPVC in many cases
- Failure modes: corrosion, UV degradation, thermal cracking
Installation And Cost
When comparing installation and upfront costs for replacement piping, homeowners and contractors weigh copper, PEX, and CPVC by material price, labor complexity, and required fittings. Copper is pricier and needs skilled soldering or brazing; it resists UV but can be vulnerable to pinholes if water chemistry is poor. PEX is cheapest to install, flexible, requires fewer fittings, and reduces labor time. CPVC sits between: lower material cost than copper, more rigid than PEX, needs solvent welding and more fittings. Long-term cost also considers durability, repair frequency, and compatibility with existing systems.
| Material | Typical Cost | Installation Notes |
|---|---|---|
| Copper | High | Skilled labor, soldering |
| PEX | Low | Fast, flexible, fewer joints |
| CPVC | Medium | Solvent weld, more fittings |
How to Prevent Galvanic Corrosion During Repairs
During repairs involving copper pipes, attention to galvanic corrosion prevents new leaks and extends joint life.
Technicians should isolate dissimilar metals, control electrical continuity, and select compatible materials to limit electrochemical reactions.
Surface preparation and protective coatings reduce contact points where corrosion initiates.
Regular inspection after repair catches early activity before pinholes form.
Practical measures include:
- Make certain mechanical separation between copper and steel or brass components
- Apply non-conductive sleeves or gaskets at metal interfaces
- Remove oxidation and apply corrosion inhibitors to cleaned surfaces
- Avoid stray electrical currents by checking grounding
- Use compatible fasteners and joint compounds
Installing Dielectric Unions and Correct Fittings
As part of preventing galvanic corrosion at connections between copper piping and dissimilar metals, installers should use dielectric unions and properly selected fittings to maintain electrical isolation and guarantee reliable seals. Dielectric unions isolate metals with nonconductive barriers and gaskets, preventing electrochemical cells. Proper thread types, compatible alloys, and correct torque ensure leak-free joints. Use dielectric nipples where full unions are impractical. Inspect sealing surfaces and replace degraded gaskets. Follow manufacturer instructions and local code for approved fittings. Regularly check joints after thermal cycling or vibration to catch early degradation.
| Component | Purpose |
|---|---|
| Dielectric union | Isolate metals |
| Dielectric nipple | Space isolation |
| Gasket | Seal and isolate |
| Thread type | Compatibility |
| Torque | Prevent leaks |
Water Treatment Options to Reduce Corrosivity (Home Scale)
Homeowners should begin by testing water pH to identify acidic conditions that accelerate copper corrosion.
Where pH is low, installing a neutralizing filter (calcium carbonate or similar media) can raise alkalinity and protect pipe surfaces.
In some cases a flow-compatible corrosion inhibitor added at the point of entry provides an additional protective film to reduce pinhole formation.
Test Water pH
Why test water pH before selecting a corrosion-control method? Testing pH identifies acidity that accelerates copper corrosion and guides appropriate mitigation without guessing.
Simple kits or lab analyses reveal if water is corrosive, near-neutral, or alkaline. Results determine treatment strategies and prioritize actions, avoiding ineffective fixes.
- Confirms acidity level driving pinhole formation
- Differentiates between temporary and persistent corrosivity
- Informs dosage for chemical adjustments
- Prevents overcorrection that can cause scaling or other issues
- Provides baseline to evaluate treatment performance
Regular pH monitoring supports targeted, cost-effective corrosion control and long-term pipe protection.
Install Neutralizing Filter
When installed on the main supply line, a neutralizing filter raises water pH by passing acidic water through a bed of calcite, magnesium oxide, or similar media that dissolves to add alkalinity and reduce corrosivity.
Properly sized units treat whole-house flow, stabilizing pH and lowering the potential for copper dissolution that leads to pinhole leaks.
Selection depends on incoming acidity, flow rate, and media life; maintenance requires periodic media replacement and monitoring of effluent pH.
Installation location, pre-filtration for turbidity, and bypass provisions matter.
Neutralizing filters are a passive, chemical-free option for homeowners seeking to mitigate acid-driven copper corrosion.
Use Corrosion Inhibitor
As an additional approach to controlling copper corrosion, corrosion inhibitors are dosed into the water to form protective films or to chemically neutralize aggressive species, thereby reducing metal dissolution and the risk of pinhole leaks. They are practical for home systems when water chemistry promotes pitting; selection and dosing depend on pH, alkalinity, and contaminants.
Proper application slows corrosion and extends pipe life but requires monitoring to avoid overfeeding or unintended deposits.
- Common inhibitors: orthophosphates, silicates, and molybdates
- Small-capacity dosing pumps suit domestic systems
- Periodic water testing confirms effectiveness
- Professional consultation recommended for selection
- Regulatory and health considerations apply
Reducing Water Velocity to Limit Erosion-Corrosion
Reducing water velocity in domestic and industrial copper piping is a primary strategy to limit erosion-corrosion by minimizing the mechanical removal of protective films and reducing turbulent shear stresses on pipe walls.
Lower velocities reduce particle impingement and cavitation, preserving oxide layers that slow corrosion.
Practical measures include resizing pipe diameters, installing flow restrictors or pressure-reducing valves, and redesigning layouts to avoid unnecessary bends and sudden expansions that promote turbulence.
Routine flow monitoring identifies high-velocity zones.
Combined with sediment management to remove abrasive particulates, controlled velocity extends service life and decreases localized metal loss that can evolve into pinhole leaks.
Addressing Stray Current: Bonding and Grounding Basics
In systems where electrical currents stray from intended routes, bonding and grounding provide essential protections for copper piping by preventing anodic or cathodic distortions that accelerate corrosion.
The discussion outlines how proper electrical continuity and earth reference reduce stray current flow, identify likely sources, and guide corrective measures without addressing joint technique.
- Verify continuous metallic path between pipe segments.
- Connect piping to building grounding electrode system per code.
- Isolate non-metallic sections with approved dielectric fittings sparingly.
- Locate and eliminate unintended electrical connections from equipment.
- Use clamp-on testers to detect stray current paths early.
Routine inspection and corrective bonding minimize pinhole risk.
Best Practices for Soldering, Flux, and Joints
Begin with clean, properly fitted joints and the correct flux to guarantee durable, leak-free soldered connections on copper piping.
Surfaces should be abraded to bright copper, degreased, and dry.
Use a compatible flux for the solder alloy and pipe type; apply sparingly to avoid contamination.
Heat evenly with the proper torch, bringing the joint to soldering temperature without overheating.
Feed solder at the joint, allowing capillary action to draw it through; avoid excessive solder that can trap debris.
Inspect joints for complete fillets and remove flux residues to prevent corrosion.
Skilled technique and appropriate materials minimize solder-related pinholes.
Monitoring and Maintenance Plan to Catch Pinholes Early
Regularly scheduled inspections and targeted monitoring give the best chance of detecting pinhole leaks early, before they cause significant water damage or corrode surrounding materials.
A concise maintenance plan defines inspection intervals, high-risk zones, and response steps.
Recordkeeping tracks trends and prior repairs to inform proactive work.
Staff or contractors should use consistent checklists and simple tools like moisture meters.
Recommended actions focus on prevention, early detection, and timely repair to minimize escalation.
- Monthly visual checks in basements, crawlspaces, and under sinks
- Annual pressure and water chemistry tests
- Immediate follow-up on any dampness or staining
- Maintain repair and inspection logs
- Replace suspect sections proactively
Cost Ranges: Temporary Fixes, Repairs, and Full Replacement
A brief overview of costs helps frame decisions between temporary patches, targeted repairs, and full pipe replacement.
Temporary patch costs typically range from minimal DIY materials to a few dozen dollars for professional emergency fixes.
Replacement expense ranges vary widely based on scope and access, from several hundred dollars for short sections to thousands for whole-house repiping.
Temporary Patch Costs
Several common options exist for addressing pinhole leaks temporarily, and each carries a distinct cost profile depending on materials, labor, and the leak’s accessibility.
Temporary patch costs typically span DIY supplies to paid emergency repairs. Choices depend on urgency, location, and longevity required.
Common cost factors include parts, plumber call-out fees, and time to reach the leak.
- Epoxy putty: low material cost, minimal skill required.
- Rubber patch and hose clamp: inexpensive, quick.
- Pipe wrap tape: moderate cost, short-term solution.
- Compression sleeve: higher material and installation cost.
- Professional emergency stop: premium labor charge.
Replacement Expense Range
After weighing temporary patch options and their associated fees, homeowners will next consider the broader expense spectrum—from short-term fixes to full pipe replacement.
Temporary measures like epoxy or clamp repairs typically run $50–$300, offering low cost but limited longevity.
Targeted section repairs, soldered or with compression fittings, commonly cost $150–$600 depending on access and labor.
More extensive repairs replacing multiple runs or sections escalate to $600–$2,000.
Whole-house repiping with copper usually ranges $3,000–$10,000 or more, influenced by home size, wall removal, and regional labor.
Unexpected complications and permit needs can increase final invoices.
How to Prioritize Repairs in Older Homes With Multiple Leaks
Assess immediate risks before scheduling any repairs: prioritize leaks that threaten structural elements, electrical systems, or indoor air quality, then address those causing significant water loss or recurring damage. Owners should document locations, rates, and visible consequences; triage focuses on safety, cost-effectiveness, and preventing progressive deterioration. Temporary measures may stabilize conditions while planning full repairs. Consider sequencing by accessibility to minimize disruption and bundling similar repairs for contractor efficiency.
- Prioritize leaks near wiring, beams, or insulation
- Tackle active, high-flow leaks first
- Group section replacements to save labor
- Inspect hidden cavities for mold risk
- Allocate budget for emergency fixes
Common Myths About Pinhole Leaks Debunked
Frequently, homeowners encounter persistent advice about pinhole leaks that is misleading or outright incorrect; separating fact from fiction is essential for proper diagnosis and repair. Common myths—such as all leaks signaling full pipe replacement, soft water causing pinholes alone, or DIY patches always being sufficient—are examined and corrected. Real causes like corrosion, water chemistry, and mechanical damage explain failures better than single-cause claims. Professionals recommend assessment based on condition, not myth.
| Myth | Claim | Reality |
|---|---|---|
| Soft water | Always causes pinholes | Can contribute but not sole cause |
| Age | Only old pipes fail | New pipes can corrode |
| Patch fixes | Permanent solution | Often temporary |
Homeowner Checklist to Prevent Future Pinhole Leaks
Having separated myth from fact, homeowners can follow a concise checklist to reduce the risk of future pinhole leaks in copper piping. Regular inspection and proactive maintenance minimize unseen deterioration. Water chemistry control and timely repairs extend pipe life. Proper installation and avoiding physical damage prevent stress points. Documenting plumbing changes helps track risk factors.
- Test and adjust water pH and hardness annually.
- Inspect exposed copper for pinholes, green-blue stains, or leaks quarterly.
- Flush and descalefilter softeners to prevent corrosive build-up.
- Replace damaged sections promptly with compatible materials.
- Hire licensed plumbers for installations and major repairs.
Conclusion
Persistent pinhole problems prompt pragmatic prevention: proactive inspection, prompt patching, and planned pipe replacement preserve property peace. Recognizing recurring corrosion, replacing reactive fittings, and reducing water chemistry stress prevents progressive punctures. Homeowners should schedule seasonal scrutiny, secure skilled servicing, and stop small seepages swiftly to save sizable sums. Thoughtful treatment trades temporary tinkering for lasting solutions, protecting plumbing performance and promoting prudent, peace-of-mind preservation.