How to Flare an Exhaust Pipe: Easy DIY Step-by-Step Guide
To flare an exhaust pipe, start by measuring the outer diameter (OD) and wall thickness of the pipe. Here’s a quick guide to help you through the process:
Key Steps to Flare an Exhaust Pipe:
1. Measure and Cut: Measure the OD and wall thickness, then cut the pipe squarely.
2. Deburr Edges: Smooth out any sharp edges to prevent injury or damage.
3. Secure in Flaring Tool: Place the tube in a flaring tool that matches the pipe material.
4. Form the Flare:
- For thin stainless steel, apply light heat and use incremental forming.
- For thicker mild steel, create a single or double flare using progressive presses with the appropriate dies.
5. Inspect the Flare: Check for concentricity, cracks, and ensure proper seating.
6. Protect the Metal: Clean and apply a protective coating to exposed metal areas.
7. Test-Fit the Flange: Ensure the flare fits properly with the flange before final installation.
Follow these steps for a successful flare, and consider using the right tooling and safety measures throughout the process.
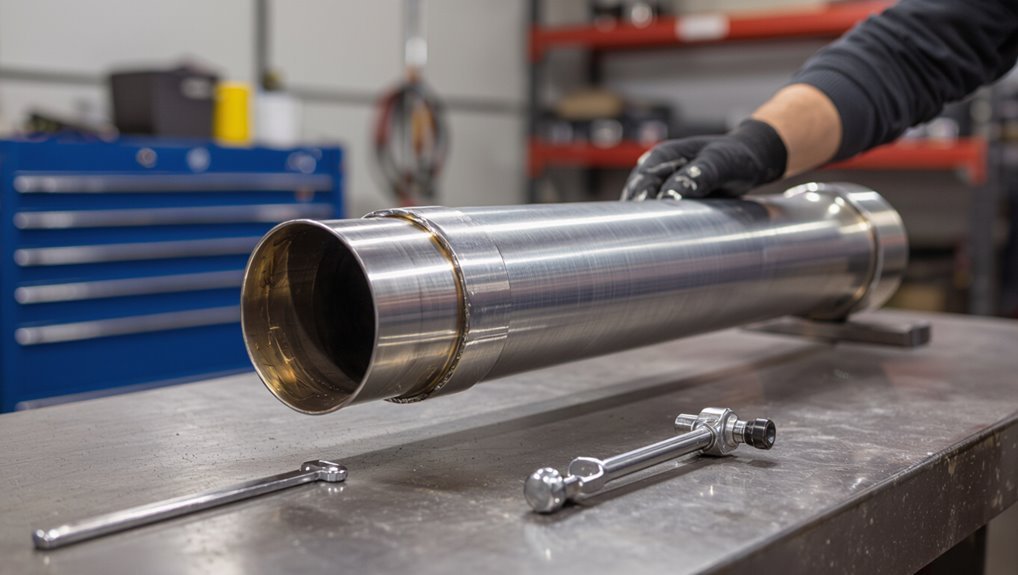
Quick Step‑By‑Step: Flaring an Exhaust Pipe
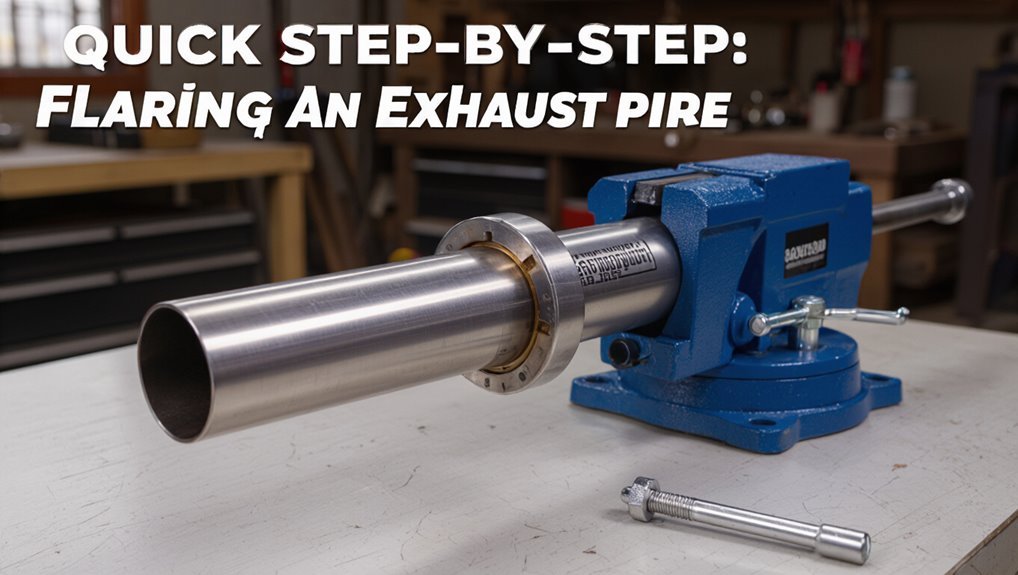
Before beginning, make certain the vehicle is cooled, supported securely, and the work area is well ventilated; then gather a tubing flaring tool, appropriate-size dies, a pipe cutter, deburring tool, and safety gear.
The mechanic measures and marks the pipe length, cuts squarely, and deburrs the edge.
The pipe is clamped in the flaring tool so the mark aligns with the die face.
The appropriate die is installed, and the cone is drawn into the pipe with steady pressure to form an even 45° flare.
After releasing the clamp, the flare is inspected for cracks and uniformity, then test-fitted to the flange.
When to Flare Vs Replace the Flange
The decision to flare or replace a flange balances repair cost against restored functionality.
Minor surface corrosion or small deformations often justify flaring as a low‑cost fix, while extensive pitting, cracks, or warped mating surfaces typically require replacement to guarantee a proper seal.
Evaluating the extent of damage and the long‑term reliability needed will guide the choice.
Cost Versus Functionality
When weighing whether to flare an exhaust pipe or replace a damaged flange, cost and long-term function must be balanced against each other; flaring offers a lower upfront expense and quick sealing for minor damage, while flange replacement provides greater durability and alignment certainty for severe corrosion or distortion. Decision factors include expected service life, labor availability, and parts cost. Short-term fixes suit budget constraints and temporary use; full replacement suits longevity and safety priorities. The table below summarizes typical trade-offs.
| Option | Cost | Typical Benefit |
|---|---|---|
| Flaring | Low | Quick seal |
| Replace flange | High | Lasting alignment |
| Hybrid | Medium | Balanced outcome |
Corrosion And Damage Levels
If corrosion is limited to surface rust and the flange remains mostly flat, flaring can restore a gas-tight seal; however, once pitting, deep rust-through, warped faces, or cracked bolt holes are present, the structural integrity required for reliable sealing is compromised and flange replacement is the safer choice.
Inspect edges for thinning, measure flatness with a straightedge, and probe suspect areas with a pick. Minor damage responds to cleaning, light sanding, and careful reshaping before flaring.
Significant material loss, fracture lines, or uneven mating surfaces demand replacement. Prioritize safety and long-term leak prevention over temporary repairs.
Overview of Common Exhaust Flare Types
The article compares the two basic flare methods—single and double—to highlight their functional differences and typical applications.
It also notes that flare angles vary and affect sealing surface area and strength.
Readers are guided to take into account both type and angle when selecting a flare for exhaust work.
Single Flare vs Double Flare
How do single and double flares differ in purpose and construction? Single flares form a simple outward flare by expanding the tube end, creating a thin lip suited to low-pressure applications and softer metals.
Double flares fold the tube first, then flare the folded end, producing a thicker, stronger sealing surface for higher-pressure or vibration-prone systems. Single flares are quicker and require less tooling; double flares resist cracking and provide improved longevity where mechanical stress or pressure is significant.
Choice depends on material, operating pressure, and desired durability; technicians select double flares for reliability and singles for simple, low-stress joints.
Flare Angle Differences
Having compared single and double flares, attention turns to flare angles, which determine how tubing mates with fittings and perform under different conditions.
Common angles include 37°, 45°, and 30° profiles, each offering distinct sealing characteristics and stress distribution. Choice depends on fitting type, pressure, and vibration exposure. Installers must match angle precisely to avoid leaks or premature failure. Visual inspection and feel when seating indicate correctness.
Emotional responses arise from confidence in a secure join or frustration when mismatched parts complicate a task:
- Relief when the correct angle fits smoothly.
- Frustration at stubborn mismatches.
- Pride in a precise, leak-free connection.
Choosing Fittings for Exhaust Flares
When selecting fittings for exhaust flares, attention centers on material compatibility, fit tolerance, and heat resistance to guarantee a durable, leak-free connection. Choices favor stainless steel or high-temp alloys to resist corrosion and thermal cycling. Match flare profile and pipe OD precisely; loose tolerances invite leaks, excessive interference risks cracking. Consider gasket styles and sealing methods suited to exhaust temperatures. Inspect thread types and coating compatibility to avoid galvanic corrosion. Prioritize fittings rated for vibration and thermal expansion. Replace worn or mismatched parts rather than forcing fitment.
| Attribute | Recommendation |
|---|---|
| Material | Stainless steel |
| Seal type | High-temp gasket |
Tools You Need to Flare an Exhaust Pipe
Selecting the right fittings informs the toolset a technician will gather to flare an exhaust pipe, since material and profile choices determine which dies, cutters, and sealing implements are compatible.
Recommended core tools include a tubing cutter calibrated for exhaust thickness, a deburring tool to make certain clean edges, and a flaring tool suited to the metal type.
Safety gear—gloves, eye protection, and hearing reduction—protects during cutting and hammering.
A good workbench and lubricant simplify forming.
Spare clamps and replacement flare adapters save time.
Emotional reassurance comes from preparedness:
- Confidence
- Control
- Satisfaction
Essential Jigs, Dies, and Clamps
For flaring exhaust pipe ends to a reliable, leak-free profile, the right jigs, dies, and clamps provide precise control over alignment, angle, and pressure.
A flaring jig holds pipe concentric to the tool, preventing offset that causes leaks; choose one with adjustable guides for varied diameters.
Dies determine flare geometry—single, double, or trumpet—so select hardened steel dies matching the intended bead.
Clamps and vice grips secure the assembly and resist twisting under force.
Soft jaws or protective pads prevent marring.
Quick-release options speed repetitive work.
Proper selection reduces rework and assures consistent, repeatable flares.
Materials That Flare Well (Steel, Stainless, Aluminized)
Different exhaust materials respond to flaring with distinct behaviors: mild steel is forgiving and forms clean flares with moderate force, stainless steel requires higher pressure and sharp tooling due to its springback and work-hardening, and aluminized steel combines steel’s ductility with a delicate coating that can crack if overheated or excessively deformed.
Choice affects technique, tooling, and finish. Consider material properties and desired longevity when planning flares.
- Mild steel — predictable, satisfying, economical.
- Stainless steel — demanding, precise, durable.
- Aluminized steel — practical, vulnerable, cost-conscious.
Safety Gear and Shop Setup
Often overlooked, proper safety gear and an organized shop layout are essential before flaring an exhaust pipe to prevent injury and protect materials.
Protective eyewear, heat-resistant gloves, and hearing protection are recommended; a respirator is advised if grinding or welding will occur.
Secure work with a bench vise and use pipe supports to prevent rolling. Make certain adequate ventilation and clear flammable materials from the area.
Keep tools arranged for quick access: dies, flaring tool, files, and measuring instruments. A fire extinguisher and first-aid kit should be nearby.
Good lighting and stable footing reduce mistakes and accidents.
How to Measure Pipe OD and Wall Thickness
Before flaring, the technician measures the pipe’s outside diameter with calipers or a tape to make certain the correct flare size.
Next, wall thickness is determined by using calipers on a cut section or by consulting the pipe’s stamp/specs to confirm material strength for forming.
Accurate OD and thickness measurements guide tool selection and prevent cracking or leaks during the flare process.
Measuring Outside Diameter
Measure the pipe’s outside diameter (OD) and wall thickness accurately before flaring to guarantee a proper fit and seal. The technician uses calipers to measure OD at multiple points, noting corrosion or dents that alter dimensions. Recording the largest consistent reading prevents mismatched fittings. For thin-walled exhaust tubing, repeat measurements after cleaning to remove soot.
A clean, flat reference surface and steady hands improve accuracy. Precise OD data informs tool selection and flare profile choice, reducing leaks and rework.
- See the fit.
- Feel the relief.
- Trust the measurement.
Determining Wall Thickness
To determine wall thickness reliably, the technician uses calipers or a micrometer to take multiple measurements across cleaned areas of the tube, recording the largest consistent values and noting any corrosion, dents, or residual soot that could thin readings.
After measuring outside diameter, the inspector measures tube interior where accessible or uses an ultrasonic thickness gauge for closed sections.
Readings are averaged from several spots, excluding damaged zones, and compared to manufacturer specs or replacement standards.
Accurate wall thickness confirms suitability for flaring, ensuring sufficient material to form a sound bead without cracking or collapsing during forming.
Choosing the Correct Flare Die Size
Which die size matches the tubing and fitting is critical for a reliable flare. The technician assesses tube outer diameter, wall thickness, and fitting type before selecting the die. Incorrect sizing causes leaks, weak joints, or split metal. Match die to tube OD and flare profile (single, double, or bubble) specified by the fitting manufacturer. Test on scrap before final work. Maintain die cleanliness and inspect for wear to guarantee consistent flares.
- Confidence: proper fit reduces anxiety about failures.
- Precision: right die yields true sealing surfaces.
- Safety: correct selection prevents hazardous exhaust leaks.
How to Mark Pipe for an Accurate Flare
Before marking, the pipe is oriented so the flare will face the correct direction in the assembly.
Measurements are taken from the pipe end to the planned flare location and transferred accurately around the circumference.
A center punch is used on each mark to prevent slippage during cutting and flaring.
Choose Correct Pipe Orientation
When preparing to flare an exhaust pipe, the technician aligns the pipe so the flare will seat squarely against the mating surface; this requires identifying the flange face, determining the correct axis of the pipe, and marking the pipe where the flare must begin. Orientation choices influence fit, leak potential, and ease of welding.
The technician rotates the pipe to match flange alignment, checks for offset or bend, and marks the high spot with a fine scribe. Visual confirmation from multiple angles guarantees concentricity.
Emotional cues drive care:
- Relief — when marks align perfectly.
- Confidence — seeing true concentricity.
- Satisfaction — ready for the next step.
Measure From Pipe End
With the pipe oriented and scribed, the technician measures from the cut end to establish the exact start point for the flare. Using a steel rule, calipers, or combination square, a precise distance is read and transferred around the circumference. Measurements account for material thickness and flare tooling offset so the finished lip aligns with mating components.
The operator rotates the pipe slowly, confirming repeat readings at several points to detect burrs or uneven cuts that would shift the reference. Marks are made lightly and consistently to guide subsequent operations without weakening the edge or introducing measurement error.
Mark With Center Punch
The technician aligns the previously scribed reference and places a center punch at each marked point to create small, precise dimples. This steady action prevents drill wander and guarantees the flare will seat squarely.
With a light mallet tap the punch, inspect each dimple for centeredness, and correct any deviation before drilling. The marks should be shallow but distinct, visible against soot or paint.
- Confidence: a crisp dimple promises a clean start.
- Control: deliberate taps reduce mistakes.
- Satisfaction: perfectly centered marks foreshadow a professional flare.
How to Cut Exhaust Pipe Square Every Time
Achieving a perfectly square cut on an exhaust pipe starts with proper measurement, marking, and a stable setup; even slight misalignment will compromise fit and seal.
Clamp the pipe in a vice with protective jaws to prevent distortion, ensuring the section is level and secure.
Use a square or machinist’s square to scribe a clear cut line around the circumference.
For hand tools, use a fine-tooth tubing saw and follow the line slowly, keeping the blade perpendicular.
For power tools, use a cutoff wheel with a guide or jig.
Verify squareness with the square before removing the workpiece.
How to Deburr and Prep the Pipe Edge
After verifying the cut is square, attention turns to cleaning the freshly cut edge so fittings seal and welds hold.
The technician removes burrs with a deburring tool or file, working around the circumference to eliminate sharp edges and metal slivers. A wire brush clears scale and loose particles; cloth or compressed air removes debris.
Final inspection checks for a uniform, slightly rounded lip and no ragged spots that could impede flaring or create leaks. Protective gloves are used throughout.
Emotional reassurance comes from methodical care:
- Relief — smooth, safe edges.
- Confidence — clean surfaces ready.
- Pride — workmanship preserved.
How Heating Affects Steel Before Flaring
Warming steel ahead of flaring softens the metal, increases ductility, and reduces the force required to shape the pipe.
Controlled heating alters crystalline structure, lowering yield strength so the flange forms evenly without cracking. Thermal expansion can slightly enlarge the bore, easing tool entry; uniform heat distribution minimizes warping and uneven thickness.
Overheating risks grain growth, which weakens the edge and impairs weldability, so modest temperatures are preferred. Allowing the piece to cool uniformly stabilizes dimensions before final fitting.
Proper heating improves repeatability and reduces tooling stress, producing cleaner, more consistent flares when performed with care.
Using a Torch Safely to Heat Exhaust Pipe
The author describes proper torch positioning to keep the flame directed at the workpiece while minimizing exposure to surrounding components.
Attention is given to heat control techniques, including adjusting flame size and moving the torch to prevent overheating or warping.
These practices reduce risk and help achieve an even, predictable temperature for flaring.
Safe Torch Positioning
Often a steady, controlled flame is the difference between a clean flare and a ruined pipe; positioning the torch requires keeping the flame angled to heat the metal evenly while avoiding direct contact with joints, welds, or nearby flammable materials.
The operator stands slightly back, supporting the torch with a steady hand, and orients the flame at a shallow angle to the pipe circumference. Movement is slow and deliberate, sweeping to distribute heat. Distance is maintained to prevent scorching. Visual cues—color change, subtle glow—guide adjustments. Safety gear remains worn and a fire extinguisher stands ready.
- Calm
- Focused
- Respectful
Heat Control Techniques
Having established steady torch positioning and careful sweeping motions, attention shifts to precise heat control to prevent warping, cracking, or uneven flares.
The practitioner heats evenly, moving the flame to avoid hotspots and maintaining a moderate distance to allow gradual temperature rise. Short, consistent passes keep metal malleable without overheating; cooling pauses with air or a damp cloth prevent grain damage. Use a temperature-indicating crayon or infrared thermometer when available to target the annealing range. Protective gear remains worn.
If the metal glows or smokes, reduce flame intensity and allow uniform cooling before proceeding to flaring or forming steps.
How to Form a Single‑Flare Exhaust Pipe End
Begin by cutting the pipe square and deburring the end to guarantee a clean surface for flaring.
The technician clamps the tube in a proper flaring tool, aligns the cone, and tightens progressively to form a smooth, even single flare.
Inspect the flare for concentricity and uniform thickness; trim if necessary.
Clean metal shavings and apply anti-seize before reassembly.
Proper single flares secure leak-free joints when joined with a flange or sleeve.
Emotional satisfaction comes from precision and a job well done:
- Pride in a clean finish
- Confidence in a reliable seal
- Calm from careful technique
How to Form a Double‑Flare Exhaust Pipe End
After mastering a clean single flare, the technician moves on to creating a double flare, which produces a stronger, more durable end suitable for higher-pressure applications.
The process begins by cutting the pipe square and deburring. A flaring tool or vice with the correct cone and mandrel is used. The technician first bubbles the tube end outward (pilot flare), then folds that bubble back over itself with the conical punch, compressing and forming a double-thickness lip. Measurements confirm the flare seated depth matches the fitting.
Final inspection checks for cracks, uniform thickness, and a smooth sealing surface before installation.
Forming an Inverted Flare for V‑Band Flanges
The section explains how to prepare the pipe end by cleaning, deburring, and cutting to the correct length for a V‑band flange.
It then outlines the steps to form an inverted flare, including sizing the flare, using the proper die and cone, and checking the bead for uniformity.
Safety precautions and inspection points for a leak‑free seal are briefly noted.
Preparing The Pipe End
For a secure V‑band connection, the pipe end must be formed into a precise inverted flare that seats cleanly against the flange; this requires removing any burrs, verifying wall thickness, and creating a uniform, angled lip that matches the flange’s cone angle.
The technician inspects the cut for square alignment, deburrs the bore and outside edge with a file, and measures wall thickness to confirm sufficient material for flaring.
Cleanliness is emphasized: oil, scale, and debris are removed.
Final steps include marking flare depth and checking flange fitment before moving to forming.
- Relief — reduces worry.
- Confidence — guarantees fit.
- Pride — finishes well.
Forming The Inverted Flare
With the pipe end squared, deburred, and checked for wall thickness, attention shifts to shaping the inverted flare that will seal against the V‑band flange. The tube is centered in a flaring tool; progressive presses form a smooth, inward lip matching the flange angle. Even compression prevents cracking; intermittent lubrication and light heat for thicker walls aid metal flow. After shaping, the flare is inspected for concentricity, uniform thickness, and a continuous sealing surface. Minor roll corrections are done with hand tools before final fitting. Table below summarizes key checks and outcomes.
| Check | Outcome |
|---|---|
| Centering | Concentric flare |
| Pressure | No cracks |
| Lubrication | Smooth flow |
| Heat | Eases forming |
| Inspection | Seal ready |
Flaring Thin‑Walled Stainless Exhaust Pipe
Flaring thin‑walled stainless exhaust pipe demands a steadier hand and finer tools than thicker mild steel tubing because the material work‑hardens quickly and resists excessive deformation.
The technician clamps the tube firmly, selects a polished, correctly sized flare mandrel, and uses light, incremental forming strokes.
Cooling between passes prevents brittleness; lubrication reduces scoring.
Inspection for microcracks follows each trial flare.
When finished, the flare should seat squarely without thinning to a hairline edge.
Emotional reactions often include pride, relief, and caution:
- Pride at a clean, resilient flare.
- Relief when no cracks appear.
- Caution to avoid overworking.
Flaring Aluminized Mild Steel Pipe
In handling aluminized mild steel exhaust pipe, technicians must account for the thin protective aluminum-silicon coating that eases corrosion but alters forming behavior; it requires moderate clamping pressure, tooling that matches the pipe diameter, and gentle, evenly distributed expansion to prevent flake-off or cracking of the coating.
Start with clean cuts and deburred edges to avoid lifting the coating. Use a properly sized flaring mandrel or die and apply incremental expansion strokes rather than one rapid blow.
After forming, inspect the flare for coating breaches and touch up exposed steel with high-temperature primer or paint to restore corrosion resistance.
How to Avoid Cracking in Aged Pipe
Aged exhaust pipe often becomes brittle and prone to cracking, so technicians must adapt their flaring technique to minimize stress on weakened metal.
Inspect for corrosion, pitting, and hairline fractures; clean debris and apply penetrating oil to reduce friction.
Use low-force, gradual flaring tools and smaller incremental steps to prevent sudden deformation.
Heat nearby areas gently to restore ductility, avoiding overheating that worsens scale.
Back the pipe internally to support the wall during forming.
- Slow, controlled action reduces surprise failures.
- Support limits brittle bending.
- Heat softens without weakening.
Document repairs and replace if integrity remains doubtful.
Checking Flare Alignment and Concentricity
A clear visual alignment check is performed first to confirm the flare sits square to the pipe and mating surface.
If necessary, concentricity is quantified with gauges or a dial indicator to measure runout and eccentricity. Any misalignment found is corrected with targeted adjustment techniques such as controlled reaming, light hammering on a support mandrel, or realignment in the flaring tool.
Visual Alignment Check
How well the flare sits on the pipe determines sealing reliability and must be checked visually before any assembly. The inspector examines the flare edge, shoulder contact, and uniform gap around the circumference. Any high spot, uneven bevel, or shadow indicates misalignment; these flaws can cause leaks, stress, and premature failure.
Visual checks are quick, require no instruments, and guide immediate rework. Follow a systematic head-on and oblique inspection under good light, rotating the joint slowly to reveal inconsistencies.
- Notice subtle gaps — they warn of leaks.
- Spot asymmetry — it signals stress risk.
- Catch defects early — prevent rework escalation.
Concentricity Measurement Tools
After the visual inspection identifies potential irregularities, measurement tools quantify how centered the flare is relative to the pipe bore. A dial indicator mounted on a magnetic base measures radial runout by rotating the tube and recording peak-to-peak deviation. An inside micrometer or telescoping gauge assesses bore concentricity relative to the flare lip. Feeler gauges detect uneven gaps between mating surfaces. Optical comparators or simple center-finding mandrels reveal offset visually and numerically.
Readings guide acceptance criteria: typical allowable runout depends on application and gasket type. Calibration of instruments and stable fixturing guarantee reliable, reproducible concentricity measurements.
Corrective Adjustment Techniques
Begin by securing the tube and flare assembly in the fixture used for measurement, then systematically address any detected misalignment by adjusting clamping pressure, centering shims, or the mandrel position until concentricity readings fall within tolerance.
The technician inspects radial runout with a dial indicator or concentricity gauge, noting high spots and direction of error.
Corrections proceed incrementally: loosen clamp, insert or remove thin shims, shift mandrel axially or radially, then re-tighten and re-measure.
Repeat until readings center.
Document final offsets and fastener torque.
This disciplined, measured approach reduces leaks, vibration, and premature joint failure.
- Calibrate
- Adjust
- Verify
Sizing and Fitting a Flange to a Flared End
When sizing and fitting a flange to a flared exhaust end, measure the flare’s outer diameter and wall thickness precisely to select a matching flange bore and lip depth.
Confirm concentricity; any eccentric flare can misalign bolt holes.
Choose a flange material and thickness compatible with exhaust temperatures and vibration.
The flange lip should support the flare without forcing deformation; a slight clearance for thermal expansion is acceptable.
Verify bolt pattern and stud length against mating component.
Use a gasket sized to the bore and rated for exhaust service.
Hand-fit parts, inspect for gaps, and adjust flange seating before final fastening.
Welding a Flared Exhaust Pipe to an Existing System
Proper fitment and alignment are confirmed before welding to guarantee the flared pipe mates squarely with the existing system.
The section summarizes appropriate welding techniques for thin-gauge exhaust steel and recommended joint preparations.
Finally, it covers sealing methods and corrosion protection to maintain a gas-tight, long-lasting connection.
Fitment And Alignment
Fitment and alignment demand careful measurement and trial positioning to guarantee the flared pipe mates cleanly with the existing exhaust without introducing stress or leaks. The technician checks lengths, angles, and clearance, marking cut lines and test-fitting clamps. Support hangers are adjusted so the joint carries weight without pulling. Gaps are verified; misalignment is corrected with mild bending or re-flaring rather than forcing parts together. Final fit guarantees smooth flow, correct road clearance, and no chassis contact.
Attention here prevents future fatigue, leaks, and noise.
- Relief — reduces worry
- Confidence — solid connection
- Pride — professional finish
Welding Techniques Overview
Begin by selecting a welding method suited to the pipe material, wall thickness, and shop capability: MIG (GMAW) for speed and ease on mild steel, TIG (GTAW) for thin stainless or precision seams, and stick (SMAW) only where access or contamination prevents other processes. The operator should prepare clean joints, tack-weld to maintain alignment, control heat to avoid burn-through or warping, and use appropriate filler and shielding. Welds must be inspected for penetration and porosity. Practice on scrap before final welding and follow safe ventilation and protective equipment protocols.
| Method | Best use | Notes |
|---|---|---|
| MIG | Mild steel | Fast, forgiving |
| TIG | Stainless/thin | Precise, slower |
| Stick | Dirty/field | Portable, smoky |
Sealing And Corrosion Protection
When joining a flared exhaust pipe to an existing system, attention to sealing and corrosion protection guarantees a durable, leak-free connection. The technician cleans mating surfaces, removes rust, and fits a high-temperature gasket or weld bead to assure exhaust integrity.
After welding, seams are inspected, ground smooth, and a high-temp, exhaust-rated sealant applied where gaps remain. Finally, protective coatings and wrap prevent rust from road salts and condensation, extending service life.
- Proper sealing inspires confidence.
- Corrosion control reduces future headaches.
- Neat workmanship delivers lasting pride.
Using Exhaust Clamps With Flared Ends
Often overlooked, exhaust clamps with flared ends provide a secure, gasket-free connection by compressing the flare against the adjoining pipe and preventing axial movement.
Installers align flared surfaces, position the clamp so pressure is evenly distributed, then tighten incrementally to avoid deforming the flare.
Stainless hardware resists corrosion; torque to manufacturer specs guarantees retention without cutting into metal.
Clamps suit repairs and modular assemblies where welding is undesirable. They accommodate minor misalignment and vibration while allowing future disassembly.
Selection must match pipe diameter and flare profile; improperly sized clamps can loosen, damage the flare, or fail under thermal cycling.
Sealing Flared Joints Against Leaks
A properly seated flare guarantees metal-to-metal contact and is the first defense against exhaust leaks.
Selection of high-temperature, exhaust-rated sealants or gaskets complements the flare without compromising heat resistance or corrosion protection.
After assembly, a simple leak check using soapy water or a smoke source confirms sealing integrity before road use.
Proper Flare Seating
Make sure the flare seats squarely against the mating surface to create a gas-tight seal; even a hairline gap or slight tilt can allow exhaust gases to escape and degrade performance.
The flared lip must be concentric, uniformly compressed, and free of nicks. Inspect mating faces for burrs, clean thoroughly, and align using clamps or fixtures.
Tighten evenly in a star pattern to avoid cocking the flare. Final checks include a smoke or soapy-water test and re-torque after heat cycles.
- Relief: stability restores confidence.
- Urgency: small errors cause big leaks.
- Pride: a precise seat signals mastery.
Sealant Selection Tips
After confirming the flare seats squarely and the mating faces are clean, selection of a sealant becomes the next decision to prevent leaks at the flared joint. The guide recommends high-temperature, exhaust-rated sealants compatible with thin-sheet steel and aluminized surfaces.
Avoid soft RTVs that degrade under constant vibration and heat; prefer anaerobic or copper-based paste where movement and thermal cycling occur. Consider application thickness, cure time, and service temperature range.
For stainless systems, use nickel-containing compounds. Always check manufacturer compatibility with gasket materials and follow torque specifications; excessive sealant can prevent proper metal-to-metal contact and cause failures.
Leak Test Methods
How best to confirm a flared joint is gas-tight? A few practical leak-test methods provide quick verification and peace of mind. Visual inspection first: check for gaps, crushed flares, or uneven seating.
Then perform pressure and soap tests to detect escaping gases.
- Pressurize the system lightly, listen for hisses, note any odor — immediate alarm signals panic and urgency.
- Apply soapy water to joints; bubbling pinpoints leaks and triggers a visceral reaction of relief when none appears.
- Use a handheld gas sniffer for final assurance; the device’s beep brings calm confidence.
How to Test a Flare for Exhaust Leaks
When inspecting a newly flared exhaust pipe for leaks, the technician should first perform a visual check for gaps, cracks, or uneven seating where the flare meets the mating surface.
Next, apply soapy water around the joint while an assistant gently pulses the exhaust or uses a low-pressure air source; bubbles indicate leaks. Alternatively, use a handheld smoke machine or dense smoke from a smoke pencil to reveal escaping gases.
For safety, wear gloves and eye protection and keep the system cool. Confirm findings by listening for hisses and feeling for drafts. Mark any leak locations for repair or reinspection.
Fixing a Misshapen or Under‑Formed Flare
A few common causes produce a misshapen or under‑formed exhaust flare—incorrect die alignment, insufficient forming pressure, or a contaminated tube end—and each requires a targeted correction.
The technician assesses the flare, measures contour, and decides whether reshaping or re‑flaring is appropriate.
Lightly score the edge, clean debris, realign dies, and incrementally increase pressure while supporting the pipe to avoid thinning.
If metal work hardening resists forming, anneal briefly.
Test fit the mating flange and inspect for concentricity.
Follow these emotional prompts:
- Relief at a snug fit.
- Confidence in restored form.
- Pride in a finished repair.
Repairing a Cracked Flare Without Replacing Pipe
Repairing a cracked exhaust flare without replacing the pipe requires evaluating crack length, location, and surrounding metal condition to determine if a durable repair is possible.
Small radial cracks near the flare lip can be ground to clean metal, beveled, and welded with thin-gauge stainless or mild steel depending on original material.
After welding, dress the bead flush, hammer-smooth the flare profile, and heat-treat lightly if needed to relieve stress.
For wider splits, reinforce with a welded patch or sleeve on the interior to restore strength and sealing.
Leak-check with light pressure and inspect for distortion before reassembly.
Flaring Pipes in Tight Access on the Vehicle
When working on exhaust pipes with restricted access, the technician must rely on compact techniques that compensate for limited space. Strategic tool selection and positioning are critical to reach and flare the pipe without enlarging openings or removing nearby components.
The following section outlines space-saving methods and tool access strategies for reliable flares in confined areas.
Limited Space Techniques
In confined areas beneath a vehicle, flaring an exhaust pipe requires compact tools and careful body positioning to avoid damaging nearby components.
The technician works methodically, choosing short-handled flaring bits and flexible drive extensions to reach the lip without straining. Clamps secure the tube while small mirrors and LED lights confirm alignment.
Slow, controlled turns prevent slips that could mar the flange or adjacent wiring. If a standard flare tool won’t fit, adapt the procedure by reducing movements and pausing to inspect the flare profile.
Emotional focus helps maintain steadiness during awkward reaches.
- Relief
- Pride
- Caution
Tool Access Strategies
Building on techniques for cramped underbody work, the technician selects and arranges specific access tools to reach and shape the pipe flare without displacing surrounding components.
A compact flaring tool kit, angled adapters, and a low-profile vise enable precision where full-sized equipment won’t fit.
Extensions and universal joints transfer torque around obstacles while padded clamps protect adjacent parts.
A bright, focused work light and magnetic trays keep hardware visible and secure.
Long-reach needle files and miniature deburring tools finish the flare in tight locations.
Safety goggles, gloves, and a fire-resistant mat complete the setup for controlled, efficient flaring.
Working Safely Under a Car to Flare Pipe
Before sliding beneath the vehicle, the technician confirms the car is securely supported on appropriately rated jack stands and that the parking brake is engaged with wheels chocked.
Protective eyewear and gloves are donned; a creeper and adequate lighting are arranged.
The workspace remains free of oil spills and clutter.
Ventilation is verified if the engine will be briefly run.
Radiation from hot components is checked by touch after cooling.
Tools are organized to avoid reaching while under the car.
- Relief — knowing supports are reliable.
- Focus — uncluttered area reduces anxiety.
- Confidence — organized tools speed safe work.
Common Beginner Mistakes When Flaring Exhaust
Novices often underestimate how small errors compound during a flare, producing leaks, weak joints, or wasted materials. Common mistakes include cutting pipes unevenly, leaving burrs, and misaligning the flare tool, which prevent a proper seal.
Using the wrong die size or excessive force distorts the flare; insufficient lubricant causes galling. Skipping test fittings and not deburring inner edges lead to exhaust leaks and premature fatigue.
Rushing the process or working with damaged tools worsens outcomes. Careful measurement, clean cuts, correct tooling, and patience prevent these beginner errors and guarantee reliable, leak‑free flares.
Time‑Saving Tips for Flaring Multiple Pipes
Efficiency matters when preparing several exhaust pipes at once; setting up tools for quick adjustments and consistent measurements reduces downtime.
Organizing the workbench with jigs, properly arranged dies, and a calibrated flaring tool speeds the process.
Applying a batch flaring technique—clamping and measuring multiple pipes before forming each flare—ensures uniform results with less repeated setup.
Efficient Tool Setup
With a compact, organized bench and a few carefully chosen jigs, a technician can set up to flare multiple exhaust pipes in sequence without wasted motion.
Tools are prearranged: die, deburring tool, clamp; each has a designated spot. Quick-change holders reduce repositioning. A labeled tray for sizes speeds selection. Safe workspace lighting and a magnetic parts tray prevent delays. Regularly inspected dies and calibrated flaring tools cut rework. Preparation reduces interruptions and maintains rhythm.
Emotional engagement comes from mastery and flow, conveyed through simple order and predictability:
- Confidence
- Pride
- Satisfaction
Batch Flaring Technique
Once the bench is organized and each tool has a fixed place, the technician shifts focus to batching work for sustained throughput. He groups identical pipe diameters, matches flare tool dies, and pre-cuts lengths to reduce setup changes.
A single clamping jig secures multiple pieces sequentially, while a calibrated depth stop guarantees consistent flare geometry. Lubrication and a quick inspection checklist precede each cycle to prevent rework.
Timing clips or a simple board layout track progress and prevent mix-ups. Between batches, brief adjustments refine alignment. The method minimizes downtime, increases uniformity, and speeds production without sacrificing flange integrity.
When to DIY Flaring Vs Hire a Shop
When weighing whether to flare an exhaust pipe at home or take the job to a shop, assess skill level, available tools, and the component’s condition. A DIY choice suits those with basic metalworking experience, correct flaring tools, and pipes in good condition. Choose a shop when corrosion, tight tolerances, or safety-critical fittings are present; professionals reduce risk of leaks and wasted material. Consider time, cost, and tolerance for trial-and-error.
Emotional drivers often influence the decision:
- Confidence — pride in completing a repair.
- Frustration — when tools or skill fall short.
- Relief — handing a difficult job to experts.
Choosing a Shop for Professional Flaring
For jobs that exceed home-shop capabilities, selecting the right shop for professional flaring hinges on reputation, tooling, and experience with exhaust systems.
The owner should verify documented experience with similar materials and vehicle types, request examples or references, and confirm use of dedicated flaring tools and proper dies.
Inspect cleanliness, fitment precision, and quality-control practices such as test-fitting and leak checks.
Ask about turnaround time, warranty on workmanship, and parts sourcing policies.
A reliable shop communicates clearly, provides written estimates, and demonstrates consistent results on stainless or aluminized pipes without overselling unnecessary repairs.
Cost Comparison: DIY Tools Vs Shop Service
How much does it actually cost to flare an exhaust pipe at home versus in a shop? A clear tally helps decide: initial tool purchase, per-job consumables, and professional fees. DIY requires investment up front but lowers per-job cost after several uses; mistakes can raise effective cost. Shop service charges per job with no tool ownership, offering speed and warranty. Consider time, risk, and frequency when comparing.
- Upfront tool cost — anxiety of spending before saving
- Per-job shop fee — relief of no tool fuss
- Mistake costs — dread of wasted materials and time
How Environment (Temp/Altitude/Humidity) Affects Flaring
In cold, high, or humid conditions, the metal’s behavior and the flaring process change measurably: lower temperatures stiffen steel and aluminum, making them less ductile and more prone to cracking during expansion; high altitude reduces air pressure and can affect oxy-fuel heating efficiency; and elevated humidity increases corrosion risk and can interfere with lubrication and clamping grip. Operators should adjust heating, rate of deformation, and protection of surfaces. Preheating, slower forming strokes, dry clamps, and corrosion inhibitors mitigate issues. Monitor fit frequently and allow controlled cooling to avoid stress fractures.
| Condition | Recommended Adjustment |
|---|---|
| Cold | Preheat pipe |
| High altitude | Increase heat |
| Humid | Use inhibitors |
| Rapid work | Slow strokes |
Maintaining Flaring Tools for Consistent Results
Regular maintenance guarantees flaring tools deliver consistent, safe flares over time.
The technician inspects dies and cones for wear, cleans chips and debris, and lubricates moving parts to prevent binding.
Calibration checks confirm flare angles remain accurate; replace damaged components promptly.
Proper storage avoids moisture and impacts that warp alignment.
Documenting service dates builds trust and predictability; routine attention reduces scrap and frustration.
- Inspect: look for wear and damage.
- Clean: remove metal shavings and grime.
- Lubricate: apply light oil to moving surfaces.
Consistent upkeep preserves tool life and improves flare quality.
Flaring for Custom Exhaust Builds and Swaps
When adapting flares for custom exhausts and swaps, technicians must account for varied tube diameters, wall thicknesses, and mating surfaces to guarantee airtight, vibration-resistant joints. They select flange profiles matching slip-fit or bolted connections, measure seat angles, and choose appropriate tooling and lubricant to prevent cracking.
Mock assemblies verify alignment and clearances before final flaring. Heat-treated or thicker tubing may require progressive flares or different dies.
After flaring, edges are deburred and checked with a feeler gauge for uniform contact. Proper clamps, gaskets, and torque settings finalize the joint, reducing leaks and fatigue in custom installations.
Adapting Flares for Mandrel‑Bent Sections
Mandrel-bent sections introduce curvature-induced stresses and altered wall distribution that affect flare formation, so technicians carry over the careful measurement and mock-assembly practices used for straight tubes while accounting for bend geometry.
Precision measuring at multiple points along the bend guarantees consistent flare depth; clamping must avoid distortion; and lubricant selection reduces tearing.
Bend radius dictates die size and mandrel support placement.
Practice on scrap bends replicates stress patterns.
When flaring, verify concentricity and wall thickness after each incremental spread to prevent cracks.
- Fear of cracking drives methodical checks.
- Pride follows perfect alignment.
- Relief comes with fit confirmation.
Integrating Flared Ends With Aftermarket Parts
In working with aftermarket components, technicians must make certain the flare geometry and surface finish match the mating part’s specifications to secure leak-free joints and proper fitment. Technicians verify flange angles, bead placement, and outer diameter against supplier drawings or measured mating surfaces.
Where tolerances differ, controlled material removal, shims, or matched couplers are used rather than forcing mismatched parts. Fastener hole alignment and gasket seating receive inspection; stainless and mild steel require compatible sealing methods to avoid galvanic issues.
Final assembly includes torque to spec and a leak check under pressure and heat cycles before vehicle return.
Documenting Measurements for Repeatable Flares
For consistent, repeatable flares, technicians record precise dimensional and process data for each run: tube outer diameter, wall thickness, flare angle, flare depth, bead location, clamping force, die size, and machine settings.
A concise log sheet captures measurements, tolerances, tool IDs, material heat, and timestamped photos.
Notes on outliers and corrective actions keep runs traceable. Data enables quick setup replication and quality audits without guessing.
Emotional stakes—pride in craftsmanship, relief at predictable fits, confidence in safety—are tied to disciplined records.
- Pride in craftsmanship
- Relief at predictable fits
- Confidence in safety
Teaching Someone Else to Flare Exhaust Pipe
Having documented measurements and process notes, an experienced technician can now focus on transferring that knowledge to an apprentice through clear demonstration and guided practice. Instruction emphasizes safety, tool selection, correct clamping, consistent heating, and measuring flare geometry. The mentor models each step, then watches the learner repeat tasks, correcting hand position and technique. Feedback is specific, timely, and linked to objective measurements. Progression moves from simple bends to complete flares under supervision. Records of attempts track improvement. A short checklist reinforces key points.
| Topic | Action |
|---|---|
| Safety | PPE |
| Tools | Selection |
| Clamping | Secure pipe |
| Heat | Even application |
| Measure | Verify flare |
How to Tell If a Flare Is Structurally Unsafe
Assess visible and measurable defects to determine whether a flare is structurally unsafe. Inspect for cracks, splits, or metal fatigue at the lip and neck; any propagation indicates failure risk. Measure uniformity: uneven thickness or deformed angles reduce sealing and strength. Check attachment: looseness, corrosion, or movement at the joint undermines integrity. Consider sound and feel: tapping should yield solid, not hollow or brittle responses.
Use the following emotional prompts to prioritize action:
- Fear: visible cracking demands immediate repair or replacement.
- Urgency: movement or corrosion requires prompt attention.
- Confidence: uniform, solid flares can be trusted temporarily.
Printable Checklist: Steps, Tools, and Checks
One concise checklist consolidates the necessary steps, tools, and safety checks into a single printable page to guide a technician through flaring an exhaust pipe. The checklist itemizes sequence: measure, cut, deburr, insert mandrel, form flare, inspect, and test fit. Required tools and consumables are listed with safety reminders: gloves, eye protection, clamps, lubricant, and proper ventilation. A pre- and post-operation inspection block guarantees leak and alignment verification. The layout is compact for quick reference and laminated for workshop use.
| Step | Tool | Check |
|---|---|---|
| Measure | Tape | Fit |
| Cut | Saw | Square |
| Flare | Mandrel | Seal |
Conclusion
Cool metal gleams in hand, edges warmed by a fading sun as the flared lip takes shape—precise, proud, and fit for the road. The guide’s steps sit like a mechanic’s map: when to mend or replace, which flare suits the job, and which tool answers the clink of bolt and pipe. With measured marks and a practiced twist, the repair becomes reliable, its silhouette sealing exhaust flow and extending the life of a vehicle’s quiet journey.