Fix Pool Pipe Leak Under Concrete: DIY Steps & Pro Tips
To fix a leaking pool pipe under concrete, follow these key steps:
- Stop the Pump: Turn off the pool pump and close the suction and return valves to minimize water loss.
- Locate the Leak: Use pressure testing and electronic tracers to accurately pinpoint the break in the pipe.
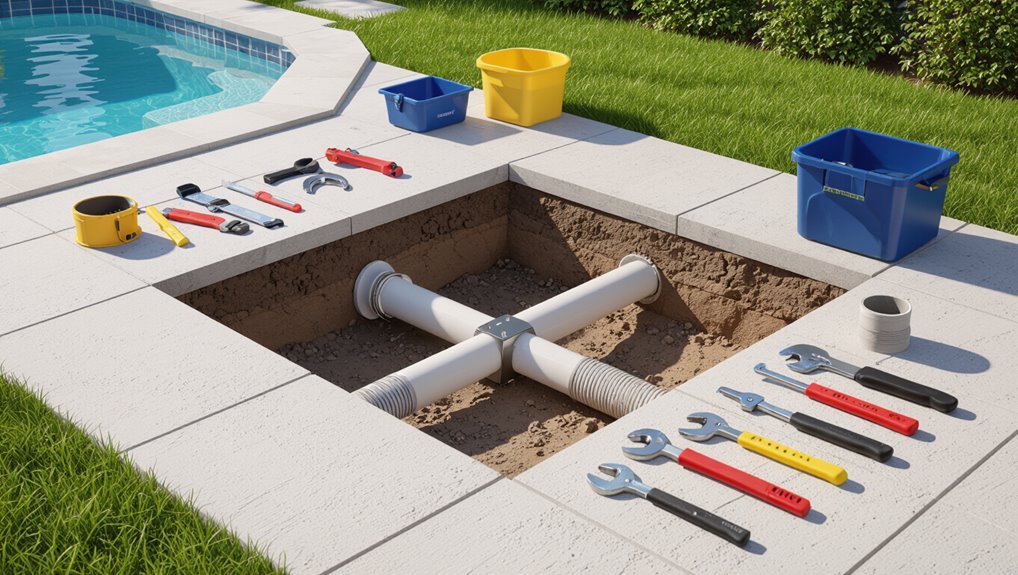
- Excavate: Carefully dig a short trench to expose the damaged section of the pipe.
- Replace or Sleeve the Pipe: Cut out the damaged area and install a properly sized slip-coupling or epoxy sleeve that is rated for pool pressure.
- Cure and Test: Allow the repair to cure, then perform a pressure test to ensure there are no leaks before backfilling the trench.
- Follow safety precautions during excavation.
- Check warranty information for any materials used.
This concise process will help you effectively address a leaking pool pipe under concrete.
Quick Answer: The Fastest Way to Fix an Under‑Slab Pool Pipe Leak
Cut the pump, locate the leak with a pressure test or electronic tracer, and expose a short section of the damaged pipe—then apply the quickest durable repair: replace the failed segment with a slip-coupling or install a high‑pressure epoxy sleeve if replacement is infeasible.
A clean cut, deburred ends, and correct coupling size guarantee a watertight joint. For plastic pipe, solvent weld or use mechanical couplings rated for pool pressure.
If epoxy is chosen, follow cure times and surface prep. Test the repair under full system pressure before backfilling.
Document pipe material and repair for future maintenance and warranty purposes.
3‑Step Emergency Stop to Minimize Water Loss
Before any excavation or repair work begins, shut off the pool circulation at the pump and close the main suction and return valves to isolate the leaking pipe and halt further water loss.
The technician then records water level, powers down electrical supply to equipment, and notifies household members.
Temporary measures like activating an automatic fill are avoided to prevent masking the leak.
If the leak causes rapid loss, consider lowering pool level below the break to reduce pressure on the damaged section.
Safety and documentation are prioritized to aid diagnosis and insurance claims.
- Record water level and time
- Power down electrical equipment
- Close isolation valves
- Notify household and contractors
Is Your Pool Losing Water or Is Evaporation to Blame?
How quickly is the water level dropping? The observer compares measured loss to expected evaporation. Record daily drop for three days with pool cover, wind, and temperature noted. If loss exceeds typical evaporation (about 1/4–1/2 inch/day depending on conditions), suspect a leak. Perform a bucket test: match filled bucket waterline with pool; differing rates indicate leak. Inspect visible fittings, skimmer, and tile line for wet soil or stains. Track results before attempting repairs or isolating plumbing.
| Test | Result |
|---|---|
| Daily drop | ? |
| Bucket test | ? |
| Visible signs | ? |
How to Shut Off and Isolate Pool Plumbing Safely
When preparing to isolate pool plumbing, the homeowner should first power down the pump and heater, then close valves and drain lines to prevent water flow and equipment damage.
Next, label and document valve positions before altering anything.
Confirm electrical disconnect at the breaker and use a lock or tag.
Slowly close multiport valves to avoid surge.
Open skimmer/return caps to relieve trapped water.
Use a wet/dry vacuum or towels for residual drainage in skimmer baskets.
Verify isolation by observing static lines and pressure gauges.
Call a licensed plumber if valves are stuck, corroded, or plumbing layouts are unclear.
- Locate and label valves
- Disconnect power safely
- Drain and relieve pressure
- Verify isolation and test
Initial Signs That Indicate a Leak Under Concrete
After isolating and confirming plumbing is shut off, attention turns to early indicators that water is escaping beneath concrete.
Observable signs include persistent damp spots or darkening on concrete slabs, unexplained pooling near pool equipment, and soft or sinking areas in adjacent turf or paving.
Unusual algae or mold growth on surfaces that should remain dry can signal subsurface moisture.
Reduced pool water level without visible surface loss suggests hidden leakage.
Sound clues—dripping behind walls or hollow-sounding slabs—may also indicate voids forming from washed-out soil.
Documenting patterns and locations helps prioritize investigative cutting or professional assessment.
How to Use a Bucket Test to Rule Out Surface Evaporation
Why conduct a bucket test? A bucket test distinguishes normal surface evaporation from a true leak by comparing water loss rates inside and outside a container. Place a marked bucket of pool water on a step; mark pool water level beside it. Run the pump as usual; leave undisturbed for 24 hours. Compare losses: similar drops indicate evaporation; greater pool loss suggests leakage. Repeat if windy or hot conditions occurred.
- Use identical pool water in bucket.
- Weight or tape marks for precise reading.
- Shield bucket from splash and sun when possible.
- Log time and weather for accuracy.
How to Locate the Leak Using Visual Clues and Water‑Loss Charts
The technician begins by scanning the deck and pool perimeter for surface signs such as damp spots, staining, or unusual plant growth that may indicate an underground leak.
Concurrently, recorded water-loss charts are consulted to quantify leakage rates and to correlate timing with observed signs.
Combining visual clues with chart trends narrows the probable leak zone before excavation or pressure testing.
Check For Surface Signs
Using visible cues and simple water-loss charts, an inspector can often narrow down a buried pool pipe leak without digging. Surface signs point to probable zones: wet or sinking soil, unusually lush vegetation, warm patches on cold days, and staining on concrete. Systematic observation across the deck and surrounding ground reduces guesswork. Walk the perimeter, note pooled water after pump shutdown, and mark anomalies relative to equipment and lines. Combine observations with pressure and isolation tests later. Record locations, timing, and weather to correlate patterns. These concise steps prioritize targeted investigation before intrusive excavation.
- Wet or soft soil
- Localized greener vegetation
- Warm or damp concrete patches
- Mineral staining or efflorescence
Use Water‑Loss Charts
After recording surface indicators, attention shifts to quantifying water loss with simple charts that help pinpoint whether leakage is from the pool shell, circulation lines, or equipment.
The method logs daily water drop, pump/off tests, and sprinkler or rain corrections.
Plotting loss on graph paper or a spreadsheet reveals patterns: steady loss with pump off suggests structural leak; increased loss when pump runs indicates pressurized lines or equipment; intermittent spikes point to weather or drip fixtures.
Combining chart trends with visual clues narrows probable zones.
Technicians use the results to decide dye testing locations, pressure testing, or excavation priorities.
Electronic Leak Detectors: Using Them on Buried Pool Pipes
When equipped with sensitivity adjustments and contact probes, electronic leak detectors allow technicians to pinpoint leaks in buried pool pipes by detecting changes in sound, pressure, or tracer gas signals. Operators scan along pipe runs, compare readings, and mark probable leak zones for excavation. Detectors require calibration, quiet surroundings, and consistent coupling to concrete or soil.
Tracer gas methods pair with ultrasonic detection for higher confidence. Limitations include depth, background noise, and impermeable surfaces that mask signals; experienced interpretation reduces false positives. Proper protective gear and safe excavation planning follow detection to address the leak without causing unnecessary concrete damage.
- Calibration
- Scanning technique
- Tracer gas pairing
- Limitations
How to Pressure Test Pipes to Pinpoint the Leak Zone
Begin by isolating the section of plumbing to be tested, then apply a controlled air or water pressure to the capped line while monitoring gauges and listening for drops or hissing that indicate leakage.
Technicians record baseline pressure, then seal fittings and introduce pressure incrementally to avoid damage.
Observe gauge decay over a defined interval; calculate leak rate (psi loss per minute) to distinguish significant breaches from minor seepage.
Repeat tests on adjacent sections to triangulate the affected zone.
When pressure drops rapidly, narrow the area and expose concrete only where tests consistently show loss.
Document results before repair.
Dye Testing and Tracer Techniques for Hard‑to‑Find Leaks
Using visible dyes and electronic tracers, technicians can pinpoint leaks that resist detection by pressure testing alone.
Dye testing involves introducing nonstaining, UV‑visible dyes into the water system and observing seepage at joints, cracks, or soil surfacing.
Electronic tracers inject a trace gas or conductive solution and employ sniffers or ground probes to follow signal paths to the leak source.
Both methods complement each other: dye for surface confirmation, tracers for subsurface guidance.
Selection depends on access, soil type, and proximity to utilities.
Safety, manufacturer instructions, and environmental regulations govern product choice and application.
- Dye introduction and observation
- Trace gas injection
- Ground probing and sniffing
- Correlate findings with pressure data
How to Read Thermal Imaging for Buried Pipe Leaks
How can a thermal imager reveal a buried pipe leak? A thermal imager shows surface temperature differences caused by leaking water cooling or warming surrounding concrete and soil. Operators scan systematically, noting consistent linear or localized anomalies versus background.
Cooler spots may indicate wet soil from a cold source; warmer patches can signal heated return lines. Readings should be correlated with ambient conditions, recent sun exposure, and known pipe layout to avoid false positives.
Use palette contrast and histogram tools to quantify deltas; mark candidate zones for follow-up testing. Equipment calibration and steady scanning speed improve detection reliability without invasive work.
When Tests Show a Leak Under Concrete: Next Steps
When tests indicate a leak under the concrete, the first priority is to pinpoint the exact source using combined evidence from thermal imaging, acoustic data, and pressure tests.
Once located, the path and extent of damage guide the choice of repair method—spot patching, sleeve repair, pipe reroute, or full replacement.
The decision balances durability, disruption to the slab, cost, and long-term risk to the pool system.
Locate Leak Source
Where exactly is the leak coming from beneath the slab? The technician narrows location using pressure tests, listening devices, thermal imaging, and dye tracing to distinguish pool system losses from ground infiltration.
Once probable zone is identified, the crew exposes concrete in small probes rather than large demolition. Careful mapping of fittings, valves, and conduit paths prevents unnecessary excavation. Documenting findings with photos and notes informs permit filings and repair planning. Safety checks for electrical and gas lines precede any further work. Accurate source location minimizes repair scope and cost while preserving surrounding finishes and utilities.
- Pressure testing
- Acoustic listening
- Thermal imaging
- Dye tracing
Choose Repair Method
Select the repair method based on the confirmed leak location, pipe condition, depth, and surrounding constraints. If the leak is near accessible joints or fittings, prioritize clamp, sleeve, or coupling repairs that minimize concrete removal.
For shallow lines where slab cutting is feasible, open-cut repair and direct splice offer durable results. Trenchless options—pipe lining, slip-lining, or sectional replacement—suit deeper pipes or when preserving concrete is preferred, but require specialized tools and expertise.
Choose materials compatible with existing plumbing (PVC, CPVC, polyethylene) and factor in long-term durability, water chemistry, and budget. When uncertain, consult a professional for assessment and quotes.
Choosing Between DIY Detection and Hiring a Pro
How should a homeowner decide between attempting pipe-leak detection under concrete and hiring a professional? The decision rests on risk tolerance, technical skill, available tools, and time. DIY suits minor suspicions, basic tools, and confidence in diagnostic steps; it reduces immediate cost but may miss deep or complex leaks.
Hiring a pro offers specialized equipment, faster localization, warranty-backed repairs, and liability coverage, at higher expense. Consider insurance requirements, permit needs, and potential for larger repairs once a breach is exposed.
Balance budget, safety, and long-term cost when selecting the approach.
- Scope and complexity
- Tools and expertise
- Liability and permits
- Time and cost
How to Mark and Map the Suspected Pipe Run on Site
The technician first notes equipment locations and fixed features to establish likely pipe corridors.
Next, visible surface clues such as patches, depressions, or staining are traced to refine the route.
Finally, a measured grid is marked on the concrete to record distances and guide any further probing.
Locate Equipment And Features
Before any excavation, a clear on-site map and visible markings must be established to trace the suspected pipe run from known equipment points to the leak area.
The technician locates pool equipment (pump, filter, heater), visible junctions, and access points, confirming dimensions and orientations.
Fixed references like deck edges, expansion joints, and nearby utilities are noted.
Measurements from equipment to suspected run are recorded on the map; flags or spray paint mark offsets.
This creates a reliable coordinate system for digging and avoids accidental damage to other infrastructure.
- Identify equipment anchors and orientations
- Note permanent landmarks
- Measure and record offsets
- Mark surface points
Trace Visible Surface Clues
Where can surface cues best indicate the suspected run of a buried pool line? Observers examine depressions, long hairline cracks, discolored concrete, settled pavers, and aligned vegetation stress as linear hints. Pay attention to straight seams, patch joints, and unusual wet spots after system use. Note slope direction from pool equipment toward the pool; visible valve boxes, conduit runs, and nearby irrigation lines often parallel plumbing. Use chalk or removable paint to trace a continuous line following these cues, recording distances to fixed landmarks and equipment. Keep markings conservative to avoid unnecessary demolition and to guide precise probing.
Measure And Mark Grid
With a tape measure and nonpermanent marker in hand, one person establishes a baseline from a fixed landmark—such as the pool skimmer, equipment pad, or a concrete seam—and records that reference on a simple sketch.
They measure perpendicular and parallel offsets in consistent units, marking grid lines on the concrete with light, removable marks. Intersections receive numbered tags tied to the sketch. Measurements include depth estimates where conduits or utility lines are known.
The resulting map narrows probable pipe corridors and guides targeted scanning or small test cuts, minimizing unnecessary demolition and focusing detection efforts efficiently.
- Establish baseline and sketch
- Mark grid lines
- Number intersections
- Record units and notes
Tools and Materials You’ll Need for an Under‑Slab Repair
For an under-slab pool pipe repair, the technician needs a concise set of tools and materials chosen for durability and access: concrete saw or jackhammer, shoring or trench boxes if the opening is large, pipe-locating equipment, replacement PVC or CPVC pipe and appropriate fittings, solvent cement and primer, couplings or slip repair sleeves, waterproofing tape or epoxy, backfill aggregate, concrete patching mix, safety gear (gloves, eye protection, respirator), and basic hand tools (wrenches, saws, chisels, tape measure).
Additional items include a wet/dry vacuum, pipe deburring tools, pressure test kit, measuring hose clamps, primer brushes, mixing bucket, and marker.
Safety Gear and Site Precautions Before Breaking Concrete
Before cutting into the slab, the crew assembles and inspects personal protective equipment and secures the work area to control hazards.
The team verifies respirators, eye and ear protection, gloves, and steel-toe boots fit and function.
Barriers prevent unauthorized access and warn neighbors of noise and dust.
Utilities are located and marked; water and electrical shutoffs are confirmed.
A small emergency kit and fire extinguisher are staged.
Communication procedures are reviewed so each member signals stops or hazards immediately.
- PPE inspection checklist
- Perimeter barriers and signage
- Utility locates and shutoffs
- Emergency response items
Best Practices for Cutting Through Concrete Safely
The writer outlines essential protective gear, including respirators, eye protection, and cut-resistant gloves, before any cutting begins.
Recommended cutting tools and techniques—such as using a concrete saw with the right blade and maintaining steady control—are highlighted for efficiency and safety.
Methods for controlling dust and debris, including wet cutting and local extraction, are presented to minimize inhalation and cleanup hazards.
Protective Gear Essentials
Donning proper protective gear is essential when cutting through concrete to repair a pool pipe beneath a slab. The worker should select gear that reduces inhalation of dust, prevents eye and skin injury from flying debris, cushions impacts, and maintains hearing protection during powered cutting. Fit must be checked and maintained throughout the job; contaminated or damaged items are replaced immediately.
Hydration and regular breaks reduce fatigue, which lowers risk. Inspect the work area for trip hazards and make certain respirator filters match particulate levels. A brief safety briefing reinforces correct use and emergency procedures.
- Respirator (P100 or N95)
- Safety goggles + face shield
- Hearing protection (earmuffs/plugs)
- Cut-resistant gloves
Proper Cutting Tools
Choose cutting tools matched to concrete thickness, reinforcement, and site constraints to guarantee efficient, safe removal.
Carbide-tipped saws suit thin slabs; diamond blades handle thicker, reinforced sections.
Use walk-behind concrete saws for large cuts and handheld angle grinders for precision or confined areas.
For localized breaking, select hydraulic or pneumatic breakers with appropriate chisel sizes.
Make certain tools have guards, vibration dampening, and compatible power sources.
Match blade speed and feed to material to prevent binding.
Inspect blades for wear and replace damaged discs.
Keep spare consumables and basic maintenance tools on hand to avoid interruptions.
Dust And Debris Control
Frequently, controlling dust and debris becomes the single most important safety measure when cutting concrete, because airborne silica and flying fragments pose respiratory, visibility, and equipment-hazard risks; consequently contractors should implement wet-cutting, local exhaust ventilation, enclosure, and scheduled housekeeping protocols, paired with appropriate PPE and site-specific containment plans to minimize exposure and downstream contamination.
The team should preplan ventilation paths, use water-fed blades or vacuum shrouds, isolate work zones, and dispose of slurry and debris per regulations.
Monitor air quality and enforce respiratory protection.
Train crew on tool limits and emergency cleanup to prevent migration and inhalation.
- Use wet cutting or HEPA vacuums
- Enclose and seal work area
- Regularly remove slurry and debris
- Monitor air and enforce PPE
How to Expose Pipe Without Damaging Surrounding Utilities
Begin by locating the pipe with noninvasive detection tools—ground-penetrating radar, electronic pipe locators, or tracer dye—so excavation can be targeted and the positions of nearby utilities confirmed before breaking concrete.
Once mapped, mark utility lines and define a minimal exposure corridor. Hand tools—chisels, small pneumatic breakers, rock hammers—and vacuum excavation reduce risk compared with large mechanical equipment.
Expose incrementally, revealing only enough pipe to assess and access the leak. Constantly re-scan and probe edges for uncharted conduits.
Protect exposed utilities with plywood shields and soft padding. Stop immediately if unexpected utilities appear and consult utility records or professionals before proceeding.
How to Excavate Concrete With Minimal Mess
When breaking concrete over a detected leak, the goal is to remove only what’s necessary while containing dust, slurry, and debris. The worker scores a perimeter with a small concrete saw, wets the blade to suppress dust, then uses a chisel or mini jack to lift slabs in controlled sections.
A tarp and dust barrier protect surrounding areas; slurry is collected with a wet vacuum and disposed of per local regulations. Personal protective equipment and periodic cleanup prevent spread. Work proceeds from the edges inward to avoid unnecessary collapse and to keep the opening as compact as possible.
- Score perimeter
- Wet cutting
- Contain slurry
- Lift sections
How to Inspect the Exposed Pipe and Identify the Leak Type
With the pipe exposed, the inspector first scans for visible damage such as cracks, corrosion, or crushed sections that indicate the repair approach.
Next, the leak type is classified—whether it is a hairline crack, joint failure, or a fitting rupture—to determine materials and techniques required.
Finally, pressure and flow tests are performed to confirm the leak location and assess system integrity before repairs proceed.
Visual Pipe Damage
A careful visual inspection of the exposed pipe provides the primary clues needed to classify the leak type. The observer notes discoloration, corrosion, cracks, or missing fittings; wetness patterns on surrounding concrete and deposits indicate chronic versus acute failure.
Surface abrasions or gouges suggest mechanical damage; hairline fractures often follow freeze or pressure stress. Joint areas show sealant failures or pipe separation. Mapping observed defects before repair guides material selection and method.
- Corrosion: pitting, greenish or white deposits.
- Cracks: length, width, location.
- Joint issues: gaps, loose fittings.
- Abrasions: scrapes, gouges.
Leak Type Identification
How can the exposed pipe be examined to distinguish between surface symptoms and underlying failure modes? The inspector notes wetness patterns, mineral deposits, and soil displacement first.
Pinpoint drips, hairline cracks, or pinholes vs. longitudinal splits by wiping and marking active weeps. Check joints, fittings, and junction points for corrosion, thread damage, or adhesive failure.
Squeeze soft spots indicating delamination or plastic degradation. Probe nearby concrete for voids or undermining that suggest external stress.
Record dimensions, location, and material type. Photographs and sketches document findings for repair decisions. Avoid pressure testing at this stage; rely on visual and tactile cues.
Pressure And Flow Tests
Begin controlled pressure and flow testing only after the exposed pipe has been visually and tactilely evaluated, so the inspector can correlate test results with observed symptoms.
The inspector isolates the section, caps fittings, and applies gauge-monitored air or water pressure to detect drops.
Flow meters and bucket-timed discharge quantify leak rate; audible stethoscopes and soap solution locate seepage.
Test both static pressure and running-flow conditions to distinguish pinhole, joint, or full-bore failures.
- Record baseline pressure and ambient conditions.
- Apply incremental pressure while watching gauges.
- Measure flow under pump operation.
- Note leak location, rate, and failure type.
How to Determine if the Pipe Is Cracked, Split, or Joint‑Failed
Which signs point to a cracked pipe, a longitudinal split, or a failed joint can be distinguished by observing leak patterns, water flow behavior, and localized damage.
A hairline crack often shows slow, diffuse seepage along pipe length and damp concrete staining without a single concentrated stream.
A longitudinal split typically produces a continuous narrow stream or wet streak following the pipe axis and may worsen under pressure cycles.
Joint failure emits intermittent spurting at connections, visible pooling near fittings, and ease of dye or tracer entry at the joint.
Combining visual inspection, listening for hissing, and targeted dye tracing helps discriminate these faults.
How to Temporarily Stop a Leak to Keep Water Contained
A quick shutoff valve can isolate flow to the damaged section and limit further loss.
Temporary patch materials, such as epoxy putty or rubber clamps, provide a short-term seal until permanent repairs are made.
A pump and simple containment (basin or sandbags) keep escaped water controlled while work proceeds.
Quick Shutoff Valve
Install a temporary quick shutoff valve on the supply line to isolate the leaking section and stop further water loss while a permanent repair is arranged. A threaded ball valve or clamp-on stop valve provides immediate control without extensive excavation.
The installer should depressurize the line, confirm valve compatibility with pipe material and diameter, and position the valve upstream of the leak. Operate slowly to avoid pressure surges and verify a watertight seal before leaving the site.
Use the valve only as a short-term measure and label it clearly for technicians.
- Confirm pipe size and material
- Depressurize before installation
- Test for leaks after closing
- Label and restrict use
Temporary Patch Materials
When immediate excavation is impractical, temporary patch materials offer a rapid way to contain water and limit damage until a permanent repair can be made.
Patching depends on access and pressure: rubber repair patches with hose clamps can seal small breaches, epoxy putty adheres to wet PVC or metal for short-term sealing, and self-fusing silicone tape conforms to irregular surfaces.
For hairline cracks, fast-setting hydraulic cement can reduce seepage where material can be applied.
Applied patches should be monitored frequently for failure and are strictly temporary; they reduce leakage and buy time but do not replace professional excavation and permanent pipe replacement.
Pump And Containment
Start pumping and isolate the leak source to prevent pool water from migrating into surrounding soil and causing further structural damage. A submersible pump lowers water level to expose the leak; containment prevents washout and eases repairs.
Valves should be shut to stop flow from supply lines. Temporary plugs, inflatable bladders, or wedge-blocks can seal open ends. Debris and suction placement require care to avoid enlarging the breach.
Monitor groundwater and pool structure while working. Once contained, proceed with diagnostics and permanent repair.
- Select pump sized to pool volume and leak rate.
- Shut nearby valves and equipment.
- Use temporary plugs or inflatable seals.
- Maintain continuous monitoring and backups.
How to Cut Out and Replace a Damaged Pipe Section
Before cutting, the damaged section must be accurately located and the surrounding concrete cleared enough to access the pipe along a straight run.
The area is dried and the system depressurized.
Mark cut lines beyond visible damage allowing for coupling length and a small bevel for fit.
Use a suitable saw or pipe cutter; support the pipe to prevent sagging.
Remove the damaged segment, deburr edges, and clean surfaces.
Dry-fit replacement piece and couplings to confirm alignment and slope.
Apply approved joining method, then pressure-test the splice before backfilling.
Restore concrete after confirming leak-free operation.
How to Choose the Right Pipe Material and Fittings for Repair
Selecting replacement components begins with confirming pipe material compatibility to prevent galvanic reactions and ensure solvent, glue, or fusion bonding will work.
Next, the repair should use fittings and pipe rated for the pool’s maximum operating pressure and temperature to avoid failure.
Finally, choose fittings and adhesives specifically formulated for the chosen material to guarantee reliable joints under wet, buried conditions.
Pipe Material Compatibility
Material choice determines long-term performance when repairing a pool pipe under concrete. Compatibility between pipe and fitting materials prevents galvanic corrosion, leaks, and joint failures. Consider chemical resistance to chlorine and salt, thermal expansion differences, and UV exposure if any section will be above ground. Use approved coupling fittings or dielectric unions when joining dissimilar materials. Follow manufacturer guidelines and local codes to guarantee solvent, mechanical, or fusion methods are appropriate.
- PVC to PVC: solvent-welded joints for permanence.
- CPVC: for higher temperature tolerance; use compatible cement.
- Polyethylene (PE): use compression or electrofusion fittings.
- Metal (stainless/bronze): require dielectric isolation and matching alloys.
Pressure Rating Match
When matching pipe and fitting materials for a pool repair, pressure ratings must align with the system’s maximum operating pressure plus a safety margin. The repairer should identify pump pressure, static head, and any transient spikes to calculate peak stresses.
Select pipes and components rated at or above that peak pressure; common choices include Schedule 40/80 PVC or high-pressure CPVC and polyethylene variants specified in psi. Make certain valves, unions, and replacement sections share equivalent or higher ratings to prevent weak points.
Temperature and UV exposure affect long-term strength; choose materials rated for expected service conditions to maintain integrity.
Fittings And Adhesives
Having established compatible pressure ratings, attention turns to choosing pipe fittings and adhesives that will maintain a leak-free joint under the same expected loads and environmental conditions. The installer selects materials resistant to pool chemicals, UV, burial moisture, and ground movement. Thermoplastic options (PVC, CPVC, HDPE) require matched fittings and solvent or fusion techniques; metal pipes demand corrosion-resistant alloys and proper thread sealants.
Adhesive cure time, temperature range, and tensile strength must suit the job. Test repairs at operating pressure before backfill and document materials for future maintenance.
- Match material chemistry
- Use rated fittings
- Choose appropriate adhesive method
- Pressure-test before backfill
When to Upgrade Buried Pool Lines to Schedule 80 or CPVC (Pool Guidance)
Professionals occasionally recommend upgrading buried pool lines to Schedule 80 PVC or CPVC when repeated leaks, chemical degradation, or pressure issues indicate the original piping no longer provides reliable performance.
Upgrade consideration rests on visible corrosion, frequent repairs, brittle or discolored pipe, and system pressures near or above original pipe ratings.
Soil chemistry, exposure to pool chemicals, heat, and UV for shallow runs factor into longevity.
Switch decisions also weigh long-term cost, access difficulty beneath concrete, and compatibility with existing fittings and equipment.
When failure risk or maintenance frequency rises, upgrading to heavier‑walled, chemically resistant pipe reduces future outages and repair invasiveness.
How to Glue, Solvent‑Weld, or Use Mechanical Couplings Properly
Upgrading to heavier‑walled or more chemical‑resistant pipe often leads to different joining methods and connection concerns, so proper joining technique matters as much as pipe selection.
Practitioners should clean, chamfer, and dry fittings; use primers where required; apply solvent evenly; and allow full cure before pressurizing.
For mechanical couplings, select rated clamps or compression fittings sized for buried service and tightness per manufacturer torque.
Avoid solvent on incompatible plastics and never mix dissimilar materials without an approved adapter.
Test assemblies under low pressure, inspect for seepage, then perform a final pressure test per local code before backfilling.
- Clean, prime, solvent‑weld per spec
- Chamfer and align for full socket depth
- Use rated mechanical couplers and correct torque
- Pressure‑test prior to backfill
How to Install a Repair Sleeve for Small Cracks
To repair small cracks in a buried pool pipe, a repair sleeve provides a durable, localized splice without replacing long runs of plumbing.
The pipe is exposed, cleaned, and dried; damaged area is sanded to fresh material.
A correct‑sized sleeve — rubber or PVC with stainless clamps or solvent‑weld coupler — is selected.
For rubber sleeves, center over the crack and tighten clamps evenly; for PVC sleeves, apply primer and cement or use a mechanical sleeve per instructions.
After curing or torqueing, pressure‑test the line before backfilling.
Document location and add warning tape above the repair for future access.
How to Replace a PVC Fitting Under Concrete
The process begins by locating the broken PVC fitting through pressure testing and visual inspection.
Once found, the technician excavates carefully around the pipe to expose enough length for a clean cut and proper jointing.
The damaged section is replaced, glued or coupled with compatible fittings, and the line is pressure tested before backfilling.
Locate The Broken Fitting
Start by identifying where the leak manifests at the pool equipment, skimmer, or visible run of PVC before breaking concrete. The technician traces wet spots, air in the system, pressure drops, and sound to narrow the defect. Noninvasive tools—pressure testing, dye, and listening devices—confirm the general area. Once localized, exposed junctions and fittings are inspected visually for hairline cracks, disbonded joints, or failing glue. Record measurements and pipe orientation for accurate replacement. Prepare a plan that limits concrete removal and targets the fitting precisely.
- Pressure-test to find the leaking zone.
- Use dye to visualize flow paths.
- Listen for leak noise.
- Measure and document fittings.
Excavate Carefully Around Pipe
With a clear mark where the leak lies, excavation proceeds methodically to expose only what’s necessary while protecting the pipe and surrounding concrete.
Workers remove surface material in a controlled radius, using hand tools near the pipe to avoid accidental strikes. Soil is lifted in layers, set aside for reuse, and larger chunks of concrete are broken back from the marked area until solid edges remain.
The pipe is kept visible along its length to confirm the fitting location; any bedding material is noted.
Careful shoring prevents collapse of the trench.
Debris is cleared to leave a clean, accessible work cavity.
Replace And Pressure Test
After exposing the damaged section and clearing a clean work cavity, attention turns to removing and replacing the faulty PVC fitting. The old fitting is cut out squarely, remaining pipe faces are deburred and cleaned with PVC primer. A compatible replacement fitting is solvent-welded following manufacturer cure times. Temporary caps seal the line for pressure testing; an air or water test to 25–30 psi verifies integrity for 15–30 minutes. If no drop occurs, backfill and restore concrete. If pressure falls, isolate leaks, repeat repairs, and retest until stable.
- Cut square and deburr
- Prime thoroughly
- Solvent-weld with correct fitting
- Pressure-test and confirm
Pressure Test Under‑Slab Pipe Repairs Before Backfill
Before backfilling, the repaired under‑slab piping must undergo a controlled pressure test to verify integrity and detect leaks that could be concealed by concrete.
The technician isolates the section, caps ends, and fills it with water or air per code, introducing pressure to the specified PSI and monitoring for hold or decay over a defined interval.
Visible fittings, joints, and exposed repairs are inspected while gauges record results.
Any pressure loss triggers excavation and repair.
Successful tests are documented with readings, date, and inspector initials before backfill proceeds, ensuring longevity and preventing costly post‑pour remediation.
How to Troubleshoot Common Pressure Test Failures
Once a pressure test registers decay or unstable readings, the technician systematically isolates potential causes to locate the fault.
Visual inspection checks fittings, visible joints, and test gauge fittings for leaks.
Repeatable short-duration tests help distinguish slow leaks from gauge drift.
Confirm test equipment integrity by swapping gauges and valves to rule out instrumentation error.
If no external leak appears, pressurize isolated segments sequentially to narrow section location before exposing concrete.
- Inspect accessible fittings and gauge connections.
- Swap test equipment to verify accuracy.
- Run timed tests to measure decay rate.
- Isolate and pressurize segments progressively.
How to Prepare Backfill to Protect the Repaired Pipe
With the pipe repaired and pressure tests confirming integrity, attention turns to backfill methods that protect the line and prevent future damage. The space is layered: bedding, padding, and final fill. Clean granular bedding stabilizes the pipe; fine sand or pea gravel cushions fittings and avoids point loads. Compact gently in 4–6 inch lifts to prevent voids while avoiding heavy compaction directly over the pipe. Keep sharp debris away and restore proper slope for drainage. Mark the location with warning tape. Inspect for settled spots after initial use and add material as needed to maintain support and protection.
| Layer | Material | Purpose |
|---|---|---|
| Bedding | Granular sand | Stabilize pipe |
| Padding | Pea gravel | Cushion fittings |
| Final fill | Compacted soil | Protect and restore grade |
How to Pour and Cure Patch Concrete Over a Repaired Pipe
After the backfill is leveled and warning tape is in place, the final step is to pour and properly cure the patch concrete to restore slab integrity and protect the repaired pipe.
The area is primed with bonding agent, forms are secured to match slab thickness, and a slightly convex finish makes certain drainage.
Mix concrete to manufacturer slump, pour in one continuous lift, and consolidate with a vibrator or tamping rod to eliminate voids.
Protect the patch from rapid moisture loss and freezing.
- Apply bonding agent evenly.
- Match slab level and pour.
- Consolidate and finish surface.
- Cure 7 days moist or with membrane.
How to Restore Decking, Tile, or Pavers After Concrete Repair
Attention to matching existing surface materials guarantees the repaired area is visually consistent with the surrounding deck, tile, or pavers.
Edges should be protected during work to prevent chipping or staining of adjacent pieces.
Joints and seams must be blended carefully so grout lines and gaps align and the repair reads as part of the original surface.
Match Existing Surface Materials
When repairing concrete around a pool, matching the surrounding decking, tile, or pavers is essential to preserve both appearance and slip resistance; careful selection of color, texture, and joint patterns minimizes the visual patch and restores safe footing.
The technician samples materials, photographs patterns, and tests small mock-ups in sunlight and wet conditions.
Mortars, stains, and sealers are chosen to replicate hue and sheen.
Cutting and laying follow original joint spacing and slope to maintain drainage and tripping safety.
- Match color and sheen with test patches.
- Replicate texture with stamps or aggregates.
- Align joints and slope precisely.
- Use compatible sealers and grout.
Protect Edges During Work
A row of foam boards and plywood shields the pool deck edges while cut-and-fill work proceeds, preventing chips, grout displacement, and accidental tool strikes.
Protective tape over tile faces and edge guards on pavers minimize surface damage. Temporary supports keep lifted coping aligned and prevent settling when adjacent concrete is removed.
Workers remove loose debris by hand near finishes, using soft brushes rather than grinders. Clear labeling and a low-traffic perimeter reduce accidental contact.
After repair, protective elements are carefully removed and surfaces inspected for remaining dust or thin mortar smears, which are gently cleaned before final curing.
Blend Joints And Seams
During concrete repair, blending joints and seams restores continuity between old and new materials so the decking, tile, or pavers read as a single, finished surface.
The technician evaluates color, texture, and joint width, then matches grout or joint filler. Edges are saw-cut or chamfered to create a clean junction. Mortar and adhesive are feathered and smoothed; excess removed before setting.
Surface textures are replicated with brushes or stamps. Seams receive appropriate flexible sealant where movement occurs. Final cleaning and color sealer unify appearance and protect repairs, producing an invisible, durable restoration.
- Match materials
- Clean and prepare joints
- Feather and texture junctions
- Seal and finish
How to Prevent Future Leaks With Proper Pipe Bedding and Slope
With proper bedding and slope, buried pool piping resists movement and minimizes standing water that accelerates joint failure.
Install a uniform bedding layer of compacted sand or pea gravel, free of sharp stones, to cradle pipe and prevent point loads.
Maintain a consistent fall—typically 1/8″ to 1/4″ per foot—toward drains or return lines to avoid pooling. Use laser or string level checks during placement and secure pipe with short stakes until backfill is compacted.
Backfill in layers, tamping gently to avoid pipe deformation.
Document slope and bedding materials for future inspections and repairs.
How to Insulate and Protect Exposed Plumbing in Cold Climates
The section outlines common insulation material options such as foam, fiberglass, and heat-trace tape and their suitability for buried versus exposed runs.
It then reviews frost-prevention techniques, including proper burial depth, heated cable use, and maintaining circulation during freezes.
Finally, it addresses methods for protecting exposed joints with weatherproof wraps, sealed enclosures, and durable mechanical protection.
Insulation Material Options
In cold climates, selecting the right insulation material for exposed pool plumbing is critical to prevent freeze damage, reduce heat loss, and simplify future repairs.
Options vary by durability, R-value, moisture resistance, and ease of installation.
Closed-cell foam offers high R-value and water resistance for buried or semi-exposed runs.
Fiberglass with vapor barrier fits controlled, dry enclosures.
Rubber foam with adhesive jacket resists ozone and UV for outdoor exposed lines.
Polyethylene foam is economical for short runs and wraps but requires UV protection.
Consider service access and compatibility with fittings when choosing materials.
- Closed-cell foam
- Fiberglass with vapor barrier
- Rubber foam with adhesive jacket
- Polyethylene foam
Frost Prevention Techniques
Typically, homeowners in cold regions combine insulation, heat tracing, and proper sheltering to keep exposed pool plumbing from freezing. Frost prevention emphasizes continuous insulation coverage, using closed-cell foam sleeves, insulated wrap, or fiberglass with vapor barrier.
Electric heat tape applied per manufacturer instructions provides supplemental warmth; thermostatically controlled models reduce energy use. Pipes should be routed inside shallow trenches or protected by simple housings that block wind and retain warmth.
Drainback and winterization remain essential when temperatures exceed system ratings. Regular inspections for damaged insulation or tape and prompt repairs preserve performance and reduce burst risk during prolonged cold spells.
Protecting Exposed Joints
Against wind and freeze, exposed joints demand targeted protection because fittings, unions, and valve stems are the most vulnerable points in a pool plumbing run. The advisor recommends layering: clean joints, apply silicone or plumber’s grease to threads, wrap with closed-cell foam, and seal with weatherproof tape. Insulation must be snug, UV-resistant, and removable for service. For long-term defense, add rigid foam shields and heat cable where permitted; monitor for moisture and condensation. Regular winter inspections catch failures early. Install labels for service access and keep spare seals on hand to minimize downtime and prevent concrete repairs.
- Clean and lubricate
- Closed-cell foam wrap
- UV tape and rigid shields
- Heat cable where allowed
How to Spot Signs of Recurring Leaks After Repair
Regularly checking for subtle changes in pool performance and surrounding ground conditions helps reveal recurring leaks after a repair. Observers note patterns: steady water loss, new wet spots, pressure fluctuations, or unexplained algae blooms. Record measurements and photos weekly for comparison. If signs cluster, prioritize inspection of repaired areas, fittings, and nearby joints. Use simple tests like bucket or pressure checks to isolate loss. Persistent indicators suggest incomplete sealing, shifting concrete, or hidden fractures requiring professional assessment.
| Sign | What to look for | Quick test |
|---|---|---|
| Water loss | Consistent drop | Bucket test |
| Wet soil | New damp patches | Visual probe |
| Pressure change | Pump behavior | Pressure gauge |
| Algae | Sudden growth | Chlorine check |
DIY Repair Costs and a Budget Checklist
A concise estimate of DIY repair expenses helps homeowners weigh labor, materials, and potential equipment rental costs before beginning work.
A targeted budget checklist should list pipe fittings, epoxy or sealant, concrete cutting and patch materials, safety gear, and contingency funds for unforeseen issues.
Clear cost categories reduce the risk of running over budget and guide decision-making between DIY and professional repair.
Estimated Repair Expenses
Estimating repair costs for a pool pipe leak under concrete requires breaking the job into clear line items—diagnostics, excavation, pipe replacement or rerouting, fittings and materials, concrete repair, and labor or tool rental—so a homeowner can compare DIY versus professional expenses and build a realistic budget.
Typical ranges vary: basic DIY might total $200–$800 for parts and rentals; moderate repairs $800–$3,000 including concrete patching; complex or reroute projects $3,000–$8,000+ with significant labor. Contingencies of 10–25% are prudent. Cost drivers include access difficulty, pipe type, permit needs, and local labor rates.
- Diagnostics
- Excavation
- Pipe work
- Concrete repair
Essential Budget Checklist
With cost categories and typical ranges outlined, the homeowner can compile a focused DIY budget checklist that maps each task to a dollar amount and schedule. The checklist prioritizes leak localization, concrete cutting, pipe replacement, backfill, and finishing. Each line item lists materials, tool rental, labor allocation, contingency (10–20%), and a target completion date. Tracking receipts and progress avoids overruns. A simple table highlights key entries for quick reference and helps compare bids or rental options before committing.
| Task | Estimated Cost | Timing |
|---|---|---|
| Leak locate | $50–$200 | 1 day |
| Pipe repair | $100–$600 | 1–2 days |
| Concrete work | $200–$800 | 1–3 days |
When to Call a Licensed Plumber or Pool Contractor
When should a homeowner escalate a concrete-encased pool pipe leak to a licensed plumber or pool contractor? A professional is warranted when risks, complexity, or legal requirements exceed DIY capacity. Seek licensed help for safety, durable repair, and code compliance.
- Visible structural cracking, settling, or large-scale concrete damage indicating undermined foundations.
- Repeated or high-volume leaks after attempted DIY fixes, suggesting deep or inaccessible failures.
- Involvement of gas lines, electrical conduit, or municipal water connections near the leak.
- Required permits, warranty concerns, insurance claims, or uncertain diagnosis needing pressure testing and specialized equipment.
How to Choose a Contractor If You Decide Not to DIY
Selecting a contractor for repairing a pool pipe under concrete requires vetting credentials, experience with concrete-encased plumbing, and clear, written estimates that specify scope, materials, timelines, and warranties.
The owner should verify licenses, insurance, and local code familiarity, request references and recent job photos, and confirm excavation and restoration methods.
Obtain at least three detailed bids, comparing line-item costs and proposed diagnostic tests.
Ask about subcontractors, site protection, and clean-up procedures.
Insist on a written contract with milestones and payment schedule.
Prefer contractors who communicate promptly, provide permits, and demonstrate prior successful concrete-embedded pipe repairs.
How to Get the Most Reliable Warranty on Pipe Repairs
Often a reliable warranty is the clearest indicator of workmanship confidence and long‑term protection for a repaired pool pipe under concrete. The homeowner should demand written terms, ask about coverage duration, and confirm what triggers a warranty repair versus an exclusion. Verify installer licensing and insurance, document pre‑repair condition with photos, and get serial numbers or part details. Prefer warranties transferable to future owners and backed by the contractor plus manufacturer.
- Ask for written, itemized warranty terms.
- Verify contractor licensing and insurance.
- Document condition and parts used.
- Prefer transferable, dual‑backed warranties.
Permits and Local Code Issues for Pool Plumbing Repairs
Permits and local code requirements determine whether a repair to a pool pipe under concrete can proceed, dictate allowable materials and methods, and establish inspection points that protect safety and property values.
Homeowners should verify jurisdictional rules, required permit types, licensed-contractor mandates, and approved pipe materials (e.g., PVC schedule, fittings).
Applications often require drawings, demolition limits, and backfill/compaction specs.
Failure to obtain permits can void warranties and complicate resale.
Inspections typically occur at rough-in, pressure-test, and final stages.
Records of approvals and permits should be retained and provided to any contractor or future buyer for compliance verification.
Quick Pro Tips to Speed the Detection and Repair Process
When time is critical, a few targeted steps drastically shorten the leak-detection and repair timeline: begin with a pressure test to localize the failure, use acoustic listening or a tracer dye to confirm the source, and document pipe routing with photos or a quick sketch before any concrete removal.
- Shut off sections and isolate the short span to minimize water loss and speed testing.
- Use a handheld ultrasonic detector to pinpoint noisy leaks through thin slabs.
- Apply fluorescent dye at suspected joints, inspect at night with UV light.
- Prepare ready-fit replacement fittings and a concrete cutting plan to reduce downtime.
Conclusion
Concluding the investigation reveals that urgent, methodical action — isolating systems, confirming true loss versus evaporation, and applying temporary stops — uncovers more than a leak: it exposes the value of preparedness and informed choices. Whether DIY or hiring a contractor, understanding permits, warranties, and detection methods transforms a disruptive failure into manageable work. The truth of the theory — that knowledge reduces harm — holds: careful assessment and decisive steps yield the most reliable, least costly outcomes.