Fix Exhaust Pipe Leak Fast: Simple DIY Repair Guide for Cars
Quick DIY Exhaust Pipe Leak Repair Guide
If you’re dealing with an exhaust pipe leak, you can fix it quickly and easily with some basic tools and materials.
Key Takeaways:
- Locate the Leak: Listen for hissing or popping sounds, look for soot marks, and confirm with soapy water or smoke.
- Prepare the Vehicle: Safely lift and support the car using jack stands.
- Clean the Area: Remove any rust or debris around the leak.
- Seal the Leak: Use high-temperature exhaust tape, muffler cement, or a stainless repair sleeve with clamps for a temporary fix.
- Check for Success: After a short drive, recheck for leaks by looking for bubbles and ensure everything is tightly secured.
For more severe or structural issues, it’s best to consult a professional mechanic. Follow these steps for a quick and effective repair!
Quick DIY Fix for Common Exhaust Pipe Leaks
Identify the leak by listening for hissing or tapping sounds and inspecting the exhaust system with the engine cold.
The DIY approach prioritizes safety: use gloves, eye protection, and jack stands.
For small holes, clean surrounding rust and apply high-temperature exhaust sealant or epoxy per instructions.
Replace deteriorated clamps and use stainless steel repair bands for larger cracks.
For split joints, wrap self-fusing silicone tape or use a muffler patch; tighten clamps evenly.
After repair, lower the vehicle, run the engine, and recheck for leaks and rattles.
If corrosion or structural damage persists, seek professional replacement rather than temporary fixes.
How to Tell If You Have an Exhaust Pipe Leak
Signs of an exhaust pipe leak often include visible smoke or black soot around joints and seams.
Increased loudness or unusual rattling and hissing noises while the engine runs can also indicate a breach.
Observing both visual discoloration and abnormal sound together strengthens the likelihood of a leak.
Visible Smoke Or Soot
How can visible smoke or black soot indicate an exhaust pipe leak? Dark smoke or concentrated soot deposits around joints, seams, or holes signal exhaust gases escaping before the tailpipe.
Soot appears as flaky black residue on nearby metal, frame components, or undercarriage shielding. Intermittent puffs during acceleration or steady streaks after short drives point to leaking locations.
Inspect visually with the engine cold; fresh soot is matte and easily wiped. Presence of oily or fuel-rich smoke alongside soot may suggest more than a simple leak and warrants inspection of fueling or combustion issues, but soot alone often marks escaping exhaust gases.
Loud Or Unusual Noise
Often a loud or oddly pitched noise announces an exhaust leak long before visual clues appear.
A hissing, tapping, or rasping sound, especially during acceleration or when the engine is cold, indicates escaping gases from a crack, hole, or loose joint.
Sounds change with load and RPM: a sharp pop suggests a small rupture; a deep rumble points to a larger breach or detached section.
Locating the source involves listening beneath the vehicle (with safety measures), noting where noise intensifies, and testing with a gloved hand or cardboard for air movement.
Prompt repair prevents performance loss, noise fines, and increased emissions.
When to Call a Mechanic vs. DIY
Decide quickly whether the leak is within a DIY skill set or requires professional attention by evaluating its location, severity, and the vehicle’s condition.
Minor surface cracks, small holes in accessible sections, or loose clamps can be handled with basic tools and temporary patches.
Severe corrosion, fractured hangers, manifold leaks, or damage near catalytic converters demand a mechanic due to safety, emissions, and repair complexity.
If the leak produces strong fumes, rapid worsening, or uncertain diagnostic signs, consult a professional.
When in doubt, prioritize inspection by a qualified technician to avoid costly secondary damage or safety hazards.
Safely Lift and Support Your Car for Exhaust Work
Before starting exhaust work, the article stresses locating the vehicle’s proper jacking points to prevent frame or body damage.
It then recommends placing and lowering the car securely onto rated jack stands rather than relying on the hydraulic jack alone.
Safety checks—firm contact, level ground, and a slight shake test—confirm stable support before anyone goes underneath.
Proper Jacking Points
When lifting a vehicle for exhaust work, locating and using the manufacturer’s designated jacking points is essential to prevent damage and guarantee safety. The technician inspects the owner’s manual and underside markings, selecting sturdy pinch welds, reinforced frame notches, or subframe mounting points. Placement avoids body panels, fuel lines, and exhaust components. The jack saddle centers on the point; slow, even lifting reduces stress. Visual confirmation of contact and minimal vehicle tilt precede any undercarriage access. Refer to model-specific illustrations and weight limits to safeguard correct positioning before proceeding with further support.
| Jack Point Type | Typical Location |
|---|---|
| Pinch weld | Along rocker panel |
| Subframe | Front/rear crossmember |
Secure Jack Stands
For safe exhaust work, the vehicle must be supported on properly rated jack stands placed at the manufacturer’s recommended lift points and set on level, solid ground. The technician should chock wheels, engage the parking brake, and use a hydraulic jack only to lift, never to support.
Position stands symmetrically under strong frame or pinch-weld areas, raise the car slightly higher than needed, and lower gently onto the stands. Verify stability by gently rocking the vehicle and inspecting contact points.
Never work beneath a car supported only by a jack. Remove loose tools and avoid sudden impacts that could shift the supports.
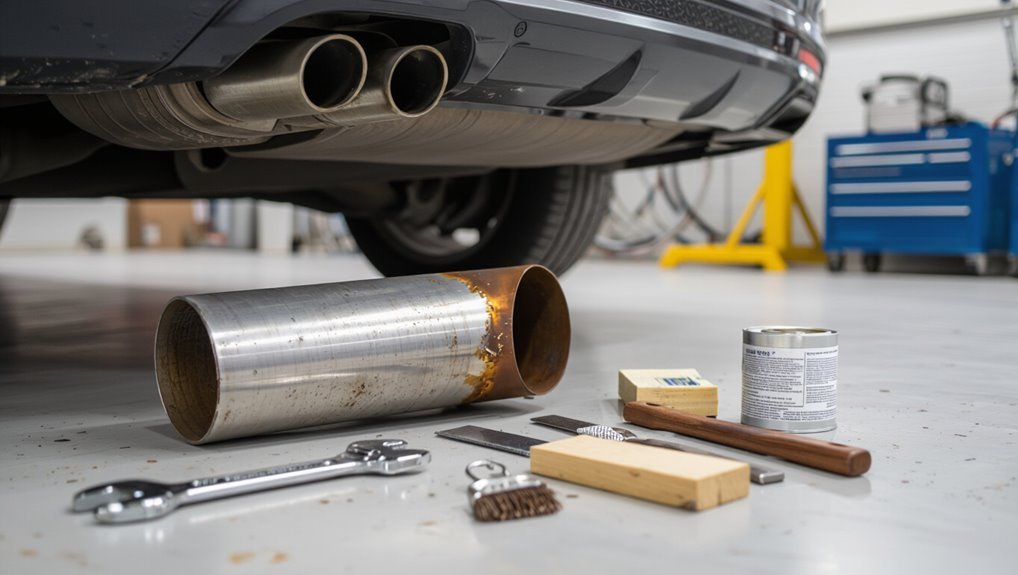
Tools and Supplies for a Quick Exhaust Repair
Equipped with the right tools and materials, a quick exhaust repair can be completed reliably and safely.
The technician gathers essentials to cut, seal, support, and protect the pipe. Quality and compatibility matter: stainless clamps suit stainless systems, high‑temp sealants resist exhaust heat, and replacement tubing matches diameter.
- Socket set and wrench — for clamps and hangers.
- Exhaust tape or high‑temp paste — for temporary sealing.
- Replacement clamp/patch and muffler cement — for durable fixes.
- Wire brush and gloves — for surface prep and safety.
Proper selection reduces repeat work and guarantees roadworthy results.
Locate the Exact Leak on the Exhaust Pipe
With tools and materials prepared, the technician moves under the vehicle to pinpoint the exact leak location on the exhaust pipe.
He listens for hissing or ticking while the engine idles, careful to avoid moving parts and hot surfaces.
A gloved hand or a length of hose amplifies sound for precise detection.
He watches for visible soot, fresh black streaks, or escaping fumes where joints, bends, or welded seams meet the pipe.
If doubtful, a brief, controlled rev aids identification.
Once located, the technician marks the spot, documents its nature and size, and plans the appropriate repair approach.
Visual Checks: Rust, Holes, Loose Clamps
Beneath the vehicle, a careful visual inspection reveals common indicators of exhaust failure: surface rust that flakes away, perforations forming thin-edged holes, and clamps or hangers that have shifted or loosened.
The observer notes affected sections, records locations, and evaluates whether corrosion is surface-level or structural.
- Inspect pipe lengthwise for blistered metal, scale, and sharp holes.
- Check joints, welds, and seams where stress concentrates and leaks start.
- Examine clamps and hangers for missing bolts, corrosion, or movement.
- Assess adjacent components for heat staining or soot that marks escaped gases.
Decisions prioritize repair versus part replacement based on severity.
Smoke and Soapy-Water Tests to Find Small Leaks
A smoke test begins by introducing visible vapor into the exhaust system and watching for its escape at suspected joints or cracks.
A soapy-water solution is then brushed or sprayed onto welds, seams, and connections to reveal leaks by forming bubbles.
The size, frequency, and location of emerging bubbles or smoke guide the diagnosis of leak severity and exact position.
Smoke Test Procedure
Begin by sealing the exhaust system and introducing a safe, visible tracer—typically commercial smoke or soapy water—to locate small leaks that are otherwise hard to detect.
The technician watches joints, flanges, hangers, and flex sections while the tracer flows under light backpressure.
Positive tracer escape pinpoints repair sites for welding, gasket replacement, or clamp tightening.
Follow safety: engine off when using smoke machines near batteries; wear eye protection and ventilate.
- Pressurize system gently.
- Inject tracer at tailpipe or service port.
- Inspect visually and with a mirror.
- Mark and document leak locations.
Soapy Water Application
Following the smoke test, soapy water provides a quick, low-cost method for confirming and pinpointing small exhaust leaks that produce visible bubbles under light pressure.
A mixture of dish soap and water is applied with a spray bottle or brush to suspected areas—joints, clamps, seams, and welds—while the system is gently pressurized using a hand pump or low-pressure compressor.
Observers watch for steady or intermittent bubbles that indicate escaping gas.
After testing, surfaces should be rinsed and dried.
Use protective gloves and eye protection; make certain the vehicle is cool and well-ventilated to avoid burns or inhalation hazards during inspection.
Interpreting Bubble Patterns
When inspecting bubble behavior from smoke or soapy-water tests, the pattern, size, frequency, and location of bubbles reveal the leak’s nature and severity.
Observers note steady streams, rapid spits, or intermittent puffs; each indicates hole size, pressure, or intermittent sealing by soot.
Direction shows flow source and nearby joints.
Consistent bubbles along a seam suggest a long crack; isolated large bubbles suggest a pinhole.
- Small, steady bubbles = slow pinhole leak.
- Large, continuous bubbles = significant breach.
- Intermittent bubbles = pressure fluctuation or partial seal.
- Bubble trail direction = exhaust flow path and leak origin.
Quick Temporary Fixes: Tape, Wrap, and When to Use Them
Often used as stopgap measures, tape and wrap can temporarily seal small exhaust leaks until proper repairs are made.
Aluminum foil tape, high-temperature silicone tape, and exhaust wrap adhere to clean, cool metal and reduce escaping gases from pinholes or short splits.
Proper surface prep—removing rust, soot, and oil—improves adhesion.
Wraps should overlap and extend past the damaged area; tapes require firm, even pressure.
These fixes suit short-term roadside stabilization or diagnostic access when a full weld or replacement isn’t immediately possible.
They are not substitutes for professional welding, replacement of corroded sections, or long-term structural repair.
How Long Temporary Repairs Last and If Driving Is Safe
Typically, temporary exhaust repairs using tape or wrap last from a few days to several weeks under light use, but their lifespan depends on factors like exhaust temperature, road vibration, and exposure to moisture or salt.
Temporary fixes reduce noise and fumes briefly but are not permanent.
Driving is permissible for short, cautious trips to a repair shop; extended high-speed or heavy-load driving accelerates failure.
Consider these points:
- Inspect daily for loosening, soot, or new leaks.
- Avoid long trips, towing, or spirited driving.
- Replace with a proper repair as soon as possible.
- Prioritize safety if fumes enter the cabin.
Patch Repair With Fiberglass or Muffler Cement (Step-by-Step)
Several straightforward steps let a technician or experienced DIYer apply fiberglass or muffler cement to patch a leaking exhaust: prepare the area by cleaning and removing rust, measure and cut the repair material to fit the breach, apply cement or wrap per product instructions, and allow proper curing before testing.
Next, sand to bare metal, degrease, and mask surrounding areas. Mix cement or saturate cloth per manufacturer ratios. Press material firmly into the hole and overlap edges for strength. Smooth seams, remove excess, and let cure undisturbed at recommended temperature. Inspect the patch for gaps, then start the engine and check for leaks.
Replace a Short Pipe Section With a Repair Sleeve
The process begins with measuring and marking the damaged section to determine the correct sleeve length and placement.
Next, a sleeve matching the pipe diameter and material is selected to guarantee a proper fit and corrosion resistance.
Finally, the sleeve is clamped or welded in place, then the repair is tested for leaks and alignment.
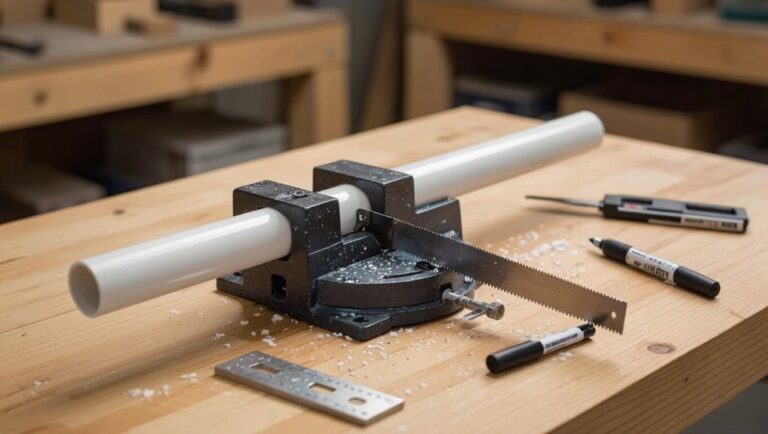
Measure And Mark Pipe
Measure the damaged section and mark exact cut points on the exhaust pipe so the replacement sleeve will fit snugly without stressing adjoining joints.
The technician verifies measurements twice and notes pipe orientation, corrosion limits, and clearance from heat-sensitive components.
Precise markings prevent misalignment and shorten welding or clamp adjustments.
- Measure twice: include overlap length for the sleeve.
- Mark cut lines square to pipe axis with a durable marker.
- Record pipe diameter and wall condition for final fit checks.
- Inspect surrounding brackets and note any required repositioning before cutting.
Choose Correct Sleeve
After marking and verifying the cut points, selection of the repair sleeve focuses on matching pipe diameter, material, and required overlap to guarantee a sealed, durable joint.
The technician chooses stainless or aluminized steel sleeves to resist heat and corrosion, matching wall thickness to the existing pipe.
Sleeve diameter should allow a snug slip fit or slip-on with minimal gap; adaptors or stepped sleeves suit mismatched sizes.
Required overlap—typically 1.5–3 inches per side—ensures strength and sealant seating.
Clamps or welded tabs compatibility is checked.
Finally, the sleeve length is confirmed so no exhaust routing or hanger alignment will be compromised.
Secure And Test Repair
Slide the repair sleeve into position, aligning overlaps and hanger points so the sleeve sits squarely on both pipe ends without twisting.
Clamp and tighten evenly to compress seals and guarantee a snug fit.
After initial tightening, inspect gaps and retorque clamps post-heat cycle.
- Tighten clamps alternately to specified torque to prevent distortion.
- Support hangers and check alignment; adjust to remove stress from the sleeve.
- Start the engine briefly and listen for leaks; use soapy water if necessary.
- Recheck all fasteners after a short road test and verify no exhaust contact with chassis.
Cut and Weld a Rusted Pipe Section
When a section of exhaust pipe is too corroded to guarantee with clamps or patching, the damaged segment should be removed and replaced to restore integrity and prevent further leaks. The mechanic measures and marks cut lines, supports the pipe, then uses a reciprocating saw or cutoff wheel to remove the rusted portion. Replacement requires fitting a new pipe, aligning flanges, and tack-welding to verify fit. Final welds should fully penetrate for strength; grinding smooths seams. After cooling, the assembly is inspected for gaps, cleaned, and reheated if necessary to guarantee a durable joint.
| Measure | Cut | Fit |
|---|---|---|
| Mark | Remove | Align |
| Tack | Weld | Inspect |
Welding vs. Clamping: Choosing a Permanent Fix
The article compares welding and clamping as permanent repairs for exhaust leaks, noting welding offers superior strength and longevity while clamping provides a faster, reversible option.
It then contrasts cost and time factors, with welding generally more expensive and time-consuming than a clamp.
Finally, suitability for the vehicle’s condition and anticipated service life is highlighted as the deciding factor.
Welding: Strength And Permanence
Welding offers a permanent, high-strength repair by fusing metal components into a continuous joint that restores structural integrity and resists vibration and heat far better than clamps.
The technique is preferred when long-term durability and leak-free performance are required, especially on corroded or load-bearing sections.
Skilled preparation and proper weld type guarantee penetration and avoid cracking under thermal cycling.
- Material match: choose compatible filler and base metal for corrosion resistance.
- Joint prep: clean, bevel, and align for full fusion.
- Heat control: manage distortion and avoid burn-through.
- Inspection: verify weld continuity and absence of porosity.
Clamping: Quick And Reversible
After outlining welding’s permanence and strength, attention shifts to clamping as a contrasting option: clamps provide a fast, reversible repair that restores sealing without specialized equipment or metallurgical skill.
Clamps suit axial or flange leaks where metal remains structurally sound; they compress gasket material or wrap patches to close gaps and stop leaks. Installation requires proper-sized clamps, clean mating surfaces, and torque applied evenly to avoid crushing thin pipes. Clamping allows inspection, replacement, or final weld later. It tolerates vibration if chosen correctly but may loosen over time and can be less effective on severely corroded or misaligned sections.
Cost, Time, And Suitability
In weighing cost, time, and suitability, one must balance welding’s higher upfront expense and longer downtime against clamping’s lower initial cost and rapid installation. The decision depends on leak severity, pipe condition, and anticipated service life. Welding offers permanence and better sealing for corroded or structural failures; clamping suits small holes, temporary fixes, or budget constraints. Consider long-term value versus immediate needs.
- Welding: higher cost, longer shop time, durable seal.
- Clamping: inexpensive, quick, removable.
- Pipe condition: corrosion often necessitates welding.
- Use-case: temporary vs permanent determines choice.
Replace a Damaged Exhaust Clamp or Hanger
Inspecting the exhaust mounting points reveals whether a clamp or hanger needs replacement: look for rusted bolts, cracked rubber isolators, or metal fatigued to the point of separation.
A safe jack or stands support the vehicle and prevent stress on the system.
Remove corroded clamps or hangers with penetrating oil and proper sockets; cut severely rusted pieces if necessary.
Fit new hangers or clamps to restore alignment and reduce vibration, ensuring hangers isolate movement without over-constraining. Tighten fasteners to manufacturer torque where available.
Recheck clearances, secure connections, and test for reduced noise and movement before lowering the vehicle.
Choosing Replacement Pipe, Sleeves, and Clamps by Size
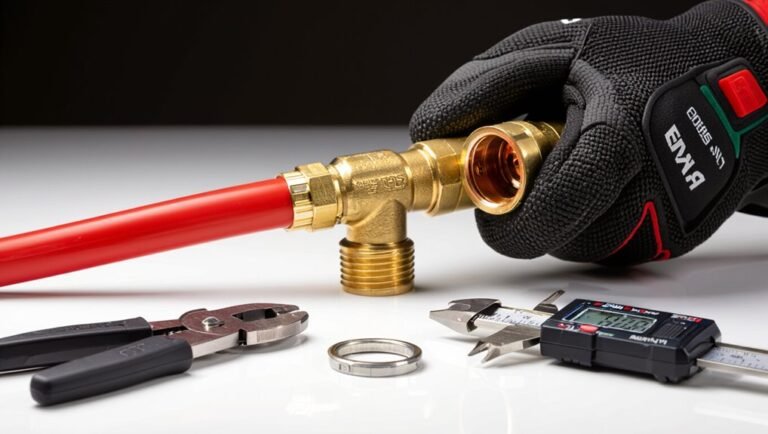
When selecting replacement pipe, sleeves, and clamps, technicians should match outer diameters and wall thicknesses to the existing system so joints fit snugly and maintain strength; measurement with calipers or a tape at multiple points accounts for ovaling from wear.
Fit tolerances, material compatibility (stainless vs aluminized), and clamp style affect longevity. Proper sleeve insertion depth and clamp torque prevent slippage.
Consider corrosion resistance and heat cycling ratings for the vehicle’s exhaust location.
- Verify OD and wall thickness precisely.
- Choose compatible materials.
- Select clamp type for the joint (wrap, U-bolt, band).
- Confirm sleeve length and insertion depth.
Seal Joints and Flanges Without Welding
After matching pipes, sleeves, and clamps for proper fit, technicians can seal joints and flanges without welding using gasketed flanges, high-temperature RTV, exhaust sealants, and mechanical band or V-band clamps designed for exhaust service. The methods chosen depend on leak size, accessibility, and heat exposure. Gaskets provide reliable flange sealing; RTV and paste sealants fill small gaps and resist heat; band clamps compress sleeves for quick repairs. Proper surface prep, torque to specification, and periodic inspection guarantee durability. Temporary fixes should be monitored and replaced with permanent solutions when possible.
| Method | Best use |
|---|---|
| Gasketed flange | Flange joins |
| RTV/sealant | Small gaps |
Test Your Repair Before Lowering the Car
Always verify the repair while the vehicle is still elevated to make sure the exhaust system is leak-free and securely mounted.
The technician inspects fittings, tightens clamps, and confirms alignment before lowering.
With the engine idling, visual and auditory checks detect escaping gases.
Use gloved hands to feel for leaks at joints (careful of heat) and a soapy water spray to reveal bubbles.
Confirm hanger positions prevent stress on the repair.
- Start engine, observe for visible leaks.
- Apply soapy water to suspect areas.
- Feel for escaping air cautiously.
- Re-torque clamps and fasteners as needed.
Post-Repair Checks: Noise, Vibration, Emissions
With the repair confirmed at operating height, attention shifts to verifying that noise, vibration, and emissions are within acceptable limits. The technician runs the engine through idle and load, listening for new leaks, feeling for abnormal vibration, and observing tailpipe color and smell. Road test at varied speeds confirms stability and absence of rattles. Emissions can be checked visually and with a simple reader if available; any persistent issues indicate seal or joint problems needing rework. Document findings and retighten clamps if necessary.
| Check | Method | Acceptable Result |
|---|---|---|
| Noise | Listen at idle/load | No new hissing/rattles |
| Vibration | Hand on chassis | No abnormal vibration |
| Emissions | Visual/OBD | Clear exhaust, no codes |
Prevent Future Leaks With Rust Protection and Heat Shielding
Through targeted rust protection and proper heat shielding, future exhaust leaks can be minimized by addressing the two main causes: corrosion and thermal stress. A concise maintenance strategy extends component life and lowers repair frequency.
- Use high-temperature exhaust paint or ceramic coatings on exposed pipe sections to block moisture and salt.
- Replace corroded clamps and hangers with stainless steel hardware to prevent galvanic deterioration.
- Install or repair heat shields and insulating wraps where pipes contact bodywork to reduce thermal cycling.
- Schedule periodic inspections, especially after winter or off-road exposure, to catch early rust or damage.
Common Mistakes That Cause Leaks to Return
Many repairs fail because critical steps are skipped or the wrong materials are chosen.
Improper surface preparation, using incorrect patch materials, and overtightening clamps or bolts each undermine the seal and promote recurrence.
A clear look at these common mistakes helps pinpoint lasting solutions.
Improper Surface Preparation
When surface preparation is rushed or incomplete, temporary fixes are likely to fail because sealants and patches cannot bond to contaminated or uneven metal.
The result is recurring leaks as adhesives peel and patches shift.
Proper cleaning, corrosion removal, and smoothing are essential before any repair is applied.
- Remove rust and scale with a wire brush or grinder until bare metal appears.
- Degrease the area thoroughly; oil prevents adhesion.
- File or sand sharp edges and pits to create a uniform surface.
- Inspect for hidden cracks; poor prep hides defects that will reopen.
Inadequate prep shortens repair life and invites repeat work.
Using Wrong Patch Materials
Cleaning and proper surface prep matter little if the wrong materials are used to seal the defect.
Using low‑temperature tape, ordinary epoxy, or non‑heat‑rated fillers leads to failure when exhaust temperatures rise. Materials must resist heat, vibration, and corrosion; muffler tape, high‑temp silicone, stainless patches, or exhaust cement formulated for high heat perform reliably.
Temporary household fixes may mask leaks briefly but delaminate, crack, or melt, causing fumes and noise to return.
Selection should match pipe metal and joint type; compatibility prevents galvanic corrosion. Choosing appropriate, automotive‑grade products guarantees a durable repair rather than a recurring problem.
Overtightening Clamps Or Bolts
Frequently, overtightening clamps or bolts meant to seal an exhaust joint creates new stress points that warp flanges, crush gaskets, or strip threads, allowing leaks to reappear despite an otherwise correct repair.
The mechanic should aim for even, specified torque and inspect parts for damage before reassembly.
- Use a torque wrench and follow manufacturer specs to avoid deformation.
- Replace crushed gaskets and corroded bolts rather than forcing old hardware.
- Tighten clamps incrementally and alternate sides for uniform compression.
- If threads strip, repair with helicoil or replace the fastener to restore reliable clamping.
Cost & Time: Temporary Patch vs. Pipe Replacement
In comparing a temporary patch to a full exhaust pipe replacement, cost and completion time emerge as the decisive factors: patches typically require minimal parts and an hour or two of labor, offering a low-cost, short-term fix, while replacement involves higher parts and labor costs and several hours to a full day, but restores long-term integrity and avoids repeat repairs. Decision-making balances budget, vehicle age, and planned use. A patch suits emergency or budget-limited situations; replacement fits long-term reliability. The table summarizes typical expectations.
| Option | Typical Cost | Typical Time |
|---|---|---|
| Patch | Low | 1–2 hours |
| Replacement | Higher | 3–8+ hours |
| Outcome | Short-term | Long-term |
When an Exhaust Leak Affects Emissions or Inspections
When an exhaust leak reaches the catalytic converter or oxygen sensor area, emissions readings can rise and cause a vehicle to fail inspection even if performance seems unaffected; addressing leaks promptly is critical because altered sensor signals and unfiltered exhaust gases undermine test accuracy and legal compliance.
The technician or owner should prioritize locating leaks near sensors and cat connections.
Typical consequences and actions include:
- False O2 sensor readings triggering check-engine codes and failed emissions.
- Catalytic converter inefficiency from unmetered air bypassing filtration.
- Inspection failure due to elevated NOx, CO, or HC levels.
- Immediate repair or qualified assessment to restore compliance.
Quick Maintenance Checklist to Avoid Future Exhaust Leaks
For preventive care, a concise checklist helps owners and technicians catch the small issues that lead to exhaust leaks before they worsen.
Inspect hangers and mounts for wear or corrosion; replace any that allow excessive movement.
Check pipe joints, clamps, and gaskets for rust, cracks, or looseness; tighten or swap parts as needed.
Examine heat shields and catalytic converter connections for damage.
Scan for soot deposits or unusual noise while running the engine to localize slow leaks.
Ensure regular undercarriage washes to remove road salt.
Schedule periodic professional inspections and document findings to track emerging problems.
Conclusion
In short, the exhausted reader learns that duct tape and optimism are poor mechanics. A quick patch can hush a rattling pipe long enough for a weekend warrior to feel heroic, but nature (and rust) will laugh later. Sensible checks, proper jacks, and timely replacement keep emissions inspectors and muffled neighbors placated. Treat the exhaust like a relationship: ignore it, and it will make noise; fix it well, and life smells marginally better.