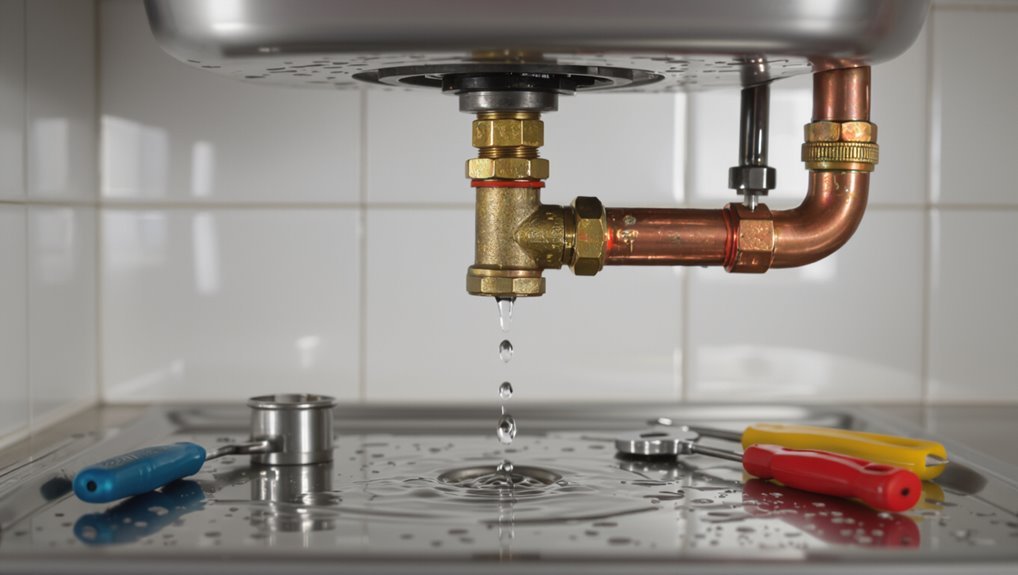
Easy Fix for a Leaky Pipe Under Sink: Quick DIY Repair Guide
Quick Fix for a Leaky Pipe Under Sink: Step-by-Step Guide
If you have a leaky pipe under your sink, follow these simple steps for a quick DIY repair:
- Shut Off Water Supply: Turn off the water to prevent further leakage.
- Inspect the Leak: Place a bucket under the sink to catch any dripping water and identify the source of the leak.
- Tighten Loose Parts: If the leak is from a loose slip-nut, hand-tighten it and then use a wrench to ensure it’s snug.
- Replace Worn Out Parts: If you notice worn washers or gaskets, replace them to stop the leak.
- Temporary Fix for Pinholes: For small pinholes, dry the area and apply self-fusing silicone tape or epoxy putty as a temporary seal.
- Address Major Damage: If the damage is bigger, replace the tailpiece or P-trap with matching parts.
- Test the Repair: Turn the water back on and check for any slow leaks.
Key Takeaway: Always start by shutting off the water supply, then inspect and address the leak with simple repairs or replacements as needed.
Emergency Steps: Stop Water and Catch Drips

When a pipe begins to leak, the first priority is to stop the flow and limit water damage: shut off the nearest shutoff valve or the main water supply if a local valve is not accessible, then place a bucket or towel beneath the leak to catch drips and protect flooring and belongings.
The next steps are to isolate electrical hazards, remove valuables from the area, and document the leak with photos for reference.
Temporary measures—tightening accessible fittings slightly, wrapping with waterproof tape or a cloth—can reduce flow until permanent repair.
Call a professional if the leak persists or involves significant pressure.
Identify If the Under‑Sink Leak Is Pipe or Fitting
Before attempting repairs, determine whether the leak originates from a pipe or from a fitting, because the cause dictates the fix: a ruptured or corroded section of pipe usually requires cutting and replacement or patching, while a leaking fitting often needs tightening, resealing with tape or compound, or replacement of a gasket.
Inspect the area dry, then run water and watch for drips. Note the drip location relative to joints, compression nuts, and trap connections. Check for corrosion, hairline cracks, or mineral buildup on straight runs. Observe whether movement or vibration triggers leakage. Photographs help document findings before proceeding.
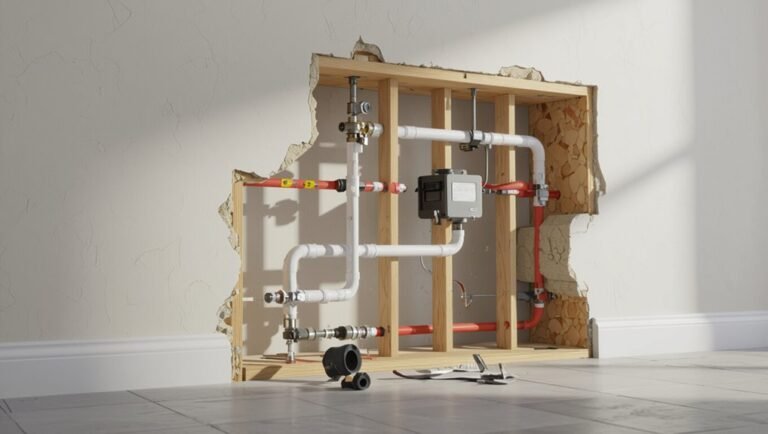
Tools & Materials for Immediate Under‑Sink Repairs
The section lists the essential hand tools — adjustable wrench, pipe wrench, pliers, basin wrench and plumber’s tape — needed for quick under‑sink fixes.
It also covers common replacement parts like compression rings, slip nuts, tailpieces, and short lengths of pipe or P-trap assemblies.
Finally, required safety gear and supplies such as gloves, safety glasses, towels, a bucket, and a flashlight are summarized.
Essential Tools Needed
Which tools are indispensable for stopping a slow leak under a sink and preventing water damage? A concise kit enables rapid diagnosis and temporary or permanent fixes. A flashlight, adjustable wrench, plumber’s tape, and bucket form the core. Protective gloves and rags control mess; a pipe cutter and small hacksaw suit more involved repairs. A basin wrench reaches tight fittings. Keep parts organized and work methodical to avoid mistakes.
| Tool | Purpose | Tip |
|---|---|---|
| Flashlight | Locate leak | Use waterproof model |
| Adjustable wrench | Tighten fittings | Match jaw to nut |
| Plumber’s tape | Seal threads | Wrap clockwise |
| Bucket | Catch water | Use shallow pan |
Common Replacement Parts
After gathering the basic tools, attention turns to common replacement parts that enable immediate under‑sink repairs. A concise kit speeds diagnosis and fixes: replace worn washers, cracked tailpieces, corroded slip nuts, or failing P-trap sections. Stocking a few sizes avoids delays.
Quick-seal compression fittings and rubber gaskets restore watertight joints; flexible supply lines swap in when braided hoses fail. Brass couplings and threaded adapters handle mismatched pipes. Keep spare hose clamps and a roll of plumber’s tape for instant sealing. Selection depends on pipe material and fitting types encountered during inspection.
- Washers and rubber gaskets
- Tailpieces and P-trap sections
- Compression fittings and adapters
- Flexible supply lines and clamps
Safety Gear And Supplies
Wearing basic personal protective equipment materially reduces injury risk during under‑sink work, so gloves, eye protection, and a dust mask should be on hand before any repair begins.
A pair of nitrile or work gloves protects from contaminants and sharp edges; safety glasses prevent splashes and debris; a respirator or dust mask filters mold spores and chemical fumes.
Essential supplies include a bucket, absorbent towels, adjustable wrench, plumber’s tape, epoxy putty, pipe repair clamp, and a flashlight or headlamp.
A utility knife, pipe cutter, and small hand saw may be needed.
Keeping a first‑aid kit nearby completes readiness.
Quick Temporary Fixes for Under‑Sink Leaks (Tape, Epoxy, Clamps)
A quick tape patch can temporarily seal a small pinhole or hairline crack until a proper repair is made.
A temporary clamp repair provides stronger compression for larger leaks or damaged fittings while parts are sourced.
Both methods are meant only as short‑term measures and should be followed by a permanent fix.
Quick Tape Patch
Often, a quick tape patch can stop an under-sink leak long enough to shut off the water and plan a permanent repair.
A clean, dry surface is essential; water or corrosion prevents adhesion.
Use plumber’s or self-fusing silicone tape wrapped tightly with overlap, stretching per instructions to form a watertight seal.
Avoid relying on ordinary duct tape.
This is strictly temporary; monitor for seepage and replace with a permanent fix promptly.
- Clean and dry the leak area thoroughly.
- Choose plumber’s or self-fusing silicone tape.
- Stretch and wrap with firm overlap.
- Check frequently and replace permanently.
Temporary Clamp Repair
Temporary clamp repair provides a rapid, sturdy stopgap for under‑sink leaks by mechanically compressing the damaged area until a permanent fix can be made.
The method requires a rubber patch or gasket, a hose clamp or specialized pipe repair clamp, and basic tools.
Clean and dry the pipe, position the rubber over the leak, then tighten the clamp evenly to avoid deforming the pipe.
Confirm no drips remain and monitor periodically.
This approach suits small pinholes, hairline cracks, or loose joints but is not long‑term; schedule a proper replacement or professional repair to restore full integrity and code compliance.
Replace a Leaking Tailpiece or P‑Trap : Step‑By‑Step
When a sink shows persistent drips or visible corrosion at the tailpiece or P‑trap, begin by shutting off the water, placing a bucket beneath the trap, and clearing the area for unobstructed access; this preparation prevents spills and speeds the replacement process.
The damaged tailpiece or P‑trap is loosened by hand or wrench, old washers and slip nuts removed, and components inspected for cracks.
A matching replacement is fitted, ensuring proper alignment and slip‑joint washers.
Reassemble, hand‑tighten nuts, test with water, then check for leaks and re‑tighten if needed.
- Confirm shutoff
- Catch water
- Match parts
- Test for leaks
Fix a Leaking Compression Joint Without Replacing Pipe
Tighten the compression nut slightly and observe whether the leak stops before attempting more invasive measures; many compression-joint drips result from a loose nut, a misplaced ferrule, or a degraded seat rather than a cracked pipe.
If tightening fails, shut off water, loosen the nut, pull the tubing free, and inspect the ferrule and seating surface.
Replace a damaged ferrule or re-seat it correctly, sliding it toward the valve and retightening to compress evenly.
Clean mating surfaces and remove corrosion.
Use minimal thread sealant only on threads if recommended by manufacturer.
Test under pressure and retighten if small weeps persist.
Reseal Slip‑Joint Connections (New Washers and Putty)
If a compression joint inspection found intact tubing and ferrule but the sink continues to drip at the P-trap or tailpiece slip joints, attention shifts to the slip‑joint washers and sealing compound.
The technician recommends shutting off water, disassembling the slip nuts, and inspecting old rubber or plastic washers for flattening, cracking, or misalignment.
Clean mating surfaces, replace washers with correct size, and optionally add a thin rope of plumber’s putty or non‑hardening slip‑joint sealant for extra assurance.
Reassemble finger‑tight then wrench snug; test for leaks and retighten incrementally.
- Inspect washers
- Clean surfaces
- Replace and seal
- Test and adjust
Repair or Replace Corroded/Cracked Under‑Sink Pipe Sections
Assess the affected under‑sink pipe sections to determine whether localized repairs or full replacements are required. Visual inspection should note corrosion scale, hairline cracks, pinholes, and soft spots.
Small punctures in plastic or mild surface rust on steel may be patched with epoxy putty, rubber repair sleeves, or compression couplings. Extensive thinning, longitudinal cracks, or multiple damaged fittings warrant cutting out the section and installing matching replacement pipe and connectors.
Make sure water is shut off, lines drained, and proper materials (PVC, PEX, copper) and joining methods are used. Test the repair under pressure and check for residual leaks before restoring cabinetry.
Short‑Term Options for Soldered Copper Joint Leaks
When a soldered copper joint begins to leak, several short-term fixes can buy time before a permanent repair.
Temporary pipe clamps can stop active drips, epoxy putty can seal small weeps, and cooling followed by reflowing the joint can restore solder in some cases.
Each method has limits and is best treated as a temporary measure until the joint can be properly serviced.
Temporary Pipe Clamps
For short-term containment of leaks at soldered copper joints, temporary pipe clamps provide a quick, nonpermanent solution that minimizes water damage until a proper repair can be made.
They are metal or rubber-lined bands secured with screws or bolts, applied over the leak, and tightened just enough to slow or stop seepage.
Clamps are easy to install with basic tools, compatible with various pipe diameters, and meant only as interim fixes.
Inspect for corrosion and replace if leak persists.
Use them to buy time before re-soldering or professional replacement.
- Ease of installation
- Size adaptability
- Limited lifespan
- Corrosion check
Epoxy Putty Repairs
Apply epoxy putty as a short-term fix to stop leaks at soldered copper joints by molding the compound around the damp area to form a hard, watertight seal.
The surface must be clean, dry, and free of loose solder or corrosion; use a wire brush and cloth to prepare the metal.
Knead the putty until uniform, press firmly into and over the leak, and smooth edges to guarantee adhesion.
Cure time varies—follow manufacturer instructions—and avoid restoring full water pressure until fully set.
This is a temporary measure; schedule proper solder repair or joint replacement for a lasting solution.
Cooling And Reflow
Cooling a soldered copper joint and then reflowing the solder can temporarily restore a weeping connection by solidifying weak spots and resealing hairline voids.
The technique suits small leaks at joints where base metal remains intact.
First, shut water and dry the area.
Apply flux, cool joint with a damp rag to prevent heat spread, then heat evenly and feed solder until it flows smoothly.
Allow controlled cooling.
This is a short‑term fix; underlying corrosion or mechanical stress requires proper replacement.
Safety: use ventilation and eye protection.
Consider a licensed plumber for permanent repair.
- Isolate water
- Clean joint
- Apply flux and reflow
- Cool and inspect
Why Leaks Often Return (Common Causes and Mistakes)
Frequently, repaired leaks reappear because the underlying cause was not fully addressed; temporary fixes often mask symptoms rather than correct root problems such as corroded pipe sections, ongoing pressure fluctuations, or compromised fittings.
Common mistakes include using improper sealants, overtightening or undertightening connections, and neglecting degraded gaskets or washers.
Patch repairs on corroded or cracked pipes fail when metal continues to deteriorate.
Incorrect pipe alignment or unsupported runs create stress at joints.
Ignoring water chemistry or high pressure allows recurring degradation.
Proper diagnosis and replacing damaged components, not just sealing visible drips, prevent repeat leaks.
How to Test Your Repair and Catch Hidden Drips
Before declaring a repair finished, the repairer should run a systematic test to confirm watertightness and reveal hidden drips. The procedure uses visual inspection, timed flow, and moisture detection to make certain the fix holds under normal and elevated conditions.
Quiet observation and tactile checks around joints, fittings, and traps help spot slow leaks. Use a flashlight, paper towels, and a small mirror to access tight spots. Pressure tests expose failures not seen at low flow.
- Inspect visually and feel all joints for dampness.
- Run full hot and cold flow for several minutes.
- Place paper towels under suspect areas to detect slow seepage.
- Recheck after 30–60 minutes and again the next day.
When to Call a Plumber : Signs Beyond DIY
When should a homeowner stop troubleshooting and call a professional? A plumber is warranted if leaks persist, water spreads to cabinets or drywall, odors or mold appear, or if shutoff valves fail. Electrical proximity, corroded fittings, or complex trap and drain issues also require expertise. Timely escalation prevents hidden damage and higher costs.
| Observable sign | Emotional cue | Action |
|---|---|---|
| Continuous drip | Anxiety | Call plumber |
| Water stains | Dread | Inspect urgently |
| Soft cabinet base | Alarm | Stop use |
| Mold smell | Revulsion | Seek help |
| Valve failure | Panic | Professional needed |
Preventive Checks to Avoid Future Under‑Sink Leaks
Regularly inspecting under‑sink components helps catch small issues before they become leaks or costly repairs.
The homeowner should follow a concise checklist: look for drips, stains, or corrosion on pipes and fittings; feel for loose joints; test shutoff valves for smooth operation; and check for moisture under insulation or cabinet surfaces.
Attention to trap alignment and sealant condition prevents slow failures.
Document findings and date inspections to track deterioration.
Replace any suspect washers, clamps, or tape promptly.
Seasonal checks after temperature swings reduce freeze and expansion risks, extending component life and avoiding emergency repairs.
- Inspect for visible damage
- Test shutoff valves
- Check seals and fittings
- Record and schedule follow‑ups
Conclusion
After swift action to stop water and assess the source, the homeowner can often secure a temporary fix or replace the tailpiece or P‑trap to restore normal flow. Like a patch on a leaking sail, these measures hold until a permanent repair is made. Regular checks and correct tightening, plus replacing worn seals, reduce recurrence; persistent, hidden, or structural leaks still warrant a professional plumber to guarantee long‑term safety and prevent greater damage.