What Does an Exhaust Pipe Do? Simple Car Exhaust Guide for DIYers
An exhaust pipe is essential for directing combustion gases away from the engine and into the atmosphere, while also ensuring these gases pass through converters, mufflers, and resonators. It plays a crucial role in reducing engine heat, supporting emissions control systems, managing backpressure for optimal performance, and providing secure mounting points. To prevent issues like leaks and noise, it’s important to ensure the exhaust pipe is the right size, properly routed, and securely mounted. Here are some practical tips for inspecting and repairing your exhaust system.
What Is an Exhaust Pipe and Why It Matters
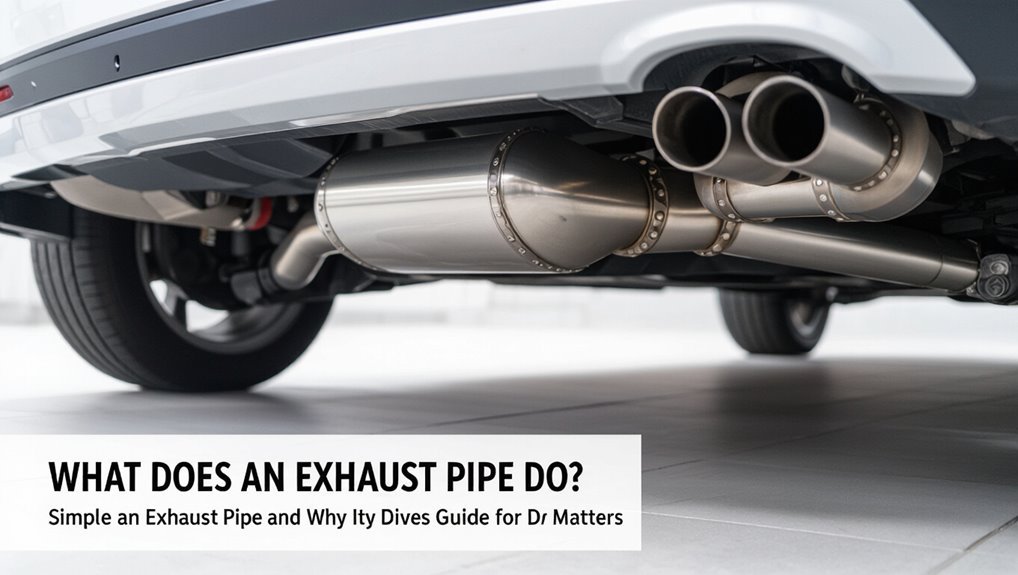
At its core, an exhaust pipe is the conduit that directs combustion gases away from an engine, channeling them from the manifold through various treatments—such as catalytic converters and mufflers—before releasing them into the atmosphere.
It protects occupants by removing toxic gases and reducing heat within the engine bay.
It supports performance by minimizing backpressure and enabling efficient scavenging, affecting power and fuel economy.
It aids emissions control by routing gases through catalysts that convert harmful compounds.
Durability, proper routing, and secure mounting prevent leaks and noise.
Proper maintenance preserves safety, efficiency, and regulatory compliance.
How the Exhaust System Fits Into Your Car’s Engine Setup
Linked directly to the cylinder head and coordinated with intake, fuel, and ignition systems, the exhaust system completes the engine’s breathing cycle by channeling spent gases away from combustion chambers and enabling fresh air–fuel mixtures to enter efficiently.
It interfaces with manifolds, sensors, and control modules, influencing backpressure, scavenging, and emission controls. Proper routing and component selection affect performance, fuel economy, and compliance with emission standards.
Integration includes thermal management and packaging within the vehicle’s underbody and chassis constraints. Maintenance and upgrades must respect sensor locations and engine calibration to avoid check-engine triggers or drivability issues.
- Manifold and header connections
- O2 and temperature sensor placement
- Muffler, catalytic converter, and routing
How the Exhaust Pipe Removes Combustion Gases
The exhaust pipe channels combustion gases away from the engine toward the catalytic converter and muffler.
Its diameter, length and routing are designed to sustain steady flow and avoid restrictions. Proper flow management also prevents backpressure that would reduce engine efficiency and power.
Channeling Exhaust Gases
Through a series of pipes and connections, the exhaust system directs combustion byproducts away from the engine and passenger compartment.
It channels hot gases from the exhaust manifold through the catalytic converter and muffler, routing flow toward the tailpipe.
The pathway reduces heat near critical components and guides emissions to treatment devices, enabling safe exit to atmosphere.
Properly sized tubing and secure joints guarantee efficient evacuation while minimizing leaks.
Corrosion, cracks or loose clamps interrupt the channel and allow fumes or noise into the cabin.
Routine inspection preserves clear passages and maintains system integrity.
- Manifold collects cylinder outputs
- Catalytic converter treats gases
- Tailpipe final exit
Preventing Backpressure
Following the channeling of exhaust gases through manifolds, converters, and tailpipes, attention shifts to how the system guarantees backpressure so combustion gases exit efficiently.
The exhaust pipe’s diameter, routing, and smooth interior minimize flow resistance; larger or properly tuned pipes reduce restrictive choke points. Mufflers and resonators balance noise control with minimal impedance, while bends are kept gradual to avoid turbulence. Properly sized catalytic converters and clean oxygen sensors guarantee steady flow and correct scavenging timing. Regular inspections prevent blockages from corrosion, carbon buildup, or collapsed components. Effective backpressure management preserves power, fuel economy, and engine longevity.
How Exhaust Pipes Route Gases From the Engine to the Tailpipe
From the engine’s exhaust ports, a network of pipes directs combustion gases through progressively larger passages, treatment components, and bends until they exit at the tailpipe.
Manifolds collect pulses from cylinders into a single channel; collector designs smooth changes and route flow into the downpipe.
The downpipe feeds catalytic converters and resonators that chemically and acoustically treat gases, then the system widens into mid-pipes and mufflers that dampen sound and accommodate chassis routing.
Tailpipes provide final routing and outlet position.
Proper supports, hangers, and flex sections prevent stress and allow thermal movement while maintaining sealed connections.
- Exhaust manifold and collector
- Catalytic converter and resonator
- Muffler, tailpipe, hangers
Why Exhaust Flow Affects Engine Performance
Exhaust flow directly influences engine breathing by altering backpressure, which can restrict exhaust exit and reduce power.
Proper flow velocity and scavenging improve cylinder evacuation and intake charging, raising efficiency and torque.
Balancing these factors in pipe design and headers determines real-world performance gains.
Exhaust Backpressure Effects
When restricted by narrow piping or convoluted routing, exhaust backpressure alters the pressure differential across the combustion chamber and reduces the efficiency of exhaust scavenging.
Increased backpressure forces the engine to work harder to expel burnt gases, raising pumping losses and lowering volumetric efficiency.
Peak torque can shift, throttle response dulls, and fuel consumption rises as cylinders retain exhaust residue.
Heat can accumulate, stressing manifolds and turbochargers.
Proper sizing and smoother paths reduce these detrimental effects without invoking scavenging dynamics.
- Elevated pumping work reduces net power output.
- Retained exhaust increases intake contamination.
- Higher temperatures accelerate component wear.
Scavenging And Flow Velocity
Harnessing high-velocity gas flow and well-timed pressure waves, scavenging actively clears combustion chambers of residual exhaust and aids fresh charge filling.
Exhaust velocity and pipe geometry shape pulse timing; tuned lengths create low-pressure traps that draw spent gases from the cylinder just after valve overlap.
Higher velocity improves scavenging at specific RPM ranges but can raise backpressure elsewhere, so headers, collector sizes, and muffler design balance flow against torque and horsepower goals.
Properly managed flow velocity enhances volumetric efficiency, combustion consistency, and throttle response.
Mismatched systems cause scavenging loss, reversion, or uneven cylinder scavenging, reducing performance and increasing emissions.
How Exhaust Pipes Reduce Harmful Emissions
Through a combination of flow management, filtration, and catalytic conversion, exhaust pipes play a direct role in lowering emissions produced by internal combustion engines. They route exhaust through catalytic converters that transform CO, HC, and NOx into less harmful gases, and they maintain backpressure and flow to optimize combustion efficiency, reducing unburned fuel.
Heat retention supports converter efficiency; proper piping diameter and smooth bends minimize turbulence that can impair catalyst performance. Corrosion-resistant materials prevent leaks that would bypass emissions control. Regular inspection and correct mounting preserve system integrity and guarantee emission-reduction components function as designed.
- Catalytic conversion transforms pollutants
- Flow tuning improves combustion
- Seals prevent bypass leaks
Muffler vs. Exhaust Pipe: What Each Does
The muffler is described as the component that reduces engine noise through internal chambers and sound-absorbing materials.
The exhaust pipe is presented as the conduit that directs combustion gases away from the engine and vehicle cabin while contributing to flow characteristics.
A clear comparison highlights how the muffler manages sound control and the exhaust pipe handles gas routing and system performance.
Muffler Purpose Explained
Many drivers mistake the muffler for merely an aesthetic tailpiece, but it performs distinct functions compared with the exhaust pipe: the muffler reduces engine noise through chambers and baffles, while the exhaust pipe channels combustion gases safely away from the vehicle.
The muffler’s design dampens pressure pulses, cancels specific frequencies, and minimizes resonance that would otherwise amplify sound. It also modestly affects backpressure, which can influence engine performance when severely restricted.
Materials and internal layout determine attenuation efficiency and durability. Regular inspection prevents rust holes and loose internals that cause rattling or increased noise.
- Chambers and baffles absorb and redirect sound energy
- Perforated tubes and packing materials dissipate noise
- Mounts isolate vibration from the vehicle body
Exhaust Pipe Functionality
In comparing mufflers and exhaust pipes, clarity about their distinct roles helps prevent confusion: the exhaust pipe primarily serves as the conduit that guides combustion gases from the engine to the atmosphere, while the muffler is a specialized module attached to that conduit to attenuate sound and fine-tune backpressure.
The exhaust pipe’s functions include directing hot gases away from occupants, maintaining flow to optimize engine performance, and resisting corrosion and heat. Its diameter, routing, and material influence backpressure, flow efficiency, and durability. While the muffler manages noise and some pressure dynamics, the pipe provides structural pathway and impacts overall exhaust system behavior.
How Catalytic Converters Work Inside the Exhaust Line
Placed within the exhaust line between the engine and the muffler, a catalytic converter chemically transforms harmful emissions into less toxic gases using a honeycomb core coated with precious metals.
It routes hot exhaust over platinum, palladium and rhodium, enabling oxidation of carbon monoxide and hydrocarbons and reduction of nitrogen oxides.
The converter’s design maximizes surface area while minimizing flow restriction; internal ceramic or metallic substrates tolerate high temperatures and thermal shock.
Sensors upstream and downstream monitor efficiency, prompting engine controls to adjust fuel mixture.
Proper function reduces pollution, meets emissions standards, and requires occasional inspection or replacement when clogged or degraded.
- honeycomb core coated with catalysts
- oxidation and reduction reactions
- temperature and sensor monitoring
Why Pipe Diameter Matters for Horsepower and Torque
When exhaust gases move through a pipe, the diameter directly influences backpressure and flow velocity, which in turn affect engine scavenging and the effective filling of cylinders. A smaller diameter raises backpressure, improving low-end torque on suboptimal turbo or naturally aspirated setups but restricting peak horsepower by limiting high-RPM flow. A larger diameter reduces backpressure and supports greater peak power by allowing higher volumetric throughput, yet can weaken low-speed scavenging and torque if excessively large.
Matching diameter to engine displacement, cam timing, and intended RPM range optimizes the compromise between torque and peak horsepower for desired performance.
How Pipe Length and Bends Change Exhaust Scavenging
Following the discussion on diameter, pipe length and bends further shape scavenging by controlling the timing and strength of pressure waves that pull residual gases from the combustion chamber.
Shorter overall lengths shift pulse arrivals earlier, aiding high-rpm scavenging; longer lengths delay pulses, favoring low-end torque.
Each bend introduces reflection, reduces pulse energy, and can smear timing when severe.
Smooth, gradual bends preserve wave integrity; tight, frequent turns degrade it.
Designers balance length and routing to match engine speed characteristics without relying on backpressure effects.
- Short, straight runs favor quick, sharp scavenging pulses.
- Long, tuned lengths enhance low-speed filling.
- Sharp bends weaken and disperse pulses.
What Backpressure Is and When It Helps or Hurts
In exhaust systems, backpressure refers to the resistance against exhaust gas flow created by components such as mufflers, catalytic converters, restrictive piping, or tight bends. Backpressure can smooth low-end torque by maintaining scavenging timing in some engines but excessive backpressure reduces peak power and efficiency. Its effects depend on engine tuning, rpm range, and manifold design. Designers aim for minimal unnecessary restriction while preserving necessary flow characteristics.
| Condition | Effect | Typical Fix |
|---|---|---|
| Mild backpressure | Improved low-end torque | Slightly restrictive muffler |
| High backpressure | Power loss | Larger diameter pipe |
| Variable backpressure | Uneven response | Tuned headers |
| No backpressure | Poor scavenging | Exhaust tuning |
How Exhaust Temperature Affects Materials and Performance
Exhaust gas temperature (EGT) directly influences both component longevity and engine performance because heat governs chemical reactions, metal stresses, and gas density. Higher EGTs accelerate oxidation and corrosion, weaken welds, and can warp thin sections; lower EGTs may promote condensation and soot accumulation, increasing corrosion and restriction. Performance shifts as gas density and speed change: hotter gases expand, altering scavenging and backpressure characteristics. Monitoring and managing EGTs helps balance durability and power without changing materials.
- Sustained high EGT: faster thermal fatigue, catalytic stress, reduced gasket life.
- Low EGT: condensation, particulate buildup, catalytic inefficiency.
- Transient spikes: shock thermal cycling, joint failure risk.
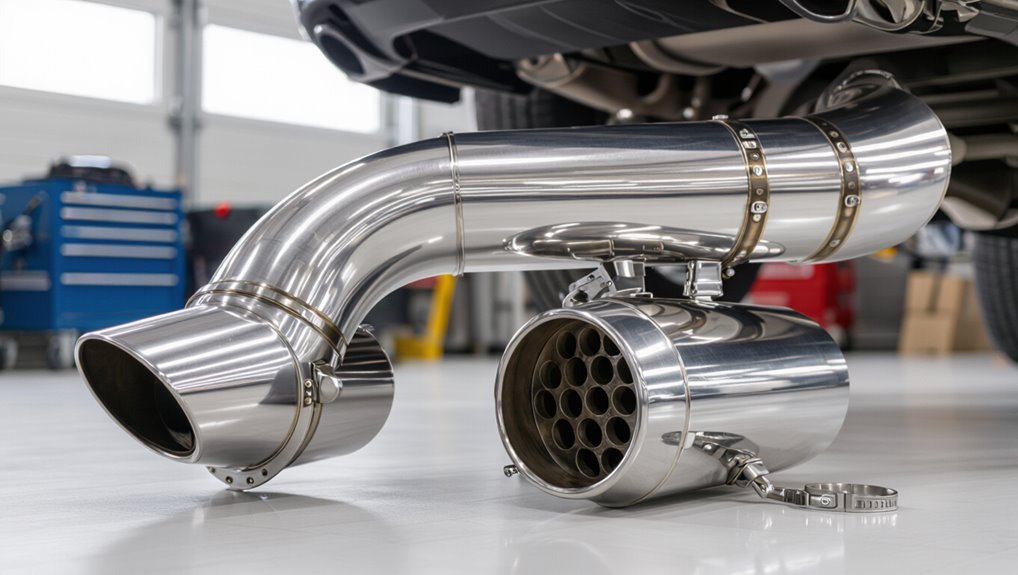
Common Exhaust Pipe Materials: Pros and Cons
Covering a range from budget mild steel to high-end titanium, exhaust pipe materials differ mainly by corrosion resistance, thermal behavior, strength, and cost.
Mild steel is inexpensive and easy to weld but rusts quickly.
Aluminized steel offers improved oxidation resistance at moderate cost, extending service life.
Stainless steel (typically 409 or 304) resists corrosion and endures heat; 304 is pricier but longer lasting.
Inconel excels at extreme temperatures and resists scaling, used in racing or turbo applications, with high expense.
Titanium provides exceptional strength-to-weight and corrosion resistance but commands premium pricing and specialized fabrication techniques.
How to Visually Inspect an Exhaust Pipe for Damage
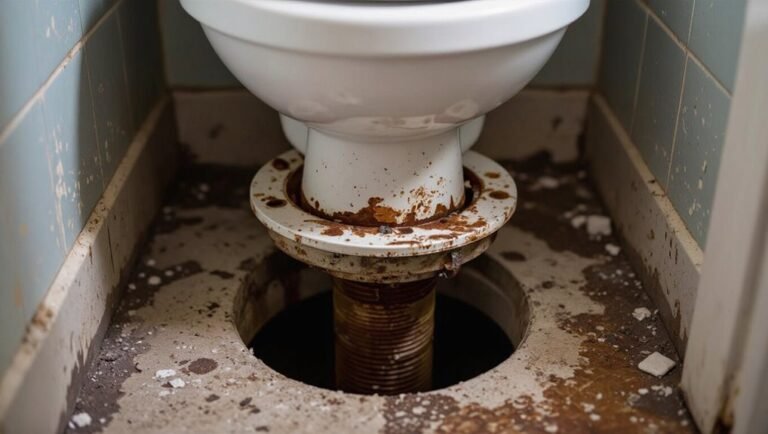
A simple visual inspection starts with a careful scan for rust along the pipe, joints, and hangers, since corrosion often signals thinning metal.
The inspector then searches for cracks, holes, or seam separations that can cause leaks and noise.
Attention to both surface discoloration and sharp edges helps reveal areas needing repair or replacement.
Check For Rust
Regularly inspecting the exhaust pipe for rust helps identify weak spots before they become holes or failures. The inspector notes surface discoloration, flaking metal, and dark streaks along seams and joints.
Attention focuses on areas near mounts, bends, and brackets where moisture and road salt accumulate. Light tapping with a small hammer can reveal thin metal by producing a dull sound; heavy corrosion often leaves powdery residue or visible perforations.
Immediate cleaning and protective coating slow progression; severely thinned sections require replacement. Document findings and compare over time to determine corrosion rate and plan repairs.
- Flaking scale along the seam
- Powdery rust near brackets
- Dark streaks at bends
Look For Cracks
Inspectors routinely scan the exhaust system for cracks because small fissures can quickly grow under heat cycles and vibration, leading to leaks or structural failure.
They examine joints, welds, bends, and flange areas where stress concentrates.
With the vehicle cooled and on a secure lift or ramps, they use a flashlight and mirror to reveal hairline splits and pinholes, noting soot trails or shiny metal where escaping gases oxidize.
Flexible sections and catalytic converter housings receive special attention.
Any suspect crack prompts marking, temporary patching with high-temperature sealant, and scheduling of proper repair or component replacement.
How to Listen for Signs of Exhaust Leaks or Failures
How can subtle changes in sound reveal an exhaust problem? A person listens for differences while the engine idles, revs, and cruises. Hissing, popping, or a louder rumble often indicate leaks, loose clamps, or damaged mufflers. Location matters: noises near the manifold differ from rear-pipe sounds. Listening inside and outside the vehicle helps pinpoint the source without tools. Safety—avoid hot components and run briefly in a well-ventilated area.
- A sharp hissing at idle suggests a small leak near a joint.
- Rhythmic popping during deceleration can mean a failing muffler or flange leak.
- Sudden loud roar typically signals a major breach.
How to Measure Backpressure and Flow at Home
Measuring exhaust backpressure and flow at home requires basic tools, careful setup, and attention to safety: a pressure gauge or manometer, a flow meter or a simple flow-estimation method, proper sealing at test points, and engine runs in a well-ventilated area. The method: mount gauge at exhaust manifold or oxygen sensor bung, run engine at idle and specified RPMs, record pressure, then compare to manufacturer ranges. For flow, use a pitot-style tube or estimate via restrictive pressure changes. Note leaks invalidate readings. Log conditions (temp, RPM) for repeatability. Seek professional help if readings indicate abnormal restriction.
| Tool | Location | Note |
|---|---|---|
| Gauge | Manifold/bung | Seal well |
| Flow probe | Pipe center | Stable RPM |
| Logbook | Workshop | Include temp |
When to Replace an Exhaust Pipe Versus Repair It
After measuring backpressure and flow to confirm whether an exhaust system is restricted, the next decision is whether to repair a damaged pipe or replace it entirely.
Inspection should assess hole size, crack length, and weld integrity. Small punctures or surface corrosion often warrant patching or clamping; major splits, crushed sections, or multiple weak spots usually require replacement.
Consider vehicle age, part availability, cost, and safety—exhaust leaks near the cabin demand replacement. Professional evaluation is advisable when structural mounts or catalytic converter connections are involved.
- Small hole near center section: patch or clamp
- Long crack or crushed bend: replace
- Multiple corroded areas: replace
How Rust Forms on Exhaust Pipes and How to Prevent It
Although exhaust systems are exposed to high temperatures that can momentarily slow corrosion, repeated heating and cooling combined with moisture and road salts create the ideal conditions for rust to form on pipes. Metal oxidizes where protective coatings fail; trapped water in seams accelerates pitting. Preventive measures include using stainless or aluminized steel, applying high-temperature coatings, ensuring good drainage and avoiding prolonged salt exposure. Regular inspections catch early surface rust before holes develop. Simple cleaning and wax or ceramic sprays extend life. The table summarizes causes and prevention.
| Cause | Prevention |
|---|---|
| Salt spray | Rinse undercarriage |
| Condensation | Park warm to dry |
| Coating wear | Recoat or replace |
| Mechanical damage | Repair promptly |
How to Remove a Rusted Exhaust Clamp or Bolt Safely
Before attempting removal, the corrosion level and access to the clamp or bolt should be assessed to determine if extraction is feasible or if replacement of adjacent parts is required.
A penetrating lubricant can be applied and given time to work into threads and joints to increase the chance of a clean release.
If lubricant alone is insufficient, controlled heat and careful leverage with the correct tools can free the fastener while minimizing damage to the exhaust.
Assess Corrosion And Access
Examining the exhaust system visually and by feel reveals the extent of corrosion and how accessible fasteners are, which dictates the safest removal method for a rusted clamp or bolt. The inspector notes scale, pitting, and any flaking metal, plus whether the clamp, bolt head, or nut is reachable with standard tools. Tight clearances, heat shielding, or nearby wiring may require removal of surrounding parts or use of specialized sockets. Structural weakness suggests avoiding force that could split components. If fasteners are fused, plan for cutting, replacing hardware, and protecting nearby surfaces during removal.
- Surface rust with intact threads and clear access
- Deep pitting, rounded heads, or seized threads
- Obstructed fastener requiring partial disassembly
Apply Penetrating Lubricant
Apply a penetrating lubricant liberally to the rusted clamp or bolt, ensuring coverage of the threads, head, and mating surfaces to break down corrosion and displace moisture.
Allow several minutes for soak time; heavier corrosion may require repeated applications over an hour.
Spray from multiple angles, wicking fluid into crevices and between overlapping metal.
After soaking, probe gently with a pick or small screwdriver to test movement without applying force.
Wipe excess to prevent drips.
Choose a product rated for automotive use and high-temperature exposure.
Observe safety: work in a ventilated area and avoid open flames or sparks near solvent vapors.
Use Heat And Leverage
With heat and steady leverage, a seized exhaust clamp or bolt can be freed without damaging adjacent components.
A propane torch heats the rusted area briefly to expand metal; avoid prolonged flame contact with rubber, wiring, and paint.
After heating, a breaker bar or a lengthened wrench applies controlled torque; taps with a hammer can shock-corrode bonds.
Alternate heating and gentle force rather than brute strength.
If the fastener turns, cool and reapply penetrating oil to ease removal.
If it refuses, cut and replace the section.
Safety gear and fire suppression readiness are essential.
- Heat the joint briefly with a torch
- Use a breaker bar for steady torque
- Protect nearby wiring and paint
How to Patch Small Exhaust Holes Temporarily
When a small hole appears in an exhaust pipe, a quick temporary patch can stop noise and limit fumes until a proper repair is made.
First, the area should be cleaned of rust, grease, and loose paint using a wire brush and cloth.
A high-temperature exhaust patch kit, muffler tape, or epoxy designed for exhaust systems is applied per instructions, ensuring overlap beyond the hole.
Wraps should be tightened and cured as recommended; epoxies require adequate drying time.
These measures are short-term fixes to reduce leakage and vibration while arranging professional replacement of the damaged section.
Welding a Cracked Exhaust Pipe: DIY Basics
The technician first assesses the crack location to determine accessibility and whether surrounding rust or thin metal require panel replacement instead of repair.
Next, an appropriate welding method and filler are selected based on exhaust material and thickness, with safety precautions for heat and fumes.
Finally, a post‑weld inspection checks for full penetration, leaks, and proper alignment before reinstallation.
Assess Crack Location
Inspect the exhaust thoroughly to pinpoint the crack’s exact location, noting whether it lies on a flange, seam, pipe bend, or muffler body. The inspector documents visible gaps, soot trails, or distortion and assesses accessibility for repair.
Corrosion extent and surrounding weld quality are noted to determine if local patching is feasible or if replacement sections are needed. Heat-affected zones and thin metal adjacent to the crack are checked to avoid future failures. Measurements from fixed reference points help record precise placement for parts ordering or welding guides.
- Crack on convex pipe bend, near outer radius
- Crack at flange bolt hole, with gasket residue
- Hairline seam crack along muffler weld
Choose Proper Welding
Having identified the crack’s exact location and assessed metal condition, the next step is selecting an appropriate welding method and consumables for a durable repair. The repairer chooses between MIG for ease, TIG for precision on thin stainless, or stick for thicker, rusted sections. Use high‑temp stainless filler for stainless pipes or mild steel wire for coated steel. Preheat if metal is thick; grind to clean edges and maintain proper fit‑up. Control heat to avoid warping. Protect surrounding components. Follow safe ventilation and PPE practices.
| Method | Best for | Filler |
|---|---|---|
| MIG | General steel | ER70S-6 |
| TIG | Thin stainless | 308/309 rod |
| Stick | Thick, rusty | 6010/7018 |
Post‑Weld Inspection
After welding, a thorough visual and tactile examination confirms the repair’s integrity before reinstallation. The inspector checks for complete fusion, consistent bead profile, and absence of cracks or porosity.
Surfaces are cleaned of slag and scale; any undercut or overlap is addressed. A gentle tap test can reveal hidden voids, while a dye-penetrant or soap-bubble check on cooled joints detects micro-leaks.
Heat-affected zones are assessed for excessive warping or thinning; if detected, reinforcement or replacement is considered. Documentation of findings and photographs helps track repairs and informs subsequent road testing.
- Visual bead continuity and uniformity
- Leak check with dye or soap bubble
- Tap test for hidden defects
How to Swap an Exhaust Section With a Replacement Pipe
Begin by elevating the vehicle and securing it on jack stands to provide safe, stable access to the damaged exhaust section; this preparation guarantees proper alignment and prevents injury during removal and installation.
Inspect hangers, clamps, and flange connections, then loosen or cut corroded fasteners. Support remaining pipe to prevent strain.
Remove the damaged segment, preserving gasket surfaces.
Test-fit the replacement pipe, trimming as needed for correct overlap and angle. Use new gaskets, clamps, or bolts and tighten progressively to specified torque.
Rehang with appropriate isolators, check clearances, and lower vehicle. Start engine and inspect for leaks and vibration.
How to Choose the Right Exhaust Pipe Material for DIYers
The choice between stainless steel and mild steel hinges on corrosion resistance and expected lifespan, with stainless resisting rust far better.
Aluminum offers light weight and good corrosion resistance but is softer and less heat-resistant than steel.
DIYers should weigh upfront cost against longevity to decide which trade-offs match their budget and maintenance willingness.
Stainless Steel vs Mild
Choosing between stainless steel and mild steel exhaust pipes requires balancing durability, cost, and fabrication needs. Stainless offers superior corrosion resistance and longevity, costing more but reducing replacement frequency.
Mild steel is inexpensive and easier to weld and shape, though it rusts faster, often needing coatings or earlier replacement. For DIYers, project budget, tools, and expected vehicle life inform the choice. Consider local climate and exposure to road salt when deciding.
- Stainless: long-lasting, resists rust, higher upfront cost
- Mild: affordable, easy to work, prone to corrosion
- Practical choice depends on budget, skills, and environment
Aluminum Pros And Cons
Offering a lightweight alternative to steel, aluminum exhaust pipe presents advantages and trade-offs that DIYers should weigh carefully. Aluminum resists corrosion from salt and moisture better than mild steel and is easy to shape and cut with common tools, facilitating custom fabrication and lighter assemblies that reduce vehicle weight.
However, it has lower strength and fatigue resistance compared with stainless steel, making it vulnerable to cracks under high vibration or heat cycling. Welding requires specific techniques and fillers, and dissimilar-metal joints need attention to galvanic corrosion. Overall, aluminum suits low-heat, lightweight applications but demands mindful design and installation.
Cost Versus Longevity
For many DIYers, balancing upfront cost against long-term durability is the primary decision when selecting exhaust pipe material.
The choice hinges on budget, expected vehicle lifespan, climate exposure, and willingness to perform future repairs.
Cheaper metals may save money today but corrode faster; premium alloys cost more yet resist rust and reduce replacement frequency.
Consider total ownership cost rather than initial price alone.
Factor in welding and fitting difficulty, availability of parts, and resale value.
Practical choices align with how long the DIYer intends to keep the vehicle and how much maintenance they will undertake.
- Low cost: mild steel, frequent replacements
- Mid cost: aluminized steel, moderate lifespan
- High cost: stainless steel, long-lasting
How to Pick Pipe Diameter Based on Engine Size and Goals
When matching pipe diameter to an engine, the goal is to balance flow capacity with exhaust gas velocity so that backpressure is minimized without sacrificing low-end response. Selection depends on displacement, RPM range, and performance aims.
Small engines or street-driven cars benefit from 1.5–2.0 inch pipes preserving scavenging and torque. Larger or high-revving engines require 2.0–3.0 inch tubing to prevent restriction. Forced-induction systems often need larger diameters to avoid turbo lag, while mild builds prioritize slightly smaller sizes for responsiveness. Use flow tables or consult charts correlating cfm and diameter for precise matching to reduce guesswork and optimize performance.
How to Choose Between Single and Dual Exhaust Layouts
Choosing between a single and dual exhaust layout hinges on balancing performance goals, packaging constraints, and cost: a single system is simpler, lighter, and often less expensive, while a dual setup can improve flow and allow more aggressive tuning on engines that can use the extra capacity.
Decision factors include engine configuration, desired power band, space under the vehicle, and fabrication complexity. Single systems suit modestly tuned four-cylinders and tight chassis; duals benefit V6/V8s or high-rev engines seeking reduced backpressure.
Weight, parts cost, and installation time also influence choice; symmetry and aesthetics may be secondary considerations.
- Single: lighter, cheaper, simpler
- Dual: higher flow, tuning headroom
- Consider space, cost, power goals
How Aftermarket Exhaust Tips Affect Sound and Appearance
How much difference can an exhaust tip make to a car’s sound and look? A tip primarily alters appearance: finishes, diameters, shapes, and dual outlets change visual impact, complementing bumper design.
Sound changes are usually minor; material and tip length can slightly amplify or mute high frequencies, while resonated or slash-cut designs may add a subtle rasp. True tone depends on headers, muffler, and piping, not just the tip. Fitment affects airflow minimally but can influence perceived volume if it narrows or expands flow at the outlet.
For DIYers, choosing style and compatible dimensions yields desired looks with modest acoustic tweaks.
How to Estimate Cost and Time for a DIY Exhaust Job
Estimate labor, parts, and contingency before starting a DIY exhaust job to avoid surprises and keep the project on schedule. The estimator compares part prices (pipes, clamps, gaskets), expected labor hours, and possible extra costs for rusted bolts or replacement hangers.
Time estimates account for disassembly, fitting, welding or clamping, and testing; add buffer for unforeseen complications. Research vehicle-specific part availability and shop manuals for realistic durations.
Use a simple spreadsheet to total costs and hours, then apply a contingency percentage based on project complexity to produce a final budget and timeline.
- Parts: list and price sources
- Labor: stepwise hour estimates
- Contingency: 10–25% final buffer
Tools You Need for Basic Exhaust Work at Home
With a budget and timeline laid out, attention turns to the tools needed to complete basic exhaust work at home.
Essential hand tools include metric and SAE socket sets, ratchets, extension bars, combination wrenches, penetrating oil, and a breaker bar for seized fasteners.
Cutting and fitting require a reciprocating saw or exhaust pipe cutter, metal file, and clamps.
Replacement parts need gaskets, hangers, and muffler/clamp kits.
Safety items—gloves, eye protection, and a respirator—protect against debris and fumes.
A torque wrench guarantees correct fastener tightness.
A magnetic parts tray and shop light aid organization and visibility.
How to Safely Lift and Support a Car for Exhaust Access
Before any work begins, the vehicle must be raised and secured so the exhaust system can be accessed safely; improper lifting is a common cause of injury and vehicle damage.
The technician locates manufacturer jack points, uses a quality hydraulic jack, and places jack stands on firm, level ground. Wheel chocks block remaining wheels and the parking brake stays engaged.
After lowering the car onto stands, a gentle shake confirms stability. Never rely on a jack alone. Lighting and eye protection improve visibility. Keep tools organized and a phone nearby for emergencies.
- Position jack at reinforced lift point
- Use matched jack stands under solid frame
- Chock wheels and engage parking brake
How to Remove and Reinstall Hangers and Rubber Mounts
Remove each exhaust hanger and rubber mount methodically, starting at the pipe nearest the engine and working rearward to avoid undue strain on joints and seams.
Use penetrating oil on corroded metal fittings, wait, then pry rubber mounts off metal pegs with a pry bar or dedicated exhaust hanger tool.
Support the assembly with a stand or jack to prevent sagging.
Inspect hangers and mounts for cracks, hardening, or elongation; replace matched sets rather than single pieces.
When reinstalling, coat metal pegs lightly with anti-seize, slide fresh rubber mounts into place, and confirm the exhaust hangs with even clearance and no tension.
How to Align and Bolt Up Exhaust Flanges Without Leaks
The technique for aligning and bolting exhaust flanges centers on clean, flat mating surfaces and the correct torque pattern for fasteners.
Surfaces should be inspected, cleaned of carbon and corrosion, and protected with the appropriate gasket or sealant where specified.
Bolts must be tightened in a cross-pattern to the manufacturer’s torque values to guarantee even pressure and prevent leaks.
Proper Flange Surface Prep
When mating exhaust flanges, precise surface preparation and alignment are essential to prevent leaks and guarantee longevity.
The mating faces must be clean, flat, and free of carbon, rust, or old gasket material. Light abrasive or gasket scraper use, followed by solvent wipe, guarantees proper contact.
Inspect for warpage; minor high spots can be lapped with fine emery until surfaces mate evenly. Use new gaskets and properly sized bolts to maintain compression. Hand-start bolts to confirm alignment before tightening.
- Clean faces, remove debris, solvent wipe
- Check flatness, lap minor high spots
- Fit new gasket, hand-start bolts
Correct Bolt Torque Pattern
Beginning with hand-started bolts to confirm alignment, the correct torque pattern guarantees even gasket compression and prevents leaks by sequencing and incrementally tightening fasteners so flange faces draw together uniformly.
The technician follows a crisscross or star sequence, tightening bolts in small steps—typically 30%, 60%, then 100% of final torque—to avoid warping.
Torque values match manufacturer specifications; use a calibrated wrench and recheck after heat cycles.
Replace corroded studs or nuts and apply anti-seize sparingly where specified.
Document final torques and inspect for exhaust leaks with a smoke or soapy-water test before road use.
How to Torque Exhaust Bolts to Avoid Leaks and Breakage
Properly torquing exhaust bolts prevents leaks and reduces the risk of stud or flange damage by ensuring even clamping force across joints.
A torque wrench and manufacturer torque specs are used; bolts are tightened incrementally in a cross or star sequence to avoid distortion.
Apply anti-seize on threads where specified, and replace damaged studs or nuts.
Final torque should be checked after heat cycles.
- Use the correct torque value and sequence to distribute load evenly.
- Tighten in stages: snug, mid-torque, then final torque.
- Inspect flange faces and hardware for corrosion before reassembly.
How to Test for Leaks After Repair or Installation
After repair or installation, a technician begins with a careful visual inspection around joints and connections for gaps, soot, or rust that indicate leaks.
A soap bubble leak test is then applied to suspect areas while the system is pressurized to reveal escaping gases.
Finally, an engine idle smoke check confirms whether exhaust is exiting only from the tailpipe or also leaking near seals and flanges.
Visual Inspection Around Joints
Inspect the exhaust joints visually for gaps, soot, shiny new residue, or misaligned flanges that indicate leaks after repair or installation. The inspector notes black streaks, fresh metallic discoloration, or uneven gasket compression; movement at hangers or warped pipes also flags concern.
Attention focuses on weld seams, clamp seating, and flange flatness. Any visible path for gas or vibration-induced rubbing suggests rework before road use.
- Look for soot trails or carbon rings around joints.
- Check flange faces for gaps and even bolt torque.
- Observe for fresh scratches, shiny metal, or displaced clamps.
Soap Bubble Leak Test
Often performed immediately after visual checks, the soap bubble leak test uses a mild soapy solution applied to joints and connections while the system is pressurized to reveal escaping gas as persistent bubbles.
The technician or DIYer masks electrical components, starts the engine briefly or uses a hand pump to pressurize the exhaust system safely, and brushes the solution over welds, clamps, flanges, and gasket areas.
Any steady bubbling marks a leak requiring tightening, reseating, or replacement.
After repairs, retesting confirms integrity.
The method is low-cost, noninvasive, and effective for pinpointing small leaks that may not be audible.
Engine Idle Smoke Check
Watching the engine at idle provides a quick, practical way to spot exhaust leaks or combustion issues after a repair or installation. The mechanic observes tailpipe and joint areas for smoke color, volume, and timing relative to throttle.
White, blue, or black smoke indicate coolant, oil, or rich combustion respectively; intermittent puffs at welds suggest sealing faults. Run the engine warmed, with safety precautions and ventilation. Use a rag or gloved hand near joints to feel for air movement without contact.
- Visual: steady vs. puffing smoke from connections
- Tactile: air flow at seams when warmed
- Timing: smoke tied to revs or constant
How Exhaust Modifications Change Fuel Economy and Emissions Tests
Changing an exhaust system can alter airflow, backpressure, and oxygen sensor readings, each of which can shift a vehicle’s fuel economy and its results on emissions tests. Reduced backpressure can improve scavenging and slightly increase efficiency at higher RPMs, but may worsen low-speed drivability and fuel use.
Free-flowing mufflers or larger pipes can change catalytic converter temperatures, potentially reducing conversion efficiency and raising NOx or HC emissions. Altered oxygen sensor signals can prompt the ECU to run richer or leaner, affecting consumption and test outputs. Legal and inspection consequences can follow when modifications cause emissions exceedances.
Tuning Intake and Exhaust Together for Best Results
When tuned together, intake and exhaust systems function as a matched pair that defines an engine’s breathing characteristics across the rev range. Optimizing both improves torque, peak power, and throttle response while preventing tuning conflicts that cause flat spots or rich/lean bursts.
Calibration balances cam timing, runner lengths, and flow rates so pressure waves aid cylinder filling and scavenging. Effective paired tuning often requires measured changes and iterative ECU adjustments or carburetor rejetting. Consider component compatibility before modifying; mismatched parts can negate gains or harm reliability.
- Longer intake runners boost low-end torque for street driving.
- Free-flowing exhaust and tuned headers enhance high-rpm power.
- ECU remap aligns fueling and timing with hardware changes.
How to Choose a Muffler or Resonator to Control Noise
The section compares common muffler designs—chambered, turbo, and straight-through—highlighting how each balances sound attenuation and backpressure.
It then contrasts resonators and mufflers, noting that resonators tune tone and reduce drone while mufflers provide greater overall noise reduction.
Guidance focuses on matching component choice to desired sound level, performance goals, and vehicle application.
Muffler Types Explained
How does one pick a muffler or resonator to balance sound control, performance, and durability? The choice hinges on design: chambered mufflers reflect and cancel sound, offering deep tone with modest restriction; turbo-style (straight-through) mufflers use packed cores for low backpressure and louder, raspier notes; baffled or glasspack units prioritize minimal restriction and aggressive sound at the cost of refinement. Material and construction affect longevity and heat tolerance.
Fitment, vehicle use, and local noise rules guide selection. Consider trade-offs between noise reduction and flow to meet driving goals without compromising component life.
- Chambered: deeper tone, moderate restriction
- Straight-through: better flow, louder
- Baffled/glasspack: minimal restriction, coarse sound
Resonator Vs Muffler
Choosing between a resonator and a muffler comes down to whether the priority is targeted tone shaping with minimal flow loss or broader noise reduction with greater sound tuning; a resonator attenuates specific frequencies to smooth or remove droning while preserving exhaust flow, whereas a muffler provides more all-encompassing sound cancellation at the expense of added restriction and weight.
Selection should consider desired sound character, backpressure tolerance, space constraints, and legal noise limits. Resonators suit enthusiasts seeking cleaner tone without power loss. Mufflers suit those needing substantial decibel reduction or a calm cabin. Combination setups balance tone control and overall attenuation.
How Local Laws Affect Exhaust Modifications and Sound Limits
Across jurisdictions, local laws shape what exhaust modifications are legal by defining permissible noise levels, required equipment, and inspection rules.
Regulations vary: some set decibel limits, others ban specific aftermarket parts or require catalytic converters and mufflers to remain functional.
Enforcement may include spot checks, periodic inspections, or penalties for complaints.
DIYers should verify local statutes, vehicle code sections, and emissions rules before modifying exhausts to avoid fines, impoundment, or failed inspections.
Compliance preserves safety and resale value while preventing nuisance noise.
- Noise limits expressed in dB at set RPM or distance
- Mandatory emissions control components
- Inspection and enforcement procedures
How to Maintain Your Exhaust System for Long Life
Local regulations and modifications aside, routine maintenance is the most reliable way to extend an exhaust system’s service life.
Inspect pipes, hangers, and clamps for rust, damage, or looseness every few months.
Clean visible soot and debris to spot leaks early.
Make certain heat shields are secure and gaskets intact at joints.
Replace corroded hardware promptly and use anti-seize on fittings where appropriate.
Monitor for unusual noises or vibration as signs of wear.
Keep the undercarriage dry when possible and address coolant or oil leaks that accelerate corrosion.
Document inspections and repairs to track component lifespan.
When to Call a Professional for Complex Exhaust Problems
Call a professional when exhaust issues exceed routine inspection or basic repairs, such as persistent loud noises, visible cracks or holes in main pipes or the catalytic converter, signs of exhaust leaks inside the cabin, or check-engine codes related to oxygen sensors or emissions control.
A trained technician diagnoses complex failures, evaluates structural damage, and makes certain emissions compliance. Repairs often require specialized tools, welding, component replacement, or computerized diagnostics. Delaying service risks reduced performance, hazardous fumes, and failed inspections. For safety and legal reasons, leave major exhaust work to experts.
- Severe rusted-through sections needing replacement
- Catalytic converter failure or theft
- Persistent exhaust odor in the cabin
Conclusion
An exhaust pipe channels hot combustion gases safely from engine to tailpipe, aiding performance and noise control; regular inspection prevents rust and leaks. Some DIYers worry aftermarket changes void warranties or worsen fuel economy, but sensible choices—properly matched headers, mufflers, and professional installation—can improve flow without harm. Compliance with local laws and timely repairs keep emissions and sound within limits, so basic maintenance plus expert help when needed guarantees longevity and safe operation.