How to Use Press Fitting Systems: Step-by-Step Guide for Plumbers and DIYers
How to Use Press Fitting Systems: A Step-by-Step Guide for Plumbers and DIYers
Press fitting systems allow you to join pipes easily and securely using a powered press tool and factory-made fittings with seals. This guide walks you through the essential steps to ensure a successful installation.
- Measure and Cut: Begin by accurately measuring the pipes and cutting them to the required length.
- Deburr and Clean: Remove any burrs from the cut ends and clean them to ensure a smooth fit.
- Insert Fittings: Fully insert the pipe ends into the fittings.
- Select the Correct Jaw: Choose the appropriate jaw for your press tool based on the fitting size.
- Activate the Press Cycle: Operate the press tool to create a secure, flame-free joint.
- Inspect and Test: After pressing, inspect the joints and conduct a pressure test for leaks. If any faults are found, replace or repress the joints as needed.
Always follow manufacturer guidelines and local codes for optimal results. This guide provides a clear pathway to mastering press fitting systems with tips on tool selection, troubleshooting, and additional professional considerations.
What Press Fitting Systems Are and Why Plumbers and DIYers Use Them
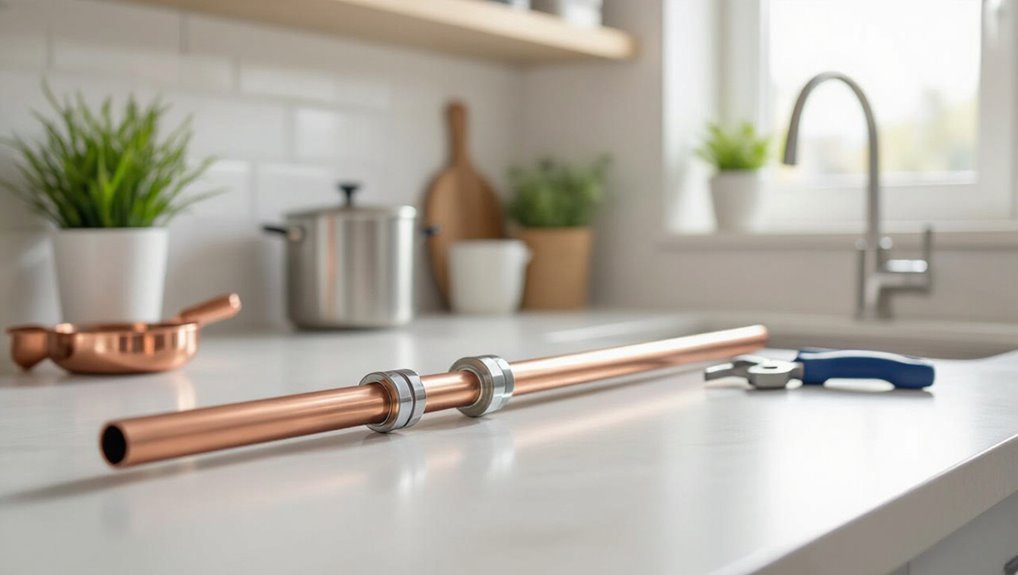
Press fitting systems consist of fittings with elastomer seals and a mechanical crimp or press sleeve that joins pipes without heat.
They are manufactured in materials such as copper, stainless steel, PEX, and brass and are produced to ASTM/ISO standards for reliable performance.
Plumbers and competent DIYers favor them for faster, cleaner installation, improved leak resistance versus soldered, compression, or threaded joints, and applicability in both residential and commercial systems.
Definition and basic components of press fittings
A press fitting system is a mechanical method for joining pipes and fittings using a hand or battery-powered press tool and specially designed fittings with compression or O‑ring seals.
Components include the press tool, interchangeable jaws, fittings with integrated seals, and prepared pipe ends.
Instructions on how to use press fitting systems emphasize correct pipe preparation, jaw selection, alignment, and confirmed press cycles for reliable seals.
Common materials and standards (copper, stainless, PEX, brass; ASTM/ISO)
Having outlined the components and basic operation of press fitting systems, the next consideration is the range of materials and governing standards that determine suitability and compatibility.
Press fittings use copper, stainless, PEX, and brass variants, each matched to application, pressure, and temperature.
Installers follow ASTM, ISO, and regional standards specifying dimensions, material properties, and test methods to guarantee safe, code-compliant installations.
Advantages over soldering, compression, and threaded joints
Choose press fitting systems when speed, reliability, and safety are priorities: they create consistent, leak-resistant joints without open flame, heated tools, or hand-tight torque, reducing installation time and skill variability compared with soldering, compression, or threaded connections.
They minimize fire risk, eliminate flux and solder mess, resist vibration loosening, enable quicker repairs, and often meet codes for potable and hydronic systems with comparable long-term durability.
Typical applications in residential and commercial plumbing
With flame-free, repeatable joints established as a clear advantage over soldering and threaded methods, press fitting systems find wide use across both residential and commercial plumbing.
They serve potable water, radiant heating, hydronic systems, and chilled-water lines, plus gas and compressed air when approved.
Fast installation, minimal downtime, and reliable seals make them ideal for renovations, tight spaces, multifamily units, and service connections.
Tools and Materials Needed Before You Start
Before beginning work with press fitting systems, the installer should confirm the appropriate press tool and jaw sizes—manual, battery, or cordless—matched to the pipe diameter.
The necessary fittings (couplers, elbows, tees, reducers, end caps) must be selected alongside pipe preparation tools such as cutters, deburrers, and reamers.
Essential safety gear and consumables—marker, measuring tape, and cleaning cloths—should be on hand before starting.
Press tool types and jaw sizes: manual, battery, and cordless options
Several press tool types are available—manual, battery-powered, and cordless—each suited to different job scales and access conditions.
Manual tools are lightweight, low-cost, and ideal for occasional use.
Battery models balance power and mobility for frequent residential work.
Cordless (brushless) variants offer higher torque, longer runtimes, and quick charging for commercial tasks.
Select jaw sizes matched to pipe diameters and material compatibility.
Fitting types and selection guide (couplers, elbows, tees, reducers, end caps)
A clear understanding of common fitting types—couplers, elbows, tees, reducers, and end caps—allows accurate selection and efficient assembly for any press-fit installation.
Selection depends on run configuration, flow direction, and space constraints. Couplers join same-size pipe; elbows change direction; tees branch lines; reducers adapt diameters; end caps seal termini.
Choose materials and pressure ratings matching system requirements.
Pipe compatibility and preparation tools (cutters, deburrers, reamers)
Having selected the appropriate fitting types for the run, attention turns to pipe compatibility and the preparation tools required to secure reliable press joints.
Confirm material compatibility (copper, stainless, PEX) and correct OD/SDR.
Use a dedicated pipe cutter for square cuts, a deburrer to remove internal/external burrs, and a reamer to guarantee proper insertion depth.
Clean and inspect cut ends before pressing.
Safety gear and consumables (marker, measuring tape, cleaning cloths)
Before beginning any press-fitting task, don appropriate personal protective equipment and gather consumables that guarantee accurate measurements and clean joints.
Safety gear includes gloves, eye protection, knee pads, and hearing protection when using power tools.
Consumables: a permanent marker for layout, a reliable measuring tape, lint-free cleaning cloths, and approved solvent or cleaning wipes to remove oil, debris, and oxidation before pressing.
Preparing Pipes and Fittings Step by Step
Accurate measurement and clear marking set the foundation for reliable press joints.
The text then outlines correct cutting methods for copper, stainless, and PEX, followed by deburring, chamfering, and thorough cleaning of pipe ends.
Finally, fittings and gaskets are inspected for damage or contamination before assembly.
Measuring and marking pipe lengths accurately
Measure twice and mark once: precise pipe length measurement is essential to guarantee fittings seat properly and joints align without stress.
Use a reliable tape, note insertion depth for each press fitting, and compensate for bends and overlaps.
Mark cut lines clearly with a fine permanent marker.
Recheck measurements after deburring and before assembly to prevent waste and misalignment.
Correct cutting techniques for copper, stainless, and PEX
Cut pipes using the tool appropriate to each material—tube cutter or hacksaw with guide for copper, powered cutoff or abrasive wheel for stainless, and plastic tubing cutter or sharp blade for PEX—ensuring straight, square cuts and minimal deformation.
Maintain steady, controlled motion, secure the workpiece, and avoid twisting. For stainless, cut slowly to prevent heat warping; for PEX, prevent crushing by using correct jaw spacing.
Deburring, chamfering, and cleaning pipe ends
Prepare pipe ends by thoroughly deburring, chamfering, and cleaning to assure a proper seal and reliable press connection.
Remove burrs from inside and outside with a reamer or file, create a slight chamfer to ease fitting insertion, and wipe surfaces free of oil, dirt, and metal shavings.
Final inspection guarantees smooth, even edges and accurate insertion depth before assembly.
Inspecting fittings and gasket/seal condition
A visual and tactile inspection of each fitting and its gasket or seal secures reliability before assembly.
The inspector checks for cuts, nicks, flattening, hardening, or embedded debris. Confirm gasket seating and correct size; verify fittings are undamaged, corrosion-free, and burr-free.
Reject any component showing deformation or contamination. Document findings and replace defective parts to guarantee leak-free, durable press joints.
How to Make a Press Connection: Detailed Step-by-Step Procedure
The procedure begins with correctly positioning the fitting, confirming insertion depth, and selecting the appropriate jaw or ring for the joint.
The operator must then execute the press tool cycle to complete the crimp and perform immediate visual and tactile inspections of the connection.
Finally, the system is pressure tested to verify leak-free joints before returning to service.
Positioning the fitting and verifying insertion depth
Position the fitting onto the prepared pipe so the insertion stops squarely at the seat, ensuring the fitting aligns with the designated flow direction and orientation.
Confirm insertion depth using the fitting’s visible stop or measured marks.
Verify full contact all around, checking for gaps, misalignment, or rotation.
Re-seat if necessary until the joint is uniformly seated and ready for pressing.
Choosing and installing the correct jaw or ring
Following confirmation that the fitting is fully seated, the installer selects the appropriate press jaw or ring based on pipe material, diameter, and the fitting manufacturer’s specifications.
They verify jaw compatibility, guarantee proper orientation, and secure the ring or jaw to the tool until it locks.
Visual and tactile checks confirm correct seating; any mismatch is corrected before proceeding to the pressing operation.
Proper operation of the press tool and completing the crimp
Begin operation by confirming the tool is set to the correct cycle and pressure for the fitting type and pipe diameter.
Then align the jaw or ring squarely over the fitting collar so the tool sits perpendicular to the joint.
Engage the trigger briskly, allowing the tool to complete its programmed crimp cycle.
Release only after cycle completion, retract the jaw, and remove the tool to reveal the finished crimp.
Visual and physical checks immediately after pressing
Inspect the newly pressed joint immediately for visible defects and confirm the crimped collar is uniformly compressed around the pipe with no cracks, gaps, or deformities.
Verify pipe alignment and that the fitting sits fully seated.
Run a tactile check for sharp edges or loose particles.
Record the joint location and any anomalies, marking components needing rework before system pressure testing.
Pressure testing the system and verifying leak-free joints
Pressure testing confirms the integrity of press-fit joints and identifies leaks before the system is commissioned.
The installer pressurizes the circuit—typically with water or air—up to the prescribed test pressure, holds for the required duration, and monitors gauges.
Inspect all fittings, joints, and valves for pressure drops or visible leaks.
Repair or repress any defective joints, then retest until stable, leak-free readings are achieved.
Installation Scenarios and Techniques
Installation scenarios for press fittings vary from cramped spaces behind fixtures to open runs, each requiring adapted access and tool positioning.
Attention to material changes—such as copper-to-PEX or stainless connections—requires compatible adapters and correct sealing methods.
Techniques also differ when repairing existing pipe runs or working on vertical versus horizontal orientations, affecting support, alignment, and press sequencing.
Working in tight spaces and behind fixtures
When access is limited, press fitting systems require careful planning and adapted techniques to guarantee reliable joints without damaging surrounding surfaces.
Technicians use compact press tools, right-angle jaws, and extension adapters. Preparation includes accurate measurement, clearing obstruction, and marking fittings.
Support and bracing prevent movement during pressing. Where visibility is poor, tactile checks and pressure testing confirm joint integrity before closing walls or reinstalling fixtures.
Joining dissimilar materials (copper to PEX, stainless transitions)
Joining dissimilar materials such as copper to PEX or connections to stainless requires selecting compatible fittings and following manufacturer guidelines to confirm leak-free, corrosion-resistant joints.
Installers must use approved connector fittings, correct insert sleeves or liners, and appropriate O-rings or seals.
Clean and deburr pipe ends, verify press tool jaw suitability, and pressure-test assemblies per code to guarantee durable, compliant connectors.
Repairing existing pipe runs with press fittings
Repairing existing pipe runs with press fittings requires careful assessment of the accessible line, remaining pipe condition, and surrounding structure to determine the most effective repair method.
Technicians isolate the section, depressurize, cut squarely, and deburr. Corroded or deformed ends are replaced.
Proper fitting selection, inspection of seals, and use of the correct jaw guarantee durable, leak-free repairs while minimizing invasive demolition.
Installing press fittings on vertical vs. horizontal runs
Although the basic press technique is the same, vertical and horizontal installations present distinct challenges in support, orientation, and access that affect pipe alignment, sealing, and tool approach.
Vertical runs require secure supports to prevent sagging, attention to gravity during joint assembly, and possible staging of tools.
Horizontal runs need level alignment, adequate hangers, and clearance for press tools; both demand inspection and proper bite depth.
Common Problems and How to Troubleshoot Them
Common failures during press fitting work typically arise from incorrect crimps, damaged seals, tool slippage, or wear that compromises the connection.
Identification focuses on visible leaks, misshapen seals or incomplete crimps, and evidence of jaw or tool malfunction, each requiring specific corrective actions such as re-pressing with proper technique, replacing seals or fittings, or servicing and securing tools.
Clear criteria for when to replace a fitting versus re-pressing help prevent repeat failures and maintain system integrity.
Causes of leaks after pressing and corrective actions
Identify and address leaks after pressing by first recognizing typical failure modes and their root causes; these usually stem from improper tube preparation, incorrect press jaw alignment or settings, defective fittings, or contamination within the joint.
Inspect joints visually, pressure-test to locate leaks, clean and re-cut tubing if burrs or debris exist, replace faulty fittings, verify tool calibration and correct jaw selection, then re-press and re-test.
Deformed seals or incomplete crimps: diagnosis and fix
Leaks after pressing often point inspectors toward visible gaps or misalignment, but some failures come from deformed seals or incomplete crimps that are less obvious yet equally problematic.
Inspect O-rings for extrusion, cuts, or wrong size; examine crimp profiles for full compression and uniformity.
Replace damaged seals, re-cut and deburr tubes, and re-press with correct fittings.
Pressure-test before concealing.
Avoiding tool or jaw slippage and ensuring proper maintenance
Inspectors and technicians should regularly check pressing tools and jaws for signs of slippage and wear, since improper grip or degraded components can cause incomplete crimps, damaged fittings, or sudden tool failure.
Clean contact surfaces, remove debris, and verify jaw alignment before each use.
Follow manufacturer maintenance schedules, lubricate moving parts sparingly, tighten fasteners, and replace worn jaws promptly to maintain consistent press quality.
When to replace fittings or re-press connections
When should a fitting be replaced or a connection re-pressed? Inspect for visible damage, corrosion, leaks, or deformation after pressing.
Re-press only if tool marks align, seals are intact, and manufacturer permits; otherwise replace the fitting.
Replace corrosion-compromised, cracked, or improperly sized fittings.
Re-press when minor misalignment or incomplete compression caused leakage, but verify integrity with pressure testing before returning system to service.
Safety, Best Practices, and Code Compliance
The article then addresses safety, best practices, and code compliance to guarantee press fittings perform reliably and remain under warranty.
It covers following manufacturer guidelines, confirming materials meet local plumbing codes, and safely handling press tools and batteries.
It also stresses documenting and labeling press-installed sections for inspections and future maintenance.
Manufacturer guidelines and warranty considerations
Adhering to manufacturer guidelines and warranty conditions is essential for safe, code-compliant press fitting installations. These documents define approved materials, required tools, installation parameters, and maintenance practices that preserve system integrity and validate warranty coverage.
Installers must follow torque, press sequence, and joint prep instructions. They should document work per warranty requirements and register products when required to maintain coverage and avoid voiding claims.
Local plumbing codes and approved materials
Following manufacturer guidelines and warranty requirements, installers must also align every press fitting installation with local plumbing codes and approved materials lists to guarantee legal compliance and long-term safety.
Inspectors often require listed fittings, certified tubing types, proper joint orientations, and approved sealants.
Verify jurisdictional amendments, obtain permits, schedule inspections, and keep documentation.
Noncompliance risks voided warranties, failed inspections, and liability.
Safe handling of press tools and battery precautions
Handle press tools and batteries with deliberate care to prevent injury, equipment damage, and job delays.
Operators must inspect tools, jaws, and seals before use, secure batteries per manufacturer instructions, and avoid exposure to moisture or extreme temperatures.
Use correct chargers, store batteries separately from metal objects, and follow lockout procedures during maintenance.
Report faults and tag defective units immediately.
Documentation and labeling of press-installed sections
After ensuring tools and batteries are safe and serviceable, attention should turn to documenting and labeling press-installed sections to preserve safety and code compliance throughout the system’s life.
Technicians should record installation date, fitter ID, joint type, pipe material, pressure ratings and test results. Durable labels and as-built drawings must be affixed and archived.
Maintain records for inspections, warranty claims and future modifications.
Cost, Time, and Performance Comparison
The comparison of press fittings to soldered and threaded joints highlights clear differences in installation time and labor requirements, with press systems typically reducing on-site hours.
Long-term reliability and expected maintenance cycles are summarized to show where press fittings perform similarly or better than alternatives.
A concise cost breakdown covering tools, fittings, and consumables frames the upfront investment against lifecycle savings.
Installation time and labor savings vs. soldering and threaded joints
Comparing press fitting to soldering and threaded joints highlights clear time and labor advantages: press fittings typically require fewer steps, no open flame or flux cleanup, and can be completed more quickly by a single technician using a battery-powered press. Install times shorten, joint consistency improves, and crew needs decrease.
| Metric | Benefit |
|---|---|
| Time per joint | Reduced |
| Labor | Fewer technicians |
| Cleanup | Minimal |
Long-term reliability and maintenance expectations
While press fitting systems often reduce upfront labor and installation time, their long-term reliability and maintenance profile must be evaluated regarding total cost, downtime risk, and performance over the system lifetime.
Durable seals and consistent press quality typically yield low maintenance, but periodic inspections, leak monitoring, and occasional ring replacement may be required.
Expected service life rivals soldered joints when properly installed and inspected.
Typical cost breakdown for tools, fittings, and consumables
Cost considerations for press fitting systems split into three clear categories: initial tool investment, per-installation fitting and consumable expenses, and ongoing maintenance or replacement costs.
Typical toolkits (battery press tool, jaws, chargers) range widely; pros purchase higher-end units, DIYers rent or choose budget options.
Fittings, seals, and ring profiles constitute per-job variable costs. Plan for periodic tool servicing and jaw replacement.
Tips, Shortcuts, and Pro Tips for Faster, Cleaner Installs
For faster, cleaner installs, the guide recommends setting up an assembly-line workflow to prepare multiple joints in sequence, reducing repetition and tool changes.
Simple tricks—such as marking insertion depth on tubing and using depth-stop guides—help guarantee consistent, full engagement every time.
It also covers practical solutions for storing and transporting press tools and fittings on site to protect components and streamline access.
Preparing multiple joints efficiently (assembly-line workflow)
Organize workstations and sequence tasks so each fitter moves through a predictable, repeatable routine: measure and mark all pipe runs first, then cut and deburr batches, then pre-fit and align joints before pressing.
Use labeled bins for fittings, staged tools at each station, and standardized checklists.
Assign clear roles—cutter, deburrer, assembler—to minimize movement and inspection delays for faster, consistent output.
Small tricks to ensure perfect insertion depth every time
After setting up an assembly-line routine and pre-fitting joints, attention shifts to guaranteeing consistent insertion depth at every connection.
Technicians mark fittings with depth gauges or colored tape, use stop collars for pipes, and rely on templates for repeated sizes.
A tactile “feel” check before pressing and periodic gauge calibration prevent under- or over-insertion, reducing leaks and rework.
Storing and transporting tools and fittings on job sites
Keep tools and fittings logically separated and easily accessible to minimize downtime and prevent damage.
Use labeled bins and foam inserts for press jaws, rings, and seals. Secure heavy tools in lockable cases and cushion fittings to avoid dents.
Route cables and hoses to prevent tripping.
Inventory before departure, replenish consumables, and store sensitive components away from moisture and direct sunlight.
When to Hire a Professional vs. DIY
Complex or concealed layouts, high-pressure mains, and unusual materials are indicators that a licensed plumber should handle press fittings.
Local permitting, required inspections, and potential liability for improper work further favor hiring a professional.
Homeowners are advised to verify technicians’ experience with press systems and check credentials before deciding between DIY and contracting.
Complexity indicators that require a licensed plumber
When a press fitting job involves multiple supply lines, hidden joints, structural penetrations, or work within municipal backflow or gas systems, it typically exceeds DIY scope and warrants a licensed plumber; such professionals carry the training, specialized tools, and permits needed to guarantee code compliance, leak-free seals, and safe integration with existing systems.
Additional indicators: complex routing, mixed-material connections, tight access, high-pressure systems, and commercial installations.
Permitting, inspection, and liability considerations
Although many minor press fitting tasks can be completed without official oversight, projects that alter plumbing or gas systems often trigger permit and inspection requirements and create potential liability for the property owner.
Homeowners should verify local codes, obtain required permits, and schedule inspections.
For significant alterations, concealed work, or fuel-gas connections, hiring a licensed plumber reduces legal risk, guarantees code compliance, and protects insurance coverage.
Finding qualified technicians familiar with press systems
Deciding whether to hire a professional or tackle a press fitting task as a DIY project hinges on the scope of the job, the type of system involved, and the homeowner’s experience with press tools and codes.
For complex installations, concealed piping, or commercial systems, seek certified technicians with manufacturer training and insurance.
For simple, accessible repairs, experienced DIYers may proceed, but should verify local code compliance and warranty implications.
Resources for Further Learning and Manufacturer References
The article directs readers to authoritative manufacturer manuals and training videos for model-specific guidance and safe operation.
A concise glossary of common press-fitting terms is provided to clarify technical language used throughout the guide.
Links to certification programs and hands-on courses are listed for those seeking formal training and practical experience.
Recommended manufacturer manuals and training videos
To build proficiency with press fitting systems, technicians should consult manufacturer manuals and training videos that detail product-specific procedures, torque values, and approved tooling.
Recommended resources include concise installation guides, certified training modules, and video demonstrations from OEMs.
Prioritize current editions and tool-specific content.
- Installation manuals
- OEM training videos
- Tool-specific calibration guides
Glossary of common press-fitting terms
A concise glossary clarifies technical terms commonly encountered when learning press-fitting systems, linking vocabulary to recommended manufacturer references and further learning resources.
Definitions include crimp, press jaw, O‑ring, ferrule, end stop, pipe preparation, inspection groove, cold expansion, torque-free joint, and leak test.
Entries pair brief descriptions with suggested manual pages, video timestamps, and keywords for manufacturer searches to aid precise troubleshooting.
Links to certification and hands-on courses
Where can technicians go to gain accredited credentials and supervised practice in press‑fitting systems?
Technical colleges, trade schools, and industry associations offer certified courses combining classroom theory with workshop practice.
Manufacturer training programs provide model‑specific instruction and certification.
Online modules supplement hands‑on sessions.
Links to organizations (trade unions, manufacturer portals, accredited training centers) are recommended for enrollment, schedules, and certification details.
Conclusion
In the end, the press fitting revolution humbly promises miracles: joints sealed with the serene efficiency of a bureaucrat stamping forms, and leaks banished with the smug finality of a reality TV judge. Plumbers and brave DIYers alike trade sweaty soldering for battery-powered zen, learning tools, tolerances, and when to summon actual expertise. Still, for those who relish drama, the comforting hiss of a failed seal remains a reliable teacher — and excellent dinner-party anecdote.