How to Restart a Gas Water Heater Safely: Step-by-Step Guide for Homeowners
To safely restart a gas water heater, begin by turning off the gas and electrical power, then check for any gas leaks and ensure proper ventilation. Next, identify your heater type and locate the pilot light, gas control, burner, and flue. Set the control to “Pilot” and follow the manufacturer’s instructions for lighting the pilot. Once lit, ensure the pilot and thermocouple are functioning correctly before switching the control to “On.” Observe the main burner for proper operation, checking for leaks, correct flame color, and normal cycling. For further assistance, consult stepwise troubleshooting, safety checks, and maintenance tips.
How to Restart a Gas Water Heater Safely: Quick Overview
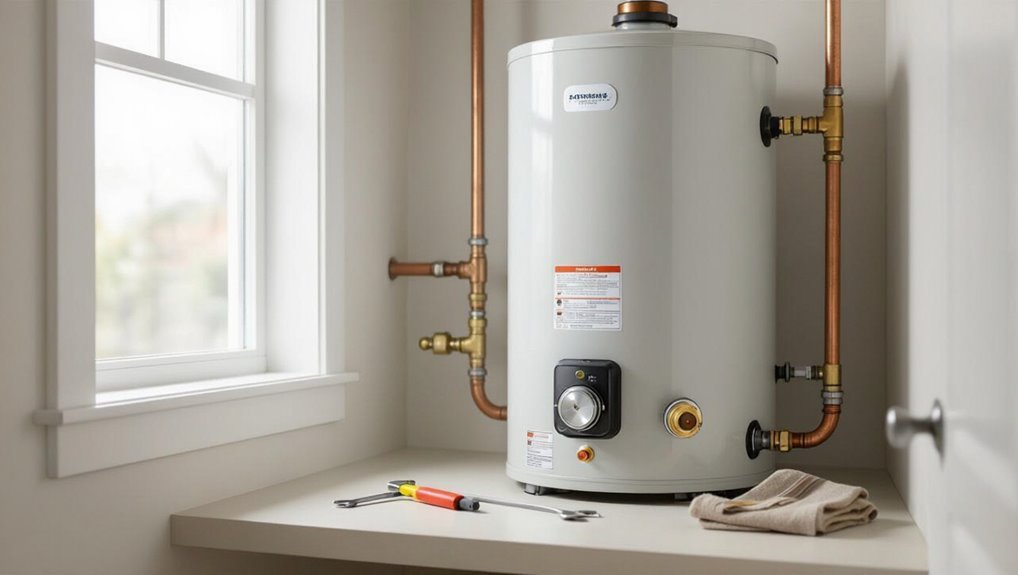
The restart process involves shutting off gas and power, checking for leaks or odors, relighting the pilot or reset ignition, and confirming normal operation because improper handling can cause fire, explosion, or carbon monoxide hazards.
A homeowner should proceed only for simple resets or pilot relights and call a licensed technician for persistent problems, suspected leaks, or complex repairs.
Typical restarts take 15–45 minutes and require basic tools such as a flashlight, wrench, and a combustible gas detector or soapy water for leak checks.
What restarting involves and why safety matters
Restarting a gas water heater requires turning on its pilot or ignition system, confirming gas flow, and monitoring for proper burner operation while following safety checks.
The process demands awareness of venting, odor detection, and secure connections; following manufacturer steps for how to restart gas water heater minimizes leak and fire risks.
Careful observation after restart guarantees safe, reliable operation.
When you should restart versus call a professional
When is a do-it-yourself restart appropriate versus when should a professional be called?
A homeowner may attempt a restart for routine outages, pilot relighting, or simple reset procedures if comfortable with basic safety checks.
Call a professional when there is gas smell, persistent ignition failure, visible damage, leaking, warped components, repeated trips, or any uncertainty about venting, combustion, or gas-line integrity.
Time estimate and required tools
After deciding whether a homeowner can safely attempt a restart or should call a professional, an estimate of time and a short tools list helps set expectations.
Typical restart takes 20–45 minutes for inspection and ignition.
Essential tools: adjustable wrench, flathead and Phillips screwdrivers, flashlight, gas sniffer or detector, work gloves, and a small bucket.
Optional: owner’s manual and multimeter.
Safety Precautions Before You Begin
Before restarting a gas water heater, the operator should shut off the gas at the appliance shutoff valve and, for combination units, isolate electrical power and pilot controls.
The work area must be checked for proper ventilation and inspected for gas odors or leaks before proceeding.
Appropriate personal protective equipment and nonflammable clothing should be worn throughout the procedure.
Turn off the gas supply: locating the shutoff valve
One essential safety step is shutting off the gas supply by locating and closing the water heater’s shutoff valve.
The valve is usually a small lever or round knob on the gas line near the heater. Turn the lever perpendicular to the pipe or rotate the knob fully clockwise.
Confirm valve position visually and check the line for labels before proceeding.
Turn off the electrical supply and pilot controls (for combination units)
Shut off the electrical supply and disable pilot controls on combination gas‑electric units to eliminate shock and inadvertent ignition risks.
The homeowner should switch off the dedicated breaker and confirm power absence with a tester.
For units with an electronic pilot, follow manufacturer instructions to lock out or disable ignition.
Tag the breaker and keep controls off until all servicing and safety checks are complete.
Ventilation and gas leak checks
Adequate ventilation and a thorough gas leak inspection are essential safety steps before relighting a gas water heater.
Confirm area vents and combustion air openings are unobstructed. Smell for gas and listen for hissing. Use a non-sparking flashlight; avoid open flames.
If gas odor or suspected leak is detected, shut off the gas, evacuate occupants, and contact the gas utility or a qualified technician immediately.
Personal protective equipment and safe clothing
Personal protective equipment reduces the risk of burns, cuts, and inhalation hazards when working on a gas water heater.
The homeowner should wear heat-resistant gloves, safety glasses, and a fitted dust mask or respirator. Long sleeves and nonflammable clothing protect skin; avoid loose garments.
Sturdy, closed-toe shoes prevent foot injury. Remove jewelry and secure long hair to minimize entanglement and contamination risks.
Identify Your Water Heater Type and Components
The reader should first determine whether the unit is a conventional tank-style, tankless, or power-vent gas water heater and note any manufacturer labels.
Key parts to identify include the thermostat and temperature control, pilot assembly and gas control valve, burner, and flue.
Consult the manufacturer’s label and manual for model-specific instructions and safety information.
Common gas water heater types and labels to check
Many residential gas water heaters fall into a few clear categories—tank, tankless, and hybrid—each with distinct labels and components that reveal fuel type, capacity, and safety features.
Inspect the data plate for model, serial number, input BTU, and gas type.
Note certification marks (ANSI, CSA), energy factor, and manufacture date to determine warranty and replacement parts compatibility.
Key components to know: thermostat, pilot assembly, gas control valve, burner, flue
A clear understanding of a gas water heater’s primary components—the thermostat, pilot assembly, gas control valve, burner, and flue—helps diagnose issues and perform safe restarts.
The thermostat regulates temperature; the pilot assembly ignites the main burner; the gas control valve manages fuel flow and safety shutoff; the burner produces heat; the flue vents combustion gases.
Familiarity aids troubleshooting and safety.
Reading the manufacturer’s label and manual
Before attempting any work, consult the manufacturer’s label and manual to confirm the water heater type, model number, fuel source, capacity, and safety specifications.
The manual clarifies required clearances, ignition procedures, maintenance intervals, and warning symbols.
Verify approved replacement parts, gas pressure limits, and venting requirements.
Adhere strictly to listed instructions; deviations can void warranties and create safety hazards for homeowners and technicians.
Step-by-Step Restart Procedure
The procedure begins with verifying there is no gas odor and confirming the gas valve is shut.
Next, the operator sets the gas control to Pilot, purges any trapped air, and follows the precise pilot-light sequence while monitoring the flame and thermocouple response.
Once a stable pilot is confirmed, the control is switched to On and the main burner is relit.
Step 1 Confirm no gas smell and shutoff status
One clear priority is confirming there is no gas odor and that the heater’s gas valve and emergency shutoff are fully closed.
The inspector visually verifies valve positions, smells around fittings and vents, and listens for hissing.
If any odor or leak indicators appear, all occupants evacuate, avoid sparks, and call the gas utility or emergency services before proceeding.
Step 2 Turn the gas control to Pilot and purge air if needed
Set the gas control knob to the “Pilot” position to prepare for ignition and, if recent service or a long cold shutdown occurred, purge trapped air from the gas line.
Open the appliance gas valve slowly, bleed any air per manufacturer guidance, and observe for steady gas flow at the pilot assembly.
Do not attempt ignition until flow is stable and odor-free.
Step 3 Lighting the pilot: exact sequence and techniques
Before attempting ignition, confirm the pilot gas flow is steady and odorless, the area is well-ventilated, and all controls are in the positions indicated by the manufacturer;
then follow the exact sequence for depressing the pilot button, activating the igniter or using a match as specified, holding the button for the required dwell time, releasing it slowly to guarantee the pilot remains lit, and observing the pilot flame’s size and color to verify proper combustion.
Hold the control per instructions, retry only after waiting, and stop if gas odor appears.
Step 4 Observing the pilot flame and thermocouple response
After the pilot is lit, observe the flame immediately for size, shape, and color to confirm stable combustion and correct positioning relative to the thermocouple. A steady blue flame that envelops the thermocouple tip indicates proper heat transfer, while a weak, yellow, or flickering flame signals incomplete combustion or drafts.
Verify the thermocouple stays heated for thirty seconds; if it cools, inspect for misalignment, soot, or airflow issues.
Step 5 Switching the gas control to On and relighting the burner
With the pilot confirmed stable, the technician carefully turns the gas control knob from “Pilot” to the “On” position to allow main burner flow.
He observes the burner ignition sequence while keeping hands and face away from the combustion area.
He listens for steady combustion, watches for full, even flame coverage on the burner, and checks for unusual odors or delayed ignition before concluding the step.
Step 6 Restoring power and setting the thermostat
Restore electrical power and set the thermostat to the desired temperature only after confirming the burner is operating normally and there are no gas odors; this prevents startup conflicts and guarantees the system will heat water to the correct level.
Reapply power at the breaker, reconnect the pilot control to electrical supply if applicable, then adjust the thermostat gradually to the homeowner’s preferred safe setting.
Step 7 Checking for proper operation and normal flame pattern
Inspect the burner assembly and observe the flame behavior to confirm the water heater is operating correctly.
The flame should be steady, mostly blue with a small inner cone, without yellow tipping, lifting, or excessive sooting.
Verify pilot stability, consistent ignition, proper venting, and no gas odor.
Monitor for a few minutes; if irregularities appear, shut down and contact a qualified technician.
Troubleshooting Common Issues During Restart
When problems arise during restart, common failures such as a pilot that will not stay lit, an unexpected smell of gas, or absence of hot water after ignition require quick, specific responses.
The guide outlines likely causes and straightforward fixes for a failing pilot, immediate safety actions if gas is detected, and checks to diagnose why water remains cold.
It also notes warning signs like odd noises, sputtering or a yellow flame that may indicate combustion or venting issues.
Pilot won’t stay lit: likely causes and fixes
If the pilot light repeatedly goes out after lighting, several common problems should be considered before attempting further repairs: a dirty pilot orifice, a weak thermocouple, improper gas pressure, drafts near the pilot assembly, or a faulty gas control valve.
Clean the orifice, inspect and replace a failing thermocouple, check for drafts, and verify gas pressure; replace the control valve if needed.
Smell of gas during restart: immediate actions
Detecting a gas odor during the restart of a gas water heater requires immediate, decisive action: shut off the gas supply at the appliance or main valve, refrain from creating sparks or using electrical switches, and evacuate the area until the smell dissipates and the fuel source is secured.
Notify the gas company or emergency services. Do not re-enter until a qualified technician confirms safety, and ventilate afterward.
No hot water after successful restart: diagnostics
Begin by systematically verifying basic indicators: confirm the pilot or electronic ignition stays lit, check that the thermostat is set above ambient temperature, and secure cold-water supply and gas valves to the heater are fully open.
If water remains cold, inspect for a tripped high-limit switch, failed thermocouple/igniter, sediment-clogged burner or dip tube issues, and confirm outlet plumbing valves and mixing valves are open.
Odd noises, sputtering flame, or yellow flame color
When restarting a gas water heater, unusual sounds, a sputtering pilot or burner, and a yellow or lazy flame each point to combustion or draft problems that require prompt attention.
These symptoms can indicate incomplete combustion, inadequate air supply, vent blockages, or burner contamination and should be diagnosed before extended operation.
The heater should be shut down if observed; inspect vents, clean burners, guarantee proper ventilation, and call a qualified technician if color or noise persists.
When to Stop and Call a Professional
If warning signs such as the smell of gas, visible damage to venting, or a pilot light that will not stay lit appear, professional service should be sought immediately.
Homeowners must also stop and consult a licensed technician when local codes, permit requirements, or warranty conditions could be affected by repairs.
When contacting a service professional, concise details—model and age of the heater, exact symptoms, and any troubleshooting steps already taken—help guarantee an efficient diagnosis.
Signs of major malfunction (gas leaks, damaged venting, persistent flame out)
Recognize early signs of serious malfunction—such as the smell of gas, visible damage to venting, or a pilot light that repeatedly extinguishes—as indicators to stop attempting DIY fixes and contact a qualified professional.
Other warning signs include hissing or bubbling noises, strong rotten-egg odor, soot or corrosion around connections, recurring gas valve trips, and carbon monoxide detector alerts.
Evacuate, shut off gas if safe, and call emergency service.
Local code, permit, and warranty considerations
Because local building codes, permit requirements, and manufacturer warranties can dictate what work a homeowner may legally perform, any repair or restart beyond basic pilot relighting should be evaluated against those rules before proceeding.
Homeowners should verify local permit thresholds, confirm warranty conditions to avoid voiding coverage, and recognize when required licensed professionals must perform inspections, repairs, or replacements for compliance and safety.
How to describe the problem to a service technician
After confirming local codes and warranty limits, homeowners should know when to stop and call a professional and how to describe the problem clearly.
They must report symptoms: no pilot, unusual noises, gas odor, leaks, or fluctuating temperatures.
Include recent actions taken, error codes, model and age, and photos or videos.
Clear, concise information speeds diagnosis and guarantees safe, effective repairs.
Maintenance Tips to Avoid Future Restart Issues
A concise maintenance routine can prevent many common restart problems by addressing inspection, flushing, and component care before issues arise.
Homeowners should follow a regular checklist that includes annual tank flushing and anode rod inspection, cleaning burners and verifying venting, and setting the thermostat to recommended temperatures for safety and efficiency.
Consistent attention to these items reduces emergency service calls and improves heater lifespan.
Regular inspection checklist
Routine inspections form the cornerstone of preventing restart problems and extending a gas water heater’s service life.
Inspections focus on safety, performance, and early fault detection.
- Check for gas leaks, corrosion, and vent obstructions.
- Verify pilot flame stability and burner condition.
- Test temperature-pressure relief valve for proper operation.
- Inspect pipe fittings, insulation, and thermostat accuracy.
Flushing the tank and checking the anode rod schedule
Having completed visual and operational checks, attention should turn to flushing the tank and inspecting the anode rod on a scheduled basis to prevent sediment buildup and corrosion that can impede restarting.
Flush annually or more often in hard-water areas to remove sediment.
Inspect the anode rod every 1–3 years, replacing when considerably corroded.
Document dates and findings to maintain service consistency.
Cleaning burners and checking venting annually
Inspect burners and venting annually to guarantee safe ignition, efficient combustion, and proper exhaust flow.
Remove debris, dust, and spider nests from the burner assembly and pilot area.
Verify burner flames are steady and blue; yellow or flickering flames indicate issues.
Clean or replace vent caps, inspect chimney or vent pipe for corrosion, blockages, and secure connections.
Schedule professional inspection if abnormalities appear.
Recommended thermostat settings and energy-saving tips
After verifying burner condition and venting integrity, attention should shift to thermostat settings and energy-saving practices that reduce strain on the heater and lower the likelihood of future restart problems.
Set the thermostat to 120°F for safety and efficiency.
Insulate pipes and the tank, schedule periodic sediment flushing, use low-flow fixtures, and consider a programmable or vacation mode to minimize runtime and energy waste.
Safety Checklist to Follow After Restarting
After restarting, a final gas leak test and a smell check should be performed to confirm no residual odors or escaping gas.
The appliance’s performance should be monitored during the first hour to verify stable ignition and consistent water temperature.
The technician or homeowner should record the service actions taken and note the recommended date for the next inspection.
Final gas leak test and smell check
Perform a final gas leak test and smell check before leaving the water heater area to guarantee no residual or newly introduced leaks remain.
Inspect connections, fittings, and pilot assembly with a soap solution or approved gas detector.
Listen for hissing and sniff for odor.
If bubbles, hissing, or gas smell are present, shut off the gas, ventilate, evacuate, and contact a certified technician immediately.
Monitoring first-hour operation and temperature stability
Monitor the water heater closely during the first hour of operation to confirm stable ignition, proper burner behavior, and steady temperature rise.
Observe for unusual noises, cycling frequency, and pilot stability.
Check hot water at fixtures periodically to verify consistent temperature.
Watch for leaks, odors, or flame discoloration.
If abnormalities occur, shut down gas supply and contact a qualified technician immediately.
Documenting service and next inspection date
Once stable operation and normal temperature behavior have been confirmed, the technician should record all work performed, component replacements, observed irregularities, and the exact date and time of the restart.
- Service actions taken and parts replaced.
- Readings: temperature, pressure, combustion checks.
- Safety issues found and corrective steps.
- Recommended next inspection date and owner contact instructions.
Quick-reference Troubleshooting Table
A concise troubleshooting table helps identify common symptoms, likely causes, and immediate actions after restarting a gas water heater. Refer to the quick-reference table below for clear guidance and a prompt indicator of when to call a professional. Keep actions limited to safe, obvious steps; call a pro if doubts remain or if problems persist.
| Symptom | Possible cause | Immediate action |
|---|---|---|
| No hot water | Pilot out or burner failure | Check pilot; relight per manual if safe |
| Gas smell | Gas leak | Shut off gas, ventilate, leave building |
| Water too hot | Thermostat misset or faulty | Lower thermostat; monitor temperature |
| Water leak | Loose connection or tank failure | Turn off water supply; inspect connections |
| Flame is yellow or irregular | Combustion or ventilation issue | Turn off heater and call a professional |
Symptom, possible cause, immediate action, when to call pro
When a gas water heater shows signs of malfunction, a concise troubleshooting table lists common symptoms, likely causes, immediate safe actions, and indicators that professional service is needed.
| Symptom | Action/When to Call Pro |
|---|---|
| No hot water | Check pilot; relight per manual; call pro if persistent |
| Strange noises | Drain/flush; call pro if noise continues |
| Gas smell | Ventilate, shut gas, evacuate; call pro immediately |
| Leaks | Shut water, isolate unit; call plumber immediately |
Conclusion
Like a lighthouse guiding a small craft through fog, the restart process brings warmth back to a household after a cold pause. When followed with care—checking valves, vents, and pilot lights—risks shrink and comfort returns. Yet even a well-read homeowner must respect the appliance’s temper: persistent odors, leaks, or strange noises are red flags. If uncertainty remains, calling a licensed professional keeps safety first and peace of mind intact.