Prevent Frozen Pipes: Easy Winterproofing Tips to Prevent Freezing Pipes
To prevent frozen pipes during winter, focus on insulating vulnerable areas such as crawlspaces, basements, attics, and exterior walls. Prioritize protecting outdoor hose bibs, supply feeds, and joints that lack insulation. Use closed-cell foam or fiberglass sleeves, seal gaps where pipes run through walls, and consider applying thermostatic heat tape on critical lines. Additionally, keep your indoor temperature steady and allow faucets to drip slightly during extreme cold. Regularly inspect your plumbing system, seal rim joists, and adhere to safe practices for heaters and heat tape to prevent damage.
Quick How-To: 5 Steps to Prevent Frozen Pipes
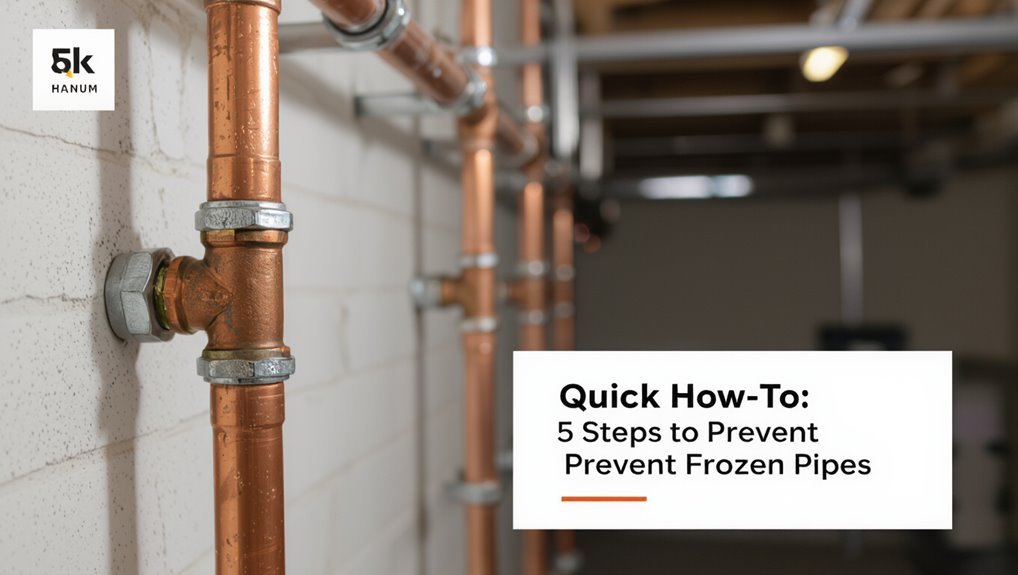
In cold weather, homeowners can take five straightforward steps to reduce the risk of frozen pipes: identify vulnerable pipes, insulate them, maintain a minimum indoor temperature, allow faucets to drip during extreme cold, and shut off and drain outdoor lines.
They locate pipes in unheated areas—crawlspaces, attics, exterior walls—and prioritize insulation or heat tape. They set thermostats to prevent severe drops and close gaps that admit cold air.
During deep freezes, they let cold‑side faucets trickle to relieve pressure. Before winter, they shut off and drain hoses and exterior valves to eliminate standing water that can freeze.
How Frozen Pipes Happen: The Basics You Need to Know
Cold water in pipes expands as it freezes, and that expansion plus pressure buildup are the primary reasons pipes crack or burst during prolonged low temperatures.
Ice formation restricts flow, raising pressure between the ice blockage and a faucet.
Pipes in unheated areas cool faster, making metal, plastic, and joint materials more susceptible to stress and failure.
Thermal contraction and repeated freeze-thaw cycles weaken fittings over time.
- Heat loss from exposed or poorly insulated piping.
- Rapid temperature drops that outpace residual heat.
- Water left standing in vulnerable segments.
- Long cold spells producing internal ice bridges.
Signs Your Pipes Are At Risk Before Winter Arrives
Visible gaps in pipe insulation and an unexplained drop in water pressure are early indicators of vulnerability before cold weather sets in.
Observing exposed sections or frayed wrapping suggests heat loss that can lead to freezing.
Consistently low pressure at taps may signal partial blockages or constricted flow that worsen when temperatures fall.
Visible Pipe Insulation Gaps
Noticing gaps in pipe insulation is an early indicator that a plumbing system may be vulnerable to freezing; exposed sections, compressed foam, or missing wraps create cold spots where ice can form first. Routine inspection identifies problem areas quickly.
Recommended actions focus on sealing and replacing damaged insulation, securing joints, and prioritizing vulnerable runs in unheated spaces.
- Inspect accessible pipes for exposed metal, crushed foam, or detached wraps.
- Measure gaps and note locations near exterior walls, garages, and crawlspaces.
- Replace brittle or torn insulation with appropriate thickness and wrap technique.
- Secure seams with tape or clamps and schedule rechecks before cold spells.
Unusually Low Water Pressure
When water pressure drops unexpectedly, it can signal developing blockages or partial freezing within pipes that make them more susceptible to bursting as temperatures fall.
Reduced flow from fixtures, sputtering faucets, or weak showers often precede full freezes; mineral buildup, debris, or migrating ice constricts passages and raises internal stress.
Regularly monitor pressure at multiple taps and note sudden declines, especially after cold nights. Address causes promptly: flush lines, clear aerators, and insulate vulnerable runs.
If low pressure persists, consult a plumber to inspect for hidden damage or compromised supply lines before sustained cold increases the risk of costly pipe failure.
Which Pipes to Winterize First: A Priority Checklist
A priority checklist helps homeowners identify which pipes deserve winterization first to reduce freeze risk and potential damage.
The checklist ranks pipes by exposure, age, and consequence of failure so limited time or materials target highest-risk lines.
Inspectors and homeowners should focus efforts where prevention yields the greatest benefit.
- Exterior hose bibs and outdoor faucets — direct exposure and early freezing.
- Basement and crawlspace supply lines — cold zones with limited heat.
- Pipes along unheated exterior walls — minimal thermal buffering.
- Main service and water feed lines — failure causes widespread disruption and costly repairs.
How to Locate Exposed and Poorly Insulated Pipes
Attention is directed to common vulnerable areas such as basements, crawlspaces, attics, exterior walls, and unheated garages where pipes are most likely exposed.
A systematic visual inspection should note gaps, visible piping, and areas where insulation is missing, damaged, or compressed.
Findings are then prioritized for repair or added insulation to reduce freeze risk.
Check Common Vulnerable Areas
In cold weather, homeowners should first survey areas where pipes are most likely exposed or poorly insulated—basements, crawl spaces, attics, exterior walls, garages, and utility closets—looking for bare metal piping, visible joints, and minimal or deteriorated insulation.
Attention should focus on common vulnerable spots and access points.
- Exterior walls: follow plumbing runs and check behind cabinets and closets.
- Unheated garages: inspect along foundation walls and near overhead doors.
- Crawl spaces and basements: look for low runs, sill plates, and rim joists.
- Attics and eaves: trace vent stacks and supply lines near roof penetrations.
Inspect Pipe Insulation
After surveying common vulnerable areas, the next step is to inspect pipe insulation to find exposed or poorly protected runs.
The inspector checks basements, crawlspaces, attics, garages, and exterior walls where pipes run.
Visuals reveal missing, compressed, or damaged insulation and gaps at joints, valves, and fittings.
Foam sleeves, fiberglass wrap, and pipe-specific tape are examined for proper thickness and continuous coverage.
Areas near vents, chimneys, and cold exterior walls receive extra attention.
Any exposed metal or sweating sections are marked for immediate repair or supplemental insulation.
A clear list of locations and recommended materials guides remediation.
Best Insulation Materials for Water Pipes
Choosing the right insulation material for water pipes hinges on factors like thermal performance, moisture resistance, ease of installation, and cost. Different materials suit varied locations and budgets; selection balances R-value, durability, and exposure.
Common options include:
- Closed-cell foam: high R-value, moisture-resistant, slips over pipes for tight fit.
- Fiberglass with vapor barrier: good thermal properties for hot water lines, requires protective jacketing in damp areas.
- Rubber/elastomeric: flexible, durable, resists condensation, ideal where movement occurs.
- Pipe wrap tape (self-fusing silicone): useful for irregular sections and repairs, low-profile, easy to apply.
Choice depends on environment and pipe type.
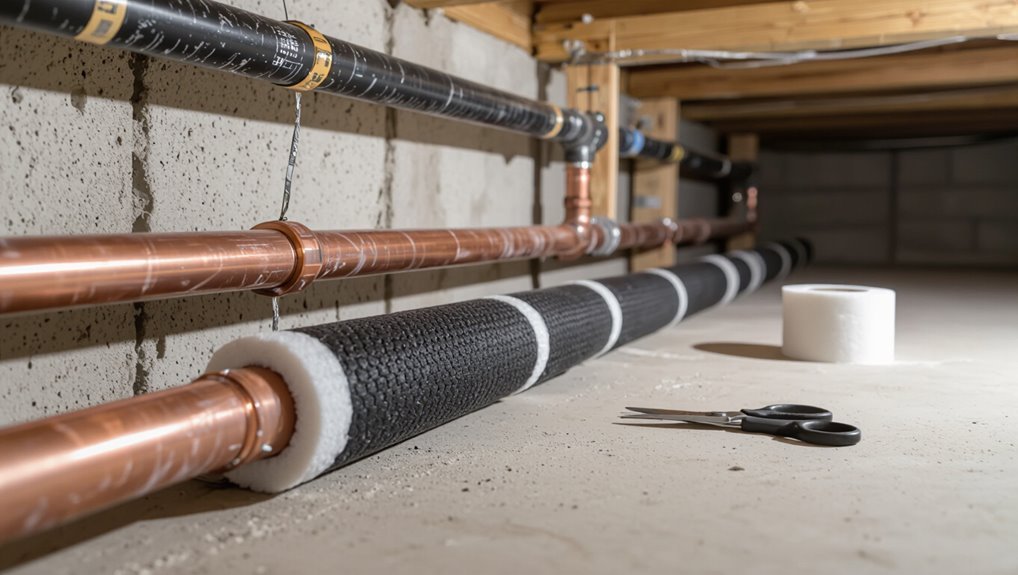
How to Install Foam Pipe Insulation Step-by-Step
Having selected closed-cell foam for its high R-value and moisture resistance, the installer prepares to fit pre-slit tubular sections over the pipes.
He measures length, cuts sections with a utility knife, and confirms snug fit around straight runs and fittings.
For seams, adhesive or built-in tape is applied along the slit; joints are butted, not overlapped, to avoid gaps.
Around elbows and valves, pre-formed covers or mitered cuts are used, then sealed with tape.
Supports are reinstalled every few feet to prevent sagging.
Finally, all exposed seams receive a continuous tape wrap to assure a uniform thermal barrier.
How to Use Heat Tape and Heating Cables Safely
Install and test heat tape and heating cables according to manufacturer instructions and electrical code to prevent pipe freezing and reduce fire risk. The user should select approved products, inspect cords for damage, and unplug before servicing. Proper attachment and spacing matter.
- Follow manufacturer layout: wrap or spiral as specified, avoid overlap.
- Secure with manufacturer-approved tape or clips; do not use staples.
- Verify grounding and GFCI protection; have a qualified electrician inspect if unsure.
- Test operation before cold weather and periodically; replace if showing wear or inconsistent heat.
Safe installation minimizes freeze risk and fire hazards.
When to Choose Heat Tape Versus Pipe Insulation
Decide between heat tape and pipe insulation based on the pipe’s location, vulnerability to extreme cold, and the consequences of a freeze. Heat tape suits exposed, hard-to-insulate runs, metal pipes in severe climates, or situations where active heat prevents repeated freezing; it requires correct installation and power.
Closed-cell foam or fiberglass insulation fits sheltered, easily accessed pipes to slow heat loss and reduce condensation risk without electricity.
For mixed conditions, combine insulation with thermostatic heat tape on critical sections. Selection should weigh energy use, maintenance, safety, and repair costs, prioritizing methods that reliably prevent rupture and water damage.
How to Protect Pipes in Unheated Crawlspaces and Basements
In unheated crawlspaces and basements, exposed pipes should be wrapped with appropriate insulation to reduce heat loss.
Gaps and cracks that allow cold air in must be sealed to limit temperature drops around plumbing.
Where possible, maintaining a minimal steady heat in the space helps prevent freezing without overworking heating systems.
Insulate Exposed Pipes
When temperatures drop, exposed water pipes in unheated crawlspaces and basements become vulnerable to freezing and bursting; insulating them reduces heat loss and helps maintain water flow. Proper insulation is straightforward and effective. Choose appropriate materials, fit snugly, and protect joints. Consider adding temporary heat where insulation alone is insufficient.
- Measure pipe lengths and diameters to select correct foam or fiberglass insulation.
- Clean and dry pipes, then slit and install foam sleeves or wrap fiberglass with vapor barrier.
- Secure seams with tape and insulate elbows and valves with preformed pieces.
- Inspect annually and replace damaged insulation promptly.
Seal Air Leaks
By sealing gaps and openings that admit cold air into crawlspaces and basements, homeowners can markedly reduce the risk of pipe freezing and the stress on insulation and heat sources.
Focus on rim joists, foundation vents, utility penetrations, and access doors.
Use caulk for small cracks, foam sealant for larger voids, and weatherstripping for movable panels.
Install vent covers or insulated hatches where appropriate.
Inspect for animal holes and repair damaged siding or vents.
Verify seals periodically and after storms.
Properly sealed spaces maintain steadier temperatures around plumbing runs, lowering condensation and extending the effectiveness of existing pipe insulation.
Maintain Minimal Heat
Regularly providing a modest, continuous heat source in otherwise unheated crawlspaces and basements prevents pipes from reaching freezing temperatures and reduces the chance of bursts. Supplemental heat can be achieved safely and economically, targeting vulnerable runs and entry points. Insulation complements warmth but does not replace it where temperatures plunge.
- Install a low-wattage, thermostatically controlled heater near exposed pipes.
- Use heat tape rated for plumbing, following manufacturer instructions.
- Insulate walls and rim joists to retain added heat.
- Monitor temperatures with a remote sensor and maintain above 35°F to avoid freezing.
How to Winterproof Pipes in Attics and Roof Eaves
In cold climates, pipes located in attics and roof eaves are particularly vulnerable to freezing because they sit in poorly insulated spaces exposed to outside temperatures.
To winterproof them, add continuous insulation around walls and rafters to reduce drafts and temperature swings. Install foam pipe sleeves or wrap heating cable along vulnerable runs, following manufacturer instructions and electrical codes.
Seal gaps and penetrations where pipes enter conditioned space to limit cold air intrusion.
Make certain attic ventilation is balanced so it prevents moisture buildup without directing extreme cold onto plumbing.
Inspect annually and repair damaged insulation or cable before winter sets in.
Quick Fixes for Outdoor Spigots and Hose Bibs
One simple step is to shut off and drain outdoor spigots before freezing weather arrives, shutting the shutoff valve inside the house, opening the bib, and removing any attached hoses to prevent trapped water from freezing and cracking the spigot.
The homeowner then inspects and protects exposed fittings. Recommended quick fixes include:
- Install foam spigot covers to add immediate insulation.
- Wrap vulnerable pipes and the bib with self-sealing heat tape rated for outdoor use.
- Replace damaged washers and tighten loose connections to prevent leaks.
- Consider a frost-proof replacement spigot if the wall mount allows for it.
How to Prepare Sprinkler and Irrigation Lines for Winter
Before the first hard freeze, homeowners should winterize sprinkler and irrigation systems to prevent ruptured lines, damaged valves, and costly repairs.
Begin by shutting off the water supply and draining surface water from hose bibs and backflow preventers.
Use the system’s manual or automatic drain valves, or employ compressed air at low pressure to blow out remaining water from lateral lines and risers.
Isolate and remove inline backflow devices for indoor storage if recommended.
Insulate exposed aboveground components with foam covers.
Label zones and note subscription service contacts for professional winterization if DIY is not feasible.
How to Insulate and Protect Hot Water Heater Pipes
Following winterization of sprinkler and irrigation lines, attention turns to the hot water heater and its piping to prevent heat loss and freeze damage.
The homeowner assesses exposed supply and return lines, insulates accessible sections, and checks the heater’s blanket and thermostat.
Recommended tasks include:
- Measure and fit foam pipe insulation on cold and hot lines, sealing seams with tape.
- Wrap the water heater with an approved insulating blanket, avoiding controls and vents.
- Insulate nearby walls and enclose pipes in an insulated box where possible.
- Maintain a low continuous heat or use a thermostatic heat cable on vulnerable runs.
How to Seal Drafts That Chill Indoor Plumbing
Attention to air leaks around plumbing fixtures and openings can prevent cold air from reaching indoor pipes.
Sealing gaps where pipes enter walls with caulk or foam stops drafts at the source.
Adding insulation or foam gaskets to drafty wall openings further reduces cold transfer and protects vulnerable runs.
Seal Gaps Around Pipes
In colder months, small gaps where pipes pass through walls, floors, and foundations can let in cold air that chills indoor plumbing and increases the risk of freezing. Seal gaps promptly to block drafts and stabilize pipe temperatures. Use appropriate materials and techniques for permanence and safety.
- Inspect: locate gaps at penetrations, around vents, and near sill plates.
- Choose sealant: use exterior-grade caulk for small cracks; expanding foam for larger voids; fire‑rated sealant where required.
- Prep: clean surfaces, remove debris, and protect nearby finishes.
- Apply and finish: fill voids, smooth seals, and allow cure before insulating or closing wall cavities.
Insulate Drafty Wall Openings
When cold air reaches plumbing through uninsulated wall cavities and gaps around openings, pipe temperatures drop quickly and freezing risk rises; insulating those wall openings and sealing the connecting seams restores thermal continuity, reduces drafts, and protects exposed runs.
Attention focuses on areas where plumbing passes between conditioned and unconditioned spaces: behind access panels, around electrical boxes, and at sill plates.
Use low-expansion foam, fiberglass batt, or rigid foam cut to fit, and seal edges with caulk or weatherstripping. Maintain access to valves.
Verify insulation covers cavities fully without compressing pipes. Inspect annually and after remodeling to insure continual protection.
How to Keep Garage and Shed Pipes From Freezing
Protecting garage and shed plumbing from freezing requires evaluating exposure, insulating vulnerable sections, and maintaining minimal heat or water flow during cold snaps. A concise strategy reduces burst risk and repair costs.
- Seal gaps where cold air enters and add weatherstripping around doors and vents.
- Insulate exposed pipes with foam sleeves or heat tape rated for outdoor use.
- Maintain slight heat using a thermostat-controlled heater or allow a slow drip from faucets during extreme cold.
- Elevate piping off cold concrete and route lines away from uninsulated exterior walls when feasible.
Regular inspection verifies measures remain effective.
What to Do About Pipes in Vacation Homes or Seasonal Properties
For vacation homes and seasonal properties, owners must plan for prolonged absence and wider temperature swings that increase freeze risk; measures used for garages and sheds—sealing gaps, insulating exposed runs, and adding controlled heat—remain useful but require different implementation and monitoring.
Remote properties benefit from winterizing plumbing: drain and shut off interior water, blow out lines, and add non-toxic antifreeze where appropriate. Install freeze sensors and remote temperature alarms tied to a caretaker or service.
Maintain exterior drains and slope ground away from foundations. Schedule periodic inspections during cold spells and keep a documented shut-down and start-up checklist to reduce oversight.
How to Set Thermostats and Heating to Prevent Frozen Pipes
Recommendations for thermostat settings begin with establishing a reliable minimum temperature to keep pipes above freezing.
Programmable schedules can maintain that minimum while lowering energy use during occupied and unoccupied periods.
Attention to heat zone prioritization guarantees vulnerable areas—such as basements, crawlspaces, and exterior walls—receive adequate, consistent warmth.
Thermostat Minimum Temperature
Maintaining a consistent minimum thermostat setting is a simple, effective step to reduce the risk of frozen pipes in cold weather. The recommendation: keep indoor temperature at or above a safe baseline so pipe zones remain warm even during cold snaps.
Consider these guidance points:
- Set a minimum of 55–60°F (13–16°C) when away to protect exposed pipes.
- Maintain higher temps near uninsulated areas, like basements and crawlspaces.
- Avoid turning heat off entirely; gradual drops risk localized freezing.
- Combine steady minimums with open cabinet doors and closed exterior vents to equalize warmth around plumbing.
Adjust slightly for severe conditions and local codes.
Programmable Temperature Schedules
After setting a reliable minimum temperature, homeowners should program thermostats to follow schedules that keep vulnerable areas consistently warm without wasting energy.
Automated schedules maintain baseline heat during cold nights and allow modest setbacks when outdoor temperatures are milder. Programs should avoid deep overnight drops, favor gradual reductions, and resume steady warmth before early-morning freezing risk.
Use multi-period daily settings to match occupancy and local climate, and enable vacation or hold modes when away.
Remote access and alerts allow adjustments if an unexpected cold snap occurs.
Regularly review and adjust schedules as seasons change or insulation and usage patterns evolve.
Heat Zone Prioritization
Heat-zone prioritization directs heating resources to areas most at risk of freezing—basements, crawlspaces, exterior-facing rooms, and plumbing chases—while allowing lower output where pipes are well-insulated or interior.
Thermostats and zoned systems are adjusted to maintain minimum safe temperatures near vulnerable pipes, balancing energy use and protection.
Recommended actions include:
- Set zone thermostats to keep at least 45°F (7°C) near exposed plumbing.
- Use smart thermostats to raise temperatures automatically during cold snaps.
- Close vents in seldom-used interior rooms but keep exterior-facing zones warm.
- Monitor remotely and respond to alerts for temperature drops.
When to Let Faucets Drip and How Much Is Enough
Often during prolonged cold snaps, homeowners should let faucets drip only when temperatures approach freezing and pipes are exposed to cold (uninsulated areas, exterior walls, crawlspaces).
A slow, steady drip from the faucet farthest from the main water shutoff helps maintain flow and relieves pressure that causes bursts. Cold-weather guidance recommends a trickle — roughly one drop per second — or a narrow stream that keeps water moving without wasting excessive supply.
Both hot and cold taps can be opened slightly. Monitor outdoor conditions and restore normal flow once temperatures rise above freezing and indoor spaces return to typical warmth.
Safe Use of Space Heaters Near Plumbing
When using portable space heaters near plumbing, position units to warm pipe runs without creating fire or electrical hazards; keep heaters at least three feet from flammable materials, avoid placing them directly beneath pipes or on unstable surfaces, and never leave them unattended.
Proper placement reduces freeze risk while minimizing danger.
Guidelines include:
- Use electric heaters with tip-over and overheat protection and plug directly into grounded outlets.
- Direct heat toward exposed pipes, maintaining safe clearance from insulation and plastic.
- Monitor room temperature with a thermostat; avoid sustained high heat that may damage fittings.
- Inspect cords and connections regularly for wear or overheating signs.
Shut Off and Drain Lines Before a Deep Freeze
Before a prolonged cold snap, the homeowner is advised to shut off outdoor water supplies and drain hoses and spigots to prevent frozen pipes.
Interior lines should also be shut off and drained where appropriate, especially in unheated areas or seasonal rooms. These steps reduce pressure and standing water that can cause pipes to burst during a deep freeze.
Turn Off Outdoor Water
As temperatures dip toward freezing, homeowners should shut off and drain outdoor water lines to prevent pipe bursts and costly damage.
The exterior shutoff reduces pressure and removes standing water that can freeze and expand.
Steps focus on simple, repeatable actions to secure hoses, valves, and irrigation systems before a cold snap.
- Locate the outdoor shutoff and close it fully.
- Open exterior faucets and remove hoses to drain remaining water.
- Use bleeder valves or drain plugs on irrigation zones per manufacturer instructions.
- Insulate exposed valves and meter lines with foam covers or wraps.
Drain Interior Lines
To prevent interior pipes from bursting during a deep freeze, shut off the main supply to affected zones and fully drain the lines so trapped water cannot freeze and expand.
After isolating valves, open faucets at highest and lowest points and flush toilets to remove remaining water. Attach garden hoses to service taps and drain to accelerate emptying.
Use built-in or auxiliary drain valves where available and operate pressure relief to clear lines.
Close drains once dry, leaving faucets slightly open to indicate closed supply. Label shutoffs and keep a simple checklist for winter emergencies to guarantee consistent, repeatable winterization.
Emergency Steps If You Suspect a Frozen Pipe
When a homeowner suspects a frozen pipe, quick, orderly action reduces the risk of rupture and water damage. The homeowner should act calmly, evaluating visible signs—frost on pipes, no flow, or bulging. Immediate steps focus on minimizing pressure and damage while awaiting repairs.
- Shut off the water supply to the affected area or the main valve to prevent flooding if rupture occurs.
- Open nearby faucets to relieve pressure and allow trapped water to escape.
- Turn off electrical power to areas with frozen pipes if water exposure is possible.
- Contact a licensed plumber promptly and avoid invasive DIY measures.
How to Thaw a Frozen Pipe Without Causing Damage
How should a homeowner approach thawing a frozen pipe without causing further damage? One method is to open nearby faucets to relieve pressure, then apply steady heat to the pipe section: use a hair dryer, heat gun on low, portable space heater, or electric heating pad—never open flame.
Start nearest the faucet and work toward the frozen area to encourage thawing toward the outlet. Insulate exposed sections as they warm to retain heat.
Monitor for leaks during thawing and stop if any appear. If the homeowner cannot locate the frozen section or the pipe is inaccessible, contact a professional plumber promptly.
How to Check for and Repair Pipe Bursts After Thawing
After thawing, the homeowner should immediately inspect exposed and accessible plumbing for signs of ruptures or leaks.
Visible pooling, damp insulation, or warped surfaces indicate damage.
If water remains on, shut the main valve and drain lines before repairs.
For small pinhole leaks, apply epoxy putty or pipe repair tape as a temporary measure; larger breaks require section replacement.
- Locate wet areas and note affected fixtures.
- Isolate the supply, drain lines, and relieve pressure.
- Use temporary sealants for minor leaks; monitor closely.
- For major ruptures, contact a licensed plumber to replace sections and restore service.
Home Upgrades to Reduce Freeze Risk (Budget-Friendly)
Simple, cost-effective upgrades can markedly lower the chance of frozen pipes by targeting common vulnerabilities.
Insulating exposed pipes, sealing gaps where cold air enters, and installing a programmable or smart thermostat are practical measures with quick payback.
Each option can be tailored to budget and skill level to maximize protection without major renovations.
Insulate Exposed Pipes
In colder months, insulating exposed pipes is one of the most cost-effective ways to reduce freeze risk by slowing heat loss and preventing ice formation. The approach targets vulnerable runs in basements, crawlspaces, attics, and along exterior walls using affordable materials.
- Measure pipe lengths and diameters before buying foam or fiberglass sleeves to make certain snug fits.
- Choose closed-cell foam for easy DIY installation or fiberglass with vapor barrier for higher temperatures.
- Secure insulation with tape or zip ties and seal joints to eliminate gaps.
- Add thermostatic heat tape where extra protection is needed, following manufacturer instructions.
Seal Air Leaks
Insulating pipes reduces heat loss at the source, but cold air seeping through cracks and gaps around walls, recessed lights, windows, and foundation penetrations can still lower ambient temperatures and increase freeze risk. Sealing air leaks raises interior temperature stability and is low-cost.
Identify drafts with visual inspection or a lit candle to spot moving air. Apply caulk to stationary joints, weatherstripping to operable windows and doors, and spray foam or expandable sealant for larger openings around pipes and vents.
Pay attention to sill plates, attic hatches, and crawlspace access. Proper sealing complements pipe insulation and reduces the chance of freezing.
Add Smart Thermostats
Frequent setbacks from unexpected cold snaps can be mitigated by adding a smart thermostat, which maintains consistent indoor temperatures and prevents pipes from being exposed to prolonged low-temperature conditions. A smart thermostat offers automated schedules, remote control, and alerts that reduce freeze risk without large expense.
- Program setbacks to keep minimal heat overnight.
- Use geofencing to raise temperature when occupants are away-to-home changes occur.
- Receive freeze warnings and temperature logs for quick responses.
- Integrate with smart valves or sensors near vulnerable pipes for targeted protection.
Installation is often DIY or low-cost professional, improving safety and energy efficiency.
Professional Services Worth Hiring for Winterproofing
Home-heating specialists, plumbers, and weatherization contractors each bring essential skills for thorough winterproofing, and homeowners should consider hiring them when the task exceeds basic do-it-yourself measures.
Professionals assess insulation gaps, seal drafts, and upgrade pipe insulation to reduce freeze risk.
Plumbers locate vulnerable supply lines, install heat tape or reroute piping, and advise on water shutoff and leak prevention.
HVAC technicians optimize heating distribution and recommend setback strategies.
Weatherization crews install door and window seals, cavitate walls for added insulation, and guarantee attic and crawlspace barriers are effective.
Hiring qualified, licensed contractors provides targeted solutions and reduces emergency repair costs.
Seasonal Maintenance Checklist You Can Follow Yearly
Regularly, homeowners should follow a concise seasonal maintenance checklist to reduce the risk of frozen pipes and other winter-related damage. A yearly routine helps identify vulnerabilities early and prioritize repairs before cold weather arrives.
- Inspect exterior pipe insulation, seal gaps, and close foundation vents.
- Service heating systems and test thermostats to make certain consistent indoor temperatures.
- Exercise indoor and outdoor faucets, drain garden hoses, and shut off outdoor valves.
- Check crawlspaces, basements, and attics for drafts, moisture, and adequate insulation.
Following this checklist annually minimizes emergency repairs and extends system longevity while keeping water lines protected during cold months.
DIY Winterproofing Tools and Supplies to Have on Hand
For practical winterproofing, a compact kit of tools and supplies lets homeowners respond quickly to cold-weather risks and prevent frozen pipes before they become emergencies.
The kit should include pipe insulation (foam sleeves, heat tape), basic tools (adjustable wrench, pliers, flashlight, utility knife), sealing materials (rope caulk, weatherstripping, silicone sealant), and temperature monitoring (stick-on thermometers or a digital probe).
Add a hair dryer or portable space heater for thawing, a bucket and towels for leaks, and spare pipe fittings and plumber’s tape for temporary repairs.
Store items in a labeled, insulated container near the main water shutoff for fast access.
Common Mistakes That Lead to Frozen Pipes and How to Avoid Them
Why do pipes freeze even in homes that seem prepared? Common mistakes often create vulnerabilities: overlooked exterior lines, inadequate insulation, and assumptions about continuous heating. To clarify common pitfalls and prevent them:
- Ignoring exposed pipes in unheated spaces — leave them insulated and sealed.
- Relying on occasional heating — maintain a consistent low temperature during cold spells.
- Blocking airflow around crawlspaces or basement vents — guarantee proper ventilation and closure where needed.
- Neglecting small leaks or drafts — repair gaps around pipes and windows to stop cold infiltration.
Addressing these stops most freezing incidents before they start.
How Climate and Local Codes Change Winterproofing Needs
In regions with harsher winters, winterproofing must be more robust and often governed by local building codes that specify insulation levels, pipe placement, and heating requirements. Climate determines risk: coastal milder zones need lighter insulation and freeze-protection at exposed fittings; continental or alpine areas demand thicker insulation, heat tracing, and enclosed service spaces.
Local codes reflect historical patterns and infrastructure, influencing allowable materials, minimum R-values, and mandatory setbacks from exterior walls. Compliance reduces liability and guarantees adequate protection. Contractors and homeowners should consult jurisdictional requirements and adapt designs to recorded lows, wind exposure, and snow load to prevent freeze-related failures.
Quick Action Plan: What to Do the Night Before a Deep Freeze
On the eve of a forecasted deep freeze, a homeowner should run through a short, prioritized checklist that secures plumbing, heating, and vulnerable outdoor systems; actions taken that night can prevent costly damage and service interruptions.
- Turn off and drain exterior faucets and irrigation; disconnect hoses.
- Open cabinet doors beneath sinks to allow warmer indoor air circulation around pipes.
- Set thermostat to a steady, no-lower-than temperature and consider leaving cabinet doors open to share heat.
- Locate and test main water shutoff and keep a small trickle of water running at vulnerable fixtures.
These concise steps prioritize prevention and rapid response.
Conclusion
As winter approaches, homeowners can take simple steps to prevent frozen pipes and avoid costly repairs. Who wants to face burst pipes and water damage when a few precautions—insulating exposed lines, closing crawlspace vents, letting faucets drip, and knowing shutoff locations—can avert disaster? Proactive inspection and basic supplies make winterproofing manageable; acting now reduces emergency calls, protects possessions, and preserves peace of mind throughout the cold season.