How to Make Toilet Bowl Cleaner at Home: Fast, Safe Recipes for Sparkling Results
How to Make Toilet Bowl Cleaner at Home: Fast, Safe Recipes for Sparkling Results
Creating an effective homemade toilet bowl cleaner is simple and economical. You can use common ingredients like vinegar, baking soda, hydrogen peroxide, borax, and essential oils to tackle stains and odors effectively. Quick recipes include mixing vinegar with baking soda, using a hydrogen peroxide rinse, or creating a foaming castile soap mixture. For optimal results, ensure proper contact time and scrubbing. Remember to wear gloves, keep the area well-ventilated, and avoid mixing incompatible chemicals. Below, you’ll find practical recipes, tips, and troubleshooting advice.
Why Make Toilet Bowl Cleaner at Home
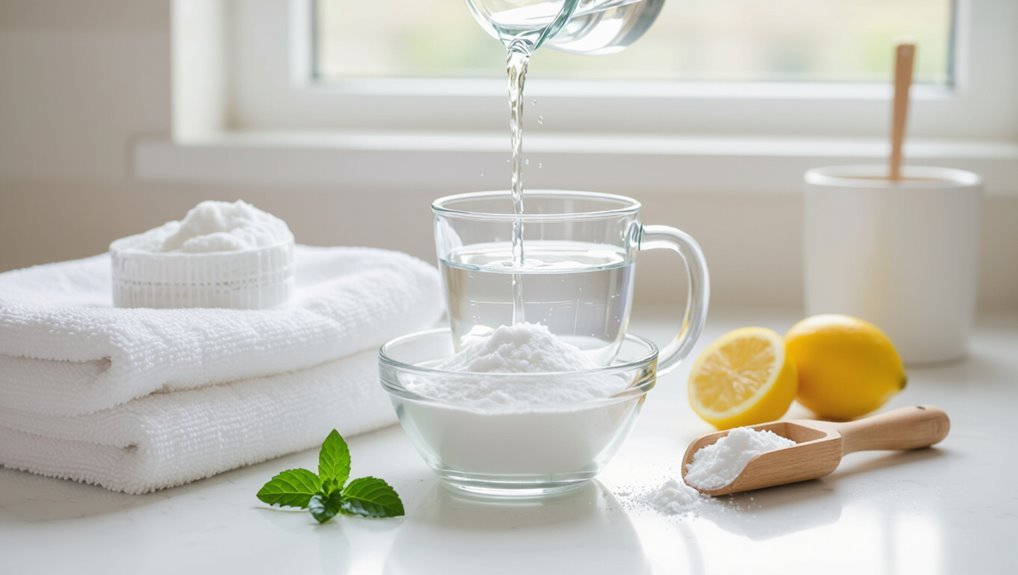
Homemade toilet cleaners can offer cost savings, reduced exposure to harsh chemicals, and customizable formulations for specific cleaning needs.
Guidance is needed on when a DIY solution is appropriate versus purchasing a commercial product.
Clear expectations about safety and cleaning effectiveness help users choose and use recipes responsibly.
Benefits of homemade toilet cleaners
Because many commercial cleaners contain harsh chemicals and strong fragrances, making toilet bowl cleaner at home offers a safer, cost-effective alternative that can be tailored to specific needs.
Homemade formulas reduce exposure to toxins, lower expenses, limit plastic waste, and allow scent or strength adjustments.
Clear instructions on how to make toilet bowl cleaner empower users to maintain hygiene with simple, controllable ingredients.
When to choose DIY over store-bought products
After outlining the benefits of homemade toilet cleaners, it helps to contemplate specific situations that make DIY the better choice.
DIY suits those wanting cost savings, ingredient transparency, reduced packaging waste, or allergy-sensitive formulas.
It is preferable for quick, small-batch needs, emergency substitutions when stores are inaccessible, or when customizing scent and strength.
Choose DIY when control and sustainability outweigh convenience.
Safety and effectiveness expectations
Confidence in results depends on realistic expectations: DIY toilet bowl cleaners can safely remove stains, control odors, and disinfect to varying degrees when properly formulated and used, but they are not universally equivalent to commercial-grade products with industrial-strength ingredients.
Users should follow recipes, test surfaces, allow adequate contact time, ventilate, store safely, and accept that stubborn mineral deposits or heavy biofilm may require stronger commercial treatments.
Quick Answer: Fast, Safe Homemade Toilet Bowl Cleaner Recipes
A concise set of homemade cleaners covers most toilet cleaning needs: a one-minute vinegar spray for light daily maintenance, a baking soda paste to tackle stains, and a bleach-free deep-cleaning mix for regular heavy-duty use.
Each option uses common, safe ingredients and requires minimal preparation. The following sections outline ingredients, proportions, and brief application steps for each recipe.
One-minute vinegar spray for light cleaning
One quick option for light toilet maintenance is a simple vinegar spray that disinfects mild soil and removes surface stains in about a minute.
Combine equal parts white vinegar and water in a spray bottle, mist under the rim and bowl, let sit 60 seconds, then scrub lightly with a toilet brush and flush.
Safe, inexpensive, and chemical-free for routine upkeep.
Baking soda paste for stains
For tougher stains that a quick vinegar spray won’t lift, a baking soda paste offers a fast, safe option: mix baking soda with just enough water (or hydrogen peroxide for whitening) to form a spreadable paste.
Apply it to stained areas, let sit 10–20 minutes, scrub with a brush or pumice stone, then flush.
Repeat for stubborn marks; rinse tools afterward and ventilate briefly.
Bleach-free deep-cleaning mix for regular use
Several simple, non-bleach recipes combine baking soda, vinegar, castile soap, and essential oils to provide regular deep cleaning without harsh fumes.
A typical mix: 1 cup baking soda, 1/2 cup distilled white vinegar, 1 tablespoon liquid castile soap, and 10–15 drops tea tree or lemon oil.
Sprinkle, pour, wait 10–15 minutes, scrub, and flush. Safe weekly maintenance; ventilate.
What You Need: Ingredients and Tools
The section outlines common, safe household ingredients—vinegar, baking soda, hydrogen peroxide, borax, citric acid, and optional essential oils—and their typical roles in homemade toilet bowl cleaners.
It also lists practical tools and containers such as spray bottles, a scrub brush, gloves, and measuring spoons or cups.
Finally, it highlights basic safety gear and ventilation practices to minimize exposure and guarantee safe use.
Safe household ingredients explained (vinegar, baking soda, hydrogen peroxide, borax, essential oils, citric acid)
A handful of common household ingredients—vinegar, baking soda, hydrogen peroxide, borax, essential oils, and citric acid—can be combined or used separately to create effective, low-toxicity toilet cleaners; each offers distinct chemical actions (acidic descaling, mild abrasion, oxidation, mineral binding, fragrance/antimicrobial enhancement, and targeted acidity) that determine how and when it should be applied.
Vinegar removes lime, baking soda scours, peroxide whitens, borax softens stains, citric acid dissolves mineral deposits, and essential oils add scent and minor antimicrobial properties.
Tools and containers (spray bottles, scrub brush, gloves, measuring tools)
After outlining which household ingredients work and why, attention turns to the tools and containers that make mixing, applying, and cleaning safe and effective.
Recommended items include sturdy spray bottles or squeeze containers, a long-handled scrub brush or toilet brush, disposable or reusable gloves, and accurate measuring cups or spoons.
Choose chemical-resistant, labeled containers and a nonabrasive brush for best results.
Safety gear and ventilation recommendations
Wear appropriate personal protective equipment and guarantee adequate ventilation before mixing or applying homemade toilet bowl cleaners.
Protective essentials include chemical-resistant gloves, safety goggles, and a mask if fumes are present. Open windows and run an exhaust fan to disperse vapors.
Avoid inhalation and skin contact; do not mix bleach with acids or ammonia.
Keep children and pets out of the area.
Step-by-Step Recipes
The following recipes provide clear ingredient lists and concise steps for five homemade toilet cleaners tailored to common needs.
Each entry covers a daily maintenance spray, a baking soda–and–hydrogen peroxide stain paste, a borax–citric acid–baking soda deep-cleaning powder, a diluted bleach-alternative disinfecting rinse, and a natural foam cleaner for under-rim cleaning.
Readers are given straightforward instructions and safety notes to prepare and use each formulation effectively.
Daily maintenance spray (vinegar + essential oil) ingredients and steps
A simple vinegar-and-essential-oil spray provides a quick, non-toxic way to keep toilet bowls fresh between deep cleanings.
Ingredients:
1 cup white vinegar,
1 cup water,
10–15 drops lemon or tea tree essential oil.
Steps:
combine fluids in a spray bottle,
shake gently,
mist under the rim and seat,
let sit 5–10 minutes,
then wipe or flush.
Use daily as needed.
Stain remover paste (baking soda + hydrogen peroxide) ingredients and steps
Mix baking soda and hydrogen peroxide into a thick paste to target stubborn toilet stains without harsh chemicals.
Combine 1 cup baking soda with about 2–3 tablespoons 3% hydrogen peroxide until spreadable.
Apply to stains, let sit 15–30 minutes, scrub with a toilet brush or sponge, then flush or rinse.
Repeat for persistent marks; store unused paste in a sealed container for short-term use.
Deep-cleaning powder (borax + citric acid + baking soda) ingredients and steps
Moving from a targeted stain paste to a broader maintenance option, readers are introduced to a powdered deep-cleaner combining borax, citric acid, and baking soda for regular and heavy-duty toilet cleaning.
Ingredients:
1 cup borax,
1 cup baking soda,
1/2 cup citric acid.
Steps:
mix dry,
sprinkle into bowl,
scrub with brush,
let sit 15–30 minutes,
flush.
Disinfecting rinse (diluted bleach alternative) ingredients and steps
Several simple, non-chlorine ingredients can be combined to create an effective disinfecting rinse that reduces pathogens without the fumes and corrosion of bleach.
Combine 1 cup distilled white vinegar, 1 cup water, 1 tablespoon hydrogen peroxide (3%), and 10–15 drops tea tree oil.
Spray or pour after cleaning, let sit 5–10 minutes, then rinse.
Store in a dark bottle, label clearly.
Natural foam cleaner for under-rim cleaning ingredients and steps
A simple natural foam cleaner tackles under‑rim grime by combining a mild alkali, a foaming agent, and a gentle acid or enzyme to lift soils and suspend debris for easy rinsing.
Ingredients:
1 cup liquid castile soap,
2 tbsp baking soda,
1 tbsp citric acid or enzymatic cleaner,
10 drops tea tree oil,
1/2 cup water.
Steps:
mix,
apply under rim,
dwell 10 minutes,
scrub,
flush.
Application Techniques for Best Results
To achieve consistent results, the writer explains how to apply homemade cleaners safely and evenly, ensuring full coverage without splashes.
Recommended scrubbing angles and under‑rim techniques are outlined to reach hidden stains, along with specific contact times for each formula.
The section concludes with clear rinsing and finishing steps to prevent residue and protect plumbing.
How to apply cleaners safely and evenly
Begin by evaluating the bowl’s condition and choosing an application method that matches the cleaner’s form—gel, liquid, or powder—to guarantee even coverage and reduce waste.
Wear gloves and eye protection, ventilate the room, and apply along the waterline and sides, avoiding splashes.
Allow recommended dwell time, then flush or remove residue with a toilet brush, rinsing tools afterward.
Best scrubbing angles and under-rim access tips
Rotate the brush in short, controlled strokes and angle it upward toward the rim to reach stains under the lip without splashing.
Focus on the section beneath the rim, using narrow brush maneuvers to dislodge buildup.
Tilt the handle to access tight curves, pause to reorient for hidden pockets, and inspect with a flashlight or phone to guarantee complete coverage before flushing residue away.
Timing: how long to let each cleaner sit
After addressing under-rim buildup with targeted scrubbing, attention shifts to how long cleaners should remain in contact with surfaces to work effectively.
Mild vinegar or baking soda solutions require 10–15 minutes to loosen deposits; stronger acidic or bleach-based homemade mixtures act in 5–10 minutes.
Tough stains may benefit from repeated applications and 20–30 minute dwell times while avoiding prolonged exposure that can damage porcelain.
Rinsing and finishing steps
Flush the bowl once to remove loosened debris, then apply a steady flow of water while scrubbing to rinse away residual cleaner and dislodged particles.
Continue flushing until water runs clear.
Wipe exterior surfaces with a damp cloth and mild detergent to remove splashes.
Air-dry or towel-dry seat and rim.
Dispose of gloves and ventilate the bathroom briefly for odor dissipation.
Comparing Homemade Recipes to Commercial Cleaners
Homemade recipes and commercial cleaners are compared on effectiveness against stains, limescale, and bacteria, as well as cost, safety, environmental impact, and recommended uses. The comparison highlights trade-offs: homemade options often cost less and have lower environmental footprints, while commercial products may offer stronger descaling and disinfection. The table below summarizes key differences to guide choice by situation.
| Factor | Homemade Cleaner | Commercial Cleaner |
|---|---|---|
| Effectiveness on stains, limescale, bacteria | Moderate for stains and bacteria; variable on limescale | Typically strong on limescale and bacteria |
| Cost per use | Low | Moderate to high |
| Safety | Generally safer ingredients but requires care | Can be more hazardous (corrosive or toxic) |
| Environmental impact | Lower, biodegradable ingredients | Higher, chemical residues and packaging |
Effectiveness on stains, limescale, and bacteria
Compare common DIY toilet cleaners and commercial formulas by their ability to remove stains, dissolve limescale, and reduce microbial load.
Homemade mixes (vinegar, baking soda, citric acid) often remove fresh stains and soften mild limescale.
Concentrated commercial cleaners with acids or surfactants work faster on heavy deposits and offer validated antimicrobial claims.
Efficacy depends on concentration, contact time, and mechanical agitation.
Cost per use, safety, environmental impact
After evaluating performance on stains, limescale, and microbes, cost per use, user safety, and environmental impact become the next practical considerations.
Homemade cleaners (baking soda, vinegar, citric acid) typically cost less per use and produce minimal packaging waste. They pose lower toxic exposure but require correct dilution and storage.
Commercial cleaners can be pricier, effective at low doses, but often contain harsher chemicals and plastic packaging.
Recommended situations for each option
When evaluating which toilet bowl cleaner to use, consider the specific problem, frequency of cleaning, and household sensitivities:
Homemade mild vinegar or baking soda blends suit routine maintenance, eco-conscious homes, and sensitive occupants.
Stronger homemade acidic pastes or diluted bleach handle stubborn stains occasionally.
Commercial formulations fit infrequent deep-clean needs, heavy mineral buildup, or time-pressed users, but may pose greater chemical and environmental risks.
Troubleshooting Common Toilet Cleaning Problems
Common stubborn issues include limescale and mineral buildup, dark rings or rust stains, and persistent odors that resist standard DIY cleaners.
Effective approaches vary by cause, from targeted acidic treatments for scale to rust-specific removers and odor-neutralizing agents.
The section also notes when professional products or services are warranted if home methods fail.
Removing stubborn limescale and mineral deposits
Tackling stubborn limescale and mineral deposits requires targeted techniques and stronger agents than routine cleaners.
Apply acidic homemade solutions (diluted vinegar or citric acid paste), allow dwell time, then scrub with a nonabrasive brush.
Repeat applications may be needed for heavy buildup. Rinse thoroughly and consider occasional preventive treatments to slow mineral accumulation without using harsh abrasives that damage porcelain.
Tackling dark ring stains and rust
Several approaches help address dark rings and rust stains in toilet bowls by targeting the specific causes—organic residue, iron deposits, or corrosion from metals.
For organic rings, enzymatic or bleach-based cleaners break down buildup; for iron stains, oxalic or citric acid dissolves ferric deposits.
For corrosion marks, gentle scrubbing with nonabrasive pads and metal-safe cleaners prevents surface damage.
Rinse thoroughly after treatment.
Dealing with persistent odors
After addressing visible stains and rust, attention turns to odors that linger despite regular cleaning.
The guide recommends enzymatic cleaners or a vinegar-baking soda soak to neutralize organic buildup under rims and in traps.
Ensuring proper flushing, scrubbing under the rim, and running a brush into overflow and siphon jets prevents recurrence.
Ventilation and routine maintenance keep smells controlled.
When DIY methods aren’t enough
When DIY cleaners and routine scrubbing fail to resolve persistent stains, odors, or flushing problems, it indicates an underlying issue that requires targeted remedies or professional help.
Home remedies may miss mineral buildup, toilet bowl glaze damage, hidden leaks, or sewer-line issues.
Recommend diagnostic steps, stronger commercial descalers, plumbing inspection, or licensed technician intervention to prevent recurrence and guarantee sanitary, functional results.
Safety Precautions and Ingredient Warnings
The article notes that certain chemical combinations—most importantly bleach with ammonia—produce toxic gases and must never be mixed.
It advises clear labeling and secure, upright storage for homemade cleaners to prevent accidental exposure or degradation.
Recommendations also cover keeping products out of reach of children and pets and using childproof containers when possible.
Dangerous chemical combinations to avoid (e.g., mixing bleach and ammonia)
Although many household cleaners seem harmless on their own, certain combinations produce toxic gases or dangerously reactive mixtures that can cause respiratory injury, burns, or even death.
Users must never mix bleach with ammonia, acids, or hydrogen peroxide; doing so releases chloramines, chlorine gas, or oxygen bursts.
Avoid mixing drain cleaners together and never combine oxidizers with organic solvents.
Seek fresh air and medical care if exposed.
Proper storage and labeling of homemade cleaners
Store homemade toilet bowl cleaners in clearly labeled, tightly sealed containers kept out of reach of children and pets, preferably in a cool, dry, well-ventilated area away from heat sources and direct sunlight.
Include ingredient lists, concentration warnings, and date prepared on labels.
Store incompatible substances separately, keep original ingredient containers when possible, and inspect containers periodically for leaks, degradation, or odor.
Child- and pet-safety practices
After labeling and segregating homemade toilet cleaners, attention turns to practices that minimize risks to children and pets.
Store products high or in locked cabinets, out of sight. Use childproof caps and secure lids. Avoid fragranced or colored additives that attract animals.
Immediately clean spills and ventilate areas. Post emergency numbers and ingredient lists near the first-aid kit for rapid response.
Eco-Friendly Tips and Waste Reduction
The text recommends selecting biodegradable ingredients to reduce environmental impact and guarantee safer break-down after use.
It encourages reusing glass or sturdy plastic bottles to minimize single-use plastic waste.
Clear disposal guidance for leftover solutions is provided to prevent contamination of drains and local waterways.
Choosing biodegradable ingredients
Many households can reduce environmental impact by selecting biodegradable ingredients for homemade toilet cleaners, prioritizing substances that break down naturally without leaving harmful residues.
Choose plant-derived surfactants, citric acid, baking soda, and essential oils with low aquatic toxicity. Avoid persistent antimicrobials and synthetic polymers.
Label mixtures clearly, store responsibly, and prefer concentrates to limit transport and production footprints while ensuring effective cleaning.
Reusing containers and minimizing plastic waste
Building on ingredient choices that limit environmental harm, attention to packaging further reduces a homemade cleaner’s footprint.
Reuse sturdy spray bottles, glass jars, or trigger dispensers; label refilled containers with contents and dilution ratios. Choose concentrated recipes to shrink refill frequency.
Repair or repurpose worn plastic vessels for non-cleaning tasks. Support refill stations and bulk purchasing to minimize single-use packaging and overall plastic waste.
Disposal recommendations for leftover solutions
Dispose leftover homemade toilet cleaner responsibly to protect drains, waterways, and septic systems.
Unused diluted, mild vinegar or baking soda solutions can be poured slowly into drains with plenty of water.
Stronger acidic or oxidizing mixes should be neutralized (baking soda for acids; vinegar for basic bleach-free alkalines) and discarded at hazardous waste collection if uncertain.
Avoid pouring concentrated mixtures outdoors or into storm drains.
Maintenance Schedule and Prevention Strategies
A clear maintenance plan helps keep homemade toilet cleaner effective and reduces buildup over time.
Suggested routines include:
- Daily quick wipe and flush check
- Weekly bowl scrub with the homemade cleaner
- Monthly inspection and stain treatment plus a seasonal deep-clean checklist.
Daily, weekly, and monthly cleaning routines
When maintained through consistent short tasks, a toilet remains sanitary and resists scale, stains, and odor buildup; establishing simple daily, weekly, and monthly routines guarantees problems are caught early and cleaning becomes efficient rather than burdensome.
Daily: quick wipe of seat, rim, and handle.
Weekly: scrub bowl, under rim, and clean brush.
Monthly: descaling, deep-clean seals, inspect tank components.
Preventative habits to reduce buildup
Regular brief actions prevent hard-water stains, mineral scale, and odor before they require strong chemicals or intensive scrubbing.
Flush twice after use in low-flow toilets, wipe bowl rim and seat after spills, run a vinegar rinse weekly, and use a pumice or brush for spot removal promptly.
Maintain good ventilation and address leaks to limit mineral buildup and microbial growth.
Seasonal deep-cleaning checklist
Although deep-cleaning can be scheduled around seasonal shifts, the checklist should be concise, actionable, and timed to address cumulative deposits and unseen microbial growth.
Inspect seals, jets, and tank components; descale with vinegar or citric acid; scrub under the rim and bowl with homemade paste; flush and refill to test; replace worn brushes and liners; document date and results for quarterly or biannual follow-up.
Quick Reference: Recipes and Measurements
A compact cheat-sheet lists each homemade toilet cleaner recipe alongside exact measurements and recommended contact times for effective use. The table below offers a quick visual summary for printing and reference. Users can follow the entries to prepare solutions safely and apply proper dwell times.
| Recipe | Measurements | Contact time |
|---|---|---|
| Vinegar + Baking Soda | 1 cup vinegar + 1/2 cup baking soda | 10–15 min |
| Borax + Lemon | 1/2 cup borax + 1/4 cup lemon juice | 15–30 min |
| Hydrogen Peroxide | 1 cup 3% H2O2 (undiluted) | 10–20 min |
| Castile Soap + Vinegar | 1/4 cup soap + 1 cup vinegar | 10–15 min |
| Essential Oil Boost | Add 10 drops per batch | Follow base recipe time |
Printable cheat-sheet of each recipe and contact times
Refer to the printable cheat-sheet for concise recipes, precise measurements, and recommended contact times for each toilet bowl cleaner variant.
It lists ingredients, dilution ratios, application steps, and surface-safe notes in tabular form.
Contact times specify stain type and necessary dwell period.
Users can print, laminate, or store digitally for quick access during cleaning, ensuring consistent, effective results and safety compliance.
Frequently Made Mistakes and How to Avoid Them
Common pitfalls include overusing abrasive mixtures that etch porcelain, applying incorrect concentrations that fail to disinfect, and neglecting ventilation or personal protective equipment.
Each mistake can reduce effectiveness, damage fixtures, or create health hazards.
The following guidance explains how to avoid these errors safely and efficiently.
Overuse of abrasive mixtures that damage porcelain
Scrubbing too vigorously with gritty or acidic homemade cleaners can wear away the porcelain glaze, leaving the bowl dull, porous, and more prone to stains and chips.
To prevent damage, use soft brushes or nonabrasive pads, dilute acidic ingredients, test on an inconspicuous spot, limit mechanical scrubbing, and opt for gentle, pH-balanced formulations designed for glazed ceramics.
Using wrong concentrations for disinfecting
Mixing disinfectants at incorrect strengths undermines effectiveness and can create safety hazards.
Individuals often dilute bleach or hydrogen peroxide improperly, yielding insufficient microbial kill or corrosive mixtures.
Precise measurements and following label instructions guarantee both efficacy and material compatibility.
Testing on a hidden area, using recommended contact times, and avoiding arbitrary concentration increases prevents damage and reduces health risks.
Ignoring ventilation and PPE
Although ventilation and personal protective equipment may seem optional for quick cleaning tasks, neglecting them greatly raises the risk of respiratory irritation, chemical burns, and accidental exposure.
The writer advises opening windows, using exhaust fans, and wearing gloves and eye protection when mixing or applying cleaners.
Proper ventilation and PPE minimize inhalation of fumes and skin contact, making homemade cleaners safer and reducing emergency risks.
When to Call a Professional
Persistent plumbing problems or stubborn, deep stains that resist homemade solutions may indicate a need for professional assessment.
A tradesperson can diagnose leaks, mineral buildup, or fixture damage that cleaning alone cannot resolve.
Readers should weigh the cost of repairs or specialized cleaning against the time and effort saved by hiring a professional.
Signs of plumbing or severe staining issues beyond cleaning
A toilet’s surface problems sometimes signal underlying plumbing or severe staining issues that routine cleaners cannot resolve.
Persistent brown or red rings, deep pitting, constant staining despite scrubbing, recurring odors, slow draining, gurgling sounds, or frequent clogs indicate mineral buildup, corrosion, cracked glaze, or sewer-line issues.
In such cases, a licensed plumber or restoration specialist should inspect and recommend repair or replacement.
Cost considerations vs. professional service
When repair needs or stubborn stains exceed what DIY cleaners can address, homeowners should weigh the cost of continued treatments against hiring a professional.
Calculate material and time expenses, estimate recurring attempts, and compare with a plumber’s diagnostic fee and repair cost.
Prioritize safety, warranty coverage, and long-term savings; choose professional service when repairs, persistent discoloration, or health risks justify the expense.
Final Tips for Sparkling Results
Practical guidance covers how to combine homemade and store-bought treatments safely for stubborn stains, noting when layering products is effective and when it risks damage.
Routine maintenance tips explain simple habits and mild, regular cleaners that keep the bowl bright with minimal effort.
Clear criteria are offered for escalating to stronger measures or professional help if problems persist.
Combining methods safely for stubborn problems
Several techniques can be combined safely to tackle stubborn toilet stains, provided compatibility and ventilation are confirmed beforehand.
One method is applying a mild acid (vinegar) after mechanical scrubbing, rinsing thoroughly before introducing an oxygen bleach solution.
Avoid mixing acids with chlorine.
Test small areas, wait between steps, use gloves and eye protection, and guarantee room airflow to prevent fumes and chemical reactions.
Long-term care to keep the bowl clean with minimal effort
A few simple habits keep a toilet bowl consistently clean with minimal effort: regular light scrubbing, weekly application of a mild cleaner or vinegar, and prompt removal of visible stains.
Additional measures include flushing after use, running a brush through the trap periodically, ventilating to prevent mildew, avoiding bleach with acidic cleaners, and using a tablet or concentrated cleaner sparingly to maintain finish and prevent buildup.
Conclusion
To sum up, the guide leaves readers equipped to craft effective, safe toilet bowl cleaners from everyday pantry staples. The instructions emphasize simple ingredients, proper tools, and methods that save money and reduce chemical use. Users are reminded to test surfaces, ventilate, and wear gloves for safety. For stubborn issues or plumbing woes, professional help is advised. Even a Victorian-era butler would approve of this modern, thrift-minded approach to sparkling, sanitary fixtures.