How to Install an Upflush Toilet: Step-by-Step Guide for DIY and Pros
Installing an upflush toilet is a straightforward process that involves using a macerator pump to grind waste and pump it through small-diameter pipes, making it perfect for basements or areas without gravity drainage. To successfully install one, you’ll need to plan for electrical and venting requirements, securely position the toilet and macerator, connect the inlet and discharge piping with the correct slope, and set up a GFCI-protected outlet. Regular maintenance and leak checks will help extend the life of your system. Follow the step-by-step procedures, troubleshooting tips, and code considerations outlined below for a smooth installation.
What an upflush toilet is and why choose one
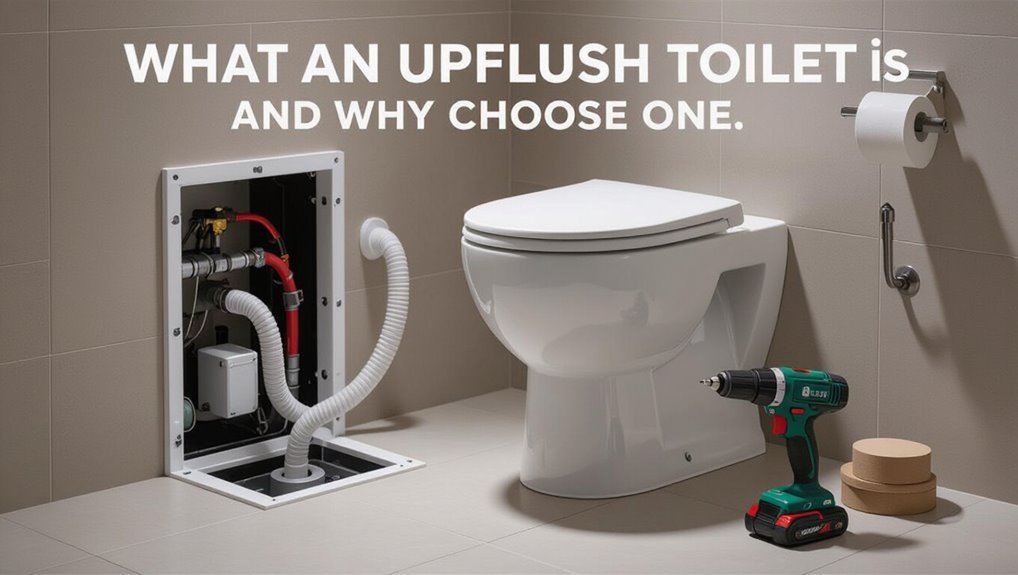
An upflush toilet uses a macerator and pump to grind waste and move it through small-diameter discharge lines, unlike a standard gravity-flush toilet that relies on gravity and fixed sewer connections.
It is commonly chosen for basement bathrooms, additions, and renovations where running traditional drain lines is impractical or costly.
However, it may be inappropriate for high-use installations, settings without reliable power, or where local codes prohibit pumped sanitary devices.
How an upflush toilet works compared to a standard toilet
A compact macerating system, the upflush toilet collects waste in a small tank beneath the bowl where a macerator grinds solids and pumps the resulting slurry through narrow-diameter discharge piping to the main sewer or septic line.
Unlike gravity-fed standard toilets, it requires power and a pump rather than a steep waste fall.
Readers learning how to install an upflush toilet should note electrical needs and venting differences.
Common installation scenarios and benefits (basement bathrooms, additions, renovations)
Having reviewed how an upflush toilet operates compared to a standard gravity-fed fixture, the discussion now moves to where and why these systems are chosen.
Common scenarios include basement bathrooms, home additions, and renovations where existing drain lines are inaccessible.
Benefits encompass minimal invasive plumbing, flexible placement, lower installation cost and faster timelines, making upflush units ideal for retrofits and constrained layouts.
Limitations and situations when an upflush toilet is not appropriate
Although upflush toilets offer clear advantages for retrofits and awkward spaces, they are not a universal solution.
They underperform in high‑traffic bathrooms, lack true gravity flush power, and depend on electricity and pumps.
Not suitable where frequent heavy use, unreliable power, strict plumbing codes, or long-term durability priorities exist.
Consider conventional gravity systems for permanence, efficiency, and code compliance.
Tools, materials, and parts checklist
A clear checklist of tools, materials, and parts sets expectations before starting the job.
It should list essential tools for a DIY installation, the required components—toilet, macerator/pump unit, fittings, hoses, and valves—and any optional supplies or upgrades such as a backflow preventer, odor trap, or sound insulation.
Preparing these items in advance reduces delays and helps guarantee a smooth installation.
Essential tools for DIY installation
Prepare a concise checklist of tools, materials, and replacement parts before beginning an upflush toilet installation to secure the job proceeds without interruptions.
A focused selection minimizes delays and guarantees safe, accurate work.
Include durable hand tools, safety gear, sealants, and plumbing supplies.
- Adjustable wrench and socket set
- Screwdrivers and utility knife
- Silicone sealant and plumber’s tape
- Safety glasses and gloves
Required parts and components (toilet, macerator/pump unit, fittings, hoses, valves)
Essential components for an upflush toilet installation include the toilet bowl and tank (or compatible wall-hung unit), a macerator/pump assembly sized for the expected waste load, flexible discharge and inlet hoses, discharge piping and elbows, appropriate non-return and isolation valves, and mounting hardware plus gaskets and seals to guarantee watertight connections.
- Correctly rated macerator unit
- Smooth-bore discharge pipework
- Flexible inlet hose and clamps
- Isolation and non-return valves
Optional supplies and upgrades (backflow preventer, odor trap, sound insulation)
Several optional supplies and upgrades can enhance performance, odor control, and longevity of an upflush toilet installation.
Professionals consider these additions when site conditions or user expectations demand extra protection or comfort.
Select materials rated for waste systems and local codes to guarantee compatibility and serviceability.
- Backflow preventer for sewer cross-connection protection
- Inline odor trap to block odors
- Vibration isolation mounts
- Acoustic insulation around the pump
Pre-installation planning and site preparation
Before any components are ordered or walls opened, precise measurements of drain/run distances and elevation drops must be confirmed to guarantee proper macerator performance.
The location and capacity of a nearby electrical supply should be identified to meet the macerator’s requirements and code-mandated grounding.
Additionally, verify local plumbing and permit requirements and prepare the floor and rough-in connections to provide a solid, code-compliant foundation for the installation.
Measuring and verifying drain/run distances and elevations
Accurate measurement of drain run distances and elevations is critical to guarantee an upflush toilet will function correctly and meet local code requirements.
Measure horizontal run to the sewer or stack, note slope percentages, and confirm available vertical drop for gravity or pumped discharge.
Record pipe diameters, fittings, wall or floor penetrations, and obstruction clearances.
Verify with local codes and manufacturer specifications before installation.
Locating power supply and electrical requirements for the macerator
A single reliable power source must be identified and evaluated for the macerator’s electrical demands, including voltage, amperage, grounding, and circuit protection requirements specified by the manufacturer and local code.
The installer should confirm outlet location, circuit capacity, GFCI needs, cable routing, and distance to the macerator.
Plan for dedicated circuiting, accessible disconnects, and adherence to electrical safety clearances.
Plumbing and building-code considerations and permits
With the macerator’s electrical needs established, attention shifts to plumbing and building-code requirements that govern installation location, waste routing, venting, and permit obligations.
Competent installers verify local codes, allowable discharge elevations, and whether backflow prevention or air admittance valves are required.
Obtain necessary permits, schedule inspections, and confirm approved pipe materials and slopes.
Guarantee access panels and service clearance comply with regulations.
Preparing the floor and rough-in connections
Measure the installation area and mark the toilet centerline and outline of the pan to guarantee proper fit and clearances.
Inspect subfloor for levelness, rot, or weak spots; repair or reinforce as needed.
Locate electrical and drain stub-outs, confirm voltage and circuit capacity, and verify macerator inlet position.
Pre-fit waste flange and secure solid mounting points to prevent noise and movement.
Smooth and seal perimeter.
Step-by-step installation guide
The installation proceeds by first unpacking and inspecting all components to verify parts and condition.
Next, the toilet base is positioned and secured, the macerator is mounted and linked to the toilet outlet, and discharge piping is run with appropriate pipe type, slope, and fittings.
Finally, venting and any required check valves are installed to guarantee proper flow and prevent backflow.
Unboxing and inspecting components
Before unpacking, the installer confirms the work area is clean and well-lit. Then, they open the box carefully to avoid damaging components.
Each part is inventoried against the packing list: macerator unit, toilet bowl, mounting hardware, discharge fittings, gaskets, power cord, and instruction manual.
Visual inspection checks for cracks, missing pieces, loose fasteners, and shipping damage. Defective items are documented and reported before proceeding.
Positioning and securing the toilet base to the floor
Position the toilet base over the planned drain and macerator location, aligning the bowl so the mounting holes sit flush with the floor and the discharge outlet mates to the macerator inlet without strain.
Verify level front-to-back and side-to-side, mark mounting hole locations, apply wax-free seal or gasket per manufacturer, drill pilot holes if needed, secure with provided bolts, and torque evenly to avoid cracking.
Installing the macerator unit and connecting to the toilet outlet
Begin by placing the macerator unit adjacent to the toilet base so its inlet lines up with the toilet discharge without forcing or angling the connection.
Secure the unit to the floor or bracket per manufacturer instructions.
Install the rubber inlet gasket and clamp, tighten evenly, then mount the access cover.
Verify alignment and clearances, leaving room for maintenance and electrical cord routing.
Connecting discharge piping to the macerator (pipe type, slope, fittings)
With the macerator secured and its inlet properly aligned, attention shifts to the discharge piping: selecting compatible pipe material, establishing the correct slope, and choosing appropriate fittings to carry effluent from the macerator to the building drain.
Use rigid PVC or ABS rated for pressurized discharge, maintain 1%–2% slope, minimize bends, use solvent-weld or approved push-fit joints, and secure piping to prevent strain.
Installing venting and check valves where required
Install venting and check valves in accordance with local code and the macerator manufacturer’s instructions to prevent sewer gas backflow and guarantee proper air intake.
Identify required vent type—mechanical air admittance or traditional vent—then position and fasten per instructions.
Install a one-way check valve on discharge if code or layout permits.
Test for leaks and proper venting before finalizing access panels.
Hooking up water supply and filling valve adjustments
After confirming vent and check valve function and securing any access panels, attention turns to connecting the water supply and setting the fill valve for the macerating toilet.
Install a shutoff valve and flexible supply line to the toilet’s inlet, tighten fittings without overtightening, then adjust the fill valve height and float to achieve proper tank level.
Test for leaks and guarantee reliable refill operation.
Making electrical connections safely (GFCI, outlet placement)
Why place the electrical connection on a dedicated GFCI circuit near the unit? A dedicated GFCI protects against ground faults in damp bathroom environments.
Install a weatherproof or bathroom-rated receptacle within code-required distance, mounted above potential splash zones.
Adhere to local electrical codes, use proper cable gauge, secure connections in a junction box, and test the GFCI before finalizing the installation.
Sealing, caulking, and final trim work
Carefully sealing and finishing the upflush toilet guarantees watertight joints, prevents odors, and delivers a clean, professional appearance.
Apply silicone sealant at the base and any floor gaps, smoothing with a wet finger or tool. Seal pipe penetrations and enclosure seams.
Install trim pieces, secure access panels, and wipe away excess caulk. Allow cure time before use per manufacturer instructions.
Initial testing and flushing procedures
Begin by powering the upflush unit and restoring water to the supply line. Then proceed with a systematic set of tests: confirm electrical connections and control panel indicators, open the water supply and check for leaks at fittings, and run a series of short flush cycles to verify pump activation, macerator operation, and proper discharge through the waste line.
Observe cycle timing, listen for abnormal noises, inspect discharge hose for flow, and correct any leaks or airlocks before finalizing installation.
Troubleshooting common problems and how to fix them
The troubleshooting section outlines common issues with upflush toilets and their practical remedies.
It covers electrical failures and macerator motor problems, slow draining and clogs, and leaks at pipe connections or seals.
It also addresses unpleasant odors with ventilation fixes and methods to reduce operational noise.
No power or macerator not running
Diagnose power and motor issues methodically when an upflush toilet’s macerator fails to run, since most stoppages stem from simple electrical or safety interlock problems.
Check power at the outlet, breakers, and any inline fuse.
Inspect the motor for burned smells, loose wiring, or jammed impeller.
Test the float and safety switches.
Replace a faulty motor or switch per manufacturer guidance.
Slow draining or frequent clogs
Address slow draining or frequent clogs by systematically isolating causes—mechanical blockages, improper waste or paper use, venting issues, or partial macerator failure—and then applying targeted fixes such as clearing obstructions, adjusting user habits, or servicing the macerator components.
Inspect inlet and discharge lines, remove visible debris, use a flexible snake for internal blockages, check venting, and test macerator blades and seals; replace worn parts as needed.
Leaks at connections or seals
Start by inspecting all junctions where the upflush toilet meets plumbing and the macerator housing, because leaks usually originate at loose fittings, degraded seals, or cracked connections.
Tighten fittings to manufacturer torque, replace rubber gaskets or O-rings showing wear, reseal threaded joints with suitable tape or compound, and replace cracked couplings.
Test under pressure and recheck after several uses to confirm repair.
Unpleasant odors and ventilation fixes
Leaks can permit odors to escape from seals or fittings, so once visible breaches are ruled out, attention shifts to ventilation and odor control.
Inspect vent pipe for blockages, confirm proper slope and airtight joints, and guarantee macerator and discharge lines are clear.
Add or upgrade mechanical vent fans, install activated-carbon deodorizers in the unit, and replace deteriorated gaskets to restore odor-free operation.
Noise reduction techniques
Noise from an upflush toilet often stems from mechanical vibration, air entrainment, or loose fittings; identifying whether the sound is a continuous hum, rattling, or loud grinding directs the correct fix.
Secure mounts, tighten hose clamps, and isolate pump with rubber mounts to stop vibration.
Bleed trapped air, check impeller for debris, replace worn bearings, and use acoustic foam or insulation to dampen remaining noise.
Maintenance schedule and long-term care
A regular maintenance schedule keeps an upflush toilet reliable and helps prevent costly repairs.
Recommendations should cover routine cleaning and descaling, inspection and timely replacement of commonly worn parts (such as macerator blades, seals, and check valves), and steps for winterizing or securing the system during extended vacancy.
Clear intervals and simple procedures will help owners maintain performance and avoid failures.
Routine cleaning and descaling recommendations
Regular maintenance should follow a predictable schedule: weekly light cleaning, monthly deeper cleans, and quarterly descaling to prevent buildup and protect the macerator components.
Use mild, non-corrosive cleaners and a soft brush for bowls and seals. Flush after cleaning.
For descaling, apply manufacturer-approved descaler per instructions, avoid bleach or harsh acids, and run several flush cycles afterward to clear residues.
Parts that commonly wear and when to replace them
Inspecting wear-prone components on an upflush toilet helps plan timely replacements and avoid failures. Regular checks focus on seals, macerator blades, pumps, and electrical connections.
Replace seals every 2–4 years or when leaking, macerator blades when dull or noisy, pumps after 5–10 years or performance loss, and wiring/connectors if corrosion or intermittent faults appear.
- Rubber seals and gaskets
- Macerator blades
- Discharge pump/motor
- Electrical connectors and switches
Winterizing and extended vacancy precautions
Prepare the upflush toilet for winter or long vacancies by draining water, protecting components from freezing, and disabling power where appropriate to prevent damage and odors.
Empty the macerator, add non-toxic antifreeze to traps and pump lines, insulate exposed pipes and motor housings, and remove batteries from alarms.
Schedule a pre-return inspection, test seals and valves, and document maintenance performed for future reference.
When to hire a professional and cost considerations
Complex electrical work, major plumbing modifications, and permit-required alterations are generally best left to a licensed plumber or electrician.
A clear cost breakdown should include parts, labor, and any permit fees so homeowners can compare estimates.
Before hiring, one should ask about licensing, insurance, warranties, timeline, and whether the quoted price covers permits and inspections.
Tasks best left to a licensed plumber or electrician
Recognize when an upflush toilet installation crosses into work that requires a licensed professional: tasks involving electrical hookups, major plumbing modifications, venting changes, or repairs inside shared sewer lines carry permit and code implications that DIYers should not assume they can handle.
Licensed pros guarantee code compliance, safe electrical connections, correct waste-line alterations, and reliable troubleshooting.
Hire a plumber or electrician for systemic, concealed, or permitted work.
Typical cost breakdown: parts, labor, permits
After outlining when a licensed plumber or electrician should be called, attention turns to the money side of an upflush toilet job: parts, labor, and permits. Typical costs vary: parts (pump, fittings), labor (installation, electrical), and permits/inspection. Compare quotes and DIY savings versus professional reliability.
| Item | Typical Range | Notes |
|---|---|---|
| Parts | $300–$900 | Pump, toilet, fittings |
| Labor | $200–$900 | Plumber/electrician |
| Permits | $0–$200 | Local requirements |
Questions to ask a contractor before hiring
When should a homeowner hire a contractor for an upflush toilet installation, and what should they ask to guarantee fair pricing and proper work?
Homeowners should consult a pro for complex plumbing, permit needs, or unclear waste routing.
Ask about licensing, insurance, written estimates, scope, timeline, permit handling, warranty, references, and change-order policies.
Verify competitive bids and clear payment terms.
Comparison of popular upflush toilet systems
A brief comparison of leading upflush systems highlights brand differences in motor power, tank capacity, noise levels, and warranty offerings.
Consideration of compact macerators versus full-size units centers on space savings and lower discharge capacity for compact models against greater flow handling and quieter operation in full-size systems.
Evaluating these trade-offs helps determine which models and features suit the installation’s space, usage frequency, and local plumbing constraints.
Overview of leading brands and models (features and capacities)
Brands in the upflush toilet market vary in design emphasis—some prioritize compactness and quiet operation while others focus on raw pumping power and scent control—so comparing models requires attention to flush mechanism (macerator vs. grinder), motor horsepower, tank capacity, noise ratings, and installation footprint. Leading brands differ by performance, warranty, and accessory availability.
| Brand | Motor HP | Tank L |
|---|---|---|
| Brand A | 0.5 | 6 |
| Brand B | 0.75 | 9 |
| Brand C | 1.0 | 12 |
Pros and cons of compact vs. full-size macerators
Although both compact and full-size macerators serve the same basic purpose of grinding and pumping waste away from fixtures, they differ sharply in capacity, noise, and installation flexibility.
Compact units save space, cost less, and suit single fixtures but run hotter, louder, and handle lower flow.
Full-size units are quieter, durable, and support multiple fixtures yet require more space, higher cost, and complex installation.
Safety, codes, and environmental considerations
The section addresses electrical and plumbing requirements that affect upflush installations, including GFCI protection and safe wiring for macerator units.
It summarizes local code and permitting considerations installers should verify before beginning work.
It also covers water and energy efficiency options and proper handling or discharge of waste and graywater to meet environmental and health standards.
Electrical safety and GFCI requirements
Safety is paramount when adding electrical components to an upflush toilet installation, because these units require reliable power and are used near water.
Installations must use GFCI protection on circuits serving pumps and controls, employ proper grounding, and follow manufacturer voltage and amperage specifications.
Outdoor‑grade or wet‑location wiring, conduit, and waterproof connections reduce shock and corrosion risks; label circuits clearly.
Local plumbing code issues and permit tips
Proper electrical preparations lead naturally into compliance with local plumbing codes and permitting, since many jurisdictions treat upflush installations as plumbing alterations that affect waste, venting, and fixtures.
Installers should verify permit requirements, allowable discharge connections, and backflow prevention rules.
Inspectors may require licensed plumber involvement, pressure tests, and documented venting.
Retain permits and approvals to avoid fines and guarantee resale compliance.
Water and energy efficiency, disposal of waste and graywater concerns
Many upflush installations can improve water and energy efficiency when specified fixtures, flush volumes, and pump settings are chosen to minimize consumption and electrical draw.
Designers should select low‑flush toilets, timed or demand pumps, and energy‑efficient motors.
Waste and graywater routing must meet codes: discharge points, holding tanks, and treatment options require approval.
Routine maintenance prevents backups and environmental contamination.
Practical tips, mistakes to avoid, and performance optimization
The section outlines common DIY mistakes—improper sealing, incorrect pipe gradients, and poor electrical connections—and how to prevent them.
It then covers best practices to extend macerator life, including regular cleaning, proper flushing habits, and scheduled inspections.
Finally, practical upgrades such as soundproofing, alarm systems, and corrosion-resistant fittings are presented to boost performance and user experience.
Common DIY mistakes and how to avoid them
Installers should anticipate common DIY pitfalls when fitting an upflush toilet and address them proactively to prevent leaks, odors, and poor flushing performance.
Attention to seal alignment, correct pipe slope, secure electrical connections, and proper macerator positioning reduces callbacks. Verify manufacturer torque, test for leaks, and confirm venting before finishing.
- Misaligned seals
- Improper discharge slope
- Loose electrical wiring
- Incorrect macerator placement
Best practices for maximizing macerator life and reliability
Preserve macerator longevity by prioritizing routine maintenance, correct installation geometry, and sensible usage habits that reduce wear.
Regular inspection, timely cleaning, and correct venting prevent clogs and motor strain. Avoid flushing inappropriate items and overuse cycles. Guarantee secure mounting and proper discharge slope to minimize backpressure.
- Schedule quarterly inspections and descale as needed
- Use only recommended cleaners
- Prevent foreign objects
- Maintain venting and slope
Upgrades that improve performance and user experience (soundproofing, alarms)
Why add upgrades like soundproofing or alarms to an upflush toilet? Enhancements reduce noise, prevent overflow damage, and alert to faults, improving reliability and comfort.
Practical tips focus on material choice, sensor placement, and maintenance; avoid obstructing vents or wiring improperly.
- Dense acoustic panels around the macerator
- Vibration isolators under mounting feet
- Water-level and leak alarms
- Accessible service panels for inspections
Conclusion
An upflush toilet offers flexibility, minimizes demolition, and expands bathroom placement; it saves time, reduces plumbing runs, and eases retrofits. With proper planning, correct tools, and careful installation, it delivers reliable performance, quiet operation, and efficient waste removal. When problems arise, diagnose promptly, repair thoughtfully, and call a pro when needed. Respect codes, prioritize safety, and optimize maintenance to guarantee long-term function, comfort, and peace of mind.