How to Clean Pipes in House: Quick DIY Drain & Pipe Cleaning Tips
Quick Guide to Cleaning Pipes in Your Home
Homeowners can effectively clean pipes by following these steps:
1. Identify the Issue: Determine if you have slow drains, recurring clogs, or complete blockages.
2. DIY Fixes:
- Wear gloves for protection.
- Isolate the water supply to the affected area.
- Use a plunger or hand auger to clear minor clogs.
- Remove and clean P-traps to eliminate trapped debris.
- Flush pipes with controlled hot water to clear buildup.
3. Best Practices:
- Avoid mixing chemical cleaners; opt for enzyme treatments for regular maintenance.
- Perform monthly hot-water flushes to keep pipes clear.
4. Inspect Regularly: Check cleanouts for signs of roots or unpleasant odors, and keep a record of repeated clogs.
5. When to Seek Help: If DIY methods don’t resolve the issue, it may be time to call a plumber.
By following these steps, you can maintain clear and functioning pipes in your home.
How to Identify Your Pipe Problem (Slow, Recurring, or Blocked)

How can one tell whether a plumbing issue is slow drainage, a recurring clog, or a full blockage? Observations determine category: slow drainage shows gradual water retreat across fixtures, often after hair or grease buildup; sounds may include gurgling or bubbling.
Recurring clogs clear partially with plunging or minor snaking but return within days or weeks, indicating partial obstruction or downstream buildup.
A full blockage prevents water passage, causing backups, pooling, or overflowing and often affects multiple fixtures simultaneously.
Testing involves isolating fixtures, running water, and noting speed, smell, and noise.
Accurate identification guides targeted cleaning methods and prevents unnecessary interventions.
When to DIY and When to Call a Plumber?
Identifying whether a problem is slow, recurring, or fully blocked informs the choice between do-it-yourself fixes and professional help. Minor slow drains, isolated clogs, and visible debris suit DIY methods: plungers, manual removal, or enzyme cleaners. Recurring issues, multiple fixtures affected, bad odors, or water backing up beyond a trap indicate deeper or systemic problems needing a plumber. Plumbing professionals diagnose hidden leaks, damaged pipes, sewer line issues, and perform safe repairs. Cost, time, and risk guide decisions: attempt simple, low-risk fixes first; call a licensed plumber when problems persist or suggest structural failure.
| DIY signs | Call plumber signs |
|---|---|
| Slow drain | Multiple fixtures affected |
| Local clog | Persistent odor |
Safety Steps Before You Start Cleaning Pipes
Before beginning any pipe-cleaning task, one should put on protective gloves to prevent skin contact with chemicals and debris.
The water supply must be shut off to avoid accidental flooding or pressure-related injuries.
Work areas should be well ventilated to disperse fumes from cleaners and guarantee safe breathing.
Wear Protective Gloves
Donning chemical-resistant gloves protects hands from corrosive cleaners, biological contaminants, and sharp edges commonly found in pipe cleaning.
Gloves should fit snugly without restricting movement; long cuffs add wrist protection when reaching into traps.
Choose gloves rated for the chemicals used—nitrile for many solvents, neoprene for stronger agents—and inspect for tears before work.
Change contaminated gloves immediately and avoid touching the face or phone while wearing them.
After finishing, remove gloves carefully to prevent skin contact, wash hands thoroughly, and dispose of single-use gloves or clean reusable ones per manufacturer instructions to maintain hygiene and safety.
Turn Off Water Supply
Shut the water supply to the affected fixture to guarantee flooding is prevented and exposure to contaminated water is limited while cleaning.
The individual locates the shutoff valve—usually under sinks, behind toilets, or at the main service—and turns it clockwise until fully closed.
If a dedicated valve is absent or inaccessible, the main house valve is used, then confirmed by opening the fixture tap to ensure flow has stopped.
After closure, ancillary appliances sharing the same feed are noted to avoid unintended disruption.
Valves are inspected for leaks and functionality; any issues are recorded and addressed before proceeding with pipe-cleaning tasks.
Ensure Proper Ventilation
Always make certain adequate ventilation when preparing to clean pipes, because chemical cleaners and loosened debris can produce harmful vapors and odors. Open windows and exterior doors, run exhaust fans, and position portable fans to direct airflow out of the work area.
If working in a basement or enclosed crawlspace, consider using a respirator rated for organic vapors and guarantee continuous fresh-air entry. Avoid using multiple chemical products together to reduce toxic fume risk.
Allow time for air exchange after treatment before re-entering without protection. Monitor occupants with respiratory sensitivities and keep children and pets away during the process.
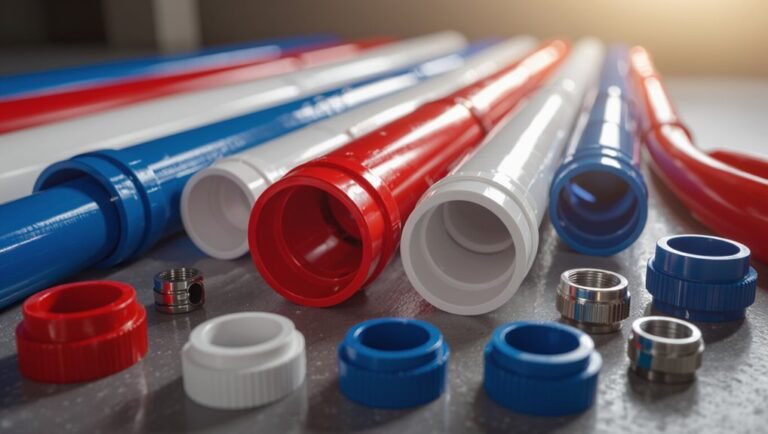
Tools for Cleaning Pipes Every DIYer Should Own
A brief overview of the tools needed to clean pipes separates basic hand tools from more specialized power equipment.
Common hand tools—wrenches, augers, plungers, and pipe brushes—address most routine clogs and maintenance tasks.
For stubborn buildups or long runs, rotary drain snakes and compact power augers offer greater reach and cutting power.
Essential Hand Tools
Which tools should sit within arm’s reach when tackling clogged pipes? A basic kit emphasizes pliers (channel-lock and slip-joint), adjustable wrench, and basin wrench for loosening fittings.
A plumber’s snake (hand auger) clears moderate blockages; a straightened coat hanger serves as an emergency probe.
A set of screwdrivers (flat and Phillips) and utility knife aid access and sealing tasks.
A bucket, rags, and disposable gloves control spills and contamination.
Small brushes and pipe-cleaning brushes scrub residue.
Teflon tape and assorted washers or rubber gaskets enable simple repairs.
A flashlight completes the set for inspecting tight, dark spaces.
Specialty Power Tools
For tougher blockages and frequent maintenance, specialty power tools bring speed and reliability that hand tools can’t match.
A compact electric drain auger handles long, winding clogs in sink and bath lines; interchangeable cable sizes suit varied pipe diameters.
A drum or handheld snake with power feed reduces fatigue and prevents cable kinking.
For grease and scale, a rotary sewer machine with cutting heads restores flow quickly.
High-pressure water jetters clear roots and stubborn deposits but require caution and proper nozzle selection.
Battery-powered inspection cameras complement these tools, confirming problem location and verifying successful cleaning.
Quick Sink Fixes: Using a Plunger Effectively
When faced with a slow or clogged sink, using a plunger properly often clears the blockage quickly and without tools. The user should seal overflow or adjacent openings, make sure the plunger cup covers the drain, add enough water to submerge the cup, then pump with steady, forceful strokes. Test flow periodically and repeat as needed. Avoid harsh chemicals before plunging. If debris is visible, remove it first. Gentle persistence usually restores drainage.
| Step | Purpose |
|---|---|
| Seal openings | Create pressure |
| Water level | Improve suction |
| Remove debris | Prevent re-clogging |
What to Do When a Plunger Fails
Try alternative approaches if plunging fails to clear a sink.
The homeowner should first remove and inspect the pop-up or strainer, clearing visible debris with gloves and a flashlight.
Running hot water while testing flow can reveal partial blockages.
A mild enzymatic drain cleaner applied per label instructions may soften organic buildup without harming pipes.
Baking soda and vinegar can be used cautiously: pour baking soda, then vinegar, wait 15–20 minutes, flush with hot water.
Check the P-trap for accumulated hair or gunk by placing a bucket underneath and loosening slip nuts.
If problems persist, consider professional assessment.
Use a Drain Snake: Step‑By‑Step for Deeper Clogs
When a plunger cannot clear a stubborn clog, a drain snake offers targeted reach into deeper pipes.
The reader is guided to select the appropriate snake type and length for the fixture and obstruction.
Clear safety practices and protective gear are emphasized to prevent injury and damage while operating the tool.
Choosing The Right Snake
For deeper clogs a drain snake must be matched to the job: a compact hand auger suits kitchen sinks and shallow traps, a power drum or sectional cable handles long runs and tough blockages in main lines, and a mini- or toilet-specific snake prevents damage to porcelain and tight bends.
Selection depends on pipe diameter, clog location, and material sensitivity. Short, flexible cables work in confined bends; longer, stiffer cables reach sewer mains. Choose appropriate tip types (corkscrew, paddle, or brush) for hair, grease, or sediment. Inspect cable length, drum power, and compatibility with fittings before purchase.
- Pipe size and material
- Clog type and location
- Cable length and stiffness
- Tip style
- Tool power source
Using The Snake Safely
Before inserting the cable, the operator should prepare the work area and take safety precautions: wear gloves and eye protection, remove standing water if possible, place a bucket and rags to catch debris, and disconnect any trap or access cover required to reach the line.
The operator should feed the snake slowly, maintaining control to prevent whipping. Rotate the drum or handle gently when encountering resistance; push and retract to break clogs. Avoid forcing past strong resistance to prevent pipe damage.
Clean the cable after use, sanitize tools and workspace, and dispose of debris properly. Inspect fittings before reassembly.
How to Remove and Clean a P‑Trap Under Sinks
Under a sink, the P‑trap collects debris and standing water that can cause odors or slow drainage, so removing and cleaning it periodically restores flow and prevents clogs.
To service it, place a bucket, loosen slip nuts, and remove the curved trap. Inspect for buildup, corrosion, or leaks; clean with a bottle brush and mild detergent, rinse, and reassemble, ensuring proper alignment and hand-tightened nuts. Test for leaks and run water to confirm flow.
- Gather tools and a catch bucket
- Loosen slip nuts carefully
- Clear and scrub the trap interior
- Inspect washers and threads
- Reinstall and test for leaks
Removing Hair Clogs Fast and Preventing Them
Removing hair clogs swiftly preserves drain flow and prevents recurring blockages.
A rigid wire hook or plastic zip-it tool extracts visible hair from pop-up stoppers and shallow traps; use gloves and a flashlight.
For deeper obstructions, a hand-crank drum auger reaches further without chemicals. After removal, flush with hot water to clear residue.
Preventive measures include installing hair catchers, brushing hair before showering, and weekly mechanical clearing with a hook tool. Avoid pouring grease or fibrous materials down drains.
Regular inspection and gentle maintenance extend plumbing life and reduce reliance on chemical treatments or professional intervention.
Cleaning Shower and Tub Drains Without Harming Finishes
When maintaining shower and tub drains without damaging fixtures, select cleaning methods and products that match the drain material and finish; porcelain, chrome, brushed nickel, and natural stone each react differently to abrasives, acids, and prolonged moisture.
The homeowner should test cleaners on an inconspicuous spot, use nonabrasive cloths, and avoid harsh acids on plated or stone surfaces.
Regular mechanical clearing prevents buildup so fewer chemicals are needed. Protective seals on stone surfaces prolong finishes. Rinse thoroughly and dry metal fixtures to prevent water spots and corrosion.
- Test cleaners in hidden area
- Use nylon brush, not steel wool
- Avoid acidic cleaners on stone
- Rinse and dry after cleaning
- Reapply stone sealer as needed
How to Clear Kitchen Sink Grease and Descale Pipes
For many kitchens, grease and mineral buildup in sink drains slow flow, cause odors, and eventually lead to clogs. A plumber’s snake or hand auger removes compacted grease and debris; insert carefully to avoid scratching pipes.
Hot water flushes softened grease, while degreasing enzyme cleaners break down fats without harsh chemicals—follow label instructions and allow dwell time. To descale, use a citric acid or commercial descaler suitable for the pipe material; circulate warmed solution and rinse thoroughly.
Regular maintenance—straining food particles, periodic enzyme treatments, and monthly hot-water flushing—prevents recurrence and preserves pipe function.
Safe Baking Soda + Vinegar Method That Works
Although not a cure-all, the baking soda and vinegar combination provides a safe, inexpensive way to loosen light grease and minor mineral buildup in kitchen sink drains when used correctly: pour a half cup of baking soda down the drain, follow with a cup of white vinegar, allow the fizzing reaction to sit for 15–30 minutes with the drain covered, then flush with several minutes of hot water to carry loosened residue through the trap and into the sewer.
- Use fresh ingredients for reliable fizz
- Cover drain to concentrate reaction
- Avoid overuse on heavily clogged lines
- Repeat monthly for maintenance
- Do not mix with chemical cleaners
When to Use Enzyme Drain Cleaners
Identifying appropriate situations for enzyme drain cleaners helps homeowners choose a gentle yet effective option: these biological products work best on organic clogs—hair, soap scum, food particles, and grease—particularly in slow drains or recurring minor backups rather than complete blockages.
They suit routine maintenance and prevention when water drains slowly but still moves. Enzymes require time and warm conditions to digest buildup, so overnight or weekend treatments are preferred.
Avoid use where nonorganic debris or solid obstructions are suspected. Follow label dosage and avoid mixing with harsh chemicals.
Regular, scheduled enzyme treatments can reduce frequency of manual snaking and preserve plumbing.
Why Avoid Regular Chemical Drain Cleaners
Regular chemical drain cleaners can cause corrosive damage to pipes and plumbing fixtures, shortening their lifespan.
They also pose environmental hazards when rinsed into waterways and carry health risks from toxic fumes and accidental exposure.
The section examines these harms and compares safer alternatives.
Chemical Corrosive Damage
Corroding metal and softened seals are common outcomes when harsh chemical drain cleaners are used repeatedly, because the strong acids and alkalis they contain attack not only clogs but also pipe material, joints, and fixtures.
Repeated exposure shortens service life, increases leak risk, and can necessitate premature replacement of plumbing sections. Visible corrosion may be delayed until failure occurs.
Recommended practices favor mechanical or enzyme methods for routine maintenance to avoid progressive deterioration.
- Accelerates metal pitting in iron, brass, and galvanized pipes
- Degrades rubber gaskets and PVC plastic over time
- Weakens soldered joints and fittings
- Promotes hairline cracks under stress
- Raises repair and replacement costs
Environmental And Health Risks
How do routine applications of chemical drain cleaners affect people and the environment? Repeated use releases caustic substances that irritate skin, eyes, and respiratory tracts; accidental splashes and fumes pose acute injury risks. Mixed chemicals can produce toxic gases.
Residues enter plumbing and municipal wastewater, harming beneficial bacteria in treatment systems and disrupting aquatic ecosystems when effluent reaches waterways. Corrosion accelerates pipe failure, increasing exposure to contaminants and costly repairs.
Alternatives such as mechanical snaking, enzymatic cleaners, and preventive maintenance reduce these risks. Choosing less toxic methods protects household health, municipal infrastructure, and downstream ecosystems while maintaining functional drains.
How to Use a Wet/Dry Vacuum for Stubborn Blockages
A wet/dry vacuum can be an effective tool for dislodging stubborn sink and floor drain blockages when used correctly.
The operator should set the machine to wet mode, seal the hose against the drain with a rag or rubber adapter, and test suction briefly.
Reverse suction and blower functions can alternate to loosen debris; use short bursts.
Empty and clean the vacuum chamber after use to avoid contamination.
Safety goggles and gloves are recommended.
- Confirm power is off to nearby appliances
- Use appropriate filter for wet pickup
- Create an airtight seal at the drain
- Alternate suction and blow cycles
- Sanitize equipment after use
Cleaning Toilet Drainlines and Solving Repeat Clogs
Inspecting toilet drainlines begins with confirming whether clogs are isolated to the bowl or recur throughout the line, since repeat blockages often indicate deeper buildup, venting issues, or partial collapses.
Technicians recommend starting with a plunger and closet auger to dislodge obstructions near the trap. If problems persist, inspect the vent stack for restrictions and test other fixtures on the same branch to map the blockage.
Use a hand auger or drain snake to reach further; note resistance patterns that suggest scale or roots. When mechanical methods fail or damage is suspected, consult a professional for camera inspection and targeted repair.
How to Flush Main House Drain Lines With Hot Water
Before flushing main house drain lines with hot water, the homeowner should arrange a safe hot water source and confirm boiler or kettle capacity.
They must protect exposed fixtures and plastic piping from thermal shock and prevent scalding at faucets.
Flushing should be performed gradually, monitoring flow and temperature to avoid damage and to guarantee effective clearing.
Prepare Hot Water Source
Gather a reliable hot water source and confirm its capacity before introducing heat into the main house drain lines. The person verifies water heater settings, estimates available gallons at target temperature, and plans sequential fixture use to maintain flow. Safety considerations and gradual temperature increases prevent pipe stress. Recommended tools and checks confirm effectiveness.
- Verify water heater thermostat and recovery rate
- Estimate hot water volume at 120–140°F (49–60°C)
- Plan fixture sequence to sustain steady discharge
- Use insulated hoses or buckets rated for hot water
- Monitor for leaks and uneven heating
Proceed only when capacity and safety are confirmed.
Protect Plumbing Fixtures
When flushing main house drain lines with hot water, the homeowner should protect visible fixtures and nearby finishes by isolating them from heat and splash exposure; this includes removing or sealing strainers, covering exposed chrome and plastic with heat-resistant cloths, and diverting overflow pans or floor drains to catch inadvertent discharge.
The operator must also shield electrical outlets, thermostats, and wooden cabinetry with waterproof barriers. Use insulated gloves and goggles to handle fittings.
Temporary plugs or faucet adapters prevent backflow into sensitive fixtures. Label protected areas to avoid accidental disturbance.
After cooling, inspect seals and finishes for damage before restoring normal use.
Flush Gradually And Safely
After protecting fixtures and finishes, proceed to flush the main drain lines gradually and safely to avoid thermal shock and pressure surges. The homeowner should heat water to a moderate temperature, not boiling, and introduce it in stages to warm piping evenly. Begin at fixtures nearest the water heater, then advance toward main stacks. Monitor for leaks, noises, or changes in flow, pausing if abnormalities occur. Maintain safe handling to prevent scalds.
- Use 120–140°F (49–60°C) water
- Pour in controlled quantities
- Allow system to stabilize between pours
- Inspect joints and traps
- Stop if unusual signs appear
How to Check and Clear Outdoor Sewer Cleanouts
Inspect the outdoor sewer cleanout by first locating the capped pipe near the foundation, driveway, or property line and noting its condition and accessibility. The person should remove the cap slowly to relieve pressure, use gloves and eye protection, and check for standing water or raw sewage odors indicating a blockage. A hand auger or sewer snake can clear shallow obstructions; for persistent backups, video inspection or a professional jetting service is advised. Keep the area clear, replace a worn cap, and document findings for maintenance records.
| Tool | Use |
|---|---|
| Gloves | Safety |
| Hand auger | Clear shallow clogs |
| Camera | Inspect interior |
| Jetting | Stubborn blockages |
Tree Roots: How to Spot, Mitigate, and When to Call Pros
Tree roots often reveal themselves through slow drains, gurgling noises, or soggy patches above buried lines, and homeowners are advised to inspect for these signs promptly.
Common mitigation options include mechanical cutting, chemical root treatments, and targeted excavation to repair or replace damaged pipe sections.
If recurring intrusion, extensive cracks, or multiple repairs are present, professional assessment and trenchless or full replacement should be considered.
Spotting Root Intrusion
Root intrusion into sewer lines is often gradual and first revealed by subtle, recurring symptoms: slow drains, gurgling toilets, localized wet spots in the yard, or sudden sewer odors indoors.
Visual inspection and simple tests help confirm suspicion.
Homeowners should note frequency, locations, and progression of symptoms before escalating.
- Persistent backups in multiple fixtures
- Wet or lush patches above sewer routes
- Foul odors that worsen after rain
- Soggy lawn near sewer cleanouts or joints
- Unexplained toilet overflows or bubbling drains
Documenting patterns and photographing affected areas aids diagnostics and informs whether professional sewer camera inspection is warranted.
Root Mitigation Options
When vegetation encroaches on sewer lines, homeowners have several mitigation paths ranging from simple maintenance to professional intervention; choosing the right one depends on severity, pipe material, and long-term landscape plans.
Minor intrusion can be managed with mechanical removal using augers or rooter machines and periodic enzymatic or herbicidal treatments formulated for root control.
For recurrent issues, consider replacing vulnerable clay or cast-iron sections with PVC or relining pipes to block roots.
Strategic landscaping—root barriers, choosing noninvasive species, relocating plantings—reduces recurrence.
Call a licensed plumber or arborist when roots repeatedly regrow, when structural damage appears, or after failed DIY attempts.
Seasonal Maintenance to Prevent Backups (Monthly Checklist)
Regularly inspecting drains and gutters each month helps homeowners catch early signs of blockages before they become backups. The checklist focuses on simple, repeatable tasks to maintain flow and reduce buildup. Perform these actions seasonally, adjusting for leaf fall or heavy rain.
- Clear visible debris from gutters and downspouts to prevent overflow.
- Run hot water through kitchen and bathroom drains to flush grease and soap.
- Use a drain strainer and clean it weekly to trap solids.
- Flush outdoor drains and low spots to remove sediment.
- Apply enzyme cleaner monthly to maintain organic-free pipes.
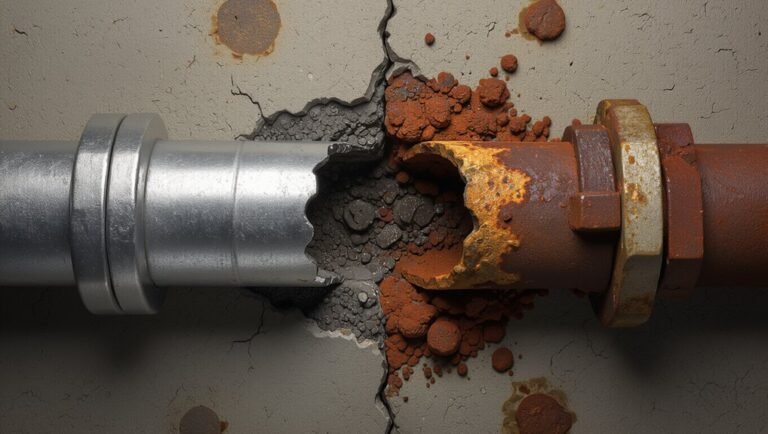
Simple Inspections to Spot Early Pipe Corrosion or Leaks
With a visual sweep of accessible pipes and fixtures, a homeowner can often detect early signs of corrosion or leaks before they escalate.
Inspect joints, fittings, and pipe undersides for greenish or reddish discoloration, white powdery deposits, or flaking metal.
Note damp spots, water stains, peeling paint, or musty odors in cabinets and crawlspaces.
Run taps and observe slow drips, pressure drops, or pooling water.
Check exposed PVC for hairline cracks and check insulation for wetness.
Photograph concerns, mark dates, and consult a plumber for persistent issues.
Early detection limits damage and repair costs.
Long‑Term Habits to Keep Pipes Clean Without Harsh Chemicals
Habitually adopting a few simple, nonchemical practices prevents buildup and extends pipe life. A detached observer notes that small, consistent actions reduce clogs, odors, and corrosion. Regular routines focus on prevention rather than reactive treatments. Key habits include limiting solids, controlling grease, and managing water temperature and pressure. Periodic flushing and filter checks catch issues early.
Recommended practices:
- Run hot water after greasy use to carry residues
- Use sink strainers to catch hair and food particles
- Dispose of oils in sealed containers, not drains
- Flush drains weekly with boiling water
- Maintain moderate water pressure to avoid stress
Cost‑Effective Products and Tools Worth Buying Once
A handful of well-chosen, durable tools and low-cost accessories can prevent most common pipe problems and save money over time.
Essential items include a sturdy plunger, a compact hand auger for sinks, and a basin wrench for faucet and trap work. A set of washable plumber’s gloves and silicone sink strainers reduce clogs before they start.
A small bottle brush and a narrow pipe brush clean residue in hard-to-reach spots. Durable plumber’s tape and a basic leak repair kit handle minor failures without service calls.
These one-time purchases offer reliable, low-cost maintenance for years.
Conclusion
After years of ignoring a slow kitchen sink, one homeowner treated the clog like a garden: small daily pruning avoided a jungle. Studies show routine monthly checks cut emergency calls by about 30%, so steady, gentle care keeps pipes flowing. This guide offers the trowel, gloves and timetable—use them. Wise maintenance turns reactive panic into calm stewardship, proving that small, regular actions prevent the storm of costly repairs.