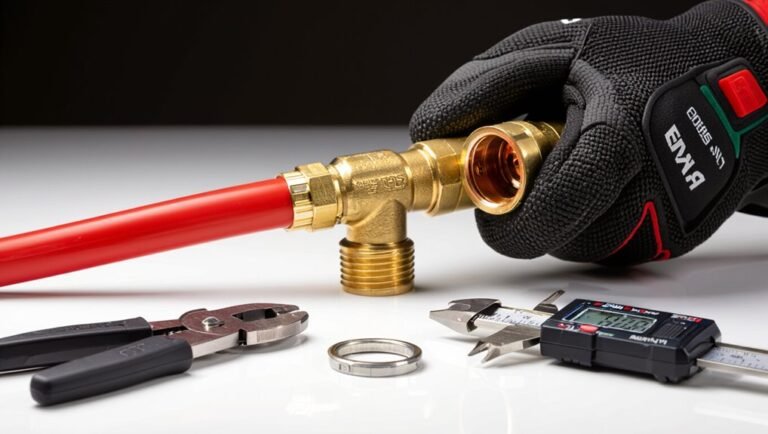
How to Add a Sprinkler to an Existing Line: Step-by-Step Guide for DIY Irrigation
To add a sprinkler to an existing irrigation line, start by locating the supply pipe and shutting off the zone. You’ll need compatible fittings for either PVC or poly pipe. Cut the line, install a saddle or tee, run new pipe to the desired sprinkler location, and attach a riser and sprinkler head. Finally, test for leaks and adjust the spray pattern as needed. Essential tools include a pipe cutter, shovel, wrench, and Teflon tape. Ensuring proper pressure and coverage matching is crucial for effective watering. Detailed steps and troubleshooting tips are provided below.
What It Takes to Add a Sprinkler to an Existing Line: Quick Overview
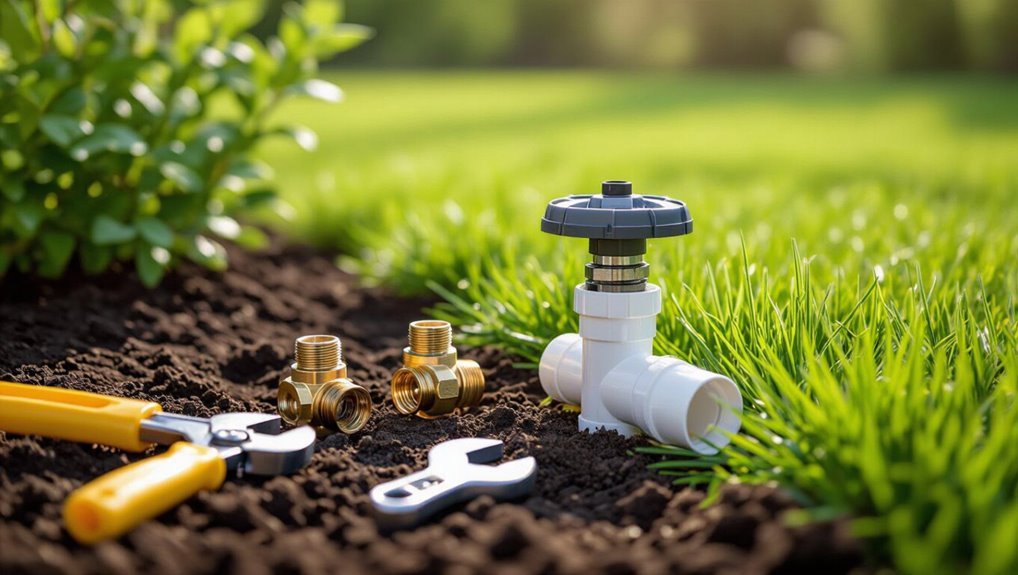
Adding a sprinkler to an existing irrigation line is often chosen to fill dry spots, extend coverage, or replace failing heads.
The basic overview includes required tools and parts (pipe, fittings, risers, a sprinkler head, and a cutter or trencher), the skills needed (basic plumbing and pipe-joining), and a quick cost estimate and time/difficulty range.
Typical projects take one to a few hours, are low to moderate in difficulty, and commonly cost a few dollars for parts to $50–150 if multiple components or professional help are needed.
When and why you’d add a sprinkler to an existing irrigation line
Extending an existing irrigation line to include an additional sprinkler is often chosen to improve coverage, correct dry spots, or accommodate new plantings without overhauling the entire system.
Homeowners consider factors like water pressure, zone capacity, spacing, and landscape changes when deciding how to add a sprinkler to an existing line.
Timing aligns with planting plans, seasonal maintenance, or when uneven growth reveals coverage gaps.
Quick summary of required tools, parts, and skills
Gathering the right tools, parts, and basic skills guarantees a smooth, reliable sprinkler tie-in without guesswork.
Required tools: pipe cutter, shovel, adjustable wrench, Teflon tape, and a marker.
Parts: saddle or T-fitting, riser, sprinkler head, barbed adapter, clamps, and PVC or polyethylene pipe.
Skills: basic plumbing, trenching, measuring, leak testing, and safe valve shutoff procedures.
Estimated time, difficulty level, and common costs
Time estimates for tying a single sprinkler into an existing line typically range from one to three hours for an average homeowner project, depending on soil conditions, access to the line, and familiarity with tools.
Difficulty is low to moderate for those with basic plumbing and landscaping skills.
Typical costs run $15–$75 for parts and $0–$150 if hiring labor, varying by region and materials.
Assessing Your Current Irrigation System
The homeowner should first identify the pipe material and diameter—PVC, polyethylene, or poly pipe—to guarantee compatible fittings.
They must then locate the nearest supply line and irrigation valves and measure available water pressure and flow.
Finally, the existing zone schedule and controller capacity should be checked to confirm the system can support an additional sprinkler.
Identify pipe type and diameter (PVC, polyethylene, poly pipe)
Before adding a sprinkler, inspect the existing irrigation line to determine whether it is rigid PVC, flexible polyethylene (poly) pipe, or another material.
Measure its outside diameter to guarantee compatible fittings and adapters. Note color, wall thickness, and any markings indicating schedule or pressure rating.
Use calipers or a ruler for accuracy. Match fittings to material and diameter for secure, leak-free connections.
Locate the nearest existing line and irrigation valves
After identifying the pipe type and diameter, the next step is to locate the nearest existing irrigation line and its control valves to determine where a new sprinkler can be tied in.
Inspect valve boxes, trace visible lateral lines, and consult system maps if available. Note valve zones, pipe depth, and fittings.
Mark an accessible tie-in point near the appropriate valve for minimal disruption.
Determine water pressure and flow availability
How much water is actually available at the proposed tie‑in point is the critical question when adding a sprinkler to an existing line.
The installer measures static and dynamic pressure with a gauge, then calculates flow (GPM) by timing outlet fill or using a flow meter.
Compare results to sprinkler and valve requirements, allowing safety margin for simultaneous zones and pressure loss.
Check zone scheduling and controller capacity
With available pressure and flow confirmed, attention turns to how the system is scheduled and whether the controller can handle an added zone.
The homeowner reviews current zone runtimes, overlaps, and peak watering times.
Controller capacity (available station terminals) is checked; if full, options include adding a controller expansion module, replacing the controller, or consolidating zones and adjusting schedules to maintain uniform coverage.
Choosing the Right Sprinkler and Fittings
Choosing the right sprinkler and fittings depends on plant needs and lawn layout, with rotors, spray heads, and drip emitters each suited to different areas.
Nozzles should be matched to the desired radius and precipitation rate for the zone while fittings, tees, couplers, and adapters must be compatible with the existing pipe size and material.
The installer must also decide between aboveground fixtures and flush-mounted pop-ups based on appearance, traffic, and maintenance access.
Selecting sprinkler head types (rotor, spray, drip) by lawn/plant needs
Which sprinkler head best matches the watering needs of a given area depends on plant type, soil, and coverage pattern.
Lawns typically use rotors for larger zones and spray heads for small, uniform areas.
Flowerbeds, shrubs, and trees benefit from drip or micro‑emitters to conserve water and deliver slow, deep soak.
Choose materials and pressure‑compatible fittings for reliable performance.
Matching nozzle, radius, and precipitation rate to zone
Because sprinkler performance must be balanced across a zone, matching nozzle size, spray radius, and precipitation rate is essential to guarantee even coverage and avoid over- or under-watering.
The installer measures flow and pressure, selects nozzles producing the same precipitation rate, and adjusts radius with pressure-regulating heads or matched nozzle sets. This prevents runoff, promotes uniform growth, and simplifies scheduling.
Choosing compatible fittings, tees, couplers, and adapters
Select fittings that match pipe material, diameter, and pressure rating to guarantee a leak-free, durable connection between the new sprinkler and the existing line.
Choose PVC, polyethylene, or copper-compatible tees and couplers. Use barbed adapters for flexible tubing and solvent-weld or threaded fittings for rigid pipe.
Verify pressure and temperature ratings, use proper seals or primer, and avoid mismatched sizes or materials.
Deciding between aboveground vs. pop-up installations
Deciding between an aboveground and a pop-up sprinkler hinges on visibility, landscaping aesthetics, and functional needs: aboveground heads are easier to install, service, and adjust but are more exposed to damage and visible in the landscape, while pop-up heads retract flush with the lawn for a cleaner look and reduced tripping hazards at the cost of slightly more complex installation and potential maintenance within the valve box or riser.
Pop-up choices suit turf; aboveground suits beds, temporary setups, or frequent adjustments.
Safety and Preparation Steps
Before beginning work, water to the affected line should be shut off and residual pressure released to prevent accidental sprays and injuries.
The area must be checked for underground utilities and the proposed trench carefully marked with measured depth and length.
Finally, the workspace should be prepared to protect turf and plants and to keep tools and materials organized.
Shutting off water and releasing line pressure
Shut off the main irrigation valve and any relevant zone valves to stop flow before working on the line.
After valves close, open a nearby sprinkler or manual drain to relieve residual pressure.
Verify no water flows from the work area.
If the system includes a backflow preventer, follow manufacturer instructions to depressurize it.
Wear gloves and eye protection during all steps.
Locating underground utilities before digging
With the water off and pressure released, the next step is to locate underground utilities to prevent accidental strikes when digging.
The homeowner contacts local utility notification services (call before you dig) and requests markings. They use handheld detectors and probe carefully where markings indicate.
Confirm gas, electric, water, and telecom lines, document depths, and avoid unmarked excavation until utilities are positively identified.
Marking layout and measuring trench depth and length
Mark the sprinkler layout on the lawn using flags and spray paint to indicate pipe runs, head locations, and valve boxes.
Then measure trench lengths and depths to match local frost lines and pipe specifications.
Record distances between heads and from the supply connection, note slope changes, and allow slack for fittings.
Verify measurements against pipe lengths and schedule parts to minimize joins.
Preparing workspace and protecting turf/plants
After confirming layout measurements, preparation shifts to protecting the work area and nearby vegetation before any digging begins.
Turf is cut or lifted in strips and stored for replacement. Shrubs receive temporary barriers and soil is moistened to reduce root damage.
Tools and materials are staged on protective boards. Safety cones mark the perimeter and irrigation valves are shut off.
Step-by-Step Installation Guide
The installation proceeds through a few clear mechanical steps that follow preparation and safety checks.
The essential actions are:
- Turn off valve and drain the line
- Expose the existing pipe and cut the line
- Install a saddle, tee, or inline coupling depending on pipe type
- Run new pipe from the tee to the sprinkler location
- Install riser, adapter, and sprinkler head
Each step is executed in sequence to guarantee a watertight, functional connection.
Step 1 Turn off valve and drain the line
Shut off the irrigation zone valve supplying the existing line and verify it is fully closed before proceeding.
Next, open a downstream sprinkler or a manual drain to relieve residual pressure and let water exit until flow stops.
If present, close any backflow preventer ports after draining.
Confirm no pressure remains by briefly attempting to actuate the zone controller.
Step 2 Expose the existing pipe and cut the line
Locate the buried irrigation pipe by tracing the existing sprinkler heads or following the visible riser line to where the pipe runs; then carefully excavate a trench long enough to access a clean, undamaged section of pipe for cutting.
Confirm the line is drained, clear soil and debris, mark the cut location, and use a PVC or tubing cutter to make a square, burr-free cut.
Reinspect for cracks.
Step 3 Install a saddle, tee, or inline coupling depending on pipe type
Begin by identifying the pipe material and size to select the correct saddle, tee, or inline coupling.
PVC, polyethylene (poly), and galvanized lines each require specific fittings and attachment methods.
Match fitting type, use solvent weld or threaded adapters for PVC, insert barb fittings for poly with stainless clamps, and use compatible tees or couplings for galvanized.
Follow manufacturer torque and sealing recommendations.
Step 4 Run new pipe from the tee to the sprinkler location
With the tee secured, run the new pipe from the fitting to the sprinkler site following the shortest practical route that avoids sharp bends and obstacles.
Measure and cut pipe to fit, deburr edges, and dry-fit sections. Use appropriate connectors and solvent or clamps per pipe material.
Maintain slight grade for drainage, secure pipe with stakes or hangers, and recheck alignment before final joining.
Step 5 Install riser, adapter, and sprinkler head
Prepare to connect the new lateral to the sprinkler by assembling the riser, adapter, and head at the pipe terminus.
Insert thread sealant or tape, thread the PVC or polyethylene adapter onto the pipe, then attach the riser.
Mount the sprinkler head to the riser, adjusting height and orientation.
Tighten fittings hand‑firm plus quarter turn with wrench; check alignment before restoring pressure.
Step 6 Backfill trench and compact soil to prevent settling
Backfill the trench carefully to restore surface grade and prevent future settling.
Replace excavated soil in layers, tamping each layer lightly to eliminate air pockets.
Recreate original turf or mulch, keeping soil slightly mounded to allow for natural settling.
Remove excess debris, smooth connections to adjacent ground, and avoid heavy traffic on the repaired area until vegetation re-establishes.
Step 7 Re-pressurize system, check for leaks, and flush the new line
Turn the water supply back on slowly to re-pressurize the line, then observe the new connections and fittings for any signs of leakage; tight joints or oozing water indicate a need for immediate tightening or resealing.
Once pressurized, open the sprinkler or a manual drain briefly to flush debris from the new segment.
Recheck fittings under pressure, correct any leaks, and confirm steady flow before final cleanup.
Step 8 Adjust nozzle, arc, and spray pattern; balance the zone
Begin by setting each sprinkler to its approximate spray radius and arc so coverage overlaps adjacent heads by about 30 percent; this guarantees even distribution and minimizes dry spots.
Then fine-tune nozzle type, spray pattern, and arc adjustments to match planting zones.
Balance runtime per zone to account for flow differences, verify uniform runoff prevention, and recheck after one full cycle for final tweaks.
Troubleshooting Common Problems
After installation, common issues that may arise include low water pressure or reduced coverage, leaks at fittings or around the new sprinkler, and uneven spray patterns or overspray onto hardscape.
The installer should also check valve operation and controller programming for changes that affect run times or zones.
Systematic inspection and simple adjustments often resolve these problems before calling a professional.
Low water pressure or reduced coverage
Low water pressure or reduced coverage in an existing sprinkler line commonly stems from obstructions, leaks, or insufficient supply capacity; diagnosing the cause quickly narrows corrective steps.
Inspect heads for clogs or misalignment, verify valve and controller operation, check mainline pressure with a gauge, and assess pipe diameter and shared demand.
Corrective actions include cleaning, adjusting head types, replacing undersized pipe, or reducing simultaneous zones.
Leaks at fittings or around the new sprinkler
Leaks at fittings or around a newly added sprinkler often follow pressure or coverage issues and require a focused inspection to prevent water waste and soil erosion.
Inspect joints, thread sealant, and barbed connections for visible seepage. Tighten or replace faulty couplings, reapply plumber’s tape, and reseat gaskets.
Test system under normal pressure and monitor for persistent drips, repairing damaged pipe sections as needed.
Uneven spray pattern or overspray onto hardscape
Diagnose uneven spray patterns and overspray by observing the sprinkler during operation to identify misaligned nozzles, damaged rotors, or incorrect pressure that send water where it’s not needed.
Adjust nozzle arcs, replace worn nozzles or rotors, and fine-tune pressure with a regulator or pressure-compensating heads.
Redirect or install shields to protect hardscape and retest to confirm uniform coverage without runoff.
Valve or controller programming issues after adding a sprinkler
When a new sprinkler is tied into an existing line, valve and controller settings often require adjustment to accommodate the added flow and run-time; mismatches can cause short cycles, stations that won’t start, or erratic timing.
The technician should verify station run-times, master valve sequencing, and zone current draw.
Reprogramming cycle limits, staggered starts, or replacing a faulty relay/terminal fixes most issues reliably.
Performance Optimization and Water-Saving Tips
Enhanced performance and water savings are achieved by matching precipitation rates across heads and using pressure regulators, check valves, and flow control to maintain uniform delivery.
Thoughtful scheduling and seasonal adjustments reduce consumption without compromising plant health.
When expanding an existing system, zoning considerations guarantee adequate pressure and runtime for each area.
How to match precipitation rates across heads
Matching precipitation rates across sprinkler heads guarantees uniform watering and prevents over- or under-watering zones that stress plants and waste water.
Assess each head’s radius and flow, then group heads with similar outputs on the same zone.
Swap nozzles or adjust arc and spacing to match inches per hour.
Test with catch cans and timer runs, record results, and fine-tune for consistency.
Use of pressure regulators, check valves, and flow control
Install pressure regulators, check valves, and flow-control devices to protect the system, maintain consistent spray patterns, and reduce water waste.
Pressure regulators prevent overpressure that distorts nozzles; check valves stop low-head drainage on slopes and prevent backflow; flow-control devices balance output between zones and limit excessive draw.
Proper placement near heads or manifolds guarantees efficient, uniform coverage and prolongs component life.
Scheduling and seasonal adjustments to save water
After verifying regulators, check valves, and flow-control devices are correctly placed, attention turns to scheduling and seasonal adjustments to maximize efficiency and reduce water use.
The controller should match local evapotranspiration rates, reduce run times during cooler months, and shift watering to early mornings.
Smart controllers, rain sensors, and manual override options prevent overwatering and guarantee compliance with local restrictions.
Zoned design considerations when expanding an existing system
When expanding an existing irrigation line, zoning should be reassessed to balance hydraulic capacity, plant needs, and water‑saving goals.
Grouping plants with similar water requirements and sun exposure allows run times and pressures to be optimized, while keeping each zone within the pipe and valve flow limits prevents pressure drop and inefficient misting.
Evaluate flow rates, adjust valve sizing, and consider sub‑zones or flow controllers to maximize efficiency.
When to Call a Professional
If the work involves a complex manifold, unusually high water pressure, or local permit requirements, a homeowner should consider professional help.
A licensed irrigation contractor can handle planning, permits, and safe installation, and will typically provide an estimate that reflects labor, materials, and any permit fees.
Before hiring, homeowners should ask about licensing and insurance, references and warranty, an itemized quote, and whether the contractor will obtain required permits.
Signs the job is beyond DIY (complex manifold, high pressure, permits)
Recognize clear limits to homeowner skill before attempting complex irrigation work: situations involving multi-zone manifolds, unusually high line pressure, or municipal permitting frequently exceed DIY scope.
Seek professional help when system layouts are unclear, pressure exceeds safe operating ranges, backflow prevention or permits are required, or troubleshooting needs specialized tools.
Attempting advanced repairs without expertise risks property damage, code violations, and unsafe conditions.
What to expect from a professional service and typical costs
After evaluating whether the project exceeds homeowner capability, it’s useful to understand what a professional service will provide and what that typically costs.
Professionals assess lines, install fittings, pressure-test, and secure permits if required.
Expect labor plus parts billed hourly or as a flat rate; typical residential additions range from $150–$600 depending on complexity, materials, and local rates.
Questions to ask a contractor before hiring
When should a homeowner move from DIY to hiring a contractor for adding a sprinkler to an existing line?
A contractor should be considered for complex trenching, unclear water pressure, permit needs, or uncertain pipe materials.
Ask about licensing, insurance, experience with irrigation, detailed written estimates, warranty terms, timeline, subcontractors, cleanup, and contingency plans for unexpected issues.
Materials and Tools Checklist
A concise inventory of parts and tools helps guarantee the sprinkler addition proceeds without surprises.
Key items vary by pipe type and task, from fittings to testing gear. A brief checklist highlights essentials and useful extras:
- PVC fittings and primer/cement or polyethylene fittings and barbed connectors
- Pipe cutter, hacksaw, deburring tool, and sandpaper
- Solvent cement and primer for PVC; stainless clamps or crimp rings for poly
- Pressure gauge, bucket or cap for testing, and Teflon tape
- Optional: trenching tool, zip ties, replacement sprinkler head, and PVC primer applicator
Parts list by pipe type (PVC vs. poly)
For installing a sprinkler onto an existing irrigation line, the required parts differ depending on whether the system uses rigid PVC or flexible poly tubing:
PVC systems need slip or threaded tee, male/female adapters, solvent cement, PVC primer, pressure-rated pipe, and PVC-compatible sprinkler riser.
Poly systems require barbed tee or compression tee, insert fittings, stainless clamps or crimp rings, polyethylene pipe, and a poly-compatible riser.
Essential tools for cutting, joining, and testing
Gathering the right tools guarantees clean cuts, secure joins, and accurate pressure testing when adding a sprinkler to an existing line.
Essential items include a pipe cutter or fine-tooth hacksaw, deburring tool or file, PVC primer and cement (or poly solvent/insert fittings), appropriate wrenches, Teflon tape, clamps, a pressure gauge or test cap, and safety gloves and eye protection for reliable, code-compliant work.
Optional tools and helpful accessories
Several useful extras can make adding a sprinkler to an existing line faster, neater, and more reliable. A cordless drill, adjustable pliers, and a hand saw speed installation.
Teflon tape, pipe clamps, and silicone sealant improve leak resistance.
A marker, measuring tape, and garden stake aid layout.
Optional pressure gauge and flow meter verify system performance after installation.
Example Installation Scenarios
The following scenarios illustrate common ways to add a sprinkler to an existing line and highlight typical fittings, pressure considerations, and excavation needs. Review each example to compare complexity, required tools, and expected time.
| Scenario | Key consideration |
|---|---|
| Pop‑up on PVC main | Permanent saddle or tee, glue vs. mechanical fitting |
| Tap into polyethylene | Use barbed fitting, clamp, and heat considerations |
| Convert spray zone | Adjust pressure, add rotors or pressure regulators |
Adding a pop-up sprinkler to a PVC main
When connecting a pop-up sprinkler to an existing PVC main, the installer should locate a convenient section of pipe that can be shut off and drained.
Cut a saddle or T fitting into the main, and add a riser and lateral to position the sprinkler at grade. Planning for flow, pipe size, and placement reduces pressure loss and simplifies future maintenance.
Install primer/cement, secure fittings, test for leaks, and adjust head alignment.
Tapping a polyethylene line with barbed fitting
Begin by identifying a straight, accessible run of polyethylene (PE) main that can be depressurized and isolated.
The technician shuts off flow, relieves pressure, and cuts a clean section.
Insert a barbed saddle or compression tee sized to the PE, seat firmly, and tighten clamps.
Reconnect, pressure-test the connection for leaks, then install the sprinkler lateral and adjust alignment before finalizing backfill.
Converting a spray head zone to mixed rotor/spray coverage
Converting a spray-head-only zone to a mixed rotor/spray layout requires evaluating water pressure, flow rate, and head spacing to guarantee compatible performance.
The installer identifies high-demand spray heads to replace with low-GPM rotors, recalculates precipitation rates, and zones accordingly.
Adjusting run times, installing pressure regulators or flow dividers, and verifying uniform coverage prevents misting, runoff, and hydraulic conflicts.
Final Inspection and Maintenance Checklist
A concise final inspection confirms there are no leaks and that the new sprinkler sprays to specification under normal pressure.
The checklist should include seasonal tasks such as winterizing, spring start-up, and routine nozzle and filter cleaning.
A simple long-term troubleshooting log is recommended to record faults, repairs, dates, and pressure or flow changes for future diagnosis.
Leak and performance verification steps
Conduct a systematic final inspection to confirm the new sprinkler ties into the existing line without leaks and operates at the aimed coverage and pressure.
Check fittings, joints and valve seals for visible drips. Run the zone, observe spray pattern, coverage overlap, and uniformity.
Measure operating pressure with a gauge. Note any leakage, misalignment, or low pressure; correct and retest until specifications are met.
Seasonal maintenance tasks after installation
Begin by establishing a seasonal checklist that consolidates inspection, adjustment, and routine care tasks to preserve system integrity and performance.
Inspect heads, nozzles, and risers for damage or clogs; flush lines and clean filters; check valves and drip zones for leaks; adjust spray patterns and run times for seasonal needs; winterize by draining or blowing out lines.
Document completed tasks and dates for future reference.
Long-term troubleshooting log suggestions
Establishing a long-term troubleshooting log guarantees systematic tracking of issues, repairs, and performance trends after the final inspection and initial maintenance.
The log records dates, symptoms, diagnostic steps, repairs performed, parts replaced, water pressure readings, and weather conditions.
Include follow-up results and responsible person.
Regular review identifies recurring faults, informs preventative maintenance, and documents warranty or contractor interactions for future reference.
Conclusion
Just as a lone sprinkler added to an old line can unexpectedly revive a parched corner of lawn, chance often nudges homeowners into small, satisfying projects. The guide’s clear steps, careful preparations, and checklist make that coincidence feel intentional: a missed dry patch becomes the catalyst for renewed irrigation confidence. When installation proceeds with the right parts and patience, the ordinary act of adding a sprinkler quietly transforms routine maintenance into practical, rewarding improvement.