How Do You Make a Solar Water Heater: Step-by-Step DIY Guide for Efficient Hot Water
To make a DIY solar water heater, you’ll harness sunlight using a dark absorber, insulated storage, and straightforward plumbing. The simplest design involves a well-insulated tank placed within a glazed collector, while advanced systems incorporate a pump, controller, and heat-transfer fluid for enhanced performance. Proper sizing, orientation, and insulation are crucial for maintaining effective temperatures and efficiency. Basic tools and weatherproof materials can help keep your project budget-friendly. Follow the upcoming step-by-step instructions, parts lists, and safety tips to successfully build your solar water heater.
How a Solar Water Heater Works: Simple Explanation of Principles
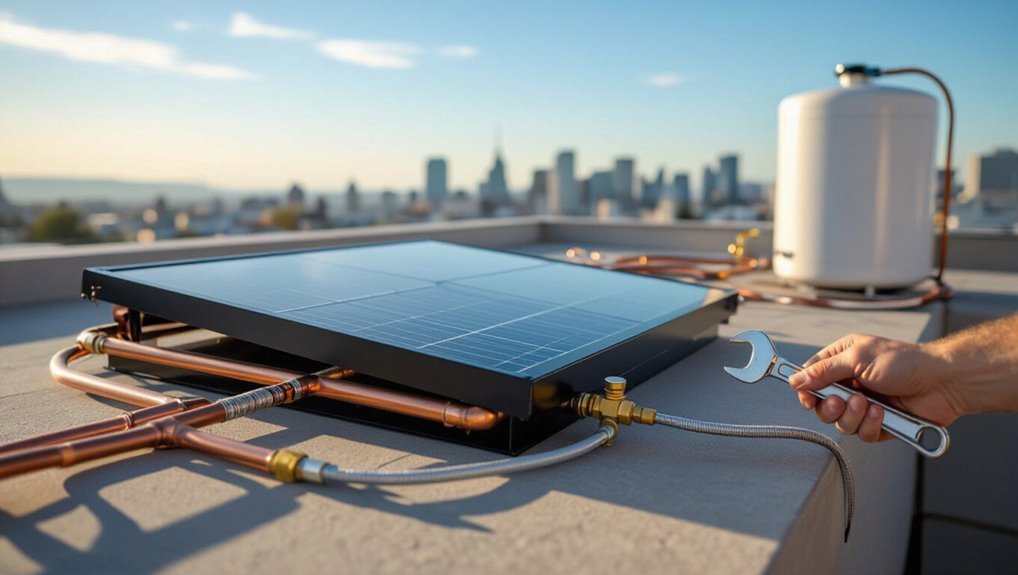
The article contrasts solar thermal systems, which capture heat directly, with photovoltaic setups that convert sunlight to electricity for heating.
It then outlines the main components—collector, storage tank, heat exchanger, and pump—and explains their interactions in transferring and storing solar heat.
Finally, it summarizes common system types (batch, active direct, active indirect, evacuated tube) and how each manages flow and heat transfer.
Solar thermal vs. photovoltaic approaches
Comparing solar thermal and photovoltaic methods reveals two distinct strategies for harnessing sunlight to heat water: solar thermal directly captures and transfers solar heat through collectors and fluid loops, while photovoltaic (PV) converts sunlight into electricity that then powers resistive or heat-pump water heaters.
When asking how do you make a solar water heater, choice depends on efficiency, cost, installation complexity, and space.
Key components and how they interact (collector, storage tank, heat exchanger, pump)
A solar water heater relies on four core components—collector, storage tank, heat exchanger, and pump—that work together to capture sunlight, transfer heat, store it, and circulate the working fluid.
The collector absorbs solar energy and heats the fluid.
The pump moves fluid through the heat exchanger, which transfers heat to stored domestic water.
The tank retains heat for later use.
Types of systems (batch, active direct, active indirect, evacuated tube)
Understanding how components interact leads naturally to the different system layouts used to harness solar heat: batch systems, active direct (open-loop) systems, active indirect (closed-loop) systems, and evacuated-tube collectors.
Batch systems are simple, low-cost.
Active direct pumps water through collectors.
Active indirect circulates a heat-transfer fluid through a heat exchanger to protect against freezing.
Evacuated tubes offer higher efficiency and better performance in cold or cloudy conditions.
Quick Overview: What You Can Build and What It Will Deliver
A simple DIY flat-plate or batch solar water heater can typically raise stored water to 40–70°C on sunny days with collector efficiencies of roughly 30–60%, depending on design and insulation.
Such systems work best for domestic hot water or preheating in temperate to sunny climates and are less effective in prolonged cold, cloudy regions without backup.
Material and installation costs are modest compared with conventional water heaters, often yielding a multi-year payback when fuel savings and local incentives are considered.
Typical performance expectations (temperature ranges, efficiency)
When sized and oriented properly, simple batch and thermosiphon solar water heaters typically raise stored water temperatures by 20–50°C (36–90°F) above ambient on sunny days.
Active, glazed collector systems can deliver 40–70°C (72–126°F) increases under strong sun.
Real-world results depend on climate, collector area per person (roughly 0.5–1.5 m² per household member), insulation quality, and whether backup heating or freeze protection is used.
Typical system efficiencies range 30–70%: unglazed panels and batches at lower end, glazed and evacuated-tube collectors at higher end.
Ideal use cases and climate suitability
Solar water heaters suit a range of needs—from simple outdoor showers and pre‑heating for laundry to whole‑house domestic hot water and space heating—so choice of type depends mainly on climate, hot‑water demand, and site constraints.
Passive batch systems work well in mild, sunny climates for intermittent use; active flat‑plate or evacuated‑tube systems suit colder or cloudier regions and higher, continuous demand.
Estimated costs and payback considerations
Choosing a system type and sizing it for local climate and demand directly affects upfront cost and payback.
DIY batch or drainback systems cost $200–$1,200 in materials; glazed collector systems run $800–$3,000.
Annual savings depend on fuel prices and usage, often recouping investment in 3–12 years.
Maintenance, incentives, and installation complexity alter final payback estimates.
Materials, Tools, and Safety Essentials
The next section lists the specific materials for each system type, from batch collectors to flat-plate and evacuated-tube setups.
It also summarizes the essential tools for construction and roof or plumbing installation.
Finally, it outlines required safety gear and key precautions for handling glass, pressurized lines, and working at height.
Complete materials list by system type
Different system types require distinct components and tools, so a clear, itemized list tailored to flat-plate, evacuated-tube, and batch heaters helps guarantee proper procurement and installation.
Each system’s materials vary: collectors, insulation, piping, mounting, and heat-transfer media should be specified by type and capacity.
- Flat-plate: copper/aluminum collectors, glazing, foam insulation
- Evacuated-tube: vacuum tubes, manifold, heat pipes
- Batch: insulated tank, dark absorber, simple plumbing
Tools required for construction and installation
Several essential hand and power tools, plus safety gear, are needed to build and install a solar water heater correctly.
The list focuses on durable, accurate tools and basic protective equipment; specialty items depend on system design.
Common necessities include:
- Cordless drill, hole saws, wrench set
- Pipe cutter, soldering torch or crimp tools, tubing benders
- Level, tape measure, caulking gun
Safety gear and precautions (handling glass, pressure, plumbing, roof work)
When working with glass, pressurized fluids, plumbing joints, or roof-mounted components, appropriate safety gear and strict precautions are essential to prevent injury and system damage.
Wear safety glasses, cut-resistant gloves, respiratory protection for sealants, and a harness for roof tasks.
Relieve system pressure before servicing, use proper fittings and leak tests, secure glass panels, and follow local codes and manufacturer warnings.
Site Assessment and Planning
The installer begins by evaluating sunlight exposure and ideal collector orientation. Then, they compare roof-, ground-, and wall-mount options for structural fit and access.
They calculate system size from household hot-water demand to determine required collector area and storage capacity.
Finally, they verify local codes, permit requirements, and inspection schedules to confirm compliance before installation.
Choosing the best location and orientation for collectors
Site assessment determines where collectors will capture the most solar energy while minimizing shading, structural conflict, and maintenance challenges.
The ideal location receives unobstructed sun during peak hours, faces true south in the northern hemisphere (north in the southern), and aligns tilt with latitude for year-round performance.
Guarantee access for servicing, secure structural support, and avoid nearby heat sources or reflective obstructions that degrade efficiency.
Roof-mount vs. ground-mount vs. wall-mount decision factors
Deciding between roof-mount, ground-mount, or wall-mount collectors hinges on available space, structural capacity, and access to unobstructed sun; each mounting option presents distinct trade-offs in performance, cost, and maintenance.
Roof-mounts save yard space and gain elevation for sun exposure but require roof strength and safe access.
Ground-mounts allow ideal tilt and easy servicing.
Wall-mounts suit limited space but may compromise seasonal angle and output.
Sizing the system: calculating hot water demand and collector area
Sizing a solar water heater begins by quantifying household hot-water needs and translating that demand into the collector area required to meet it.
Estimate daily volume and temperature rise (liters × ΔT), convert energy need to kWh, and divide by site-specific solar insolation and collector efficiency.
Include storage sizing and peak-day margin to guarantee reliable supply without oversizing the array.
Local codes, permits, and inspections to check
After determining system capacity and collector area, the next step is to verify applicable local codes, permits, and inspection requirements that govern installation.
Research building, plumbing, electrical, and solar-specific regulations; contact the local permitting office for required documents, fees, and timeline.
Confirm structural, roof-penetration, and setback rules.
Schedule inspections and obtain written approvals before operation to guarantee compliance and insurance validity.
Step-by-Step Build: Simple Batch/Tank-in-Box Solar Water Heater
The build begins with preparing a well-insulated storage tank and continues with constructing or selecting an appropriate collector box with glazing.
Attention then turns to designing an absorber plate and flow channels before assembling the tank inside the collector and sealing all joints.
Final steps cover plumbing connections and a one-way flow arrangement to guarantee safe, efficient circulation.
Step 1 Preparing the storage tank and insulation
Begin by preparing a well-sealed storage tank and continuous insulation layer that will minimize heat loss and protect the system from freeze or overheating.
Select a corrosion-resistant tank, inspect seams and fittings, and apply food-safe sealant where needed.
Add closed-cell foam or mineral wool around the tank, vapor barrier, and rigid exterior sheathing.
Include access ports for maintenance and temperature sensors.
Step 2 Constructing or selecting the collector box and glazing
Construct or select a collector box sized to fully enclose the tank and provide a secure mounting surface for glazing, insulation, and absorber materials.
The box should be weatherproof, rigid, and thermally insulated; use marine plywood, aluminum, or treated timber with foam board.
Fit glazing—tempered glass or polycarbonate—at an angle for sun exposure, seal edges against moisture, and provide access panels for maintenance.
Step 3 Designing and installing absorber plate and flow channels
Design a flat, dark absorber plate sized to fit the collector box and transfer heat efficiently to the tank.
Then arrange simple flow channels that promote even water circulation and minimize air traps. Secure the plate with thermally conductive adhesive or clips.
Route channels gently sloped toward the inlet/outlet, using narrow fins or stamped grooves to increase surface contact.
Test flow, purge air, and guarantee uniform heating across the plate.
Step 4 Assembling the tank inside the collector and sealing
With the absorber plate and flow channels secured, attention shifts to placing the water tank into the collector and creating a watertight, thermally efficient enclosure.
The tank is centered, supported on insulating pads to prevent heat bridging and abrasion.
Joints around pipes and edges are sealed with high-temperature silicone or EPDM gaskets.
A removable access panel allows inspection and future maintenance.
Step 5 Plumbing connections and one-way flow arrangement
Connect the tank to the household supply and delivery lines using heat-rated piping and fittings that guarantee a one-way flow from cold inlet through the collector to the hot outlet.
Install a check valve on the outlet, a shutoff valve on the inlet, and an air vent/bypass to prevent siphoning.
Insulate exposed pipes and pressure-test the system for leaks and correct flow direction.
Step 6 Mounting, angling, and securing the unit
After the plumbing is pressure-tested and flow direction verified, the assembled tank-in-box must be mounted so the collector faces the sun and remains stable under wind and weather.
Secure placement uses a sturdy frame or roof brackets angled to local latitude minus 10–15° for summer bias, with corrosion-resistant fasteners, vibration dampers, and check for shading, access for maintenance, and safe load distribution.
Step 7 Initial fill, bleed air, and leak testing
Begin by slowly filling the system with water while monitoring inlet and outlet points to guarantee steady flow and to prevent trapped air pockets.
Open bleed valves at high points until steady water emerges.
Inspect all joints, fittings, and welds for drips.
Maintain modest system pressure, retighten fittings as needed, and allow a short soak period to reveal slow leaks before finalizing connections.
Step 8 Commissioning and measuring output
Power up the circulation pump and open the system to solar exposure to start commissioning. The technician observes inlet and outlet temperatures, flow rate, and pressure to establish baseline performance.
Record temperature rise, collector efficiency, and delivered kilowatt-hours over test duration. Adjust flow or tilt if readings are suboptimal.
Verify safety valves, insulation integrity, and controller logging. Document results for routine comparisons and warranty evidence.
Step-by-Step Build: Active Closed-Loop Glycol System (More Advanced)
The section outlines a practical build for an active closed-loop glycol system, starting with collector selection (flat plate versus evacuated tubes) and mounting with attention to insulation and freeze protection.
It then covers integrating a heat exchanger and insulated storage tank, choosing an appropriate pump and control strategy (thermostatic or differential controller), and setting up pressure relief and an expansion tank.
Finally, procedures for filling with propylene glycol-based heat-transfer fluid, pressure testing the loop, and verifying system operation are summarized.
Step 1 Selecting collector type (flat plate vs. evacuated tubes)
Choosing the right collector is the foundational decision for an active closed-loop glycol solar water heating system.
The guide compares flat-plate and evacuated-tube collectors: flat plates offer durability, lower cost, and good performance in mild climates; evacuated tubes provide higher efficiency in cold or diffuse-light conditions and tolerate freeze risk better.
Selection depends on climate, roof space, budget, and desired efficiency.
Step 2 Installing collector array and insulation considerations
Begin by mounting the collector array on the roof or a ground frame that provides the correct tilt and unobstructed southern exposure (northern hemisphere) while ensuring structural support for wind and snow loads.
Secure collectors, plumb supply and return headers with proper slope, and use flexible, glycol-compatible lines.
Insulate all exposed piping and joints with closed-cell insulation and weatherproof jacketing to minimize freeze and heat loss.
Step 3 Installing heat exchanger and storage tank
With collectors and insulated headers secured, attention shifts to integrating the heat exchanger and storage tank that will transfer and store solar heat from the closed-loop glycol circuit to the potable or auxiliary-use water.
The installer mounts a corrosion-resistant coil or plate exchanger inside a well-insulated, appropriately sized tank, plumbs glycol supply and return to exchanger ports, and installs pressure relief, expansion, temperature sensors, and condensate management.
Step 4 Pump selection and control options (thermostatic, differential controller)
Select a pump and control strategy that match system size, collector output, and freeze-protection needs: a reliable, variable-speed or PWM-friendly circulator paired with either a simple thermostatic controller or a more precise differential-temperature controller will govern flow, efficiency, and safety in an active closed-loop glycol system.
Choose pump head and flow to overcome loop resistance; prefer corrosion-resistant components and include manual or automatic overrides for overheating.
Step 5 Filling with heat-transfer fluid, pressure testing, and expansion tank setup
Flush and fill the loop with the chosen propylene-glycol mix, then pressure-test the system and set up the expansion tank to maintain safe operating pressures.
Bleed air thoroughly, circulate until temperature and specific gravity stabilize, and top off to correct concentration.
Pressurize to recommended test value, inspect for leaks, adjust expansion tank precharge to system static pressure, and document final readings.
Step 6 Wiring controls, sensors, and safety features
Having confirmed leak-free plumbing, correct glycol concentration, and stable pressures, attention turns to the electrical and control systems that will operate the collector loop safely and efficiently.
Install a differential controller, pump relay, temperature sensors at collector and storage, and high-limit cutouts.
Wire to a fused circuit and earth-ground, include manual shutoff and pressure/flow interlocks.
Label wiring and enclose in weatherproof housings.
Step 7 Commissioning, balancing, and performance checks
Begin by energizing the control system and running the glycol loop at nominal speed to verify pump operation, sensor responses, and controller logic under live conditions.
Observe flow rates, check for leaks, confirm proper purge of air, and adjust balancing valves for even collector distribution.
Validate temperature differentials, expansion tank pressure, and antifreeze concentration.
Document baseline performance and schedule periodic retests.
Plumbing, Controls, and Integration with Existing Water Systems
This section addresses how solar loop plumbing and control strategies are integrated with an existing domestic hot water system to guarantee safe, reliable operation.
Key topics include temperature control and anti-scald measures (tempering valves), freeze protection options and the trade-offs between drainback and glycol systems, and pressure-related safeguards such as relief, check, and expansion devices.
It will also cover coordinating backup heaters and priority control so the solar array complements, rather than conflicts with, existing equipment.
Safe temperature control: tempering valves and anti-scald strategies
Safe temperature control in a solar water heating system requires reliable mixing and fail-safe measures to prevent scalding while preserving system efficiency.
A thermostatic mixing (tempering) valve limits delivery temperature, blending storage water with cold supply.
Install pressure-balanced or thermostatic anti-scald devices at fixtures, include high-temperature alarms and a bypass for maintenance, and follow code for setpoint limits and regular valve testing.
Freeze protection and drainback vs. glycol considerations
Several common strategies protect solar water heaters from freezing, primarily drainback and closed-loop glycol systems, each with distinct plumbing, control, and integration implications.
Drainback requires slope, reliable pump/controller logic, and isolated collectors to gravity-drain into a reservoir.
Glycol systems need proper fluid selection, expansion accommodation, heat exchangers, and periodic testing; compatibility with existing potable plumbing and pump sizing differs between approaches.
Pressure relief, check valves, and expansion protection
Protect pressure relief, check valves, and expansion devices as essential components that prevent overpressure, backflow, and thermal expansion stresses in solar water-heating systems connected to existing plumbing.
Install a code-rated relief valve, a dedicated expansion tank sized for system volume and temperature rise, and suction-appropriate check valves to prevent reverse flow.
Periodically test and replace components per manufacturer and local code intervals.
Integrating with backup heaters and priority control
Integrate solar collectors with existing backup heaters using a control strategy that prioritizes solar heat while ensuring reliable hot-water delivery during low-solar periods.
Implement thermostatic or differential controllers to activate backups only when storage drops below setpoint.
Use priority piping or a dedicated solar-preheat loop ahead of the conventional heater, incorporate isolation valves, sensors, and fail-safe interlocks to prevent overheating or cold-water bypass.
Performance Optimization and Monitoring
To maximize efficiency, attention should focus on insulation upgrades and minimizing heat loss throughout the collector and piping.
Ideal tilt, azimuth, and seasonal adjustments guarantee the collector captures the most solar energy, while simple monitoring of temperature delta, flow rate, and stored volume reveals performance trends.
Sensors, data loggers, and basic maintenance logs provide the measurements and records needed to identify issues and confirm improvements.
Insulation upgrades and reducing heat loss
Improving insulation around a solar water heater and its plumbing greatly reduces heat loss, raising system efficiency and extending usable hot water periods.
Apply high-temperature pipe insulation, foam board around the tank, and seal gaps at joints and entry points.
Insulate exposed fittings, valves, and storage tank lids.
Regularly inspect for compression or moisture damage and replace degraded materials to maintain thermal performance.
Tilt, azimuth, and seasonal adjustments
After upgrading insulation and sealing losses, attention turns to collector orientation and seasonal adjustments to maximize solar gain.
Proper tilt equals latitude for year-round balance; increase tilt in winter, decrease in summer. Azimuth favors true south in northern hemisphere (true north in southern).
Adjustable mounts or simple angle stops permit seasonal optimization. Small orientation errors are tolerable; shading must be avoided.
Simple monitoring methods and what to track (temp delta, flow rate, volume)
How can a homeowner quickly verify a solar water heater is performing as expected? A few simple checks reveal system health: measure inlet/outlet temperature difference, estimate flow rate, and track daily volume delivered.
Recommended quick checks:
- Record temperature delta between collector outlet and storage.
- Time a measured volume to calculate flow rate.
- Note total hot volume used per day versus expected solar input.
Using sensors, data loggers, and basic maintenance logs
Install sensors and keep concise logs to turn occasional checks into continuous insight.
Temperature probes, flow meters, and a simple irradiance sensor feed a data logger or inexpensive IoT device.
Record daily summaries: peak temps, flow anomalies, and runtime.
Use basic maintenance logs for cleaning, antifreeze checks, and valve replacements.
Periodic review reveals performance trends and prompts timely corrective actions.
Common Problems, Diagnostics, and Troubleshooting
Common issues with homebuilt solar water heaters include no or low heat output, leaks and material corrosion, faulty pumps, controllers, or sensors, and risks of overheating or stagnation.
Diagnostics should focus on systematic checks: thermal performance and flow rate for heat problems, visual inspection and pressure testing for leaks, electrical and signal tests for control components, and temperature monitoring to detect stagnation.
Troubleshooting pairs specific fixes—insulation and collector alignment adjustments, sealant or component replacement, electrical repairs or sensor recalibration, and drainback or bypass strategies—to the diagnosed fault.
No or low heat causes and fixes
Diagnosing no or low heat in a solar water heater begins with systematically checking the system’s key components and conditions to isolate the cause.
Inspect collector orientation, glazing cleanliness, and shading.
Verify pump operation, flow rate, and controller settings.
Check for airlocks, clogged risers, or insufficient insulation.
Confirm thermostat calibration and bypass valves.
Restore proper flow, clear obstructions, replace faulty components.
Leaks, corrosion, and material failure remedies
Inspecting and addressing leaks, corrosion, and material failures in a solar water heater requires a methodical approach that prioritizes safety and minimizes downtime.
Identify leak sources, shut off water, drain affected sections, and dry components.
Replace damaged pipes, seals, or panels with corrosion-resistant materials; treat mild corrosion with appropriate inhibitors or coatings.
Pressure-test repairs, monitor for recurrence, and document maintenance for future prevention.
Pump, controller, and sensor faults and how to test them
Beyond fixing visible leaks and corrosion, attention must shift to the mechanical and electrical components that move and control the heat transfer fluid: pumps, controllers, and sensors.
Test pumps for flow and noise; check voltage and continuity at terminals.
Verify controller settings, power, and fault LEDs.
Calibrate sensors against a reference thermometer; inspect wiring and connectors for corrosion or loose contacts.
Replace faulty parts.
Overheating and stagnation management
When collectors remain exposed to strong sun while load demand is low, the system can overheat or stagnate, causing fluid breakdown, pressure spikes, and component stress.
Effective management requires recognizing specific symptoms, isolating causes, and applying targeted remedies.
Inspect expansion tanks, pressure relief, and heat-dump controls.
Diagnose by temperature, pressure, and fluid condition.
Remedies: bleed, flush, add inhibitors, install active cooling, improve control logic, or provide shading.
Maintenance Schedule and Long-Term Care
A clear maintenance schedule helps preserve performance and prevent failures, with routine checks recommended monthly for leaks and gauges, seasonally for glazing and insulation, and annually for heat-transfer fluid and anode inspections.
Heat-transfer fluid, degraded insulation, cracked glazing, or depleted sacrificial anodes should be replaced based on measured condition or manufacturer intervals to avoid accelerated wear.
Long-term life is extended through corrosion protection, timely component upgrades, and attention to system water chemistry.
Routine checks (monthly, seasonal, annual)
Routine checks establish a predictable cadence for preserving collector efficiency, plumbing integrity, and system safety.
The owner inspects visible seals, gauges, and mounts monthly; flushes and drains seasonally; and schedules a professional annual review.
Recommended checklist:
- Monthly: visual leaks, pump operation, controller readouts.
- Seasonal: panel cleanliness, freeze/overheat protections, insulation condition.
- Annual: pressure test, valve function, structural fasteners.
When to replace fluid, insulation, glazing, or sacrificial anodes
How often should key components be refreshed to sustain performance and prevent failure?
Replace heat-transfer fluid every 3–5 years or sooner if cloudy, odorous, or low freeze/anticorrosion efficacy.
Check insulation annually; replace when compressed, wet, or thermally compromised.
Replace glazing if cracked, delaminated, or seriously scratched.
Inspect sacrificial anodes yearly; replace when over 50% consumed or showing heavy pitting.
Extending system life: corrosion protection and component upgrades
Having established replacement intervals for fluids, insulation, glazing, and anodes, attention turns to strategies that prolong system life through corrosion mitigation and targeted upgrades.
Regular inspections, pH-stable heat transfer fluids, impressed current or upgraded sacrificial anodes, dielectric unions, and corrosion-resistant tubing materials reduce deterioration.
Periodic coating, fastener replacement, and sensor/controller modernization improve reliability and efficiency while minimizing invasive repairs over decades.
Cost Breakdown, Savings Calculation, and Incentives
The section outlines typical cost components for DIY and professional solar water heater installations, including materials, labor, permits, and any system-specific parts.
It then explains simple methods to estimate energy savings and calculate the payback period based on local fuel rates and system performance.
Finally, it summarizes common rebates, federal/state tax credits, and local incentives that can greatly reduce net project cost.
Typical DIY vs. professional installation cost components
When comparing DIY and professional solar water heater installations, cost components fall into clear categories—equipment, materials, labor, permits and inspections, and ongoing maintenance—each affecting upfront spending and long-term savings. DIY saves labor but may add tools, time, and permit risks; professional adds warranty, compliance, and higher labor. Consider incentives offsetting costs.
| Component | DIY vs Professional |
|---|---|
| Equipment | Similar costs |
| Labor | DIY lower, pro higher |
How to estimate energy savings and payback period
After comparing upfront components between DIY and professional installations, attention turns to quantifying long-term returns: estimating annual energy savings, calculating payback period, and accounting for rebates or tax incentives that reduce net cost.
Estimate reduced electricity or gas consumption by comparing baseline usage to expected solar contribution; multiply by utility rates for annual savings.
Divide net installed cost by savings to find payback years.
Available rebates, tax credits, and local incentives
Curious which incentives will meaningfully shorten the payback period?
Homeowners should research federal tax credits, state rebates, utility incentives, and local grants that apply to solar thermal systems.
Incentive amounts vary by jurisdiction and may require certified installers or equipment.
Combining programs can reduce upfront costs and payback time; verify eligibility, documentation, and expiration dates through official energy office and utility websites before purchasing.
Materials and Product Recommendations
This section outlines practical recommendations for choosing durable absorber materials and appropriate glazing to maximize heat capture and longevity.
It also covers recommended pumps, controllers, and safety valves that balance efficiency with reliability.
Finally, guidance is provided on where to source parts and how to evaluate suppliers for quality, warranty, and customer support.
Durable absorber materials and glazing options
Select absorber materials and glazing with longevity and thermal performance as priorities; choices determine efficiency, maintenance frequency, and lifetime costs.
Use high-conductivity metals (copper, aluminum) with selective coatings to maximize absorption and minimize emissivity.
For glazing, opt for tempered low-iron glass or UV-stable polycarbonate depending on budget and freeze risk.
Guarantee corrosion-resistant mounting and sealed edges to prevent moisture ingress.
Recommended pumps, controllers, and safety valves
Recommend reliable circulator pumps, differential controllers, and high-quality safety valves tailored to system size and climate to secure efficient, safe operation.
Select pumps with low-power consumption, corrosion-resistant materials, and appropriate head/flow ratings.
Choose controllers supporting freeze/overheat protection, pump delay, and temperature sensors.
Use pressure relief valves, check valves, and expansion tanks sized per system pressure and thermal expansion to prevent damage and secure longevity.
Where to source parts and how to evaluate suppliers
Several reliable sourcing avenues exist for solar water heater components, including specialized solar suppliers, HVAC/plumbing distributors, industrial marketplaces, and reputable online retailers.
Evaluate suppliers by certification, warranty, and documented performance; compare prices and shipping. Prioritize corrosion-resistant materials and proven brands.
- Check certifications (ISO, UL, CE) and warranties
- Read technical datasheets and independent reviews
- Request references and lead-time guarantees
Real-World Examples and Small Project Plans
The section presents concrete examples and concise plans adaptable to common needs: a small household batch system with a parts list and rapid build outline, and a mid-size evacuated-tube design tailored for colder climates.
It also offers photos and measurement checklists to guide placement and verify performance.
Readers are encouraged to compare options and match a plan to their site and skill level.
Small household batch system: parts list and quick build plan
Start by listing essential components and a concise build sequence for a small household batch solar water heater, focusing on items that balance performance, cost, and ease of assembly.
Components:
- insulated tank (dark-painted)
- glazed collector box
- copper or PEX plumbing
- clear glazing
- simple tilt frame
- check valve
- pressure relief
- basic thermometer.
Build:
- assemble collector
- mount frame
- plumb tank
- test for leaks
- insulate.
Mid-size evacuated-tube plan for colder climates
Designs for mid-size evacuated-tube solar water heaters adapt proven thermosiphon and heat-pipe concepts to deliver reliable year-round performance in cold climates by maximizing insulation, freeze protection, and solar gain.
Typical plans specify 12–18 tubes, a 150–300 L storage tank, angled mounting for winter sun, heat-pipe collectors with antifreeze loop, controlled drainback or glycol circulation, and durable enclosure details for snow and wind loads.
Photos and measurement checklists for common installations
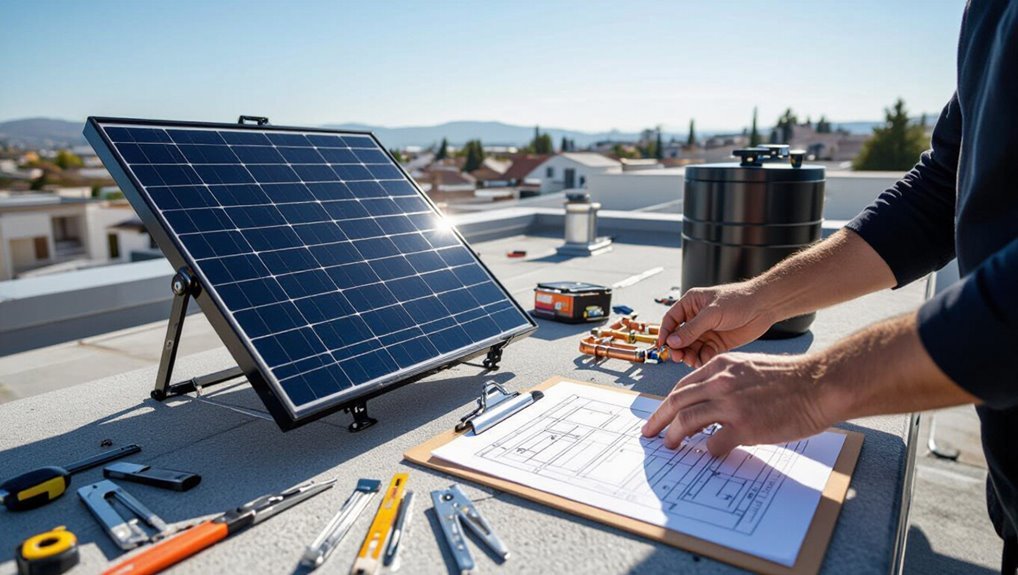
Several clear photos and a concise measurement checklist help installers verify fit, orientation, and connections before committing to a mid-size evacuated-tube system.
Include roof pitch, available unobstructed sun hours, mounting rail spacing, tube length, tube-to-header distance, and plumbing run lengths.
Supply annotated images: roof layout, proposed array footprint, nearby shading, manifold location, pump/valve placements, and insulation access points.
Final Checklist Before You Start Building
Before beginning construction, the article prompts a final review of permits, safety provisions, and the availability of required tools and materials.
It also advises defining clear performance targets and commissioning acceptance criteria to judge system success.
This checklist guarantees regulatory compliance, worker safety, and measurable outcomes before work starts.
Permits, safety, tools, and materials verification
One clear checklist consolidates permits, safety precautions, tools, and materials to confirm readiness before construction begins.
It guarantees compliance, reduces risk, and prevents delays. Verify documentation, inspect equipment, and confirm personal protective gear. Check structural mounts and plumbing compatibility.
- Confirm local permits, inspection schedule, and code requirements.
- Verify tools: drill, wrenches, sealants, pressure gauges.
- Inspect materials: collectors, pipes, insulation, valves.
Performance targets and commissioning acceptance criteria
Although the system’s design phase is complete, establishing clear performance targets and commissioning acceptance criteria guarantees the solar water heater meets operational, safety, and regulatory expectations before construction begins.
Define measurable targets: daily thermal output, collector efficiency, storage temperature stability, heat-loss rates, and pressure limits.
Specify test procedures, instrumentation, acceptable tolerances, fault responses, documentation requirements, and sign-off authorities for final commissioning.
Conclusion
A concise summary emphasizes that a simple batch or tank-in-box solar water heater can reliably supply warm water using basic materials, thoughtful site selection, and careful assembly. Practical benefits include energy savings, reduced emissions, and straightforward maintenance, yet realistic expectations about performance and safety are essential. Is embracing small-scale solar projects a practical step toward greater self-reliance and environmental stewardship? With planning, modest investment, and common tools, many homeowners can successfully build and benefit from one.