How to Fix a Leaky SharkBite Fitting: Quick DIY Steps to Stop the Drip
To fix a leaky SharkBite fitting, first, shut off the water supply and drain the line. Inspect the joint for improper insertion, damaged O-rings, or debris. If the leak continues, reseat the fitting or tighten its alignment. If problems persist, use a disconnect tool to remove the fitting, cut back any damaged pipe, deburr it, and install a new push-fit connector to the correct depth. Finally, test the connection under pressure. For additional troubleshooting tips, continue reading below.
What Causes a SharkBite Fitting to Leak
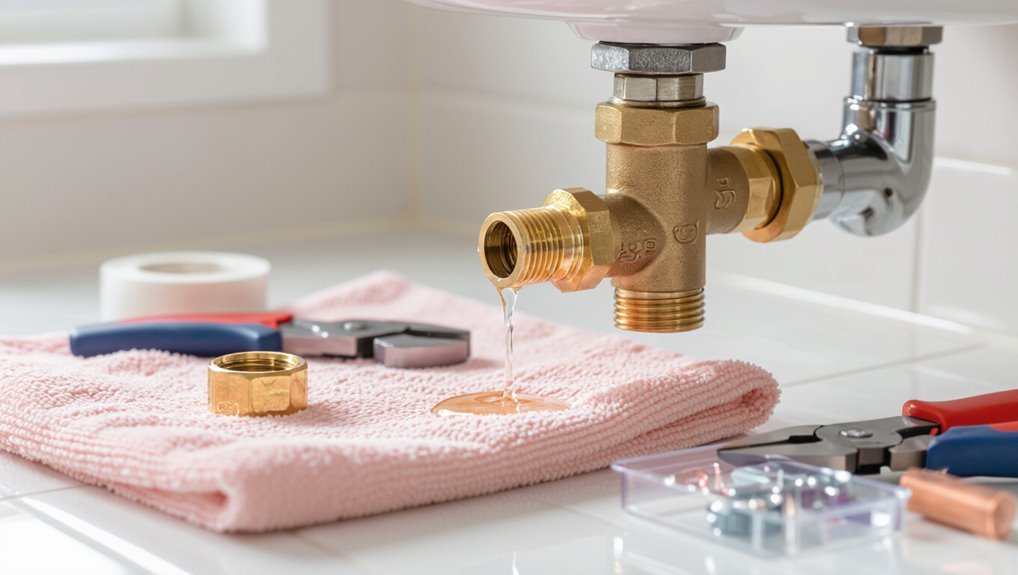
Leaks commonly stem from installation errors such as insufficient pipe insertion or incorrect cutting, as well as from surface issues and debris that prevent a proper seal.
Worn or damaged O-rings, collars, or fittings also compromise the connection.
Additionally, extreme temperature changes, excessive pressure, and pipe movement can cause or exacerbate leaking.
Common installation mistakes that lead to leaks
Common installation mistakes that cause a SharkBite fitting to leak usually stem from improper pipe preparation, incorrect insertion depth, or damaged O-rings and grab rings; each error compromises the seal or grip needed for a watertight connection.
Misalignment, reuse of fittings, and failing to fully seat the pipe are common. Guides on how to fix a leaky sharkbite fitting emphasize inspection, replacement, and proper seating.
Pipe surface issues and debris contamination
Inspecting the pipe surface is essential because scratches, burrs, corrosion, or residual solder can prevent the SharkBite O-ring from forming a proper seal.
Contaminants like metal shavings, pipe paste, paint, or debris lodged in the fitting seat compromise sealing and cause leaks.
Cleaning, deburring, and polishing the pipe end, then blowing out particles before insertion, reduces contamination-related failures.
Damaged O-rings, collars, or fittings
Examine the internal components when a SharkBite fitting fails, since damaged O-rings, deformed stainless-steel grab rings (collars), or cracked housings are frequent culprits.
Inspect O-rings for cuts, flattening, or extrusion; replace if compromised.
Check grab rings for bent teeth or loss of spring tension.
Examine plastic or metal housings for cracks or stress fractures.
Replace any defective part before reassembly.
Temperature, pressure, and movement-related leaks
Thermal expansion, excessive system pressure, and mechanical movement each create conditions that can compromise a SharkBite fitting’s seal: rapid temperature changes expand tubing, raising internal pressure; overpressurized systems push against O-rings; vibration or pipe shifting misaligns collars.
These stresses fatigue components, cause microgaps, and trigger intermittent or persistent leaks. Addressing temperature control, pressure regulation, and secure supports prevents recurrence.
Quick Assessment: How to Diagnose a Leaky SharkBite Fitting
A quick assessment begins with a visual inspection checklist: check for corrosion, moisture trails, mineral buildup, and loose or misaligned fittings.
Next, identify the leak location and severity, determine whether to shut off the water and relieve system pressure, and note visible spray versus slow seepage.
Keep basic tools and materials ready—adjustable wrench, flashlight, towel, bucket, and replacement fittings—to speed diagnosis and safe handling.
Visual inspection checklist
Visual inspection begins with a close, methodical scan of the SharkBite fitting and surrounding area for visible signs of leakage, corrosion, or misalignment.
Check for wetness, mineral deposits, discoloration, or paint/insulation damage.
Verify that pipe ends are fully seated and fittings are straight.
Note any loose clamps, nearby strain, or vibration sources.
Record observations for repair steps.
How to identify leak location and severity
With the inspection notes in hand, the next step is to pinpoint where the leak originates and how serious it is.
Observe whether water seeps at the fitting body, tubing seam, or push-fit collar. Measure drip rate (drops per minute) and note spray or steady flow.
Check nearby corrosion, looseness, and wetness spread to estimate severity and urgency for repair or replacement.
When to shut off water and relieve pressure
If the leak shows more than a slow drip, spraying, or soaking of surrounding materials, the homeowner should immediately shut off the nearest shutoff valve to isolate the affected line and prevent further water damage.
After isolating the line, open a downstream faucet to relieve pressure and drain residual water. Then inspect the fitting.
Record valve positions and note any continued seepage before proceeding.
Tools and materials to have on hand for diagnosis
Before beginning the inspection, assemble a concise kit of essential tools and materials so the diagnosis proceeds smoothly: adjustable wrench, slip-joint pliers, flashlight, rag, bucket, towel, and a marker.
Also include a magnifier, leak-detection dye or soapy water in a spray bottle, replacement O-rings or SharkBite replacement sleeve, and nitrile gloves.
These items enable quick, accurate identification of leak source and condition.
Immediate Temporary Fixes to Stop the Drip
The author outlines quick, temporary steps to stop a leaking SharkBite fitting, starting with safely shutting off the water and attempting gentle tightening or slight repositioning to reseat the connection.
If the leak persists, plumber’s tape around the pipe stub combined with a clamp-style temporary seal can reduce or halt the drip until a proper repair is possible.
Guidance is given on when such short-term measures are acceptable (emergencies, short delays) versus when a permanent repair or replacement is required.
Tightening and repositioning the fitting safely
Begin by shutting off the water supply and relieving pressure at the fixture to guarantee a safe workspace; then inspect the SharkBite connection to locate the exact source of the leak.
If visible misalignment or slight looseness exists, firmly push the pipe into the fitting until it seats; rotate gently to realign.
Reopen supply slowly to verify the leak stopped before leaving the repair.
Using plumber’s tape and clamp-based temporary seals
Apply quick, temporary measures like plumber’s tape or a clamp-based seal to stop minor leaks until a permanent repair can be made.
The homeowner observes, prepares the area, and applies materials precisely to reduce drainage.
Suggested steps:
- Clean and dry the joint before wrapping tape tightly.
- Position a rubber-lined clamp over the leak.
- Monitor the temporary seal for continued effectiveness.
When a temporary fix is acceptable vs. when permanent repair is needed
When is a quick patch acceptable and when must a homeowner move to a permanent repair?
A temporary patch suits minor drips, slow leaks, or while awaiting parts/professional help.
Permanent repair is required for persistent leaks, visible corrosion, loose fittings, pressure loss, or repeated patch failures.
Safety, water damage risk, and insurance requirements dictate timely shift from temporary to lasting fixes.
Permanent Repair: Step-by-Step Replacement of a Leaky SharkBite Fitting
The permanent repair section outlines the step-by-step replacement process, beginning with basic safety precautions and preparing the work area.
It then covers shutting off and draining the line, using a disconnect tool to remove the leaking SharkBite, and inspecting and preparing pipe ends for reinstallation.
Finally, it explains correct installation of a new SharkBite fitting, including proper depth, alignment, and the push-fit technique.
Safety precautions and preparing the work area
Before any tools are handled, guarantee the work area is secured: shut off the water supply, relieve line pressure by opening nearby faucets, and isolate electrical sources if the fitting is near outlets or appliances.
Clear the area of trip hazards, provide adequate lighting and ventilation, gather PPE (gloves, eye protection), have a bucket and towels ready, and keep a phone accessible for emergencies.
Shutting off water and draining the line
With the work area secured and pressure relieved at nearby fixtures, the next step is to shut off the water supply to the affected line and fully drain it.
Locate and close the appropriate shutoff valve or the main supply if necessary.
Open downstream faucets and a high drain point, then wait until flow stops and the pipe feels empty before proceeding with the repair.
Removing the leaking SharkBite fitting with a disconnect tool
Cut the connection by sliding the SharkBite disconnect tool over the pipe until it seats against the fitting collar.
Then depress the tool to release the metal teeth and pull the fitting straight off the tubing.
Maintain steady axial pressure while withdrawing; avoid twisting.
If resistance persists, reposition the tool and repeat.
Capture any residual water with a rag or bucket before fully removing the fitting.
Inspecting pipe ends and preparing them for reinstallation
After the SharkBite fitting is removed and any trapped water is contained, inspect the exposed pipe ends for damage, corrosion, or residual debris.
Cut any nicked or deformed sections squarely with a pipe cutter, deburr and chamfer edges, and clean surfaces with emery cloth or a rag.
Verify straightness and proper length so the replacement fitting will seat on clean, undamaged pipe.
Installing a new SharkBite fitting correctly (depth, alignment, push-fit technique)
Begin the installation by confirming proper fitting selection and measuring insertion depth: the pipe must be fully inserted to the manufacturer’s depth mark so the stop on the fitting seats correctly.
Align pipe and fitting straight, push firmly until the depth mark is flush. Rotate slightly to guarantee grip.
Verify the release collar is unobstructed and the tubing is clean, cut square, and deburred before final engagement.
Testing the repair for leaks and restoring water
Restore water gradually and observe the joint closely for leaks: once the replacement SharkBite fitting is fully seated, reopen the supply slowly to pressurize the line, watching the connection and surrounding areas for any signs of moisture, drips, or weeping.
If dry after several minutes, increase pressure to normal and recheck.
If leaks appear, depressurize, remove and reseat or replace the fitting, then retest.
Alternative Repair Methods and When to Use Them
The article summarizes alternative repair options such as threaded or push-fit couplings, adapters, and traditional soldered connections as substitutes for SharkBite fittings.
It compares the pros and cons of replacing only the fitting versus cutting out and replacing a section of pipe, noting trade-offs in durability, skill required, and materials cost.
Guidance is offered on scenarios that warrant calling a professional plumber, including persistent leaks, complex joints, or uncertain pipe materials.
Using couplings, adapters, or soldered connections instead of SharkBite
Several effective alternatives to SharkBite fittings exist—mechanical couplings, threaded adapters, and traditional soldered joints—each suited to different pipe materials, pressures, and permanence requirements.
Mechanical couplings offer quick, gasketed repairs on damaged tubing. Threaded adapters bridge dissimilar materials. Soldered connections provide durable, permanent joins on copper.
Selection depends on accessibility, tool availability, code compliance, and homeowner confidence with the technique.
Pros and cons of replacing pipe sections vs. replacing the fitting
Deciding between replacing an entire pipe section and swapping out a single fitting hinges on factors like leak location, pipe condition, access, cost, and desired longevity. Replacing a fitting is faster and cheaper but may not fix underlying pipe corrosion. Replacing a section is more durable yet costlier and invasive; choice depends on inspection and future reliability priorities.
| Option | Pros | Cons |
|---|---|---|
| Fitting | Quick, low cost | May miss pipe issues |
| Section | Durable, thorough | More labor, cost |
When to call a professional plumber
When should a homeowner call a professional plumber for a leaky SharkBite fitting?
A plumber is advised when water damage is extensive, the leak persists after basic fixes, multiple fittings fail, soldered or PVC connections are involved, or pressure/flow issues suggest a systemic problem.
Also call for inaccessible fittings, complicated rerouting, or when local codes require licensed work.
How to Prevent Future Leaks with SharkBite Fittings
To prevent future leaks with SharkBite fittings, installers should follow precise cutting and deburring methods, verify proper insertion depth with clear marking, and confirm the pipe type meets the fitting’s temperature and pressure ratings.
Attention to common installation errors—such as failing to remove burrs, under-inserting the pipe, or using incompatible materials—reduces the risk of joint failure.
Clear marking and measured insertion for each connection create consistent, reliable seals.
Best practices for cutting and deburring pipe ends
Clean, square cuts and smooth, burr-free edges are critical for reliable SharkBite connections because rough or uneven pipe ends can prevent the O-ring from seating properly and compromise the grab ring’s grip.
Use a quality tubing cutter or mitre saw for straight cuts.
Deburr both inside and outside with a chamfering tool or file, then inspect for nicks, dirt, and deformation before assembly.
Proper pipe insertion depth and marking technique
Precision in insertion depth is the single most important factor in ensuring a leak-free SharkBite joint: each pipe must be pushed fully to the fitting’s internal stop so the O-ring seats correctly and the grab ring engages the pipe.
Mark the pipe at the correct depth with a permanent marker or tape, confirm by visualizing the stop, and recheck after insertion to prevent partial seating and future leaks.
Avoiding common mistakes during installation
After marking and seating the pipe correctly, installers should turn attention to common installation errors that lead to leaks. Attention to detail prevents repeat failures.
- Confirm pipe ends are deburred and clean
- Verify full insertion to the marked depth
- Avoid twisting the fitting while pushing the pipe
Careful inspection and gentle handling reduce leaks and prolong fitting life.
Suitable pipe types and temperature/pressure limits
Compatibility with pipe materials is critical to preventing future leaks with SharkBite fittings. The fittings work with copper, CPVC, and PEX; PVC requires conversion adapters.
Users must respect rated limits—typically 200°F and 200–250 psi depending on pipe type and local codes. Exceeding temperature or pressure ratings, or mixing incompatible materials, increases failure risk and voids warranties.
Tools, Materials, and Cost Estimates
A concise inventory of essential and optional tools will help determine what’s needed to repair a leaking SharkBite fitting.
A clear parts checklist, including compatible SharkBite connectors and O-rings, prevents mismatches and extra trips to the store.
Estimated DIY time and material costs are compared with typical professional service fees to help readers choose the most practical option.
Essential tools and optional helpful tools
Successful repair of a leaky SharkBite fitting depends on having the right mix of essential tools and a few optional items that speed the job and reduce mistakes.
Essential items focus on safe disassembly and seal checks; optional tools improve access and verification.
Recommended tools:
- Adjustable wrench, tube cutter, and emery cloth
- Flashlight, inspection camera, and silicone grease
- Bucket, rags, and protective gloves
Parts checklist and compatible SharkBite products
Gather the right parts before beginning repairs to prevent delays and guarantee a proper seal.
A concise checklist includes replacement SharkBite couplings, push-to-connect adapters, stop valves, end caps, and compatible copper, CPVC, or PEX tubing.
Also include pipe cutters, deburring tool, PTFE tape, and safety gloves.
Verify product sizes (1/2″, 3/4″, 1″) and manufacturer compatibility before purchase.
Typical DIY time and cost range vs. professional service
With parts and tools on hand, estimating time and cost helps determine whether a homeowner should tackle the repair or hire a pro.
Typical DIY fixes take 30–90 minutes, costing $15–60 for fittings, cutter, deburring tool and PTFE tape.
Professional service runs $100–300+ labor, useful for insurance claims, complex lines, or confidence in long-term reliability.
Troubleshooting Specific Scenarios
The guide now addresses common failure patterns, comparing leaks at straight fittings with those at elbows and tees to highlight different causes and fixes.
It also covers intermittent leaks linked to thermal expansion, failures that appear after freezing or mechanical impact, and cases where corrosion or chemical damage is suspected.
Readers are guided to diagnostic steps tailored to each scenario to determine whether repair or replacement is required.
Leaks at straight fittings vs. elbows and tees
Distinguishing leaks at straight SharkBite fittings from those at elbows and tees helps pinpoint likely causes and streamline repairs.
Straight-fit leaks commonly indicate insertion depth issues, debris on the pipe, or damaged O-rings.
Leaks at elbows and tees more often reflect misalignment, stress from piping geometry, or inadequate support.
Inspection focuses on seating, joint alignment, and securing adjacent piping.
Intermittent leaks tied to thermal expansion
Several homeowners notice intermittent leaks at SharkBite fittings that coincide with temperature swings, a pattern often caused by thermal expansion and contraction of the piping.
Pipes lengthen and press fittings; repeated movement can break seals or loosen connections.
Diagnosis involves observing timing, isolating affected runs, and relieving stress with expansion loops, clips, or a flexible connector.
Replace damaged fittings if leakage persists.
Leaks after freezing or mechanical impact
When a SharkBite fitting leaks after pipe freezing or a physical strike, the failure often stems from abrupt deformation of the pipe or fitting components rather than gradual wear. Ice can split copper or PEX and impact can dent tubing or displace the O-ring, creating gaps that the push-fit seal cannot tolerate.
Inspect for cracks, flattened tubing, or displaced O-rings; replace damaged sections and refit with new connectors.
Corrosion or chemical damage cases
If exposed to corrosive water or aggressive chemicals, SharkBite fittings can suffer degraded metal surfaces, swollen O-rings, or pit-corroded tubing that compromise the push-fit seal.
Inspect for visible corrosion, brittle or discolored plastic, and distorted seals.
Replace affected fittings, tubing, and O-rings with compatible materials; flush and neutralize the system chemistry; consider stainless or CPVC alternatives to prevent recurrence.
Real-World Repair Examples and Short Case Walkthroughs
The section presents concise, real-world repair examples to illustrate common SharkBite issues and solutions.
It covers a quick kitchen sink supply line fix, repairing a leak in a radiant heating loop, and replacing a fitting in a cramped or hard-to-reach space.
Each case includes the key steps, required tools, and practical tips to avoid repeat leaks.
Quick repair of a kitchen sink supply line
A homeowner tightens a leaking kitchen sink supply line at the SharkBite connection and documents the steps taken: identify the leak source, shut off water, depressurize the line, and inspect the fitting and tubing for visible damage or misalignment.
They remove and reseat the tubing, confirm full insertion depth, clean debris, check the O-ring and ferrule, then restore water and verify no further seepage.
Fixing a leak in a radiant heating loop
When a radiant heating loop develops a leak, the technician begins by isolating the affected loop, depressurizing the manifold, and documenting system pressure and temperature before any disassembly.
The leak location is traced by visual inspection and pressure decay testing. A failed SharkBite or tubing abrasion is removed; fittings and tubing are cleaned, cut square, and replaced.
The loop is refilled, bled, and tested to restore service.
Replacing a fitting in a cramped or hard-to-reach space
Moving from isolating and testing a failed loop to replacing a fitting often reveals a different challenge: limited access.
The technician assessed clearance, removed nearby panels, and used compact tools—mini ratchet, swivel adapter, long-nose pliers—to unseat the SharkBite.
A short stub of pipe allowed a push-fit replacement. Pressure-tested and insulated, the repair held.
The method prioritized minimal disturbance and repeatable technique.
Final Checklist Before Finishing the Job
A brief leak test is performed and the fitting is observed under pressure for the recommended period to confirm no weeping or hidden seepage.
The installer schedules a re-inspection after 24 to 48 hours to verify continued integrity and document any changes.
Final notes include photos, test results, and any SharkBite warranty details required for future claims.
Leak test steps and observation period
Begin by restoring water supply to the repaired section and slowly pressurizing the line while watching the fitting and adjacent joints.
Observe for leaks for at least 10–15 minutes, checking under pressure and after short flow cycles.
Dry surfaces and inspect for microdrips. Record any weeps, tighten or reseat as needed, then monitor periodically during the remaining job tasks before finishing.
Re-inspection after 24 to 48 hours
After 24 to 48 hours of normal pressure and occasional flow, the repaired SharkBite fitting should be re-inspected to confirm long-term integrity.
Inspect for moisture, corrosion, movement, or softened plumbing nearby.
Gently dry the joint and monitor under light pressure cycles.
Verify fittings remain securely seated with no audible leaks.
If any issue appears, shut water off and re-evaluate the connection immediately.
Documentation and warranty considerations for SharkBite products
Documentation guarantees accountability and protects both installer and homeowner when finishing a SharkBite repair.
Records should note part numbers, installation date, pipe material, and photos of the joint.
Retain receipts and packaging for warranty claims and register products per manufacturer instructions.
Clear documentation supports troubleshooting, validates workmanship, and expedites warranty service if leaks reoccur or components fail.
Keep files accessible.
Conclusion
A succinct, confident wrap-up summarizes the steps and reinforces safety. Like a seasoned mechanic closing a toolbox, the homeowner can assess causes, try quick stops, or perform a full SharkBite replacement with basic tools. Temporary fixes buy time; permanent replacement prevents recurrence. Knowing when to call a pro saves stress and damage. With parts, materials, and a final leak check in hand, the job finishes cleanly and water stays where it belongs.