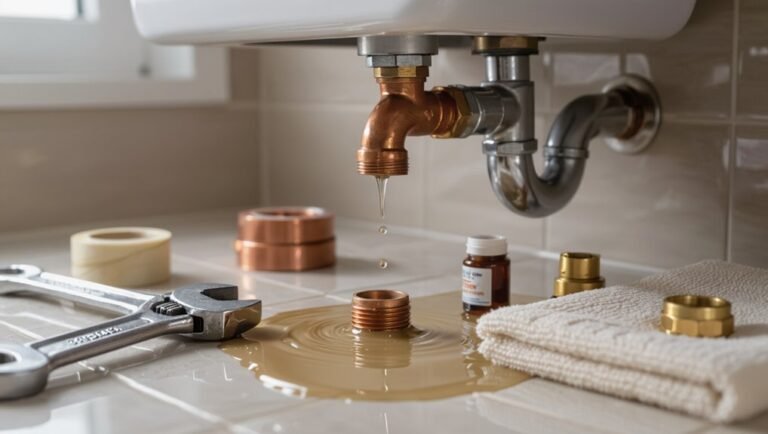
How to Keep Attic Pipes From Freezing: Proven Preventive Steps for Homeowners
To prevent attic pipes from freezing, homeowners should use a combination of insulation, air-sealing, and controlled heating. Begin by insulating exposed pipes with foam or wrap insulation and applying electrical heat tape. Seal attic penetrations and rim joists with caulk to eliminate drafts. Ensure balanced ventilation, consider relocating pipes to conditioned spaces when possible, and utilize low-output space heaters or let faucets drip during extreme cold. Before winter sets in, inspect insulation and test heating sources. For detailed step-by-step actions, troubleshooting tips, and upgrade options, continue reading.
How to Prevent Attic Pipes from Freezing: Immediate Overview
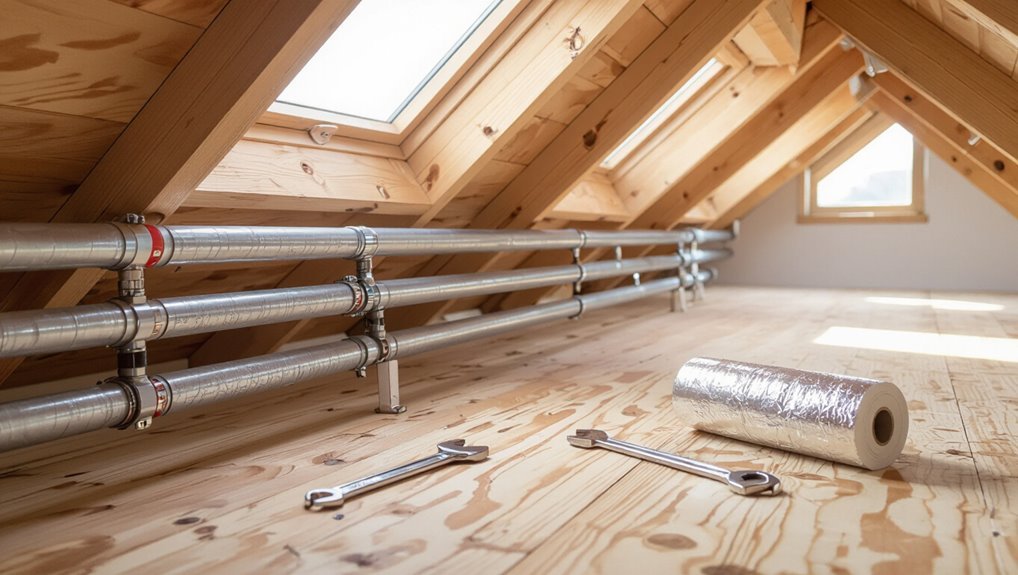
A few immediate actions can reduce the risk of attic pipe freezing: open cabinet doors, apply heat tape or portable heaters safely, and insulate exposed pipes.
If visible leaks, bulging pipes, or no improvement after warming, contact a licensed plumber right away.
Prioritize safety and shut off the main water supply before attempting any direct repairs.
Quick actionable steps to stop freezing now
Start by identifying vulnerable sections and acting quickly to prevent ice formation.
Inspect exposed pipes, open nearby cabinet doors, and run a trickle of warm water.
Apply pipe insulation or heat tape rated for attic use, seal drafts around joists, and use a portable space heater on low with safe clearance.
Monitor temperatures and check for leaks until warmth stabilizes.
When to call a professional immediately
If immediate measures—insulating exposed runs, sealing drafts, and running a trickle of warm water—do not stop frost buildup or a pipe begins to bulge, a professional should be contacted without delay.
A licensed plumber can assess hidden damage, shut off water, and perform targeted repairs or replacements.
Call urgently for visible cracking, significant leaks, loss of water pressure, or if frozen pipes are unreachable safely.
Why Attic Pipes Freeze: Causes and Risk Factors
Temperature, airflow, and inadequate insulation combine to lower pipe temperatures in attics, creating conditions where standing water can freeze.
Certain layouts—long runs against exterior walls, exposed vent stacks, or poorly routed supply lines—raise the likelihood of cold exposure.
Regional climate and seasonal swings further determine how long and how often pipes face freezing risk.
How temperature, airflow, and insulation interact
Heat levels in the attic, air movement, and the quality of pipe insulation act together to determine whether pipes freeze: low ambient heat and stagnant, cold drafts lower pipe surface temperatures, while gaps or inadequate insulation let heat escape rapidly, creating cold spots where ice can form.
Temperature gradients, convective airflow, and insulation R-value dictate heat loss rates; reducing drafts and improving coverage minimizes freeze risk.
Common attic pipe layouts that increase freeze risk
Pipes routed through unheated attic zones, along exterior walls, or across long, uninterrupted spans are particularly vulnerable to freezing because they experience prolonged exposure to cold air and limited recovery from intermittent warm periods.
Additional high-risk layouts include low-clearance runs near roof sheathing, pipes bundled without insulation, and lines crossing vented soffits or gable vents where drafts concentrate.
Seasonal and regional risk considerations
Although attic pipe freeze risk exists year-round, seasonal shifts and regional climate patterns strongly shape when and how frequently freezing occurs.
Cold snaps, prolonged subfreezing stretches, and rapid temperature drops elevate risk. Coastal, continental, and mountain regions each present distinct exposure profiles.
Local snowfall, wind-driven chill, and atypical cold events determine urgency for insulation, heat tracing, ventilation adjustments, and proactive winterization planning.
Inspecting Your Attic Plumbing: What to Look For
A quick visual checklist helps identify pipe location, check for adequate insulation, and spot gaps where cold air can reach lines.
Inspectors should look for signs of previous freeze damage and small leaks, such as bulging, corrosion, hairline cracks, or water stains.
Carrying a flashlight, tape measure, basic sealant, pipe insulation sleeves, and a wrench enables immediate minor repairs and clearer assessment.
Visual checklist for pipe location, insulation, and gaps
Begin the attic inspection with a systematic visual checklist that identifies each plumbing run, evaluates existing insulation, and locates gaps where cold air can reach pipes.
Note pipe materials, exposed lengths, insulation type and thickness, compression or missing sections, attic vents, soffit and ceiling penetrations, and areas near exterior walls.
Flag locations needing insulation, sealing, or rerouting for prioritized repair.
How to detect previous freeze damage and leaks
Inspect the plumbing for signs of past freezing and leakage by looking for visible damage, corrosion, stains, and warped or bulging pipe sections that indicate prior ice expansion or prolonged moisture exposure.
Also note mineral deposits, white or greenish crusts at joints, rust flakes, and dried water trails.
Damp insulation, musty odors, and unexplained ceiling stains below the attic pinpoint concealed leaks.
Tools and materials to carry for a basic inspection
Several essential tools and materials make a basic attic plumbing inspection efficient and safe:
- flashlight with fresh batteries
- headlamp
- utility knife
- adjustable wrench
- pliers
- tape measure
- moisture meter or infrared thermometer
- leak-detection dye or paper towels
- pipe insulation sleeves or foam
- electrical tester
- disposable gloves
- dust mask
- small first-aid kit.
A notepad or smartphone documents findings and photos.
Passive Prevention Methods (Long-Term)
Long-term prevention focuses on passive measures that reduce heat loss and block cold air before it reaches piping.
Key strategies include adding proper pipe and attic insulation, air-sealing penetrations and rim joists, and balancing attic ventilation with selective heat retention.
When feasible, pipes should be repositioned or rerouted out of unconditioned spaces to eliminate the exposure risk.
Proper insulation for pipes and attic spaces
Proper insulation of pipes and attic spaces forms the foundation of passive freeze protection by minimizing heat loss and preventing cold air infiltration that can lower pipe temperatures below freezing.
Install foam pipe sleeves or fiberglass wrap with proper thickness for local climate. Insulate attic floor and exposed plumbing, maintain continuous coverage around bends and valves, and use vapor-retardant materials where condensation risk exists.
Air sealing penetrations and rim joist areas
Seal gaps and cracks around pipe penetrations and rim joists to block cold air that drives heat loss and lowers pipe temperatures.
Use caulk, spray foam, or foam gaskets to seal small openings; install rigid foam or spray foam insulation in rim joist cavities.
Seal attic access and vents around ducts.
Prioritize airtightness where pipes enter conditioned space to maintain warmer pipe surroundings.
Improving attic ventilation versus heat retention
While both increased attic ventilation and enhanced heat retention can reduce the risk of frozen pipes, they work by opposite principles and must be balanced based on climate, roof design, and insulation strategy.
Ventilation lowers moisture and attic temperatures in cold climates to prevent ice dams; heat retention via air sealing and insulation keeps pipe surroundings warmer.
Selection depends on local climate, roof assembly, and moisture control.
Repositioning or rerouting pipes out of unconditioned spaces
Rerouting plumbing out of unconditioned spaces is a long-term, passive strategy that eliminates exposure to freezing temperatures by relocating supply and drain lines into heated portions of the home or within insulated chases.
This requires planning, possible drywall or ceiling access, and code-compliant supports.
Benefits include permanent frost risk reduction and lower energy use versus continuous heat tape; costs and disruption vary with layout complexity.
Active Prevention Methods
Active measures focus on adding controlled heat to vulnerable plumbing.
Recommendations cover proper heat tape and heat cable installation, use of thermostatically controlled heat sources, and guidelines for temporary space heaters.
Emphasis is placed on safe operation and selecting the right method for the attic’s layout and wiring.
Heat tape and heat cable installation guidelines
Several types of heat tape and self-regulating heat cable are commonly used to prevent attic pipes from freezing by providing controlled, localized warmth along vulnerable runs.
Installation requires following manufacturer instructions, securing cable with approved clips, maintaining proper spacing, avoiding overlap, and using weatherproof connections.
Power must be GFCI-protected, junctions kept outside insulation gaps, and periodic inspection for damage and proper operation is essential.
Using thermostatically controlled heat sources
Consider thermostatically controlled heat sources when localized, responsive warming is needed to prevent attic pipe freezing.
These units sense temperature and activate heating elements only when pipes approach freezing, conserving energy and reducing overheating risk.
Select devices rated for plumbing use, guarantee proper mounting and electrical protection, and position sensors close to vulnerable pipe sections.
Regular testing verifies reliable operation throughout cold periods.
Temporary space heating options and safe operation
Thermostatically controlled heaters provide targeted, automatic protection, but situations may call for temporary space heating when sensors are unavailable or when broader attic warming is preferred.
Portable electric heaters, oil-filled radiators, and infrared units can raise ambient temperature quickly.
Operate only with clearances, GFCI protection, and stable surfaces; avoid combustibles, unattended use, or running generators indoors.
Monitor carbon monoxide where applicable.
Step-by-Step: How to Insulate and Protect Attic Pipes
A concise procedure guides the preparation, selection, and installation steps needed to insulate and protect attic pipes.
Key actions include:
- prepare surfaces and workspace; choose insulation type and R‑value; install foam sleeves and wrap
- seal joints, valves, and slip fittings; verify insulation with temperature and flow checks
- prioritize accessible valves and poorly insulated runs for immediate attention
These steps establish a clear sequence to minimize freezing risk.
Preparing the pipe surface and workspace
Before applying insulation, the pipe surface and surrounding workspace should be clean, dry, and accessible to guarantee proper adhesion and a safe installation.
Remove dust, oil, and loose debris with a cloth; dry surfaces thoroughly.
Clear nearby stored items, provide firm lighting and stable footing, and secure any loose hangers or supports.
Verify pipes are leak-free and mark joints or valves for easy access.
Selecting the right insulation type and R-value
Several common insulation types—foam sleeves, fiberglass wrap, and spray foam—suit attic pipes, but choice should be driven by pipe material, space constraints, and moisture risk.
R-value selection depends on local climate and attic exposure: colder zones require higher R-values.
Consider vapor barriers for copper or metal pipes, flexibility for bends, and long-term durability.
Match thickness to recommended R for the region.
Installing foam insulation sleeves and wrap
Begin by measuring each pipe run to determine sleeve length and wrap quantity, including allowances for fittings and bends.
Cut closed-cell foam sleeves to fit, slit along length, and snap them over pipes. Secure seams with foil tape.
For flexible or irregular runs, wrap polyethylene or foam tape spirally, overlapping by half the width and anchoring ends with tape or zip ties.
Sealing joints, valves, and slip fittings
Seal all joints, valves, and slip fittings to stop air movement and moisture that accelerate freezing and corrosion.
Inspect connections for gaps, old tape, or deteriorated plumber’s putty.
Use appropriate materials—pipe thread sealant, silicone caulk for non-threaded seams, and approved epoxy or compression fittings where needed.
Guarantee seals remain accessible for future maintenance and fully cure before re-insulating surrounding pipe.
Verifying effectiveness with temperature and flow checks
After sealing joints, valves, and fittings, confirm the work by performing temperature and flow checks to verify insulation and seals are functioning as designed.
Using an infrared thermometer or surface probe, compare pipe temperatures at insulated and exposed sections.
Run taps to measure steady flow and observe for pressure drops or delays.
Reinspect problem areas, tighten or add insulation, then retest until readings stabilize.
Cost, Materials, and Time Estimates
Typical materials, average costs, and expected lifespans are summarized to help homeowners plan, followed by a brief comparison of DIY versus professional installation expenses. Below is a concise cost-and-materials snapshot to guide decision-making and time estimates. The comparison clarifies trade-offs in price, durability, and labor.
| Item | Typical Cost Range | Expected Lifespan |
|---|---|---|
| Foam pipe insulation | $0.50–$3 per foot | 5–15 years |
| Heat tape / cable | $20–$150 | 5–10 years |
| Professional installation (per hour) | $50–$150 | N/A |
Typical materials, average costs, and expected lifespan
For preventing attic pipe freeze, common materials include foam pipe insulation sleeves, fiberglass wrap, heat tape or cable, and pipe collars or enclosures.
Each offers different insulation values, installation complexity, and cost profiles that influence both upfront expense and expected service life.
Typical costs range from $0.50–$6 per linear foot; heat tape runs higher.
Lifespans: foam 5–10 years, fiberglass 10–20, heat tape 5–15.
DIY vs. professional installation cost comparison
Many homeowners weigh the upfront savings of a DIY attic pipe freeze-prevention project against the reliability and time savings of hiring a professional. Key differences hinge on material choices, labor costs, and the complexity of access and electrical work.
DIY kits cost $50–$300 plus time; pros charge $300–$1,200 depending on travel, permits, and wiring.
Warranty, safety, and code compliance favor professional installation.
Common Mistakes and How to Avoid Them
Many homeowners make preventable errors when protecting attic pipes, each with distinct consequences.
Excessive insulation can trap moisture and promote rot. Improper heat tape installation creates electrical hazards. Neglecting ventilation or altering combustion air pathways can produce dangerous backdrafting.
Clear guidance on proper materials, installation, and airflow prevents these common problems.
Overinsulating causing moisture problems
Excessive insulation in an attic can inadvertently trap moisture against pipes, creating conditions that promote corrosion, mold growth, and reduced insulation effectiveness.
Homeowners should balance insulation thickness with proper ventilation, maintain vapor barriers, and guarantee pipe insulation materials breathe appropriately.
Regular inspections detect condensation, and selective removal or repositioning of insulation prevents chronic dampness without compromising thermal protection.
Incorrect use of heat tape and electrical hazards
Installers and DIYers sometimes misuse heat tape, creating fire and shock risks when it is applied to incompatible pipe materials, left overlapped, plugged into unprotected outlets, or installed without following manufacturer instructions.
Proper practice requires selecting UL-listed tape for the pipe type, avoiding overlaps, using ground-fault-protected circuits, securing per instructions, and periodic inspection for damage or wear to prevent electrical hazards and fires.
Ignoring attic ventilation or creating combustion risks
After addressing electrical risks from improper heat-tape use, attention must turn to attic ventilation and combustion hazards, which present a different but equally serious set of problems.
Poor ventilation traps cold air and moisture, increasing freeze risk and structural decay. Blocking soffits or installing unshielded heat sources creates fire and CO dangers.
Guarantee proper vents, clear airflow paths, and use approved, vented heating solutions installed by professionals.
Troubleshooting Frozen Pipes and Emergency Response
The section outlines clear steps for safely thawing a frozen attic pipe, including recommended tools and precautions.
It highlights warning signs of a burst pipe and immediate mitigation measures to minimize water damage.
Guidance is provided on when to shut off the water and contact an emergency plumber.
How to safely thaw a frozen pipe step-by-step
Begin by locating the frozen section and shutting off the water supply to that line or the main valve to prevent pressure buildup and potential bursts.
Open nearby faucets to relieve pressure and confirm ice location.
Apply heat gradually using a hair dryer, heat lamp, or electric space heater; avoid open flames.
Wrap with warm towels, monitor progress, and check for leaks before restoring full water flow.
Signs a pipe has burst and immediate mitigation steps
Recognize a burst pipe quickly by watching for sudden loss of water pressure, visible water pouring from walls, ceilings, or floors, steadily rising water stains, or the sound of rushing or dripping when fixtures are off.
Immediately move occupants away from wet areas, contain spreading water with towels and buckets, protect valuables, shut off electricity to affected zones if safe, and document damage for insurers.
When to shut off water and call an emergency plumber
Any sudden loss of flow, visible bursts, or persistent pooling of water signals an immediate need to stop the supply and summon professional help.
Homeowners should shut off the main valve, open faucets to drain lines, and disconnect power to affected areas.
If freezing persists, insulation or temporary heat won’t suffice; call an emergency plumber for repair, leak detection, and safe thawing to prevent further damage.
Maintenance Checklist and Seasonal Preparation
A concise seasonal plan helps prevent attic pipe freezes by specifying pre-winter tasks and simple winter routines.
Recommended actions include a quick inspection schedule, targeted repairs or insulation updates, and nightly or weekly checks while temperatures remain low:
- Pre-winter inspection timeline and tasks
- Ongoing monitoring and simple winter routines
- Quick-response steps for detected issues
These items guide routine maintenance and reduce emergency repairs.
Pre-winter inspection timeline and tasks
One clear schedule for pre-winter attic pipe inspection breaks tasks into intervals—early fall, late fall, and immediate pre-freeze—so homeowners can prioritize checks and repairs before temperatures drop.
Early fall: inspect insulation, seal attic penetrations, document pipe layout.
Late fall: test heat sources, replace deteriorated insulation, secure loose pipes.
Immediate pre-freeze: confirm insulation coverage, repair leaks, stock emergency supplies.
Ongoing monitoring and simple winter routines
Following the pre-winter inspection schedule, regular monitoring and simple winter routines keep attic pipes protected throughout cold spells.
Homeowners should check insulation integrity, thermostat setback settings, and pipe wrap weekly.
Maintain a steady low heat, run faucets briefly during extreme cold, and test alarms and moisture sensors.
Document observations, address drafts promptly, and schedule professional service if temperatures or performance deviate.
When to Upgrade Your Plumbing or Attic System
Signs such as repeated freeze incidents, persistent condensation, or brittle and corroded pipe sections indicate that rerouting or replacement may be necessary.
Relocating supply lines into conditioned space reduces freeze risk, lowers repair costs, and improves overall system reliability.
The following guidance explains when upgrades are warranted and the practical benefits of moving plumbing out of the attic.
Indicators that rerouting or replacing pipes is necessary
Persistent leaks, repeated freeze events, or frequent ice buildup in an attic signal that simple insulation or heat-tracing may no longer suffice; these patterns point to underlying layout or material problems that warrant rerouting or replacing pipes.
Additional indicators include extensive corrosion, multiple freeze-related repairs, inadequate clearance from cold zones, inaccessible shutoffs, and chronic pressure loss — all justify evaluating relocation or full replacement.
Benefits of relocating pipes to conditioned space
A straightforward and durable solution is relocating vulnerable water lines from an unheated attic into conditioned space, where stable temperatures and easier access reduce freeze risk and maintenance costs.
This approach lowers burst potential, simplifies insulation and repairs, increases pipe longevity, and can improve energy efficiency.
It also minimizes emergency disruption and insurance exposure, offering a proactive, cost-effective long-term mitigation strategy for homeowners.
Real-Life Examples and Small-Scale Case Scenarios
The section presents concise real-life examples of attic pipe protections that homeowners implemented successfully, such as added insulation, heat tape, and targeted air sealing.
It also contrasts these with small-scale failures where temporary fixes were insufficient and led to frozen pipes or water damage, necessitating professional repair or system upgrades.
Readers are encouraged to compare outcomes to their own situations to judge when DIY measures suffice and when to call a plumber.
Typical homeowner fixes that succeeded
Several homeowners reported simple, low-cost interventions that prevented attic pipe freezes during cold snaps.
Examples included adding foam pipe insulation, sealing attic air leaks with caulk and weatherstripping, installing inexpensive heat tape on vulnerable runs, and improving attic insulation coverage.
Others used temporary controlled warm-air circulation or kept cabinet doors open to distribute heat.
These measures reliably reduced freeze incidents in modestly exposed systems.
Failures that required professional remediation
While many homeowners solved minor freeze risks with DIY measures, some situations exceeded amateur remedies and required professional intervention.
Examples included collapsed insulation revealing hidden drafts, corroded fittings that leaked under heat tape, and improperly routed pipes freezing repeatedly.
Contractors performed pipe relocation, insulation replacement, vapor barrier sealing, and targeted heating solutions to restore function and prevent recurrence.
Conclusion
In sum, homeowners can ward off attic pipe freezes through inspection, insulation, and mindful heat management—small steps that yield big returns. Like a watchful lighthouse guiding ships, routine checks, sealed penetrations, and targeted heating steer pipes away from sudden ice. When prevention falters, swift thawing and repairs limit damage. With seasonal preparation and timely upgrades, attic plumbing remains resilient, turning winter’s threat into a manageable, familiar routine.