How to Install Sprinkler Valves: Step-by-Step Guide for DIY Irrigation Success
To install sprinkler valves effectively, start by planning your irrigation zones and selecting appropriately sized valves. Locate a frost-protected manifold, then shut off the water supply and relieve pressure in the lines. Dig trenches to the required depth and prepare pipe ends for either solvent-weld or compression fittings. Install either inline or anti-siphon valves, connect them to the controller using direct-bury cable, and ensure they are organized for easy maintenance. After completing the installation, perform pressure and leak tests, adjust the solenoids and flow, and program the zones. For further guidance, refer to detailed instructions on wiring, troubleshooting, and seasonal maintenance.
Overview of Installing Sprinkler Valves
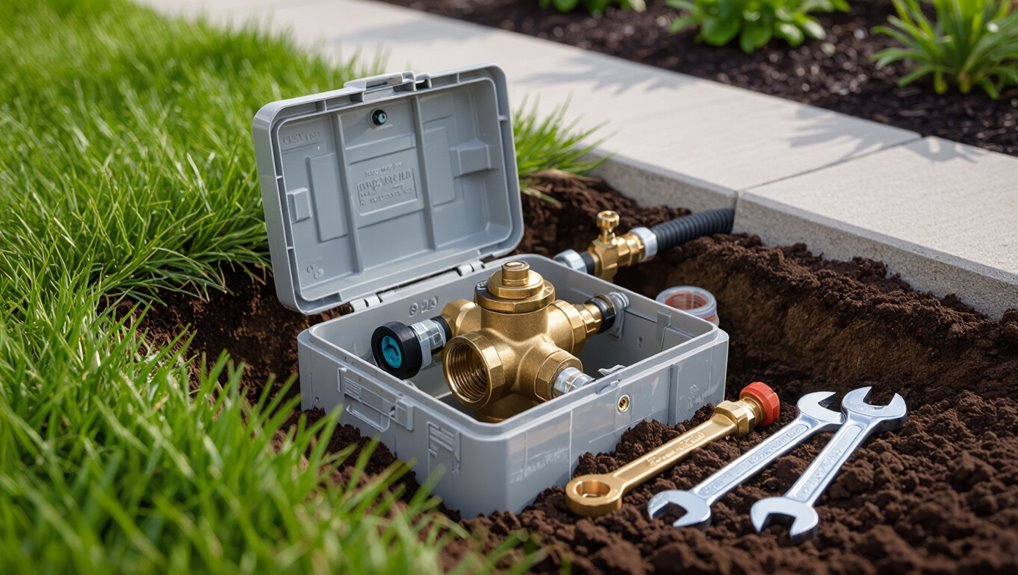
Sprinkler valves control water flow to different irrigation zones, and correct installation guarantees reliable operation, leak prevention, and efficient water use.
The main valve types—manual, electric, and hydraulic—are selected based on system size, control needs, and landscape layout.
Required skills, tools, and materials include basic plumbing and electrical familiarity, a pipe cutter, primer and solvent or fittings, appropriate valves, and a multimeter for testing.
What sprinkler valves do and why proper installation matters
Control valves regulate water flow and timing across an irrigation system, opening and closing to deliver precise volumes to each zone.
Proper installation prevents leaks, water waste, pressure loss, and electrical faults, ensuring reliable scheduling and plant health.
Clear placement, secure fittings, correct wiring and testing are essential steps in how to install sprinkler valves for long-term system performance and maintenance.
Types of sprinkler valves and common uses
Having covered why proper placement, secure fittings, and correct wiring matter, the discussion now moves to the common valve types used in irrigation systems and when each is appropriate.
Manual ball valves offer simple shutoff for zones. Electric solenoid valves enable automated scheduling and remote control. Master valves reduce downstream leaks.
Pressure-regulating valves protect sensitive emitters. Anti-siphon valves prevent contamination.
Choose by system scale and control needs.
Required skills, tools, and materials checklist
Before beginning valve installation, a clear inventory of required skills, tools, and materials guarantees the job proceeds smoothly and safely.
Essential skills: basic plumbing, pipe cutting, joint assembly, and electrical wiring for solenoids.
Tools: pipe cutter, crimper, screwdriver set, multimeter, wrenches, Teflon tape.
Materials: valves, PVC/PE pipe, fittings, solvent, clamps, wire connectors, and replacement seals.
Planning Your Valve Installation
Before digging or buying parts, the installer evaluates the irrigation layout and water source to determine required flow and pressure.
From those measurements, the correct valve sizes and counts are calculated, and ideal valve locations are selected for accessibility and freeze protection.
The planner also checks local codes, obtains any needed permits, and locates underground utilities.
Assessing your irrigation layout and water source
Several key checks set the foundation for a reliable valve installation: mapping the irrigation zones, confirming available water pressure and flow, and locating the main supply and backflow prevention.
The installer reviews zone layouts, identifies valve manifold placement, traces pipe routes, notes existing control wiring and isolation points, and verifies access for maintenance. Documenting these details avoids conflicts and simplifies installation sequencing.
Calculating flow rate, pressure, and valve sizing
Calculate the required flow and pressure for each irrigation zone to select appropriately sized valves and guarantee reliable operation.
Measure static and dynamic pressure at the main, then run the zone with one sprinkler to record flow and pressure under demand.
Match valve flow capacity (GPM) and pressure rating (PSI) to zone requirements, including solenoid specifications and head loss through fittings and pipe.
Choosing valve locations for accessibility and freeze protection
When selecting valve locations, prioritize easy access for maintenance and protection from freezing by placing boxes or enclosures in well-drained, sheltered spots close to the irrigation manifold and power source.
Group valves logically by zone, leave clearance for tool access and solenoid replacement, elevate or insulate boxes in frost-prone areas, and route wiring and mainlines to minimize exposure and simplify troubleshooting.
Local codes, permits, and utility locating
Before any digging begins, verify local codes, obtain any required permits, and call utility locating services to mark underground lines.
Compliance prevents fines and unsafe conflicts with gas, electric, water, or telecom infrastructure.
Submit accurate plans if required, allow inspection scheduling, and follow setback, depth, and backfill specifications.
Retain verification records and locate flags before trenching to guarantee legal, safe valve installation.
Preparing the Site and System
Before any work begins, water must be shut off and lines depressurized to prevent injury and leaks.
The crew should follow excavation best practices, keeping trench depths and slopes within local code and protecting nearby utilities.
Pipe ends must be cleanly cut and fitted with the correct connectors and solvent or thread sealant to guarantee watertight joints.
Shutting off water and depressurizing existing lines
Shut off the main water supply to the irrigation system and relieve pressure in the lines to prevent water spills and accidental valve activation.
Close the irrigation shutoff or meter valve, then operate a downstream manual valve or quick-coupler to bleed residual pressure.
Verify zero flow at a test point.
Wear gloves and eye protection; tag the shutoff to prevent accidental reopening during work.
Excavation best practices and trench depth guidelines
With the system depressurized and the shutoff secured, excavation can begin to create safe, stable trenches for valves and piping.
Crews should locate utilities, mark lines, and remove sod carefully.
Trenches must slope for drainage, be deep enough to frost- and traffic-proof pipe (typically 12–18 inches depending on climate/local code), and wide enough for fitting access and bedding material.
Compact backfill evenly.
Preparing pipe ends and using proper fittings
Prepare pipe ends by cutting squarely, deburring, and chamfering to guarantee tight, leak-free joints; use a fine-toothed saw or pipe cutter for PVC and a tube cutter for copper, then remove burrs with a reamer or file and smooth the outer edge.
Select compatible fittings, apply primer and solvent for PVC, use thread sealant or PTFE tape on threaded metal, and test assemblies for alignment.
Step-by-Step Valve Installation
The installation phase covers connecting inline valves to PVC or polyethylene pipe, fitting anti-siphon and atmospheric vacuum breaker devices, and wiring electrically operated valves to the controller with proper safety.
It also addresses assembling manifolds and grouping valves for multiple zones to simplify control and maintenance.
Finally, the procedure explains backfilling and securing valve assemblies to prevent shifting and guarantee long-term reliability.
Installing inline valves on PVC or polyethylene piping
Begin by choosing a straight section of PVC or polyethylene pipe that provides enough room for the valve body and a few inches of pipe on either side for fittings; this guarantees accurate alignment and simplifies cutting and gluing or crimping during installation.
Follow manufacturer torque specs, deburr and clean pipe ends, and secure unions or solvent welds to prevent leaks.
- Measure and mark
- Cut and prep
- Install and test
Installing anti-siphon and atmospheric vacuum breaker valves
After completing inline-valve placement and verifying straight, clean pipe sections, attention shifts to anti-siphon and atmospheric vacuum breaker (AVB) installations, which protect potable water from backflow when sprinkler heads are above ground level.
Position AVBs above highest sprinkler outlet, maintain required vertical clearance, use appropriate fittings and thread sealant, secure mounting to prevent stress, and test each device for proper venting and leak-free operation.
Wiring electrically operated valves to a controller safely
Prepare to wire the electrically operated valves to the controller by confirming power is off, reviewing the controller’s wiring diagram, and laying out valve runs to minimize wire length and crossing.
Use proper gauge, direct burial irrigation cable, and color-code common and station wires. Strip conductors, crimp or solder connections, waterproof splices with gel-filled connectors and tape, then test each station for correct operation.
Installing manifolds and grouping valves for multiple zones
With the controller and valve wiring confirmed and tested, attention moves to installing manifolds and grouping valves for multiple zones.
The installer aligns valves on a rigid manifold, spaces ports for pipe fittings, and secures unions for maintenance.
Each valve is labeled by zone and piped to mainline tees.
Pressure-rated connectors and proper slope guarantee reliable flow and simplified future servicing.
Backfilling and securing valves to prevent shifting
Set the valve box on a stable, level bed of compacted sand or gravel so the assembly sits squarely without rocking.
Backfill evenly with clean sand or screened soil, tamping in layers to eliminate voids around pipes and fittings.
Anchor larger boxes with concrete collars if necessary.
Verify solenoids and wiring remain accessible, then recheck alignment and test valves before final cover.
Testing and Commissioning the System
The installer begins commissioning with an initial leak and pressure test to confirm pipe integrity and system pressure.
Solenoids, diaphragms, and flow controls are then adjusted for proper seating and consistent operation.
Finally, controller zones and run times are programmed and coverage is verified, with emitters and rotors tweaked as needed.
Initial leak test and pressure checks
Begin by isolating the newly installed valve assembly and pressurizing the main line slowly to the system’s normal operating pressure while monitoring gauges.
Inspect all joints, fittings, and solenoid connections for visible leaks.
Listen for hissing and check for pressure drops over a 10–15 minute interval.
Record static and working pressures, compare to design values, and tag any deviations for repair before full commissioning.
Adjusting solenoids, diaphragm seating, and flow controls
Adjust solenoids, verify diaphragm seating, and fine-tune flow controls to guarantee each valve responds reliably and delivers the aimed pressure and volume.
Inspect solenoid plunger movement, secure coil connections, and replace faulty seals.
Confirm diaphragm sits flat with no wrinkles or debris.
Adjust manual bleed or flow-limiting screws to balance zones, observing pressure gauges and flow meters until stable, then recheck for leaks.
Programming controller zones and run times
With solenoids, diaphragms, and flow controls verified, attention turns to programming the controller zones and run times for system testing and commissioning.
Set each zone’s duration based on soil type, plant needs, and sprinkler output. Stagger start times to prevent pressure drop.
Run manual tests for each station, observe valve response and leak indicators, log settings, and adjust schedules for seasonal changes.
Verifying coverage and making emitter/rotor adjustments
Inspecting coverage and fine-tuning emitters and rotors guarantees uniform water distribution across all planted areas.
The installer activates each zone, watches spray patterns, and notes dry or oversaturated spots. Emitters are adjusted for flow, rotors for arc and radius, and nozzle swaps or pressure regulators are used as needed.
Final checks confirm overlap, eliminate runoff, and document settings for seasonal tweaks.
Common Problems and Troubleshooting
After commissioning, the installer inspects for common problems such as leaks, slow flow, and valve hammer to determine whether fittings, pressure, or pipe damage are the cause.
Electrical faults—faulty wiring, stuck solenoids, and failed continuity—are tested with a multimeter and isolated from hydraulic issues.
The technician also checks for debris and mineral buildup, notes signs that a valve should be replaced, and clears or replaces components as needed.
Diagnosing leaks, slow flow, and valve hammer
Diagnosing leaks, slow flow, and valve hammer begins with observing symptoms at the controller and at the valve itself, then narrowing the cause through targeted checks of pressure, flow, seals, and electrical operation.
Inspect joints, diaphragms, and solenoid seating for damage or debris. Measure inlet pressure and flow rate, isolate zones to localize issues, and replace worn seals or add shock arrestors to cure hammer.
Electrical issues: faulty wiring, stuck solenoids, and continuity tests
Electrical failures are a common cause of irrigation downtime, and they typically present as valves that won’t open, won’t close, or respond intermittently.
Technicians check controller settings, fuse and transformer output, and perform continuity tests across valve pairs.
Faulty wiring, corroded connectors, or shorted coils cause misbehavior; stuck solenoids may be freed by manual plunger movement or require coil replacement if resistance readings fall outside spec.
Handling debris, mineral buildup, and valve replacement indicators
Inspecting and addressing debris and mineral buildup is essential to maintaining reliable sprinkler valve function and preventing premature replacement.
Technicians should remove grit, clean diaphragms, and flush lines; use vinegar or descalers for calcium deposits.
Test valves after cleaning for proper seal and response.
Replace valves when persistent leaks, warped diaphragms, corroded bodies, or repeated electrical failures occur despite maintenance.
Maintenance and Winterization
A clear routine maintenance schedule should list parts to inspect regularly, including solenoids, diaphragms, seals, and wiring.
Before freezing weather, valves should be drained or blown out following manufacturer guidelines to prevent freeze damage.
Removable components should be cleaned, dried, and stored indoors for the off-season to extend service life.
Routine maintenance schedule and parts to inspect
Routine maintenance guarantees reliable operation and extends the life of sprinkler valves.
Inspections should occur seasonally and after heavy use, focusing on wear, leaks, and electrical connections.
Replace worn diaphragms, solenoids, and valve seats promptly. Clean debris and confirm proper seating.
- Diaphragm, seals, and seats
- Solenoid and wiring
- Body, screws, and debris filters
Steps to winterize valves and prevent freeze damage
After completing seasonal checks and replacing worn parts, attention should turn to winterizing valves to prevent freeze damage.
Drain systems using manual bleeds or automatic drains, shut off and isolate main water supply, and remove backflow devices if required.
Insulate aboveground components with foam covers and wrap exposed piping.
Verify solenoids and wiring are dry and protected before cold onset.
Off-season storage and cleaning for removable components
Remove, clean, and store removable components in a way that prevents corrosion and preserves functionality.
Disassemble solenoid caps, diaphragms, and filters; rinse with fresh water, gently scrub mineral deposits, and air dry.
Apply a light, specified lubricant to seals.
Place parts in labeled, sealed containers with desiccant.
Store containers in a cool, dry location away from sunlight and freezing temperatures until reinstallation.
Upgrades, Alternatives, and Cost Considerations
Consideration of upgrades such as smart controllers, flow sensors, and pressure regulators can improve efficiency and fault detection.
The trade-offs between manual and automatic valves hinge on cost, convenience, and maintenance requirements. A typical cost breakdown — parts, labor, and possible permit fees — helps determine when professional installation is warranted.
Smart controllers, flow sensors, and pressure regulators
Upgrading a basic irrigation setup with smart controllers, flow sensors, or pressure regulators can greatly improve water efficiency, system reliability, and long-term operating costs. Smart controllers automate schedules; flow sensors detect leaks; regulators protect emitters. Initial costs vary, but payback often follows reduced waste and maintenance.
| Device | Benefit | Typical Cost |
|---|---|---|
| Smart controller | Automation, weather adapt | $100–$400 |
| Flow sensor | Leak detection | $50–$200 |
| Pressure regulator | Stable pressure | $20–$100 |
Pros and cons of manual vs. automatic valves
When choosing between manual and automatic sprinkler valves, the decision hinges on factors like convenience, cost, maintenance, and system complexity.
Manual valves are inexpensive, simple, and reliable but require hands-on operation and risk inconsistent irrigation.
Automatic valves enable scheduling, zoned control, and water savings but add expense, electrical or controller needs, and potential failure points requiring occasional troubleshooting.
Typical cost breakdown and when to hire a professional
Because costs vary with system size, valve type, and site conditions, a clear cost breakdown helps homeowners weigh DIY versus professional installation.
Typical expenses: valves $15–$80 each, controllers $50–$300, piping/fittings $20–$150, wiring $10–$60, and labor $50–$150/hour.
Hire a professional for complex zoning, poor drainage, mains pressure issues, permit requirements, or when reliable long-term performance is critical.
Practical Tips and Best Practices
The section outlines time-saving installation shortcuts that preserve workmanship, such as prefabricating manifolds and using proper fittings to reduce rework.
It also highlights safety precautions to prevent injury and property damage, including proper shutoffs, protective gear, and safe trenching practices.
Finally, it covers environmental considerations and water-efficient strategies like pressure regulation, smart controllers, and matched precipitation rates.
Time-saving installation shortcuts that don’t compromise quality
Installers can shave hours from a job without sacrificing reliability by prioritizing layout planning, using quality prefabricated fittings, and staging materials before trenching begins.
Quick testing of manifolds, labeling lines, and choosing modular valve assemblies reduce callbacks. Efficient use of trenching equipment and measured pipe runs minimizes waste.
- Preassemble manifolds and fittings
- Label and map circuits
- Batch-test assemblies before burial
Safety precautions to avoid injury and property damage
After streamlining layout and testing, attention must shift to safety practices that prevent injury and property damage during valve installation.
The installer should shut off mains, relieve pressure, and lock out controls. Use proper PPE, insulated tools for electrical connections, and sturdy ladders.
Verify utility locations before digging, secure heavy components, and follow local codes to reduce risk and guarantee reliable operation.
Environmental considerations and water-efficient strategies
When considering sprinkler valve installation, attention to environmental impact and water efficiency reduces runoff, conserves supply, and improves system performance.
Select low-flow heads, smart controllers with weather sensors, and proper zoning to match plant needs. Guarantee leak-free connections, pressure regulation, and mulch to reduce evaporation.
Schedule watering for early morning and monitor soil moisture to avoid overwatering and runoff.
Conclusion
The guide empowers homeowners to install sprinkler valves confidently, turning a challenging chore into an achievable project. With careful planning, correct tools, and attention to testing, systems perform reliably season after season. Troubleshooting and maintenance prevent most failures, while thoughtful upgrades add convenience and savings. Though a single misstep can feel like the end of the world, following these steps keeps irrigation simple, efficient, and surprisingly satisfying for the dedicated DIYer.