How to Fix Shower Leaking Through Ceiling: Step-by-Step Repair Guide
If your shower is leaking through the ceiling, it’s essential to identify and stop the source of the leak before addressing any water damage. Begin by shutting off the water supply and electricity to the area. Contain the leak to prevent further damage, then thoroughly inspect the shower, plumbing lines, and attic. Conduct controlled water tests to pinpoint the leak, checking grout, caulk, shower pans, valves, and drains for any issues. Repair or replace any damaged components, and remove wet drywall and insulation. After drying the area, treat for mold and restore finishes. Follow the detailed step-by-step guide for diagnostics, repair options, and preventive measures.
What Causes Water to Leak Through a Ceiling from a Shower
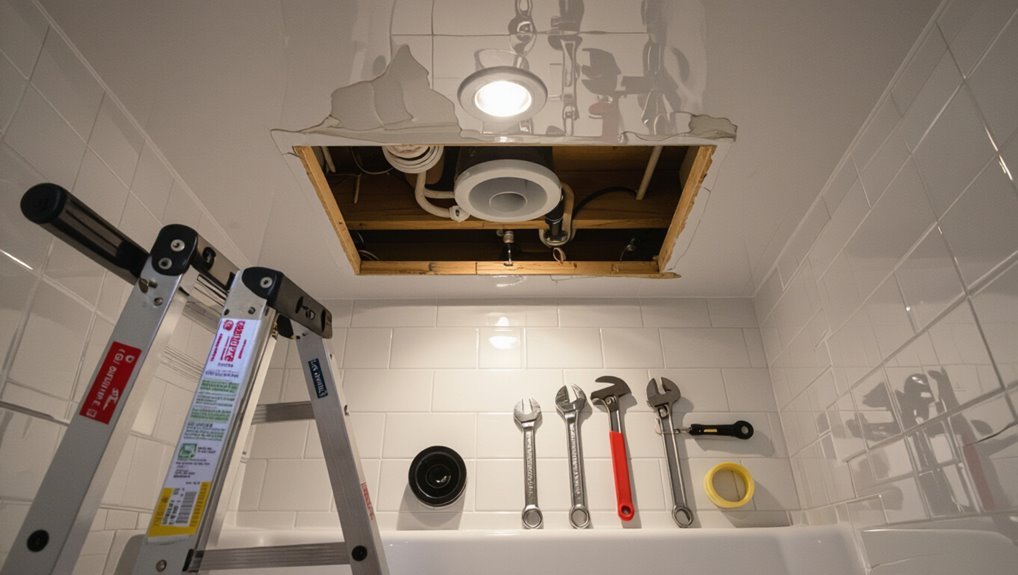
Leaks from showers into ceilings typically stem from structural failures like cracked tiles or bad grout, plumbing issues such as damaged drain or supply lines, or unrelated roof and attic problems that allow water to track into the same space.
Distinguishing the source relies on timing (water during shower use points to the shower), location of wetness, and visible signs like staining along pipes or roof seams.
Urgent indicators include persistent mold growth, a sagging ceiling, or proximity to electrical fixtures, all of which require immediate attention.
Common structural and plumbing sources of shower-to-ceiling leaks
One common homeowner discovery is water staining or dripping through a ceiling beneath a bathroom; such shower-to-ceiling leaks stem from a limited set of structural and plumbing failures.
Typical sources include failed shower pan or liner, damaged tile grout or seams, loose or cracked drain assemblies, leaking supply or waste connections, and compromised flashing or underlayment.
Guidance on how to fix shower leaking through ceiling targets these areas.
How to identify differences between roof, pipe, and shower leaks
Distinguishing whether water seeping through a ceiling originates from the roof, a plumbing pipe, or the shower itself requires examining where stains appear, how water behaves during use, and any seasonal or weather-related patterns.
Roof leaks worsen with rain and center near the roofline; pipe leaks may be constant, localized above supply/drain runs; shower leaks correlate with shower use, grout/calk failures, or fixture seals.
Signs that the leak is urgent (mold, sagging ceiling, electrical risk)
When a shower-related ceiling leak shows signs of mold growth, a bulging or sagging ceiling, or reaches electrical fixtures, the situation becomes urgent because these conditions threaten health and structural or fire safety.
Immediate action includes stopping water, turning off affected circuits, and inspecting for structural compromise.
Mold requires remediation; sagging drywall risks collapse.
Call a licensed plumber, electrician, or contractor without delay.
Quick initial steps to stop further damage
First, the homeowner should shut off the shower’s water supply and, if there is any risk of electrical contact, switch off power to the affected area at the breaker.
Next, they can contain water with towels, buckets, and a tarp to protect floors and furnishings while monitoring the leak.
If the leak is large, uncontrollable, or poses structural or electrical danger, a licensed emergency plumber or electrician should be contacted immediately.
How to safely shut off water supply and electricity
At the first sign of ceiling leakage, the homeowner should immediately shut off the water supply to the affected area and cut power to nearby circuits to prevent further water damage and electrical hazard.
Locate the shower shutoff or main valve, turn clockwise to close, then switch off the corresponding breaker(s) at the electrical panel.
Verify no power and stop water flow before proceeding.
Temporary measures to contain the leak (towels, buckets, tarps)
After confirming water and power are shut off, the homeowner should act quickly to contain the leak and protect belongings.
Place buckets beneath drips, use towels to soak and direct water into containers, and replace saturated towels frequently.
Stretch a tarp or plastic sheeting over furniture and floors, securing edges with tape or weights to prevent spreading and minimize immediate water damage until permanent repairs begin.
When to call an emergency professional
Recognize when the situation exceeds DIY response and call an emergency professional immediately if water pours continuously, the ceiling bulges or sags, electrical fixtures are wet, or visible mold and heavy staining suggest prolonged saturation; these signs indicate structural risk, electrical hazard, or active contamination that require rapid assessment and mitigation by licensed plumbers, electricians, or water-damage specialists to stop further harm.
Promptly shut water and power if safe, document damage, and evacuate at-risk areas.
Tools, materials, and safety precautions needed for repair
The section lists essential diagnostic and repair tools such as leak detection kits, wrenches, pipe cutters, and a wet/dry vacuum.
It outlines common materials needed for fixes—plumbing sealants, waterproof membranes, replacement pipes and fittings, and grout or tile adhesive.
It also covers required safety gear (gloves, goggles, respirator), electrical precautions, and when permits or professional inspections may be necessary.
Essential tools for diagnosing and repairing shower leaks
A concise set of tools, appropriate materials, and strict safety precautions are essential before diagnosing or repairing a shower leak that penetrates a ceiling.
Recommended items: flashlight, moisture meter, pry bar, utility knife, screwdriver set, adjustable wrench, pipe cutter, inspection mirror, camera, leak detection dye, shop vacuum, drop cloths, gloves, safety goggles, respirator, and non-slip footwear.
Materials for common repairs (sealants, membranes, pipes, grout)
Following the tools and safety measures outlined previously, attention shifts to the specific materials used to stop leaks and restore shower assemblies.
Recommended items include silicone and polyurethane sealants, waterproofing membranes (liquid or sheet), PVC/CPVC/PEX replacement pipes and fittings, epoxy or cement-based grout, tile adhesive, and corrosion-resistant screws.
Select materials rated for wet areas and compatible with existing substrates.
Safety equipment and permit considerations
Before starting any repair, homeowners should gather appropriate personal protective equipment and confirm permit requirements to guarantee work proceeds safely and legally.
Essential PPE includes gloves, eye protection, respirator, knee pads, and non-slip footwear. Tools should have grounded cords or battery power.
Verify local building codes and obtain permits for structural, plumbing, or electrical work. Record inspections and retain receipts for compliance.
How to diagnose the exact source of a shower leak
A systematic approach begins with a visual inspection of the shower area and the attic or ceiling cavity for obvious damage, stains, or failed seals.
If nothing is immediately apparent, a controlled water test — directing water to specific fixtures while an observer watches below — helps isolate the leak location.
When visual checks and water testing are inconclusive, moisture meters, infrared cameras, and colored dye tests can pinpoint wet areas and the leak’s path.
Step-by-step visual inspection of shower area and attic
One clear visual inspection combines methodical checks of the shower enclosure, plumbing fixtures, and the attic space above to trace the leak’s path.
Inspect grout, caulk, tile joints, and shower pan for cracks or gaps. Examine faucet, valves, and supply lines for drips and corrosion.
In the attic, follow stains, wet insulation, and pipe connections upward to pinpoint the source.
How to perform a water test to isolate leak location
After visual inspection narrows potential weak points, a controlled water test confirms where water actually escapes.
One person runs water on specific shower areas—head, valve, door seams, wall tiles—while another observes below and in the attic.
Apply water for several minutes per section, watching for drips or stains.
Document timing and location to pinpoint the leak source before repairs.
Using moisture meters, infrared cameras, and dye tests
Use diagnostic tools to move from suspicion to certainty when pinpointing a shower leak. A moisture meter maps wet areas behind finishes; infrared cameras reveal temperature anomalies indicating hidden moisture paths.
Combine with dye tests in the tub and showerhead to trace active leaks visually. Record findings, prioritize repairs at the moisture source, and recheck after fixes to confirm the leak is resolved.
Step-by-step repairs by leak type
The following concise repair paths match common leak types and guide the reader from simple fixes to components that may require replacement.
- Repairing grout and tile joint leaks;
- Resealing or replacing shower door and pan caulking;
- Fixing shower pan cracks or failed liners
- Repairing or replacing leaking shower valves and cartridges;
- Fixing loose or damaged drain assemblies
A brief procedure for each category follows, noting tools, materials, and when to call a professional.
Repairing grout and tile joint leaks
Begin by identifying whether the leak originates from deteriorated grout between tiles or from failed caulk and tile joints, since each requires a different repair technique.
Inspect for cracked, missing, stained, or soft areas and run a water test to isolate the exact source before proceeding.
Remove damaged grout, clean joints, apply new polymer-modified grout, seal with penetrating sealer, and allow full cure before testing.
Resealing or replacing shower door and pan caulking
Once grout and tile joints have been ruled out or addressed, attention shifts to the seals around the shower door and pan, common sources of leaks that require different handling depending on whether the failure is visible mold, cracked caulk, or separated seams.
Remove old caulk, clean and dry surfaces, apply mildew-resistant silicone, tool joints smoothly, and allow full cure.
Replace damaged door gaskets if needed.
Fixing shower pan cracks or failed liners
Identify the leak source and match the repair method to the failure type before proceeding:
Hairline cracks in a fiberglass or acrylic pan, obvious fractures or holes, and failed vinyl liners each require distinct approaches and materials.
For hairline cracks, clean, sand, and apply epoxy or fiberglass repair kits.
For holes or severe damage, replace the pan.
For failed vinyl liners, remove and install a new liner or convert to a tile pan.
Repairing or replacing leaking shower valves and cartridges
Turn off the water supply and drain the lines before inspecting the valve assembly to prevent further damage and make diagnosis easier.
The technician removes trim, tests for external leaks, then isolates cartridge or valve body. Worn seals or corroded cartridges are replaced; loose packing nuts are tightened.
After reassembly, pressure tested and observed for leaks. Document parts and recommend preventive maintenance.
Fixing loose or damaged drain assemblies
Begin by isolating the drain area and drying the surrounding ceiling and tub so the exact leak location and type can be determined; common causes include loose flange connections, deteriorated gaskets, cracked tailpieces, or failed trap seals.
Remove trim and test with water to locate leak. Tighten or replace flange, gaskets, tailpiece, or trap as needed. Re-seal with plumber’s putty or silicone and retest.
Repairing plumbing supply or waste pipe leaks in wall or ceiling
Locate the leak precisely before cutting into walls or ceilings, then choose the repair method that matches the pipe type and failure mode—pinholes and small corrosion spots call for patching or epoxy.
Threaded joint leaks need tightening or replacing fittings and sealing with appropriate tape or compound.
Soldered copper joints require draining and re-soldering, while plastic (PVC/CPVC/PEX) failures are fixed by replacing the damaged segment and using solvent welds, push-fit fittings, or crimped connections as specified.
When exposed, clean, cut back to sound pipe, dry thoroughly, install correct replacement, pressure-test before closing wall, and restore finishes.
How to access and repair ceiling damage caused by the leak
The section outlines how to evaluate the ceiling’s structural integrity and check for mold after a shower leak.
It describes safe removal of wet drywall and insulation, followed by methods for repairing or replacing those materials.
It also covers matching ceiling texture and repainting to restore a finished appearance.
Assessing ceiling structural integrity and mold contamination
Inspect the ceiling for sagging, soft spots, staining, and visible mold to gauge structural compromise and contamination extent.
Evaluate joist alignment, plaster or drywall firmness, and any cracking around fixtures.
Use moisture meter readings and infrared imaging if available.
Note odor, discoloration patterns, and nearby venting.
Document findings, mark unsafe areas, and determine if professional structural or mold remediation assessment is required.
Removing damaged drywall and insulation safely
Begin by establishing a safe work area: shut off power to the affected room at the circuit breaker, cover floors and furniture with plastic, and wear gloves, eye protection, a dust mask or respirator rated for mold and dust, and a hard hat if ceiling collapse is possible.
Cut out wet or soft drywall beyond saturated edges, remove insulation with minimal agitation, bag contaminated materials, and label for disposal.
Inspect framing and vent area.
Repairing and replacing ceiling drywall and insulation
Access the damaged area by cutting back to solid, dry drywall and removing any remaining wet insulation, taking care to expose the ceiling joists and any plumbing or venting lines for inspection.
Measure and install new insulation to match R-value, fit drywall panels to span joists, screw securely, tape and apply joint compound, and allow proper drying before proceeding to texture and paint.
Matching texture and repainting the repaired ceiling
With the drywall taped, mudded, and fully cured, attention turns to matching the existing ceiling texture and preparing for repainting.
The technician assesses texture type—knockdown, orange peel, or popcorn—then applies matching compound with appropriate tools.
After drying and light sanding, primer seals repairs.
Finally, two coats of ceiling paint restore uniform color and finish, blending new work with surrounding surfaces for an invisible repair.
When to replace key shower components versus repair
Decisions between repairing and replacing shower pans or stalls hinge on visible damage, recurring leaks, and the extent of underlying structural rot.
Homeowners should weigh immediate patch costs against long-term lifespan and reliability of a full replacement.
When replacement is chosen, selection should consider material durability, installation complexity, and budget to prevent future ceiling damage.
Indicators that require shower pan or stall replacement
A clear set of indicators distinguishes repairable shower issues from those that require replacing the pan or entire stall.
Persistent water staining, rot or soft subflooring, widespread cracked or delaminated pan material, chronic leaks after multiple repairs, mold growth embedded in structure, significant tile failure or loose substrate, and visible structural movement all signal replacement rather than further patching.
Cost and lifespan comparisons: patch vs. full replacement
Cost-benefit analysis helps determine whether a patch or full replacement is appropriate by comparing upfront costs, expected service life, and the likelihood of recurring problems. Short repairs cost less now but may recur; full replacement raises initial expense yet extends lifespan and reduces future leaks. Consider age, damage extent, and warranty when deciding.
| Option | Typical Cost | Expected Lifespan |
|---|---|---|
| Patch | Low | Short |
| Replacement | High | Long |
How to choose a replacement shower system
When recurring leaks, extensive corrosion, or outdated components persist despite targeted repairs, homeowners should evaluate replacing the shower system rather than pursuing more patches.
Assess water damage, plumbing layout, and budget. Prioritize durable valves, corrosion-resistant fixtures, and proper drain assemblies.
Choose certified installers and warranty-backed products.
Replace when cumulative repair costs approach replacement or when functionality, safety, or efficiency cannot be reliably restored.
Preventative maintenance to stop future leaks
A concise preventative plan begins with a regular inspection checklist covering visible shower fixtures, tile grout and sealant, and attic areas under the shower.
Recommended products and practices for durable waterproofing include high-quality silicone or polyurethane sealants, cement backer board where applicable, and proper flashing techniques.
A seasonal and long-term maintenance schedule — quarterly quick checks, annual thorough inspections, and component replacement timelines — helps catch issues before they become leaks.
Regular inspection checklist for shower and attic
Establishing a concise inspection checklist helps homeowners detect early signs of shower and attic moisture issues before they escalate into ceiling leaks.
Monthly checks should include grout and caulk condition, shower drain flow, visible mold or discoloration, and vent operation.
Quarterly attic inspections: roof penetrations, insulation dampness, exhaust fan ducts, and any stains or musty odors.
Document findings and schedule repairs promptly.
Best products and practices for long-lasting waterproofing
Several key products and practices form the foundation of long-lasting waterproofing for showers and ceilings: high-quality silicone or urethane caulk for joints, polymer-modified cementitious membranes for substrate protection, properly sized and insulated exhaust ducts, and routine replacement of grout sealers every one to two years.
Use stainless-steel fasteners, bonded niche/flange systems, linear drains with waterproofing-compatible membranes, and guarantee tiled surfaces slope correctly toward drains.
Seasonal and long-term maintenance schedule
One clear seasonal and long-term maintenance schedule prevents small issues from becoming costly ceiling leaks.
Regular inspections, cleaning, and minor repairs extend waterproofing life and catch failures early.
Recommended routine:
- Quarterly visual checks: grout, caulk, shower fixtures, and ceiling stains.
- Annual resealing: grout and caulk renewal; replace worn membranes.
- Post-storm inspection: verify flashing, vents, and roof drainage for leaks.
Common mistakes to avoid when fixing shower leaks
Homeowners should be warned about DIY errors that can worsen leaks or void warranties, such as improper sealant use or removing manufacturer parts.
Temporary patches often become permanent problems when underlying causes are not addressed.
The next section will outline common pitfalls and how to avoid them.
DIY errors that worsen leaks or void warranties
Avoiding common DIY mistakes is essential when repairing a shower leak, because improper fixes can exacerbate damage or void product warranties.
Using incorrect sealants, over-tightening fittings, neglecting manufacturer installation steps, or patching without addressing the source often worsens leaks.
Unlicensed electrical or plumbing alterations and removing labeled components can void warranties and local codes; professional consultation is advised for complex or unclear issues.
When temporary fixes become permanent problems
Patchwork that’s meant to hold until a proper repair can be made often becomes the de facto solution, creating bigger problems down the line.
Temporary seals, quick caulking, and patching drywall without addressing the source mask leaks, promote mold, and destabilize structures.
Relying on shortcuts may void warranties, increase repair costs, and necessitate full replacements that could have been avoided with timely professional intervention.
Typical repair timelines and cost estimates
Typical repair types—caulking and grout touch-ups, replacement of shower pans or valves, and ceiling drywall or mold remediation—each carry distinct time and cost ranges.
Estimates should list labor, materials, permits, and contingency so homeowners can compare apples to apples.
When obtaining contractor quotes, ask for a written scope, timeline, itemized pricing, proof of insurance, and references.
Time and cost breakdown by repair type
When evaluating leaks through a ceiling, repair options range from quick, low-cost fixes to multi-day, higher-budget projects; understanding the likely timeline and expense for each helps prioritize action. Typical breakdown: minor caulking or flange reseal—hours, $50–$200. Tile reglue or grout—1 day, $150–$500. Shower pan or plumbing replace—2–5 days, $800–$3,500.
| Repair type | Time & cost |
|---|---|
| Caulking/seal | Hours; $50–$200 |
| Grout/tile | 1 day; $150–$500 |
| Valve/pipe | 1–3 days; $300–$1,200 |
| Pan replacement | 2–5 days; $800–$3,500 |
| Ceiling repair | 1–2 days; $200–$800 |
How to get reliable contractor quotes and what to ask
How should a homeowner approach getting dependable contractor quotes for a ceiling leak from a shower?
Obtain at least three written bids detailing scope, materials, labor, permits, and timelines.
Request references, proof of licensing and insurance, and a clear warranty.
Ask for phased costs (diagnosis, repair, finish), start and completion dates, and contingencies for hidden damage.
Compare line-item pricing and communication responsiveness.
Signs you need a professional plumber or contractor
When a leak involves structural damage, exposed wiring, or visible mold, a professional contractor or licensed plumber is usually required to guarantee safe, code-compliant repairs.
Homeowners should check licenses, insurance, and trade references before hiring, and request written warranties for both work and materials.
Verifying credentials through local licensing boards and asking for proof of liability and warranty coverage helps reduce risk and avoid future costs.
Complex scenarios requiring structural, electrical, or mold remediation
Although some leaks can be traced to a loose valve or worn seal, certain signs indicate problems beyond basic plumbing repairs and warrant a licensed professional: widespread ceiling sagging, visible structural damage, electrical fixtures exposed to water, recurrent or extensive mold growth, compromised insulation, or leaks persisting after standard fixes.
These conditions require coordinated structural, electrical, and mold remediation expertise to guarantee safety and code compliance.
How to verify credentials and warranties
Because repairs involving ceilings, wiring, or mold can escalate liability and cost, homeowners should confirm a contractor’s licensing, insurance, and warranty before work begins.
Check state license numbers online, verify general liability and worker’s compensation certificates, and request written warranties specifying coverage duration and scope.
Seek references, reviews, and written estimates.
Decline contractors unwilling to provide verifiable credentials.
Final checklist before closing up the ceiling and finishing
Before sealing the ceiling, the repaired area should be tested repeatedly with water to confirm the leak is fully eliminated and no hidden drips remain.
The inspector should also verify that ventilation is restored or improved to control humidity and reduce mold risk.
Only after successful tests and ventilation measures are documented should the ceiling be closed and finished.
Verifying leak elimination with repeated water tests
Begin a systematic series of water tests to confirm the repair holds under typical and extended use.
Run short showers at varied temperatures and pressures, inspecting the ceiling and attic for moisture after each.
Follow with a prolonged soak (20–30 minutes) to simulate extended use.
Repeat tests over 24–48 hours, documenting results; only close the ceiling when no dampness or staining appears.
Ensuring proper ventilation and mold prevention after repair
Having confirmed the leak is resolved through repeated water tests, the focus shifts to ventilation and mold prevention as the final step before closing the ceiling.
Guarantee exhaust fan capacity matches shower size, verify ducting to exterior, and restore proper insulation and vapor barrier.
Treat exposed framing with mold inhibitor, allow thorough drying with dehumidifier, and document conditions before installing drywall.
Conclusion
Coincidentally, the drip heard while making morning coffee turned into the very clue that saved the ceiling. The homeowner followed the guide’s diagnostics, stopped the immediate damage, and patched the exact leak—only to discover the old flange gasket owed its retirement to the same storm that loosened the attic vent. By addressing causes, using proper tools, and knowing when to call a pro, the repair proved straightforward, practical, and oddly satisfying.