How to Fix a Cracked Copper Pipe Without Replacing It: Step-by-Step Repair Methods
How to Fix a Cracked Copper Pipe Without Replacing It: Step-by-Step Repair Methods
If you have a cracked copper pipe, you can fix it without replacement by following a few straightforward methods. First, shut off the water supply, isolate any valves, and drain the lines. Next, assess the type of crack and its accessibility. For quick temporary fixes, use epoxy putty or a rubber patch. For medium-term solutions, consider a repair clamp or hose-clamped sleeve. For more permanent repairs, soldering, brazing, or using push-fit couplings are effective.
Ensure you clean, dry, and prepare the pipe surfaces before applying your chosen method. After completing the repair, test the pipe at low pressure and monitor for leaks. Below, we’ll outline step-by-step tools, safety tips, and method comparisons to help you through the repair process.
What to Do Immediately When You Discover a Cracked Copper Pipe
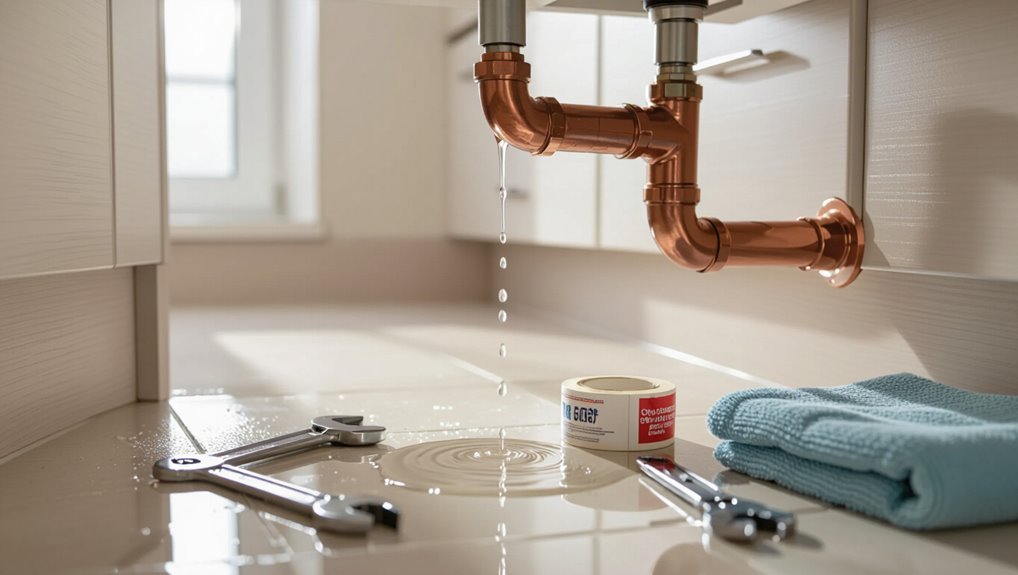
Upon discovering a cracked copper pipe, the first priority is to shut off the main water supply and any relevant local valves to stop flow and limit damage.
The person should also take quick safety precautions—turn off nearby electrical circuits, avoid standing water near outlets or gas appliances, and watch for slippery floors.
If the leak is large, uncontrollable, or risks structural or electrical hazards, contact an emergency plumber immediately.
Shut-off steps to stop water flow and prevent damage
Shut off the main water supply immediately to stop flow through the cracked copper pipe and limit damage.
Then isolate the affected branch valve, drain residual water by opening nearby taps, and relieve pressure.
Use a bucket and towels to contain drips.
Document valve positions and call a professional if unsure.
These steps enable prompt containment before attempting how to fix a cracked copper pipe without replacing it.
Quick safety precautions (electricity, gas, slippery floors)
After stopping the water and isolating the affected valves, attention should turn to immediate safety hazards before any repair begins.
Check for electrical risks: shut power to nearby outlets or appliances if water reached them.
Smell for gas; if detected, evacuate and ventilate without operating switches.
Clear and dry floors to prevent slips.
Use caution with temporary repairs until hazards are resolved.
When to call an emergency plumber
When a cracked copper pipe is discovered, assess whether the leak is controllable or life-safety threatens the area. If water cannot be stopped at a nearby valve, is flooding a risk, or are electrical or gas hazards present? Call an emergency plumber immediately.
If controllable, shut main water, isolate circuit breakers, move valuables, contain dripping with buckets, and schedule professional repair promptly to prevent escalation.
Quick Assessment: How to Evaluate the Crack and Pipe Condition
The inspector first categorizes the failure—hairline, pinhole, longitudinal crack, or joint leak—to guide repair options.
Next, they locate the exact breach using visual inspection, a paper towel or dye test, and, if needed, a controlled pressure check.
Finally, they evaluate surrounding water damage and how accessible the pipe is for repair or replacement.
Types of copper pipe cracks and failures (hairline, pinhole, longitudinal, joint leaks)
A quick visual and tactile inspection helps categorize copper pipe failures into four common types—hairline cracks, pinhole leaks, longitudinal splits, and joint leaks—each with distinct causes and implications for repair.
Hairlines are superficial stress fractures; pinholes are small corrosion breaches; longitudinal splits indicate metal fatigue or freezing; joint leaks arise from solder failure or loose fittings.
Severity and accessibility guide repair choice.
How to find the exact leak location (visual, paper towel, dye, pressure test)
Locating the exact leak begins with a systematic inspection that combines sight, touch, and simple tests to pinpoint water escape without unnecessary disassembly.
Visually trace wetness, corrosion, or green staining. Wipe suspect areas with a paper towel to reveal slow weeps.
Introduce food coloring or leak-detection dye into the flow for hidden drips. Perform a low-pressure test by isolating the section and observing for new moisture.
Assessing surrounding damage and accessibility
Before beginning repairs, inspect the area around the crack to determine how much water has affected nearby materials and how easily the pipe can be reached.
Note corrosion, softened wood, mold, or insulation saturation. Confirm access space for tools and whether drywall, flooring, or cabinets require removal.
Record pipe orientation, fittings, and nearby electrical or gas lines to plan a safe, efficient repair approach.
Tools and Materials You’ll Need for On-the-Spot Repairs
For an on-the-spot repair of a cracked copper pipe, the responder should gather a compact set of tools, materials, and safety gear to match the chosen method.
Below is a concise checklist to take into account before starting work:
- Pipe cutter, emery cloth, torch, wrench
- Epoxy putty, pipe clamps, rubber patch, repair sleeve, hose clamps, solder, flux
- Gloves, eye protection, fire extinguisher
- Small torch-safe bucket or drip pan, cleaning brush
- Replacement coupling or short length of copper pipe and fittings
Essential tools (pipe cutter, emery cloth, torch, wrench)
Repairing a cracked copper pipe requires a small set of reliable tools: a pipe cutter to make clean cuts, emery cloth to remove oxidation and prepare the joint, a torch for soldering or annealing, and an adjustable wrench for fittings.
Each tool serves a specific role—cutting squarely, cleaning surfaces, applying heat safely, and tightening or loosening connectors—ensuring a durable, professional repair when used correctly.
Common materials (epoxy putty, pipe clamps, rubber patch, repair sleeve, hose clamps, solder, flux)
A handful of common materials can stop a leak quickly and hold until a permanent fix is made: epoxy putty for molding a watertight seal, rubber patches paired with hose clamps or specialized pipe clamps for temporary wraps, and repair sleeves for more robust coverage.
When a soldered repair is possible, flux and solder are required to create a lasting joint.
Also useful are emery cloth, cleaning brushes, and replacement tubing.
Safety gear (gloves, eye protection, fire extinguisher)
Several essential items protect against common hazards when addressing a cracked copper pipe: cut-resistant gloves to shield hands from sharp edges and hot surfaces, safety goggles to prevent solder flux, metal shards, or pressurized spray from entering the eyes, and a nearby fire extinguisher rated for class B/C fires when using torches or hot work.
Additional gear includes long sleeves, heat-resistant gloves, and a face shield.
Temporary Emergency Repairs You Can Do Fast
The section outlines quick, temporary fixes for a cracked copper pipe, including step-by-step use of epoxy putty to seal leaks and the straightforward application of a rubber patch secured with hose clamps.
It also describes installing a repair clamp or a universal pipe repair kit and explains basic installation steps.
Guidance is provided on when such temporary measures are appropriate and when a permanent repair or professional service is required.
Using epoxy putty: step-by-step for immediate sealing
Mixing epoxy putty and applying it to a clean, dry section of pipe provides a fast, temporary seal that can stop leaks until a permanent repair is made.
The procedure: shut off water, dry and sand the area, knead putty per instructions, press firmly over the crack with overlapping layers, smooth edges, allow full cure time, and restore water to check for leaks.
Applying a rubber patch and hose clamps: quick containment method
Wrap a piece of rubber—cut from an inner tube, garden hose, or automotive hose—over the cracked section of copper pipe and secure it tightly with one or more hose clamps to contain leaks quickly.
Make sure the pipe is dry, center the patch over the breach, tighten clamps evenly, and test for drips.
This method is temporary; monitor pressure and replace properly when possible.
Using a repair clamp or universal pipe repair kit: installation steps
After containing an active drip with a rubber patch and hose clamps, a repair clamp or universal pipe repair kit offers a more secure, short-term fix that requires minimal tools.
Clean and dry the pipe, center the rubber gasket over the crack, position the metal clamp halves, and tighten bolts evenly until watertight.
Test under pressure and re-tighten if needed. Monitor for leaks.
When temporary fixes are acceptable and when they are not
When is a temporary repair acceptable, and when must a permanent fix be sought?
Temporary measures suit small pinholes, slow leaks, or overnight emergencies to stop water and buy time.
They are unacceptable for long cracks, corrosion, joints under pressure, or buried/main lines.
Permanent repair or replacement is required when leaks recur, structural integrity is compromised, or code compliance and safety matter.
Permanent Repair Options Without Replacing the Pipe
Permanent repairs can restore a cracked copper pipe without full replacement by using heat, fittings, or sleeves tailored to the damage.
Options include soldering for small, clean cracks after proper preparation, brazing when walls are thicker or the crack is larger, and using compression or push-fit couplings as quick mechanical fixes.
Epoxy-lined or mechanical repair sleeves offer a conservatively invasive alternative for sealing and reinforcing a damaged section.
Soldering a cracked copper pipe: prerequisites and step-by-step process
Before soldering, the pipe must be drained, thoroughly dried, and cleaned to bright copper to guarantee a reliable joint.
The technician then chooses between cutting out the damaged section and rejoining with a coupler or applying a soldered patch over the crack, each requiring different prep and tools.
Clear, step-by-step technique and proper flux and solder application determine whether the repair will be permanent without replacing the pipe.
Preparing the pipe (drain, dry, clean)
Several clear steps prepare a cracked copper pipe for a soldered permanent repair: fully drain the line, remove residual moisture, and clean the joint to bare metal.
Shut water supply, open nearby taps to relieve pressure, and flush remaining water. Use a clean cloth and compressed air to dry.
Remove oxidation and solder using emery cloth or a wire brush until bright copper is exposed.
Cut-out and rejoining vs. patch solder technique
With the pipe drained, dried, and cleaned to bright copper, the repairer must choose between cutting out the damaged section and rejoining the line or applying a soldered patch over the crack.
Cutting out offers a stronger, long-term fix using couplings or fittings; patch soldering is quicker for small cracks but requires flawless cleaning, flux, heat control, and pressure testing to guarantee durability and leak-free performance.
Brazing for larger cracks or thicker walls: when to choose brazing
Choose brazing when cracks are large, the pipe wall is thick, or service conditions demand a stronger, corrosion-resistant joint than soldering can provide.
Brazing uses higher temperatures and a brazing alloy to fuse metal, producing a robust, leak-resistant repair suited to high-pressure, high-temperature, or concealed locations.
It requires proper flux, torch technique, and often professional skill for reliable, code-compliant results.
Installing a compression or push-fit coupling around the damaged section
A repairer chooses between slip couplings and push-fit fittings based on access, pipe condition, and permanence required.
Slip couplings suit tight spaces and soldered repairs where the pipe ends can be deburred and slid together, while push-fit brands like SharkBite offer fast, tool-free installation when cutting out a section and immediate pressurization is needed.
Corrosion, pipe diameter, and whether the repair should remain removable determine the best fitting type.
When to use slip couplings, SharkBite, or similar fittings
When is a slip coupling, SharkBite, or similar push-fit fitting the appropriate permanent repair for a cracked copper pipe? Such fittings suit accessible, short sections of localized damage where remaining pipe is sound, size and material match, and pressure ratings are met.
They work well when soldering is impractical, during quick emergency repairs, or in retrofit situations, but inspect for corrosion and verify proper installation and testing afterward.
Sleeve repair with epoxy-lined or mechanical repair sleeves: application steps
Begin by isolating the damaged section and draining the line to remove pressure and moisture before fitting a sleeve; proper surface preparation and a dry, depressurized pipe are essential for either epoxy-lined or mechanical sleeves to bond or clamp correctly.
Clean and abrade copper, measure and select correct sleeve, apply epoxy liner or position mechanical sleeve, tighten clamps evenly, cure per manufacturer instructions, then restore pressure and test for leaks.
Step-by-Step Guide: Soldering a Crack Without Replacing the Pipe
The following section outlines a concise procedure for soldering a crack in a copper pipe without replacing the section.
It covers isolating and draining the line, thoroughly cleaning and applying flux to the damaged area, and using controlled heat and solder to seal the crack.
Final steps include cooling, pressure testing for leaks, and finishing touches to restore the pipe.
Preparing the work area and isolating the pipe
Clear the immediate area, remove nearby furniture or items, and lay down drop cloths to protect surfaces and catch flux or solder drips.
Then shut off the appropriate supply valves, tag them if needed, and relieve any pressure per protocol.
Arrange tools, heat shield, fire extinguisher, and ventilation.
Confirm adequate lighting and clear access to the cracked section before proceeding.
Draining and drying the line completely
With the work area secured and valves shut, attention turns to removing all water and moisture from the pipe section to be soldered.
The line is drained via low-point drains or opened fixtures, then blotted with clean rags.
Compressed air or a propane torch’s gentle heat (used cautiously and only after verifying no flammable vapors) dries the interior thoroughly before proceeding.
Cleaning and fluxing the damaged area
Begin by removing any remaining surface debris and corrosion around the crack using a wire brush or emery cloth until bare, shiny copper is exposed for at least an inch on either side of the defect.
Wipe clean with a cloth and apply a suitable flux evenly over the prepared area.
Confirm flux covers joints and the crack edges to promote solder adhesion; remove excess.
Applying heat and soldering the crack safely
Position the torch so the flame heats the pipe evenly around the prepared area, not directly on the crack, to draw solder into the joint by capillary action.
Heat until flux bubbles, then touch rosin-core or solder wire to the heated metal—not the flame—allowing solder to flow into the seam.
Move torch steadily, avoid overheating, and maintain proper ventilation and eye protection throughout the process.
Cooling, testing, and finishing touches
Once the solder has flowed and the joint has been heated evenly, allow the pipe to cool naturally to room temperature; rapid cooling with water can stress the metal and weaken the bond.
After cooling, inspect the seam for complete coverage and wipe away flux residue.
Pressurize the line slowly, check for leaks, tighten fittings if needed, and insulate the repaired section.
Troubleshooting Common Problems During Repair
When repairs do not go as planned, common issues include solder that will not flow or bond, persistent leaks after an attempted fix, and limited access that complicates work.
The discussion will cover causes and remedies for poor soldering, steps to diagnose remaining leaks, and alternative approaches when the damaged section is hard to reach.
It will also outline when corrosion or multiple pinhole leaks indicate that a simple repair is no longer viable and replacement is required.
Solder won’t flow or bond properly causes and fixes
Solder failing to flow or bond properly is a common obstacle during copper pipe repair and usually indicates issues with heat, cleanliness, or technique.
Causes include insufficient torch temperature, oxidized or dirty surfaces, mismatched flux, or poor joint fit.
Fixes: clean and sand joint, apply appropriate flux, preheat evenly to flux smoking point, guarantee tight fit, and feed solder into heated joint for capillary action.
Persistent leaks after repair diagnosis steps
If solder failed to flow or bond properly, and a repaired joint continues to leak, a systematic diagnosis is required to locate the persistent source.
Inspect adjacent fittings, hairline cracks, pinholes, and stress fractures with bright light and solvent cleaning.
Pressurize the system and watch for micro-leaks.
Verify water chemistry, temperature cycles, and mechanical strain.
Replace or re-solder only confirmed failure points.
Difficulty accessing the pipe alternative approaches
Because access can be limited by framing, insulation, or congested plumbing runs, technicians must consider alternative approaches rather than forcing a direct repair.
Options include using flexible repair sleeves, employing press-fit fittings accessed through small inspection holes, applying epoxy putty via injection ports, or rerouting flow temporarily with hose bypasses.
Document constraints, choose minimally invasive methods, and verify pressure integrity after repair.
Corrosion or multiple pinhole leaks when repair is not viable
When access limitations or confined repairs reveal wider deterioration, the technician must reassess whether local fixes are appropriate or if the copper run is compromised by widespread corrosion or multiple pinhole leaks.
If corrosion or numerous pinholes exist, patching becomes temporary, risk of failure rises, and systemic replacement or rerouting should be recommended.
Document findings, inform the owner, and provide costed replacement options.
Comparing Repair Methods: Durability, Cost, Skill, and Time
A concise comparison of epoxy putty, clamps, soldering, and push-fit couplings highlights trade-offs in durability, cost, required skill, and repair time for different locations and pipe conditions. The table below summarizes typical strengths and best-use scenarios to guide method selection. Practical choice depends on leak size, access, pipe condition, and whether a permanent or temporary fix is needed.
| Method | Best use / notes |
|---|---|
| Epoxy putty | Quick temporary seal on small fractures or hard-to-reach spots; low skill, low cost |
| Clamp | Temporary to medium-term fix for larger cracks or pinhole leaks on accessible straight runs |
| Soldering / push-fit coupling | Soldering: permanent repair on clean accessible copper with soldering skill; Push-fit: permanent, faster alternative where section replacement is possible |
Epoxy putty vs. clamp vs. soldering vs. push-fit coupling
Choosing the right repair method for a cracked copper pipe depends on the leak’s size and location, the homeowner’s budget and skill level, and how permanent the fix must be.
Epoxy putty: inexpensive, quick, temporary for small hairline cracks.
Clamp: low skill, moderate cost, good short-term seal.
Soldering: durable, requires skill and tools.
Push-fit coupling: reliable, faster than soldering, higher material cost.
When each method is most appropriate by location and pipe condition
Several factors — leak location, pipe accessibility, water pressure, and corrosion level — dictate which repair method is most appropriate.
Epoxy putty suits small surface cracks in hard-to-reach spots and low-pressure lines.
A clamp fits temporary fixes or larger hairline splits.
Soldering offers durable, permanent repairs where access and skill permit.
Push-fit couplings excel for clean breaks and quick, reliable replacements.
Maintenance After Repair and How to Prevent Future Cracks
After repair, the system should be pressure-tested and monitored for several hours to days to confirm leak-free performance.
Attention to water quality (pH control, corrosion inhibitors or sacrificial anodes/filters), proper insulation and freeze protection, and secure mechanical support will reduce corrosion and mechanical stress that cause future cracks.
Scheduled inspections and a timeline for full replacement when wear or recurring failures appear help prevent emergencies and extend system life.
Pressure testing and monitoring for hours/days after repair
Begin pressure testing once the repaired joint has cooled and any solder or adhesive has fully set.
Apply system pressure slowly to the normal operating level while watching for drops or visible leaks.
Continue monitoring pressure gauges and visually inspect the repair for several hours, then periodically over the next 24–72 hours.
Record any pressure decline, audible hisses, or moisture and address issues immediately.
Water quality and corrosion prevention (pH, anode/filtering)
Monitoring post-repair pressure and leak checks also reveal underlying water chemistry issues that can accelerate copper deterioration.
Water pH should be neutral to slightly alkaline; acidic water corrodes copper.
Install sacrificial anodes or consider dielectric filters and corrosion inhibitors where municipal treatment is unsuitable.
Periodic testing for pH, dissolved oxygen, and chloride levels helps detect corrosive conditions before they cause new pinholes or stress fractures.
Insulation, freezing protection, and mechanical support
Protect vulnerable copper runs with proper insulation, freeze protection, and mechanical supports to reduce thermal stress, prevent ice expansion, and limit vibration that can propagate hairline cracks into full fractures.
Use closed-cell foam or fiberglass wrap, heat tape where freezing is likely, and secure pipes with cushioned clamps spaced per code.
Maintain clearance from sharp edges and avoid excessive bending to minimize stress concentrations.
Scheduled inspections and when to plan a full replacement
Regularly scheduled inspections are essential after any copper-pipe repair to verify integrity, detect early signs of recurrent leaking or corrosion, and confirm that insulation and supports remain effective.
Inspectors should check joints, soldered areas, and wall thinning every six to twelve months.
Plan full replacement when corrosion is widespread, multiple repairs accumulate, pressure loss persists, or inspection reveals significant wall erosion compromising long-term reliability.
When to Hire a Professional Plumber
If leaks are extensive, water damage is present, or the crack affects a main supply line, a professional plumber should be called for repair or replacement.
Homeowners should ask prospective plumbers about scope of work, timeline, materials, and request written estimates for comparison.
They should also verify licenses, insurance, references, and any warranty or guarantee on the work before hiring.
Signs the damage requires professional repair or replacement
Several clear indicators show when a cracked copper pipe exceeds DIY scope and requires a professional plumber.
Persistent leakage despite temporary patches, extensive corrosion, multiple cracks or joint failures, hidden or inaccessible damage within walls or ceilings, significant water pressure loss, contaminated water discoloration, or structural compromise around piping all signal need for expert assessment and likely repair or replacement by a licensed plumber.
Questions to ask and estimates to obtain from plumbers
When hiring a plumber, what key questions should be asked and which estimates must be obtained to guarantee a transparent, reliable repair?
The homeowner should request scope details, written itemized estimates, labor rates, parts brands, repair timeline, and warranty terms.
Ask about experience with copper pipe repairs, required permits, inspection availability, and contingency costs.
Compare at least three bids before deciding.
How to verify credentials and warranties for repair work
After comparing bids and clarifying scope, the homeowner should verify the plumber’s credentials and the warranty terms that will protect the repair.
Confirm license number and insurance, check trade association memberships and online reviews, and request references.
Obtain a written warranty detailing duration, coverage, exclusions, and remedies.
Ascertain the contract names the technician, start date, and escalation process for disputes before work begins.
Conclusion
When a cracked copper pipe appears, swift, sensible action can avert catastrophe; one small patch can feel like saving the Titanic. Immediate containment, a clear assessment, and choosing between temporary clamps or permanent solder, epoxy, or compression fittings restore flow without full replacement. Proper tools, careful technique, and post-repair checks confirm longevity. If doubts persist or damage is extensive, a licensed plumber should be called to guarantee a safe, code-compliant fix.