How to Install CPVC Water Lines: Step-by-Step Guide for DIY Plumbing Success
To successfully install CPVC water lines, follow these essential steps: Start by planning your pipe route and shutting off the water supply. Drain the lines thoroughly before measuring and cutting the CPVC pipes squarely. After cutting, deburr and chamfer the ends for a smooth fit. Dry-fit the fittings to ensure proper alignment, then apply a CPVC-compatible primer and solvent cement. Insert the pipe into the fitting until it reaches the shoulder, giving it a quarter turn, and hold in place until the bond sets. Support the pipes with appropriate hanger spacing and account for thermal expansion. Conduct a pressure test with water, fix any leaks, and insulate or firestop any penetrations. For further details, tips, and safety precautions, continue reading.
Overview of CPVC Water Line Installation
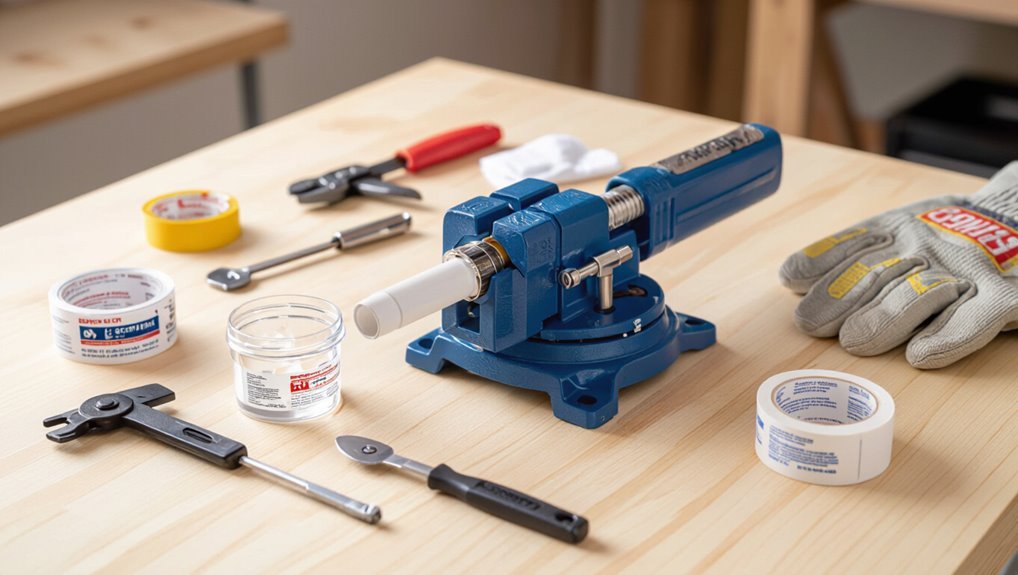
CPVC (chlorinated polyvinyl chloride) is a rigid plastic piping material valued for its corrosion resistance, ease of joining, and suitability for hot and cold potable water.
Typical uses include residential and light-commercial supply lines, while limitations involve temperature/pressure caps and incompatibility with certain solvents and UV exposure.
Installers should follow local plumbing codes, verify material approvals, and obtain permits when required.
What CPVC is and why choose it for water lines
A lightweight, durable plastic made from chlorinated polyvinyl chloride is widely used for residential and commercial hot- and cold-water distribution because it resists corrosion, handles higher temperatures than standard PVC, and offers reliable joint integrity when solvent-welded.
Its smooth interior reduces scale, it’s chemically stable, and installers prefer CPVC for longevity and ease of installation.
This explains why homeowners learn how to install CPVC water lines.
Common applications and limitations of CPVC plumbing
Serves well in residential and light commercial plumbing, chlorinated polyvinyl chloride tubing is commonly used for potable hot- and cold-water distribution, branch lines to fixtures, and recirculation loops where moderate pressure and elevated temperatures are expected.
It resists corrosion, scales and chemical degradation but has temperature/pressure limits, poor UV tolerance, and stricter joining requirements; not ideal for exterior, high-temperature steam, or direct sunlight exposure.
Basic building codes and permit considerations for CPVC
When installing CPVC water lines, local plumbing codes and permit requirements establish the minimum materials, joining methods, supports, and pressure/temperature ratings that must be met to confirm safe, code-compliant work.
Inspectors may require permits, approved fittings, temperature/pressure ratings, fire-stopping, proper burial/clearances, and documented testing.
Contractors and DIYers should verify jurisdictional standards, obtain permits, schedule inspections, and retain records to avoid violations and confirm safety.
Tools, Materials, and Safety Gear Needed
The section outlines the essential tools, including cutters, deburring tools, and solvent applicators, needed for CPVC installation.
It also lists required materials and fittings—pipe, primers, cements, couplings, elbows, and valves—to complete typical runs.
Finally, it covers personal protective equipment and safe work practices such as gloves, eye protection, ventilation, and proper handling of solvents.
Essential tools list
A concise set of tools, materials, and safety gear is required to install CPVC water lines correctly and safely.
The list focuses on accuracy, cutting, joining, and protection. Proper tools reduce leaks and speed installation.
- CPVC pipe cutter or fine-tooth saw
- Deburring tool and reamer
- Primer and solvent-weld applicator
- Adjustable wrench and tubing cutter
- Safety glasses and nitrile gloves
Required materials and fittings
With tools and safety gear assembled, attention shifts to the specific CPVC materials and fittings required for a reliable water line installation.
Necessary items guarantee proper flow, seal integrity, and code compliance.
- CPVC pipe (appropriate diameter and schedule)
- CPVC solvent cement and primer
- Assorted CPVC elbows, tees, couplings
- Threaded adapters and unions
- Pipe hangers and straps
Personal protective equipment and safe work practices
Begin by donning appropriate personal protective equipment—safety glasses, chemical-resistant gloves, and a respirator or mask rated for organic vapors—before handling CPVC cement, primer, or cutting tools.
Follow ventilation, tool maintenance, and workspace cleanliness. Observe lockout of water supply and test joins only after cure time.
Use caution with heat, solvents, and sharp edges.
- Safety glasses
- Chemical-resistant gloves
- Organic-vapor respirator
- Adequate ventilation
- Lockout and testing procedures
Preparing for Installation
Before cutting any pipe, the installer inspects the existing plumbing, plans the new run, and measures and maps the route to produce an accurate materials cut list.
They shut off the water and drain the system following safe procedures, then locate studs, joists, and any electrical hazards to avoid during installation.
These preparatory steps reduce surprises, prevent damage, and guarantee a smooth, code-compliant installation.
Inspecting existing plumbing and planning the run
Inspect existing plumbing to identify pipe materials, connection types, shutoff locations, and any signs of leakage or corrosion that could affect tie-in points; document fixture locations and measure clearances to plan the most direct, code-compliant CPVC run that minimizes fittings and thermal expansion issues.
Evaluate access, routing obstacles, required support spacing, and potential isolation needs to guarantee safe, serviceable installation and compliance.
Measuring, mapping, and creating a materials cut list
With the site surveyed and tie-in points confirmed, the installer measures runs and maps the route onto a scaled plan, marking pipe lengths, offsets, elevation changes, and fixture connections.
Each segment is recorded, fittings and valves counted, and allowances made for bends and clearance.
A materials cut list is compiled with pipe lengths, fittings by type/size, solvent cement, primer, hangers, and spare stock.
How to shut off water and drain the system safely
Shut off the appropriate supply valves and isolate the section of piping to be worked on, confirming isolation at both the building main and any local shutoffs serving the affected zone.
Open faucets and lowest drains to relieve pressure and vent air.
Use pressure gauges or test fittings to verify zero pressure.
Drain remaining water into a bucket, mop up spills, and cap or plug exposed pipe ends securely.
Locating studs, joists, and avoiding electrical hazards
Before cutting or fastening, identify wall studs and ceiling joists and map the route of existing electrical lines to prevent accidental strikes.
Use a reliable stud finder and confirm with small test holes. Trace visible conduit, switch boxes, and outlets; consult building plans if available.
Maintain safe distances from wiring, mark clear drill paths, and wear insulated gloves and eye protection while working.
Cutting, Deburring, and Dry-Fitting CPVC
Accurate cutting of CPVC to produce straight, square ends is essential for reliable joints.
After cutting, ends should be deburred and lightly chamfered to remove burrs and ease insertion.
Parts should then be dry-fitted and alignment points marked to confirm layout and fit before solvent cementing.
Accurate cutting techniques for straight, square ends
Cutting CPVC pipe squarely sets the foundation for leak-free joints and proper socket seating.
Using a fine-toothed PVC/CPVC cutter or a reinforced tubing cutter, measure and mark with a square. Secure the pipe, align the blade perpendicular, and cut in a single steady motion to avoid jagged edges.
Verify squareness with a small carpenter’s square before proceeding to test-fit.
Deburring and chamfering pipe ends
Remove burrs and round the pipe edge to guarantee smooth seating and solvent flow; this prevents interference with the socket joint and reduces the risk of stress concentrations that can cause leaks.
Use a deburring tool or fine file to remove inner and outer burrs, then lightly chamfer the outer edge (15–30°).
Clean dust and verify a uniform, smooth surface before solvent application.
Dry-fitting layout and marking alignment points
Lay out the CPVC runs and assemble the fittings without solvent to verify fit, access, and alignment before any gluing occurs.
Position pipes, supports, and fixtures; note offsets and clearances. Mark alignment points on pipe and fitting faces with a permanent marker aligned to reference surfaces.
Record cutbacks and rotation orientation. Recheck layout for accessibility, slope, and strain before final solvent welding.
Solvent Cement Joining Procedure Step-by-Step
The next section outlines a step-by-step solvent cement joining procedure, beginning with selecting the correct primer and CPVC-rated solvent cement for the application.
It describes proper primer and cement application, how to insert the pipe to the correct depth in fittings, and how to control alignment.
Timers, required set and cure times, and adjustments for varying ambient temperatures are also covered.
Choosing the correct primer and solvent cement
Select primer and solvent cement specifically formulated for CPVC to guarantee proper solvent welding and long-term joint integrity.
Verify manufacturer compatibility with pipe and fitting specifications, and choose the correct cement viscosity for pipe diameter.
Confirm product certifications (ASTM, NSF) and ambient temperature ratings.
Purchase matched primer and cement from reputable brands, check shelf life, and follow storage recommendations before use.
Proper application of primer and cement
Begin by preparing clean, dry pipe and fitting surfaces—cut squarely, remove burrs, and wipe away dirt, oil, and moisture—then mark insertion depth on the pipe to guarantee consistent seating.
Apply primer evenly to socket and pipe end, allow brief dwell time. Coat cement liberally on pipe, then a thin layer inside fitting.
Assemble promptly, hold alignment until set per manufacturer.
Inserting pipe into fittings and achieving correct depth
Insert the pipe firmly into the fitting while maintaining the marked depth, ensuring the pipe bottoms out against the socket shoulder for a proper seal.
Rotate the pipe a quarter turn to evenly distribute cement and verify alignment. Hold position until initial set prevents movement, wiping excess cement from joint.
Confirm depth markings and flush fit before proceeding to the next step.
Timers, set times, and handling cures under different temperatures
When ambient temperatures and pipe size vary, cure and set times for CPVC solvent cement change predictably and must be observed to guarantee joint strength.
Manufacturers’ published open, set, and cure times provide baseline guidance, but installers should adjust those intervals for colder conditions, higher humidity, or larger-diameter tubing.
Use timers, allow extended tack and full cure in cool or damp environments, and avoid pressure testing prematurely.
Alternative Joining Methods and Fittings
Beyond solvent cement, installers may consider mechanical fittings and push-fit options for quicker, tool-free connections and for situations where disassembly may be needed.
Connector fittings enable secure mating of CPVC to copper, PEX, or PVC, with each type requiring the correct adapter and installation technique.
A clear comparison of pros and cons—durability, cost, ease of installation, and leak risk—helps determine the best method for a given application.
Mechanical fittings and push-fit options
Although solvent cement remains the most common method for joining CPVC, mechanical fittings and push-fit options provide reliable alternatives where heat, cure time, or access are concerns.
These fittings offer quick installation, reusability, and strong seals for repairs or tight spaces. Selection depends on pressure rating, chemical compatibility, and manufacturer guidance.
- Twist-on mechanical couplings
- Compression fittings
- Push-to-connect (push-fit) connectors
- Reinforced threaded adapters
- Space-saving elbow and tee options
Transition fittings for connecting to copper, PEX, or PVC
Connect CPVC to copper, PEX, or PVC using purpose-made connector fittings that accommodate differing materials, diameters, and joining methods.
Conversion fittings include solder-on adapters, compression-to-CPVC couplers, crimp/expansion PEX adapters, solvent-weld PVC adapters, and threaded metal-to-CPVC unions.
Select compatible materials and follow manufacturer torque, solvent, or crimp instructions to guarantee leak-free, code-compliant connections.
- Solder-on adapters
- Compression couplers
- Crimp/expansion adapters
- Solvent-weld adapters
- Threaded unions
Pros and cons of each joining method
When choosing between solder-on, compression, crimp/expansion, solvent-weld, or threaded connections, each method presents distinct trade-offs in reliability, installation speed, required tools, and long-term maintenance; understanding these differences helps determine the best fit for a given application, code constraints, and installer skill level.
| Method | Feeling |
|---|---|
| Solder-on | Confident |
| Compression | Cautious |
| Crimp/expansion | Efficient |
| Solvent-weld/threaded | Secure |
Routing, Support, and Thermal Considerations
Proper hanger spacing and secure support methods are essential to prevent sagging and stress on CPVC lines.
Installers must also provide for thermal expansion and contraction with loops, offsets, or sliding supports to avoid joint failure.
Routes should be planned to clear obstacles and protected where pipes pass through framing.
Proper hanger spacing and support methods
Adequate hanger spacing and secure supports are essential for CPVC water lines to maintain alignment, prevent sagging, and accommodate thermal movement.
Hangers should be placed at manufacturer-recommended intervals (typically 3–4 feet horizontal, 6–8 feet vertical), near fittings and changes of direction.
Use cushioned, non-corrosive supports that avoid pipe deformation and allow minor movement while preventing stress at joints and fixtures.
Allowing for thermal expansion and contraction
Because CPVC expands and contracts noticeably with temperature changes, routing and support must accommodate axial movement without stressing joints or fixtures.
Install expansion loops or offsets where long runs occur, allow slip-fit at hangers, and use cushioned, nonbinding supports.
Leave calculated growth allowances per manufacturer guidelines, secure anchor points to control movement, and avoid rigid restraints that transfer stress to fittings and connections.
Routing around obstacles and through framing
When guiding CPVC lines around obstacles and through framing, installers must plan clear, continuous paths that minimize bends and preserve the pipe’s ability to move with temperature changes.
They should drill oversize holes, use smooth protective bushings, route to avoid heat sources and sharp corners, and support runs at manufacturer intervals.
Allow access for future repairs and guarantee vapor barriers or insulation remain intact.
Pressure Testing and Leak Detection
Before pressurizing the CPVC system, the installer verifies that all joints are cured, caps and test plugs are secure, and air vents or drains are in place to prevent trapped pockets.
The text compares pneumatic and hydrostatic testing methods, noting safety precautions, applicable pressure levels, and when each method is appropriate.
It then outlines systematic techniques for locating leaks—visual inspection, soap solution, and pressure decay—and common repair options for fittings, joints, and damaged pipe sections.
Preparing the system for pressure testing
Prepare the CPVC system for pressure testing by isolating the newly installed section, capping all outlets, and removing any debris or foreign material from the pipes and fittings.
Verify correct solvent-weld joints, allow proper cure time, and guarantee valves operate smoothly.
Install a calibrated test gauge and a reliable pump or water source.
Document ambient temperature and system configuration before commencing the test.
Performing a pneumatic vs. hydrostatic pressure test
Distinguish between pneumatic and hydrostatic pressure testing by comparing their mechanisms, risks, and appropriate applications for CPVC systems.
Pneumatic testing uses compressed air; it detects leaks quickly but poses rupture and projective hazard, so it’s rarely recommended for CPVC.
Hydrostatic testing uses water, is safer due to incompressibility, provides accurate leak confirmation, and is the preferred method for verifying CPVC integrity.
How to locate and fix common leaks
Having established why hydrostatic testing is the preferred method for verifying CPVC integrity, attention shifts to locating and repairing the leaks that such tests reveal.
Inspect visible joints, fittings, and solvent-welds for drips or wetness. Use soapy water to find small bubbles at pressurized sections.
Isolate the faulty segment, cut back to good pipe, deburr, and apply proper primer and solvent cement or replace the fitting.
Connecting Fixtures and Valves
The section addresses the proper installation of shutoff valves, unions, and service stops to guarantee accessible control and maintenance.
It then covers final threaded or flanged connections to fixtures and appliances, emphasizing correct fittings and secure seals.
Finally, it reviews backflow prevention and check valve installation to protect the potable water supply.
Installing shutoff valves, unions, and service stops
Begin by preparing the pipe run and fixture locations so that shutoff valves, unions, and service stops can be installed without stress or misalignment.
Measure and cut CPVC squarely, deburr, and dry-fit components.
Apply primer and solvent cement per manufacturer instructions, seating fittings fully.
Support assemblies to prevent strain, orient valves for access, test joints after curing, and label shutoffs for future maintenance.
Final connections to fixtures and appliances
Proceed to make the final connections to fixtures and appliances by verifying alignment, cleanliness, and correct adapter types before bonding or fastening.
Confirm threaded or solvent-weld fittings match fixture inlets, using plumber’s tape on threads where required.
Securely fasten adapters, test for proper seat and clearance, then slowly pressurize the system.
Inspect all joints and tighten or re-seat as necessary before completing trim and restoration.
Backflow prevention and check valve installation
Install backflow prevention devices and check valves at appropriate locations to protect potable water from contamination and to verify one-way flow.
The installer selects approved devices per code, positions them near fixtures, appliances, and branch takeoffs, and guarantees correct orientation.
Test and inspect assemblies after installation, secure accessible shutoffs, and document device type and test results for compliance and future maintenance.
Finishing Work and Wall/Ceiling Penetrations
The final stage addresses proper treatment of wall and ceiling penetrations to meet firestopping requirements and local code.
It also covers insulating exposed CPVC and shielding piping from UV exposure where applicable.
Guidance on repairing drywall and installing or sealing access panels completes the finishing checklist.
Firestopping and code-compliant penetrations
When CPVC lines pass through walls, floors, or ceilings, firestopping and properly detailed penetrations are required to maintain a structure’s fire-resistance rating and meet code.
Penetrations must be sealed with approved firestop materials, maintain required clearances, and use listed collars or wraps where needed.
Documentation and inspection verify compliance; installers should follow manufacturer and local code specifications for rated assemblies.
Insulating exposed CPVC and protecting from UV
After addressing firestopping and rated penetrations, attention turns to exposed CPVC runs that remain visible in basements, crawlspaces, or exterior walls, where insulation and UV protection preserve performance and longevity.
Insulate cold and hot lines with closed-cell foam sleeves to prevent heat loss and condensation.
For exterior or skylight-exposed piping, apply UV-resistant paint or wrap designed for CPVC; secure insulation at fittings and supports.
Repairing drywall and sealing access panels
Begin by restoring drywall openings and access panels to a finished condition that preserves firestopping, maintains accessibility, and conceals piping without impeding future service.
Patch drywall, tape seams, and apply joint compound; sand smooth.
Install removable access panels sized for fittings and valves.
Repaint to match surroundings.
Seal perimeter with appropriate intumescent caulk where required to maintain fire and smoke barriers while allowing future maintenance.
Common Mistakes and How to Avoid Them
Common installation errors can undermine CPVC system performance and longevity.
Typical issues include improper solvent application and cold-weather curing problems, over-tightening that cracks fittings, and inadequate support or incorrect slope that causes stress and drainage problems.
Recognizing these pitfalls early helps installers adopt simple, corrective techniques to prevent leaks and failures.
Improper solvent application and cold-weather issues
Improper application of solvent cement and neglecting cold-weather precautions are leading causes of CPVC joint failures and leaks.
Insufficient or uneven solvent prevents full fusion; overapplication creates weak, messy joints.
In cold conditions, slow curing and moisture contamination compromise bonds.
Use manufacturer-recommended primers and cements, apply evenly, work quickly, and warm materials or use cold-weather formulations to guarantee proper cure and reliable joints.
Over-tightening and damaging fittings
After addressing solvent application and cold-weather precautions, attention must shift to mechanical mistakes that damage fittings—most notably over-tightening.
Excess torque can crack CPVC sockets, distort threads, and compress gaskets, causing leaks. Proper hand-tightening followed by a specified fraction-turn with a wrench prevents stress.
Use correct tools, avoid excessive leverage, and replace compromised fittings immediately to guarantee joint integrity.
Insufficient support and incorrect slope
Undersupporting CPVC runs or failing to maintain a consistent slope undermines flow and strains joints, leading to sagging, water pooling, and increased stress on fittings.
Install supports every 3–4 feet for horizontal runs, closer near fixtures.
Ascertain a slight slope toward drains (typically 1/8–1/4 inch per foot) where required.
Use proper hangers, avoid compression at supports, and check alignment during installation.
Maintenance Tips and Longevity Best Practices
A concise maintenance routine helps preserve CPVC water lines and prevent failures.
A basic inspection checklist should cover joints, supports, visible discoloration, and signs of leaks so decisions can be made about repairing versus replacing sections.
Clear indicators such as brittle or swollen pipe, surface crazing, softening near heat sources, or unusual chemical odors signal chemical or heat damage and warrant prompt action.
Routine inspection checklist
When performing routine inspections of CPVC water lines, technicians should follow a concise checklist that emphasizes leak detection, joint integrity, support spacing, and thermal exposure.
Inspect visible joints, probe for dampness, verify hanger spacing, assess insulation and UV exposure, and record pressure anomalies. Use a checklist to document findings and schedule corrective actions.
- Check joints for softening or cracks
- Feel for damp spots
- Measure hanger intervals
- Inspect insulation condition
- Note temperature-related stress
When to replace sections versus repair
How should a technician decide whether to replace a CPVC section or perform a repair? The technician evaluates damage extent, leak location, joint versus run, and access difficulty.
Small pinhole leaks or isolated joint failures often warrant repair; multiple cracks, brittle pipe, recurring leaks, or inaccessible patched areas justify section replacement.
Consider expected lifespan, water pressure, and cost-effectiveness when choosing.
Signs of chemical or heat damage to CPVC
Decisions about repair versus replacement also require evaluating whether damage stems from chemical exposure or excessive heat, since those causes affect remaining service life and repairability.
Signs include brittleness, cracking, discoloration (yellowing or dark spots), distorted or softened fittings, chalky residue, and stress fractures near joints.
Odors, sudden leaks after solvent contact, or warping near heat sources indicate irreversible degradation needing replacement.
Cost Estimates and Timeframe for Typical Projects
A brief cost outline compares material and tool expenses for a small residential CPVC run, typically including pipe, fittings, solvent cement, and basic cutting/cleaning tools.
Estimated out-of-pocket costs for materials and tools often range from a modest DIY kit to higher amounts if specialty tools or bulk fittings are required.
Typical labor time is a few hours for a straightforward DIY install but can be completed faster by a professional, who also adds labor charges to the total project cost.
Material and tool cost breakdown for a small residential run
For a small residential CPVC run—typically 20 to 50 feet with a few fittings—material and tool costs are modest but variable depending on brand, regional prices, and whether specialty fittings or insulation are required. Typical items and ballpark prices:
| Item | Estimated Cost |
|---|---|
| CPVC pipe (20–50 ft) | $15–$45 |
| Fittings (couplings, elbows) | $10–$40 |
| Solvent cement/primer | $5–$15 |
| Basic tools (cutter, deburr) | $10–$40 |
Typical labor time for DIY vs. professional installation
After outlining material and tool costs for a small residential CPVC run, attention turns to the labor required to complete the job and how that differs between DIY efforts and hiring a professional.
A competent DIYer may finish a simple 20–40 ft run in one weekend (8–16 hours).
A licensed plumber typically completes the same job in 2–4 hours, with higher hourly costs but faster, warranty-backed work.
When to Hire a Professional
Complex or high-risk CPVC work—such as major reroutes, connections to mains, or situations involving gas, structural alterations, or code-sensitive systems—typically requires a licensed plumber.
Homeowners should verify contractor credentials, request detailed bids, confirm required permits are obtained, and check references before hiring.
Ask prospective contractors about experience with CPVC, warranty terms, inspection procedures, and who will be responsible for permit sign-offs.
Complex scenarios requiring a licensed plumber
Recognize that certain CPVC water-line jobs exceed typical DIY scope and should be entrusted to a licensed plumber—particularly when work involves main shutoffs, pressure-regulating devices, structural alterations, gas or sewer proximity, multi-story systems, or code-sensitive installations that can affect safety and insurance coverage.
Complex scenarios also include extensive corrosion, concealed leaks, fire-suppression connections, and medical or commercial systems where failure carries higher liability and compliance demands.
How to evaluate contractors and obtain permits
Vet contractors carefully and confirm permit requirements before committing to a professional for CPVC water-line work.
Check licenses, insurance, and local building-department records; verify experience with CPVC installations and recent references.
Obtain written estimates outlining scope, timeline, and permit responsibility.
Contact the local permitting office to determine required permits, inspection schedules, and fees; make sure the contractor will secure and schedule required inspections.
Questions to ask before hiring and warranty considerations
After confirming licensing, insurance, references, and permit responsibilities, homeowners should prepare a concise set of questions to guarantee the contractor’s methods, timelines, and protections align with the job.
Ask about experience with CPVC, materials and brands used, project schedule, contingency plans, lien releases, and cleanup.
Clarify labor and parts warranty durations, transferability, claim process, and written guarantees before signing.
Useful Diagrams and Visual Reference Guide
The article provides clear cross-section images of typical CPVC joints to show glue application, socket depth, and proper alignment.
It also includes example layout diagrams for common room installations—kitchen, bathroom, and laundry—that illustrate routing, shutoff valve placement, and spacing from fixtures.
These visual references support accurate assembly and reduce installation errors.
Typical CPVC joint cross-section images

Clear, labeled cross-section diagrams make it easy to identify the components and assembly of common CPVC joints: pipe, fitting socket, primer/glue layer, and the tight interference fit where solvent-welded material fuses.
Illustrations show wall thickness, insertion depth, and glue bead location. Callouts note proper chamfering, alignment marks, and interference tolerance.
Scales and legend clarify measurements for correct joint strength and leak prevention.
Example layout diagrams for common room installations
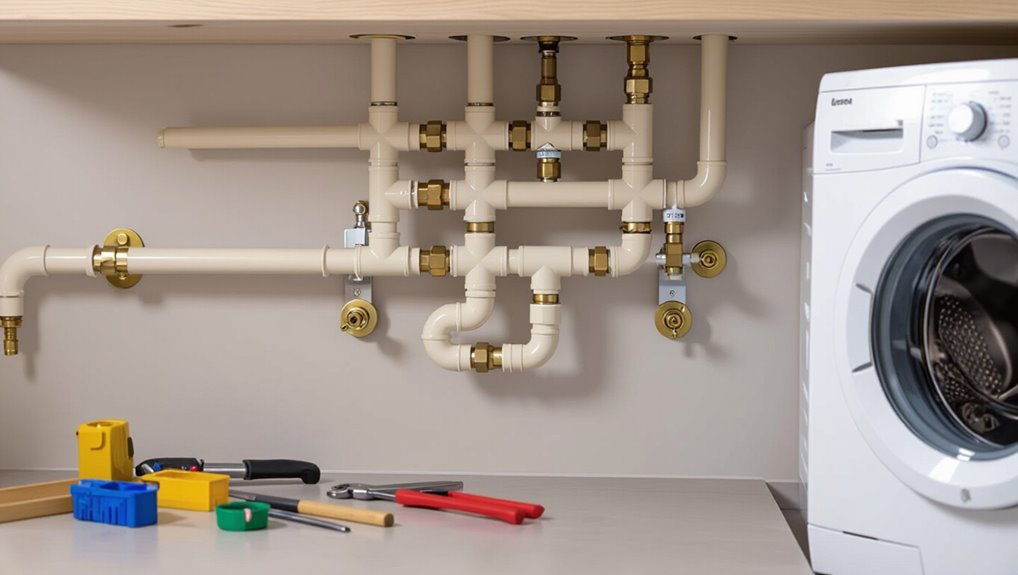
Diagrams for common room installations provide compact, standardized layouts showing CPVC runs, fixture connections, shutoff valves, and venting clearances for kitchens, bathrooms, laundry rooms, and utility closets.
They depict branch routing, pipe sizes, fittings, and access panel locations. Symbols indicate hot/cold lines, isolation valves, and fixture tailpieces.
Scaled plans simplify estimating materials, identifying potential conflicts, and guiding efficient, code-compliant installation.
Conclusion
To sum up, the guide equips a determined homeowner with clear steps, tools, and safety measures to install CPVC water lines confidently. Like a compass guiding a sailor, it points to proper cutting, solvent cement technique, and maintenance for leak-free service. While many projects suit DIYers, awareness of local codes and when to call a licensed plumber prevents costly mistakes. Careful preparation and patience turn plans into reliable plumbing that endures.