How to Remove Old Solder From Copper Pipe: Step-By-Step Guide for Clean, Reusable Joints
To effectively remove old solder from copper pipes, you’ll need to employ controlled heating, mechanical removal, and thorough cleaning to ensure the joints are reusable. Start by shutting off the water supply, draining the pipes, and protecting any nearby materials. Use a propane or MAPP torch to evenly heat the joint until the solder softens, then utilize desoldering braid to wick away the solder. Gently pry the fittings apart. If you prefer a heat-free method, consider using abrasives, rotary bits, or chemical flux removers, followed by solvent cleaning and emery sheeting. Always prioritize safety, and refer to additional sections for detailed tools, alternatives, and troubleshooting tips.
What Removing Old Solder from Copper Pipe Involves
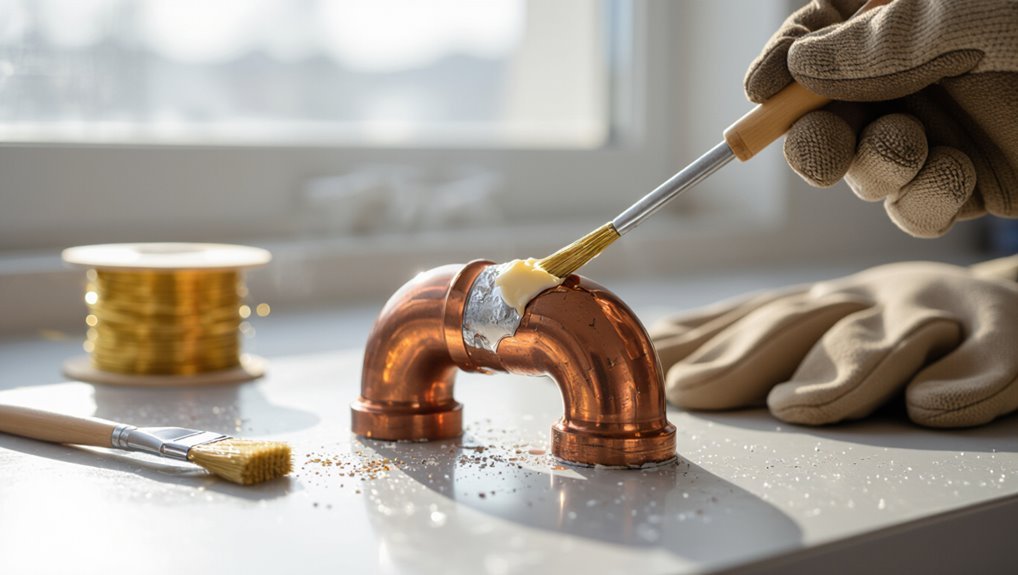
Removing old solder from copper pipe is often necessary for repair, to reuse fittings, or to eliminate compromised joints that pose safety risks.
Success depends on whether the solder can be fully cleared without damaging the pipe—sometimes replacement is the safer option when joints or pipe walls are too corroded or mechanically altered.
The chosen method varies with the solder composition, pipe thickness, and joint type (sweat vs. compression), so material and joint assessment precede any removal attempt.
Why you might need to remove old solder (repair, reuse, safety)
Because solder joints can degrade, corrode, or obstruct future work, removing old solder from copper pipe is often necessary for effective repair, reuse, and safety.
Technicians learn how to remove old solder from copper pipe to restore proper fit, guarantee leak-free connections, eliminate contamination, and comply with plumbing codes.
Clean joints reduce failure risk and simplify subsequent brazing or soldering tasks.
Typical outcomes and when removal is possible vs. replacement
When old solder is softened and the copper tubing remains undamaged, salvaging the joint is often feasible; however, extensive corrosion, warped fittings, or fused solder deep within the pipe typically make replacement the safer, more reliable option.
Outcomes range from straightforward reflow and cleaning to partial component swap or full section replacement.
Decision hinges on visible metal integrity, leak history, access, and cost-effectiveness.
Materials and joint types that affect removal approach
After determining whether a joint can be salvaged or must be replaced, attention turns to the materials and joint types that dictate removal technique and tools.
Copper tubing thickness, fitting alloys, lead-free versus traditional solder, and presence of flux or corrosion change method choice.
Compression, sweat, flare, and brazed joints require different heat, mechanical, or chemical approaches to preserve pipe integrity and guarantee reusability.
Tools, Materials, and Safety Gear Required
This section lists the specific tools, consumables, and safety gear needed to remove old solder from copper pipe.
Included are essential tools (torch, soldering iron, desoldering braid, heat sink, wire brush, scraper), consumables and cleaners (flux remover, isopropyl alcohol, emery cloth), and personal protective equipment plus ventilation and fire-safety measures.
Alternatives and small-scale tools for tight or delicate systems are also noted.
Essential tools (torch, soldering iron, desoldering braid, heat sink, wire brush, scraper)
Gather the right tools before attempting to remove old solder from copper pipe: a propane or MAPP torch and a soldering iron provide controllable heat sources; desoldering braid absorbs molten solder; a heat sink protects nearby fittings; stiff wire brushes and non-marring scrapers remove flux residue and loosen remaining solder.
Additional essentials include flame-resistant gloves, safety goggles, and a flame shield to control heat and protect surroundings.
Consumables and cleaning agents (flux remover, alcohol, emery cloth)
Once the proper tools and protective gear are on hand, attention turns to the consumables and cleaning agents that make solder removal effective: quality flux remover or solvent, isopropyl alcohol for final cleaning, and abrasive materials such as emery cloth or fine-grit sandpaper to remove oxidation and remaining solder.
Use noncorrosive flux removers, lint-free wipes, and progressively finer abrasives to prep joints for reliable reflow.
Safety equipment and precautions (PPE, ventilation, fire safety)
Because solder removal involves heat, fumes, and molten metal, appropriate personal protective equipment and strict safety measures are essential to prevent injury and property damage.
Safety gear includes heat-resistant gloves, flame-retardant clothing, eye protection (safety goggles or face shield), and a respirator for flux/metal fumes.
Verify adequate ventilation, clear combustible materials, have a fire extinguisher nearby, and work with a fire watch if needed.
Tool alternatives for tight spaces or delicate systems
When access is limited or pipes are part of a delicate system, choose tools that minimize heat, force, and vibration while still allowing precise solder removal.
Compact butane torches, micro-tip soldering irons, heat-resistant cold knives, solder braid with a low-mass copper tip, and low-temperature solder-removal fluxes are commonly used alternatives.
Operators should prioritize controlled, localized heating, gentle mechanical scraping, and protective shielding to avoid damage.
Preparing the Pipe and Work Area
Before heating, the plumbing system must be shut off and drained to prevent water in the lines from boiling and to avoid pressure buildup.
The specific section should be isolated and nearby fixtures or finishes protected with heat shields and drop cloths.
The joint area ought to be cleaned of debris and flux and marked to guide where to apply the torch.
How to shut off and drain the plumbing system safely
Shutting off and draining the plumbing system begins with locating and closing the appropriate isolation valves—usually the main shutoff for the building and any nearby branch valves—then opening faucets at the highest and lowest points to relieve pressure and channel remaining water into a prepared drain or bucket; this minimizes water loss, prevents pressure surges, and provides a dry work section for solder removal.
| Step | Action |
|---|---|
| 1 | Close main/branch valves |
| 2 | Open high/low faucets |
| 3 | Collect/drain residual water |
Isolating the section and protecting nearby fixtures
Several measures guarantee the work area is isolated and nearby fixtures are protected: shut the local isolation valves serving the target run, cap or plug adjacent open pipe ends, and clear or shield fixtures, finishes, and sensitive surfaces with heat-resistant pads and splash protection.
Disconnect electrical devices if nearby, remove combustibles, lay a fire blanket under the joint, and position a bucket or rag to catch flux, debris, and solder.
Cleaning and marking the joint before heating
Clean and inspect the joint area thoroughly: remove surface grime, solder splatter, and old flux with a brass brush or fine emery cloth until the copper shows a bright, even finish.
Then wipe with a clean rag and a solvent such as isopropyl alcohol or acetone to eliminate oils and residues.
Mark alignment with a non-permanent marker or scribe; protect surroundings with heat shields and fire-resistant cloths.
Step-by-Step Method: Removing Solder with Heat
A propane or MAP gas torch is used in a controlled step sequence to heat the joint until solder becomes malleable.
The operator applies even, indirect heat to protect the pipe and fittings, then removes molten solder and separates the joint with appropriate tools.
After cooling, remaining residue is wiped away and the copper is inspected for damage before any reassembly.
Using a propane or MAP gas torch step sequence
Heat the joint methodically using a propane or MAP gas torch to soften and remove old solder from copper pipe.
Follow a consistent sweep: ignite, adjust flame, heat evenly around the joint perimeter, observe solder flow, and draw molten solder away with a soldering pick or rag.
Reduce flame, quench briefly if needed, then clean flux residue.
Repeat until the joint is clear and reusable.
Proper heating technique to avoid damaging pipe or fittings
After warming the joint evenly and removing molten solder, attention shifts to controlled heating to prevent damage to the pipe or fittings.
The practitioner applies short, even passes with the torch, avoids localized overheating, and monitors flux color and temper.
Maintain moderate flame distance, cool periodically, and keep nearby fittings shielded.
Stop heating once solder softens uniformly to protect metallurgical integrity.
Removing molten solder and separating joint safely
Begin by rewarming the joint evenly until the solder becomes visibly molten, using steady, sweeping torch motions to avoid hotspots.
Once flow is evident, pry the fitting gently with insulated pliers or a brass or copper drift to separate components.
Maintain heat; do not yank. If resistance remains, reapply heat briefly.
Secure hot parts with heat-resistant gloves and pliers, setting them aside safely.
Cooling, wiping away residue, and inspecting the copper
Allow the joint to cool naturally until it is safe to touch or handle with heat-resistant gloves.
Then quench only if specified by the fitting or system manufacturer; rapid cooling with water can warp thin fittings or trap flux residues.
Once cool, wipe away soot and softened flux with a clean cloth and pick off remaining solder flakes.
Inspect for pitting, cracks, or uneven surfaces before cleaning and reuse.
Step-by-Step Method: Mechanical Removal (No Heat)
Mechanical removal relies on abrasion and scraping to clear surface solder without applying heat.
For more stubborn deposits, rotary tools, bore brushes, or needle files are used to reach inside joints and crevices.
Chemical flux removers or paste are reserved for residues that cannot be removed mechanically or to neutralize oxides after tooling.
Using abrasive tools and hand scraping for surface solder
Using abrasive tools and hand scraping, the surface solder can be removed without applying heat by progressively abrading and lifting the softened metal from the copper. The practitioner uses fine abrasives, a scraper, and steady pressure, checking fit frequently to avoid gouging. Clean with solvent and inspect for residue before reuse.
| Tool | Grit/Type | Purpose |
|---|---|---|
| Sandpaper | 400–600 | Remove thin solder |
| Scraper | Brass/steel | Lift flakes |
| Scotch-Brite | Fine | Finish surface |
Using rotary tools, bore brushes, or needle files for stubborn deposits
When thin solder and surface flakes resist hand scraping, more aggressive rotary tools, bore brushes, or needle files can be employed to reach crevices and heavy deposits without heat.
Operators should use low-speed rotary bits, soft-bristle bore brushes, or fine needle files to avoid gouging copper.
Work incrementally, inspect frequently, remove metal dust, and finish with a clean, bright surface ready for flux and fitting.
When to use chemical flux removers or paste
Consider chemical flux removers or pastes when mechanical methods cannot fully clear old flux, tarnish, or microscopic solder residues from crevices and joints. They dissolve stubborn residues, ease cleaning of inaccessible areas, and are chosen when preserving joint geometry is critical. Follow manufacturer instructions, ventilate, and neutralize residues after use.
| Product type | Use case | Neutralizer |
|---|---|---|
| Gel paste | Vertical joints | Water |
| Liquid | Deep crevices | Mild alkali |
Desoldering Braid and Specialized Removal Tools
Desoldering braid can be applied to heated copper plumbing joints to wick molten solder away, but it requires controlled heat and clean contact to be effective.
Solder removal pumps and wet-vacuum tools offer suction-based alternatives for clearing liquid solder from fittings, especially in confined spaces.
For cases where solder cannot be removed intact, reaming tools or pipe cutters are recommended to remove or replace the affected section quickly and safely.
How to use desoldering braid on copper plumbing joints
Start by selecting a copper-safe desoldering braid sized for the joint; the braid wicks molten solder away when heat is applied, making it an effective tool for clearing old fills and restoring joint access.
Secure the braid over solder, heat with a suitable torch until solder flows into braid, lift wick while hot, trim used braid, and repeat until solder-free.
Clean residue before reassembly.
Using solder removal pumps and wet vacuum tools
Employ specialized solder removal pumps and wet-vacuum tools to rapidly extract molten solder from copper joints where braid alone is slow or impractical.
Heat the joint evenly, seat the pump or suction tip immediately, then trigger to pull liquid solder away. Repeat heating and suction until the joint is clear.
Clean remaining flux and inspect for complete solder removal before reheating or rejoining.
When to use reaming tools or pipe cutters instead
Consider switching to reaming tools or pipe cutters when solder removal methods—braid, pumps, or vacuum—cannot fully clear the joint, when the pipe end is deformed, or when internal obstructions or excessive corrosion prevent a clean fit for a new connection.
Reamers restore inner diameter and remove burrs; cutters provide a square, fresh end. Use deburring and cleaning afterward to guarantee proper capillary action and reliable joints.
Cleaning and Preparing the Joint for Reuse
After solder removal, the joint area should be cleaned of flux residue and oxidation using a recommended cleaner or a mild acid solution to guarantee a contaminant-free surface.
The pipe and fitting faces are then brought to the proper finish with emery cloth or a wire brush, removing any remaining tarnish and producing a bright, smooth surface for solder adhesion.
Finally, an appropriate flux is applied and fittings are positioned correctly to confirm a reliable new joint before reheating and soldering.
Removing flux and oxidation with recommended cleaners
Several effective cleaners are available to remove residual flux and surface oxidation from copper pipe before re-soldering.
Recommended options include commercial flux removers, isopropyl alcohol for light residues, and a diluted vinegar or citric acid rinse for oxidation.
Apply with a lint-free cloth or brush, rinse thoroughly with water, and dry completely.
Always follow product instructions and use gloves and eye protection.
Achieving proper pipe surface finish (emery cloth, wire brush)
Once flux and oxidation have been removed, attention turns to achieving a proper pipe surface finish so the new solder will wet and bond evenly. Lightly abrade with fine emery cloth along the tube, or use a stainless wire brush for fittings. Remove debris and wipe with a clean, lint-free cloth before assembly.
| Tool | Purpose |
|---|---|
| Emery cloth | Smooth copper |
| Wire brush | Clean fittings |
Applying flux and fitting preparation for a reliable new joint
Apply a thin, even layer of flux to the cleaned pipe and fitting surfaces, concentrating on the joint area where solder must flow.
Confirm mating surfaces are dry and free of debris, then insert the pipe fully into the fitting with consistent rotation to spread flux.
Secure alignment, avoid excess flux that can cause contamination, and inspect the joint for full contact before heating and soldering.
Common Problems and How to Fix Them
Common problems encountered when removing old solder from copper pipe include stuck fittings that require progressive release techniques, overheating that can damage the pipe and necessitate repairs, and solder residue inside the bore that must be flushed and deburred.
The section will also address diagnosing leaks after re-soldering with a concise checklist.
Practical fixes and when to call a professional are outlined for each issue.
Stuck or seized fittings: progressive release techniques
When fittings seize on copper pipe, a calm, methodical approach prevents damage and saves time. Begin with penetrating oil and gentle tapping, then alternate heat and cooling; try adjustable pliers with protectors, moving progressively to larger tools. If still stuck, apply controlled heat while supporting pipe. Stop before forcing to avoid deformation; seek a cutting approach if release fails.
| Step | Action |
|---|---|
| 1 | Penetrant + tapping |
| 2 | Heat/cool cycles |
| 3 | Protected pliers |
Overheating or damaging the pipe: repair options
Overheating a copper pipe during soldering can thin or warp the metal and ruin internal flux, leaving weak joints or leaks that require repair.
Assess damage: replace short sections with new tubing using coupling or slip-sleeve repairs, or cut out and rejoin with sweat fittings.
For minor thinning, reinforce with compression fittings.
Always pressure-test repaired runs and deburr cut ends before reassembly.
Solder residue inside pipe bore: flushing and deburring
After addressing heat-damaged sections, attention should turn to solder residue that can cling to the inside of a copper bore and obstruct flow or foul joints.
The procedure involves flushing with solvent or hot water to remove loose particles, followed by careful deburring with a small round file or reamer to remove crusted solder.
Finish by rinsing and inspecting with light for smooth, clean bores.
Leaks after re-soldering: diagnosis checklist
How can one systematically identify why a joint still leaks after re-soldering?
Inspect for incomplete solder coverage, cold joints, or burned flux.
Check mating surfaces for contamination or misalignment, guarantee correct gap and capillary action, verify proper heating and solder type.
Test under pressure, isolate sections, and re-clean, re-flux, and reheat or remake the joint if defects persist.
Alternatives When Removal Fails
If solder cannot be safely removed, the next option is to cut out the affected section and replace it with new copper.
Alternatively, compression or push-fit fittings can provide a quick, reliable repair without soldering.
Professional plumbers should be called for complex joints, extensive corrosion, or if the homeowner lacks the tools or confidence to perform the replacement.
Cutting out and replacing a pipe section
When removal of old solder or fittings proves impossible without risking further damage, cutting out and replacing the affected pipe section becomes the practical alternative.
The damaged segment is measured, isolated by shutting water and draining, then removed with a tubing cutter or saw.
A replacement piece is fitted, deburred, fluxed and soldered or joined per chosen method, then pressure-tested for leaks before restoring service.
Using compression or push-fit fittings as repairs
Consider replacing a damaged soldered joint with a compression or push-fit fitting as a straightforward, non-soldered repair.
These fittings clamp or grip clean pipe ends, creating reliable seals without heat. They suit temporary or permanent fixes, tight spaces, and differing pipe materials.
Verify pipe ends are squared, deburred, and clean; follow manufacturer torque and insertion depth recommendations for leak-free results.
When to call a professional plumber
Call a professional plumber when attempts to remove old solder are unsuccessful, the piping is damaged, or the job requires code‑compliant repairs beyond basic DIY skills.
A licensed plumber assesses corrosion, pinholes, and hidden damage, recommends soldering, repiping, or approved fittings, and guarantees pressure testing and permits are handled.
Rely on professional expertise for safety, long‑term reliability, and warrantyable work.
Time-Saving Tips and Best Practices
Efficient solder removal begins with proper preheating and even heat distribution to loosen joints quickly without overheating the pipe.
Selecting the correct torch tip and matching flame size speeds the process while reducing the risk of under- or over-heating.
Simultaneously, attention to fire safety and shielding nearby materials prevents accidents and limits cleanup time.
Preheating and heat distribution strategies
A few minutes of targeted preheating can dramatically reduce solder removal time and prevent cold spots that cause uneven melting; applying even, controlled heat to the joint before engaging the main torch guarantees the old solder softens uniformly, making it easier to wipe or braid away.
Heat evenly around the fitting, move the flame steadily, and monitor temperature to avoid overheating nearby components or flux degradation.
Choosing the right torch tip and flame size
Several small, focused tips make selecting the correct torch tip and flame size straightforward: use a tip that matches the joint diameter, choose a neutral flame for clean heating, and scale flame size to heat the fitting without overheating adjacent pipe.
Match tip shape to access tight joints, favor smaller tips for precision, larger tips for bulk heating, and adjust flame length to concentrate heat on the joint only.
Preventing fire hazards and protecting surrounding materials
Many plumbers and DIYers rely on a small set of precautions to prevent fires and shield surrounding materials when reheating copper joints: clear combustibles at least 3 feet away, drape flame‑resistant blankets over nearby insulation and wood, and keep a fire extinguisher and water source immediately on hand.
They also ventilate the area, use heat shields on adjacent fittings, monitor for hot spots with a tempering glove or infrared thermometer, and never leave a lit torch unattended.
Maintenance and Long-Term Considerations
After pressure testing, the installer inspects each joint for leaks, hairline cracks, and proper sealing to guarantee long-term integrity.
Routine visual checks and occasional cleaning of fittings help prevent future solder buildup and corrosion.
Recommending corrosion-resistant fluxes, lead-free solders, and suitable sleeve or compression fittings can improve the longevity of repaired joints.
Inspecting joints after pressure testing
Verify each joint visually and by touch immediately after pressure testing to identify hairline leaks, incomplete seams, or weak solder bonds.
Note any moisture, bubbles, or soft spots. Mark defects, depressurize, and repair solder or reflow as needed.
Re-test only after cooling and cleaning.
Record findings, repair actions, and pressure hold duration to track joint reliability over time.
Preventing future solder buildup or corrosion
Having documented defects and completed any immediate repairs, attention should turn to practices that minimize future solder buildup and copper corrosion.
Routine cleaning of joints, periodic inspection, and controlled solder application reduce deposits.
Confirm flux is fully removed after soldering and avoid excessive overheating.
Maintain stable system chemistry and water quality, promptly address leaks, and store spare fittings dry to prevent galvanic or chemical deterioration.
Recommended materials to improve longevity of repaired joints
Durable repairs depend as much on selected materials as on technique; prioritizing corrosion-resistant components, proper flux and solder grades, and compatible sealing compounds greatly extends joint life.
Use lead-free 95/5 or 90/10 tin-silver-copper solders, rosin-based or acid-removed flux for plumbing, and nickel- or tin-plated fittings where dissimilar metals meet.
Apply PTFE tape or NSF-approved thread sealant sparingly. Regular inspections help detect early wear.
Quick Reference Checklist
A concise checklist helps guarantee safe, efficient removal of old solder from copper pipe and prevents common mistakes. Key items include personal protective equipment and workspace safety, followed by clear step sequences for both heat and mechanical removal methods.
Use the following quick reference before starting:
- Check PPE, ventilation, and nearby combustible materials
- Heat method: flux, apply controlled heat, wipe away molten solder, cool
- Mechanical method: score, scrape or use a rotary tool, clean residue, polish
- Final inspection: pressure test and verify joints are clean and secure
Safety checks before starting
Before any work begins, the technician reviews a concise safety checklist to confirm the workspace, tools, and materials are ready: verify gas and water shutoffs, guarantee adequate ventilation, check for flammable materials, confirm fire extinguisher and heatproof pads are on hand, inspect torch, fittings, and flux for damage, wear safety goggles and gloves, and establish clear emergency access and communication.
Step sequence summary for heat method
With safety checks complete, the technician follows a concise heat-method checklist to remove old solder from a copper pipe.
Preheat joint evenly, apply flux, heat until solder melts, wipe solder with a clean rag or copper wool, cool slightly, use solder remover or solder braid to draw residual solder, clean flux residue with solvent, inspect for cleanliness and damage before reassembly.
Step sequence summary for mechanical method
Begin by securing the pipe in a stable vise or clamp and wearing appropriate PPE.
Use a wire brush or abrasive cloth to remove loose solder.
Apply a solder-removal tool or rotary bit to scrape remaining material, working evenly around the joint.
Clean residues with emery cloth, then flush with solvent and dry.
Inspect for smoothness and repeat spot work until the joint is ready for re-soldering.
Conclusion
Removing old solder from copper pipe restores joints like a careful gardener pruning dead branches: methodical, patient, and aimed at healthy regrowth. The guide’s techniques—thermal soldering, mechanical scraping, and fallback options—equip readers to reclaim clean, reusable fittings while prioritizing safety and surface integrity. Attention to preparation, correct tools, and post-removal maintenance guarantees reliable seals on future joins, saving time and preventing leaks when the system is reassembled and tested.