How to Fix Blue Water Pipe: Step-by-Step Guide to Diagnose and Repair Discolored Plumbing
If you’re experiencing blue or blue-green tap water, it indicates copper leaching or corrosion, which requires immediate attention. Begin by identifying whether the issue is in hot or cold water lines. Use testing kits or send samples to a lab to check pH and copper levels. Inspect visible pipes for corrosion, flush the lines, and clean aerators. If needed, replace any corroded sections with compatible materials and dielectric unions. For long-term solutions, consider installing filters or corrosion inhibitors. If the problem persists, consult a licensed plumber for further assistance. Follow the step-by-step repair guidance and safety checks for effective resolution.
What Causes Blue or Discolored Water in Pipes
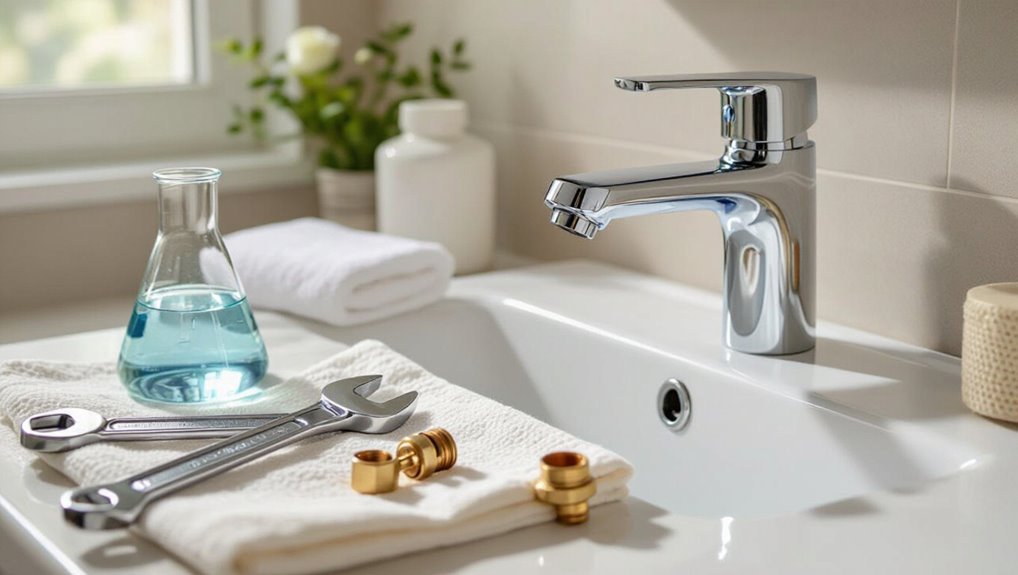
Blue or discolored water most often stems from chemical and biological sources—dissolved copper from brass fittings or corrosion, algae and mineral content, or treatment byproducts from the municipal supply.
Mechanical factors such as rust, sediment buildup, and reactions inside water heaters or fixtures can also introduce color and particles.
Changes in supply lines, seasonal shifts, or maintenance work frequently alter water chemistry and exacerbate these issues.
Common chemical causes (copper, algae, minerals)
Several chemical factors commonly discolor household water, most importantly dissolved copper, algal metabolites, and concentrated dissolved minerals.
Dissolved copper yields blue-green tint when leached from fittings; algal metabolites in storage or well water can impart blue or green hues.
High mineral concentrations (iron, manganese, carbonate scaling) alter clarity and color.
For practical guidance on how to fix blue water pipe, test water chemistry and address sources.
Corrosion and brass/copper pipe reactions
Corrosion of brass and copper plumbing commonly produces blue-green or bluish stains as metal ions dissolve into the water and deposit on fixtures or laundry.
Electrochemical reactions accelerate where dissimilar metals join, low pH or oxygen-rich water exists, or protective patina is removed.
Symptoms include tinted water, greenish deposits at outlets, and accelerated fitting wear; remediation targets corrosion control and material replacement.
Sediment, rust, and municipal treatment byproducts
Many instances of discolored tap water stem from sediments, rust, or residual treatment chemicals carried through the distribution system.
Particulate sediment and iron oxide from aging mains or hydrant flushing can tint water brown, red, or yellow.
Chlorine byproducts and metal precipitates sometimes produce blue-green hues.
Temporary disturbances, pipe repairs, or seasonal treatment changes often explain intermittent discoloration; testing isolates causes.
Water heater and fixture-related causes
Beyond distribution-system issues, discoloration can originate inside the building from water heaters and fixtures.
Corroded heating elements, anode rod failure, mineral buildup, or degraded internal linings release metal ions and particles that tint water.
Faulty mixers, worn valve seats, or decorative finishes in faucets can leach dyes or metals.
Inspection, flushing, element replacement, and fixture repair or replacement typically resolve these sources.
Seasonal or supply-change factors
When seasonal shifts or changes in the municipal supply occur, water chemistry and flow patterns can alter enough to mobilize metals or suspended particles that tint tap water blue or otherwise discolored.
Increased runoff, reservoir turnover, treatment adjustments, or pressure fluctuations can release copper, manganese, or algae fragments.
Temporary discoloration often resolves after flushing; persistent tinting warrants testing and supplier notification.
How to Quickly Assess If Blue Water Is a Health Risk
A quick assessment should distinguish between harmless dye and copper contamination by noting scent, taste, staining of fixtures or laundry, and bluish-green residues.
Immediate cessation of use is advised if water has a metallic taste, causes irritation, or leaves strong colored stains; basic at-home tests (pH strips, household ammonia, or colorimetric metal kits) can help identify metal presence.
If results suggest copper or other metals, or if symptoms persist, contact a licensed plumber or the local water authority for testing and guidance.
Signs that indicate copper contamination vs harmless dye
How can one tell whether blue water results from copper corrosion or a harmless dye?
Check odor and taste: metallic, bitter notes suggest copper.
Inspect fixtures and stains: blue-green staining on sinks, bathtubs, or laundry indicates copper.
Test with pH and hardness strips: acidic, soft water promotes corrosion.
Dye often appears uniform, lacks metallic taste, and disappears after flushing.
Seek lab testing for confirmation.
When to stop using the water immediately
If blue water shows signs of copper contamination — metallic or bitter taste, blue‑green stains, or acidic/soft water readings — immediate precautions are warranted to reduce exposure.
Stop using the water for drinking, cooking, bathing infants, and wound care.
Use bottled or boiled water for hygiene and food prep.
Contact the water supplier and a licensed plumber promptly for testing and corrective action.
Simple at-home tests to identify metal contamination
Wanting a quick gauge of risk, homeowners can perform a few simple at‑home checks to determine whether blue water likely indicates metal contamination.
Collect clear samples, note staining on fixtures, and test pH with strips. Use a home test kit for copper/lead, observe metallic taste or staining of laundry, and compare results to kit thresholds; record findings for further action.
When to call a professional or public water authority
When should a homeowner escalate blue-tinted water concerns to a professional or the local water authority?
If discoloration persists after flushing, affects multiple taps, coincides with metallic taste, staining, or health symptoms, contact a licensed plumber and the utility immediately.
If tests indicate elevated copper or other contaminants, cease using water for drinking/cooking until remediation and official guidance are provided.
Tools and Materials You’ll Need for Diagnosis and Repair
A concise set of tools and materials is essential for accurately diagnosing blue water issues and making reliable repairs. The following list outlines typical diagnostic instruments, plumbing tools, replacement parts, and safety items an installer or homeowner should have on hand.
Proper selection of these items reduces guesswork and prevents unnecessary damage during work.
- Diagnostic tools: pH strips, copper test kit, turbidity meter
- Plumbing tools: adjustable wrenches, tubing cutters, pipe brushes
- Replacement parts and materials: PEX, CPVC, fittings, dielectric unions
- Safety equipment and sampling: gloves, goggles, and clean water sampling containers
Diagnostic tools (pH strips, copper test kit, turbidity meter)
Gather essential diagnostic tools—pH strips, a copper test kit, and a turbidity meter—to quickly identify water chemistry and particulate issues that can cause blue discoloration.
pH strips detect acidity that accelerates copper corrosion. A copper test kit measures dissolved copper levels, confirming metal leaching.
A turbidity meter quantifies suspended particles that scatter light, indicating corrosion or particulate contamination needing targeted remediation.
Plumbing tools (wrenches, tubing cutters, pipe brushes)
After identifying water chemistry and particulate issues with pH strips, a copper test kit, and a turbidity meter, attention shifts to the physical tools needed for inspection and repair.
Essential items include adjustable and basin wrenches for fittings, tubing cutters for clean pipe ends, pipe brushes to remove corrosion and deposits, and a deburring tool to finish cuts.
Proper use minimizes damage and leaks.
Replacement parts and materials (PEX, CPVC, fittings, dielectric unions)
Several key replacement materials and fittings are required to repair or replace blue water lines reliably.
Suitable pipe choices include PEX for flexibility and CPVC for higher temperature resistance.
Assorted fittings—crimp, push-fit, threaded—and appropriate adapters enable secure joins.
Dielectric unions prevent galvanic corrosion between dissimilar metals.
Use compatible clamps, primers, solvent cement, and replacement valves sized for the system.
Safety equipment and water sampling containers
A basic set of safety equipment and properly labeled water sampling containers is essential before diagnosing or repairing blue water pipes.
Recommended items include nitrile gloves, safety goggles, a respirator for mold or chemical odors, and waterproof boots.
Use sterile, clearly labeled bottles for microbiological and chemical samples.
Include a marker, cooler with ice packs, and chain-of-custody forms for lab submissions.
Step-by-Step Inspection to Locate the Source
The inspector first determines whether the blue tint appears only on hot or cold lines and checks multiple fixtures to establish the problem’s scope.
Visible supply lines, valves, and fixtures are then examined for corrosion while water is tested at the main shutoff and the meter.
If the source remains unclear, labeled water samples are collected for laboratory analysis.
Verify whether discoloration is isolated to hot or cold lines
How can homeowners determine whether blue discoloration appears only in hot or cold water lines?
They should run each tap briefly, collecting samples from the cold and then the hot supply into clear containers.
Label and compare hues immediately.
If blue shows solely from hot output, suspect water heater or hot-side fittings; if only cold, focus on incoming piping, valves, or supply fixtures.
Check multiple fixtures to determine scope
Begin by checking multiple fixtures throughout the home to map where the blue tint appears and where water remains clear.
Record affected rooms, whether tint occurs at hot, cold, or both, and note timing (continuous or intermittent).
Compare fixtures on same supply lines and at varying distances from the main.
This mapping narrows likely source locations before targeted inspection or professional consultation.
Inspect visible supply lines, valves, and fixtures for corrosion
Carefully inspect all exposed supply lines, shutoff valves, and fixtures for signs of corrosion—such as blue-green staining, flaking metal, greenish residue around joints, or pitted surfaces—that can leach copper into water.
Note active leaks, loose fittings, and discoloration patterns to trace source locations. Document affected components, photograph evidence, and mark areas needing repair or replacement before proceeding with targeted remediation.
Test water at the main shutoff and meter
At this stage, the inspector collects water samples at the main shutoff and at the meter to determine whether discoloration originates inside the house plumbing or from the supply line.
Flow is briefly opened, water observed for hue, particulates, and odor. Results guide next steps: internal repair focus if shutoff sample is clear, or contacting the utility if both samples show the same blue tint.
Collect and label samples for lab testing if needed
If both shutoff and meter samples show a blue tint or if visual inspection cannot pinpoint the source, the inspector should collect and label water samples for laboratory analysis.
Use sterile, manufacturer-approved containers, record location, date, time, and sample ID.
Seal and refrigerate per lab instructions, complete chain-of-custody forms, and deliver samples promptly to a certified lab for metal, pigment, and microbiological testing.
Common Repairs and When to Use Them
Common repairs for blue-tinted water focus on cleaning and replacing affected components based on the source.
Typical actions include flushing supply lines and aerators, replacing corroded copper fittings or sections, installing dielectric unions to stop galvanic corrosion, and upgrading galvanized or old iron pipe to PEX or CPVC.
Water heater elements or anode rods may also require repair or replacement.
The choice of repair depends on whether contamination originates at fixtures, within piping runs, or from the water heater.
Flushing supply lines and aerators
Flushing supply lines and cleaning faucet aerators are straightforward first steps when blue-tinted water appears, because sediment, mineral buildup, or stagnant water in pipes and fixtures often causes discoloration.
Run cold water at full flow, open exterior hose bibs, and flush until clear.
Remove aerators for cleaning or replacement; soak in vinegar, brush deposits, then reassemble.
Document results and retest water.
Replacing corroded copper fittings and sections
After flushing lines and cleaning aerators, inspection may reveal persistent blue staining or greenish corrosion on copper joints and fittings that simple flushing cannot remove.
Corroded sections should be cut out, replaced with matching copper tubing and fittings, and joined using soldered or press connections.
Confirm water is off, debris removed, and pressure-tested after repair.
Replace any weakened nearby pipe to prevent recurrence.
Installing dielectric unions to prevent corrosive contact
One simple, effective measure to stop galvanic corrosion where dissimilar metals meet is the installation of a dielectric union between the copper and galvanized or steel piping.
A dielectric union electrically isolates metals, preventing current flow that accelerates corrosion. Proper selection, correct thread sealing, and secure mounting guarantee longevity.
Use when joining dissimilar pipes without replacing entire runs; inspect periodically for leaks and integrity.
Replacing galvanized or old iron with PEX/CPVC
While dielectric unions can stop galvanic action at dissimilar joints, many repairs benefit from replacing corroded galvanized or old iron with modern plastic piping like PEX or CPVC.
These materials resist corrosion, reduce sediment buildup, and simplify routing. Replacement requires evaluating water quality, pressure, and local code.
Proper fittings, support, and oxygen-barrier PEX selection prevent future discoloration and contamination.
Repairing or replacing water heater components
Assess repairs to the water heater by identifying symptoms—discolored hot water, insufficient heat, leaks, strange noises, or pressure issues—and matching them to likely failed components such as sacrificial anodes, heating elements, thermostats, valves, or the tank itself.
Replace anodes to reduce corrosion, swap elements or thermostats for heating issues, repair valves for leaks, and replace the tank when irreparable corrosion or persistent contamination is evident.
Treating municipal-supplied discoloration (filtration, chemical adjustments)
After addressing internal water heater faults, attention shifts to discoloration originating from the municipal supply, which requires solutions beyond tank components.
The recommended approach includes point-of-entry filtration, activated carbon for organics, and oxidizing filters or chlorination for iron/manganese.
Coordination with the water utility for source testing and pH/chemical adjustments is essential; implement municipal remedies before in-home repairs to prevent recurrence.
How to Replace a Corroded Copper Pipe Section Step-by-Step
Before any cutting begins, the water supply must be shut off and the affected section drained to prevent spills.
The corroded segment is then cut out, pipe ends prepared and a compatible replacement piece selected and fitted with appropriate seals or soldered joints.
Finally, the repair is pressure-tested and the system slowly restored to service once no leaks are detected.
Turn off water and drain affected section
Shut off the main supply valve to isolate the affected line, then open the nearest faucets and any downstream fixtures to relieve pressure and drain residual water from the section to be replaced.
Confirm flow stops and check a pressure gauge if available.
Catch remaining water with a bucket, towels, and a slight tilt of the pipe.
Guarantee adequate drying time before proceeding.
Cut out corroded section safely
With the section emptied and fittings dried, proceed to remove the corroded copper by first marking the cut points at least 1–2 inches past visible damage to reach solid metal.
Wear gloves and eye protection, support the pipe to prevent stress, and use a tubing cutter or saw for clean, square cuts.
Deburr edges and inspect for hidden weakness before discarding the removed segment.
Prepare pipe ends and choose compatible replacement material
Prepare the cut ends by removing any remaining burrs, solder, or corrosion until solid, bright metal is exposed and the pipe faces are square and clean.
Measure diameter and wall thickness, confirming copper grade or suitable alternative (PEX, CPVC) that matches pressure, temperature, and local code.
Select matching fittings and connector materials to prevent galvanic corrosion; document sizes for ordering.
Install replacement with correct fittings and seals
Begin the replacement by dry-fitting the new section and chosen fittings to verify alignment, clearances, and glue or solder type before committing to permanent joins.
Once satisfied, apply flux and solder or primer and solvent per material, assemble fittings with proper torque, and install approved compression or push-fit seals.
Trim excess, remove debris, and guarantee joints are neat and fully seated before moving to testing.
Pressure-test and restore service
Pressurize the repaired section and inspect all joints for leaks before returning the system to normal use.
Slowly open isolation valves to reintroduce water, monitoring pressure gauges and visual connections.
Bleed trapped air via high points or fixtures until steady flow occurs.
Confirm fittings remain dry under operating pressure.
Gradually restore full service, documenting the repair and any pressure readings for records.
Post-repair checks for leaks and water quality
Inspect the repaired section thoroughly for any signs of leakage and verify water quality before returning the system to routine use.
The technician observes joints under pressure, checks for dampness, and re-tests fittings after temperature cycles.
Collect water samples to confirm absence of discoloration, metal taste, or odor.
If contaminants persist or leaks appear, isolate the section and repeat repair or consult a water-quality specialist.
When to Use Filtration, Softeners, or Chemical Treatments
Selection of treatment depends on scope and cause: point-of-use filters can remove copper at taps while whole-house systems protect plumbing throughout the building.
Choosing filter media (e.g., activated carbon, ion exchange, or specialized metal-adsorbing cartridges), a water softener, or chemical options hinges on measured metal levels, hardness, and pH.
Chemical neutralizers and corrosion inhibitors can adjust water chemistry where physical removal is insufficient or impractical, but they require proper dosing and monitoring.
Point-of-use filters vs whole-house systems
When addressing blue-stained plumbing, homeowners must choose between targeted point-of-use filters and whole-house systems, or consider softeners and chemical treatments based on contaminant type and plumbing goals.
Point-of-use filters protect drinking water and fixtures at specific taps. Whole-house systems treat all incoming water, preventing staining throughout plumbing.
Softeners and chemical dosing address hardness or specific chemistry issues when appropriate.
Filters and media that reduce copper and metals
Many situations with blue-stained fixtures arise from elevated copper or other metals in water.
Choosing the appropriate treatment—filtration, ion-exchange softening, or chemical dosing—depends on contaminant concentrations, water pH, and the homeowner’s goals for point-of-use versus whole-house protection.
Cartridge filters with chelating media, catalytic carbon, or greensand remove metals; reverse osmosis offers point-of-use reduction.
Greensand and specific resins suit whole-house applications with proper maintenance.
Pros and cons of water softeners in corrosion control
After considering filters and media that remove copper and other metals, attention turns to water softeners as a possible tool for corrosion control.
Softeners reduce hardness minerals, which can lower scaling and sometimes change corrosion dynamics.
Pros: protect appliances, reduce deposits.
Cons: can increase sodium, alter water chemistry, and sometimes worsen metal leaching.
Effectiveness depends on water composition and system monitoring.
Chemical neutralizers and corrosion inhibitors
Consider chemical neutralizers and corrosion inhibitors as targeted treatments that adjust water chemistry to prevent pipe degradation when filtration or softening alone are insufficient.
They correct acidity, stabilize pH, and form protective films on metal surfaces.
Application suits systems with persistent blue staining, low alkalinity, or galvanic corrosion.
Professional water testing guides selection and dosing; monitoring guarantees effectiveness and prevents residual chemical issues.
Comparison of Pipe Materials for Preventing Blue Water
A concise comparison of common pipe materials clarifies how choices affect blue water risk, balancing durability, corrosion potential, and cost. The table below summarizes copper, PEX, CPVC, and galvanized steel across key factors to guide selection for different water chemistries and budgets. Recommendations follow from that matrix to match material strengths with system conditions.
| Property | Summary |
|---|---|
| Copper | Durable, low leaching risk, higher cost |
| PEX | Flexible, corrosion-resistant, moderate cost |
| CPVC | Chemically resistant, rigid, mid-to-low cost |
| Galvanized | Prone to corrosion/blue staining, low cost |
Copper vs PEX vs CPVC vs Galvanized (durability, corrosion risk, cost)
When selecting piping to prevent blue water, homeowners and plumbers must weigh durability, corrosion resistance, and cost across copper, PEX, CPVC, and galvanized options.
Copper is durable and antimicrobial but can corrode in aggressive water and is costly.
PEX resists corrosion, is flexible, and affordable.
CPVC offers chemical resistance but can become brittle.
Galvanized corrodes and is cheapest upfront yet highest long-term risk.
Best material choices for different water chemistries and budgets
Selecting the right pipe depends on the specific water chemistry and the homeowner’s budget: hard, alkaline water, soft acidic water, high dissolved oxygen, or high chloride content each push material choice in different directions.
For acidic or high-oxygen water, PEX or CPVC resists corrosion.
For alkaline, copper performs well.
For chloride-rich or budget constraints, PVC or lined HDPE reduces leaching and cost.
Preventive Maintenance to Avoid Future Discoloration
Preventive maintenance focuses on regular tasks that reduce the risk of future blue discoloration, such as scheduled fixture flushing and checks.
It also includes monitoring water chemistry—pH and hardness—plus replacing sacrificial anodes and servicing the water heater as needed.
Clear recordkeeping and recognizing warning signs that require immediate action help guarantee problems are caught early.
Routine flushing and fixture maintenance schedule
Establishing a regular flushing and fixture maintenance schedule reduces the risk of recurring blue discoloration by removing accumulated minerals and biofilm before they reach problematic levels.
Monthly flushing of low-use lines, quarterly aerator and cartridge cleaning, and annual supply-line inspection are recommended.
Records of dates, flow duration, and findings help identify trends and trigger earlier intervention when staining or flow changes appear.
Monitoring water pH and hardness
Regular monitoring of water pH and hardness enables early detection of chemical conditions that promote blue staining, allowing targeted adjustments before corrosion or mineral deposition accelerates.
Technicians should test pH and total hardness monthly, record trends, and adjust treatment—neutralizers, sequestrants, or water softening—based on results.
Consistent monitoring prevents metal leaching and buildup that contribute to blue discoloration.
Replacing sacrificial anodes and water heater maintenance
Inspecting and maintaining the water heater’s sacrificial anode and related components reduces the risk of metal corrosion that can release copper and other ions into the plumbing, causing blue discoloration.
Regularly check anode depletion, replace with appropriate magnesium or aluminum rods, flush tanks to remove sediment, tighten fittings, and verify temperature/pressure relief valve function.
Routine service extends heater life and minimizes contaminant release.
Keeping records and signs that warrant immediate action
When maintenance tasks and observations are logged systematically, patterns that signal emerging corrosion or plumbing failures become clear and allow timely interventions.
Records should note water tests, discoloration incidents, pipe replacements, anode changes, and pressure events.
Immediate action is required for persistent blue staining, sudden pressure loss, metallic taste, visible leaks, or elevated metal concentrations in tests; these indicate active corrosion or contamination.
Cost Estimates and When to Hire a Licensed Plumber
Typical DIY repairs for blue-stained water pipes often cost a few dozen to a few hundred dollars, while professional replacement or extensive remediation can range from several hundred to several thousand depending on materials and scope.
A licensed plumber should be engaged for persistent staining, suspected corrosion, lead or copper contamination, visible leaks, or when local codes and permits are involved.
Homeowners should ask for a written estimate, proof of license and insurance, a clear scope of work, timeline, and any warranty or post-repair testing documentation.
Typical DIY vs professional replacement cost ranges
A range of factors — pipe length, material, accessibility, and local labor rates — largely determines whether replacing blue water pipe is economical as a DIY project or requires a licensed plumber.
DIY costs typically range $30–$300 for materials and basic tools; professional replacements commonly run $300–$2,500+, depending on complexity, permits, and finish restoration.
Obtain multiple quotes and compare warranties.
Scenarios that require licensed intervention
Because blue water pipe failures can affect a home’s structural integrity, safety, and local code compliance, certain situations clearly demand a licensed plumber rather than a DIY approach.
Hire a pro for persistent discoloration with unknown source, active leaks behind walls or ceilings, galvanized-to-modern conversions, municipal code triggers, multi-unit buildings, or when permits and pressure testing are required.
Expect formal estimates and warranties.
What to ask a plumber and what documentation to request
When circumstances require a licensed plumber, homeowners should come prepared with specific questions and request clear documentation that supports cost estimates and permits.
Ask about licensing, insurance, scope of work, itemized estimates, timeline, warranty, and subcontracts.
Request written estimate, proof of license and insurance, permit copies, and a signed contract detailing materials, labor rates, change-order process, and warranty terms before work begins.
Real-World Examples and Short Case Scenarios
Several brief case scenarios illustrate common causes and remedies for blue water.
One describes small, localized fixture discoloration cleared by flushing; another shows homewide blue water traced to corroded copper fittings requiring part replacement.
A third attributes temporary discoloration to a recent municipal supply change and outlines appropriate homeowner responses.
Small localized fixture discoloration resolved by flushing
Technicians describe short episodes of blue staining confined to a single sink or shower that disappear after running the cold tap for a few minutes; in these cases the discoloration is traced to small amounts of copper corrosion or aerator deposits loosened by pressure changes and remedied by simple flushing and cleaning of the fixture.
Technicians report removing aerators, flushing lines, and replacing damaged cartridges when staining recurs.
Homewide blue water caused by corroded copper fittings
Small, fixture-specific blue staining that clears with flushing can sometimes signal a broader problem: widespread blue water across multiple taps caused by corroded copper fittings in the plumbing system.
In one house, green-blue flow persisted until a plumber isolated a corroded mixing valve. Replacing deteriorated copper fittings and flushing lines eliminated staining.
Homeowners were advised to inspect aging fittings and schedule professional assessment promptly.
Municipal supply change triggering temporary discoloration
When a municipal water utility alters treatment chemicals or switches source water, households can experience temporary blue-green discoloration that appears across multiple taps.
Case reports show the tint often dissipates after lines flush or the system re-equilibrates. Utilities issued advisories in several towns; residents flushed cold and hot lines, documented episodes, and reported resolution within days.
Persistent staining prompted targeted plumbing inspections and communication with the supplier.
Signs a Problem Is Resolved and How to Verify Long-Term Safety
After repairs, a clear water testing protocol—initial tests, follow-up sampling at set intervals, and checks for contaminants—confirms whether the blue discoloration has been eliminated.
A defined monitoring timeline with scheduled inspections and documented results guides necessary follow-up actions if readings worsen or linger.
If staining or abnormal test results reoccur despite correct repairs, it likely signals broader system issues requiring thorough assessment.
Water testing protocol after repair
A clear, methodical water testing protocol is essential to confirm that repairs resolved the blue water issue and that potable quality is sustained over time.
Post-repair testing should include visual, pH, copper, lead, and microbiological assays. Use certified labs, document results, compare to standards, and retain samples.
Repeat tests per local guidance to verify stability. Immediate corrective steps are planned if exceedances recur.
Timeline for monitoring and follow-up actions
Six to twelve weeks of scheduled monitoring provides a clear window to confirm that blue-staining and elevated metal levels have been resolved and that water quality remains stable.
Samples taken at weeks 0, 2, 6, and 12 should show declining metal concentrations and absence of staining.
If successive tests meet regulatory limits and no new discoloration appears, shift to routine annual testing and document results for records.
When reoccurrence indicates broader system issues
If monitoring over the initial 12-week period shows consistent declines in metal concentrations and no new staining, attention should shift to recognizing signs that recurring blue water points to wider system failures rather than isolated pipe corrections.
Recurrence, correlated across multiple fixtures, fluctuating pH, persistent particulate presence, or municipal supply changes suggests systemic corrosion, contamination, or treatment failures; pursue thorough system inspection, water chemistry testing, and utility coordination.
Conclusion
To summarize, homeowners confronting blue or discolored water should act promptly yet calmly, combining basic tests with targeted repairs or professional help when needed. Significantly, water discoloration complaints account for roughly 15% of residential plumbing service calls, underscoring its common—often solvable—nature. With systematic inspection, simple fixes like replacing corroded fittings or flushing lines, and routine maintenance, most discoloration issues can be resolved and long-term water quality safeguarded.