
How to Connect Misaligned PVC Pipe: Simple Fixes for a Leak-Free Joint
To connect misaligned PVC pipes and ensure a leak-free joint, begin by assessing the offset and angle of the misalignment. For small angular discrepancies, use swivel or repair couplings. For larger offsets, cut the pipes to square ends and use elbows or short couplers. Apply primer and solvent cement for a permanent fix, or opt for flexible rubber couplings with corrosion-resistant clamps for a temporary solution. Always support the piping and allow for thermal expansion to prevent future misalignments. For detailed step-by-step instructions, tool lists, and troubleshooting tips, continue reading.
Why Misaligned PVC Pipes Cause Leaks and When to Fix Them
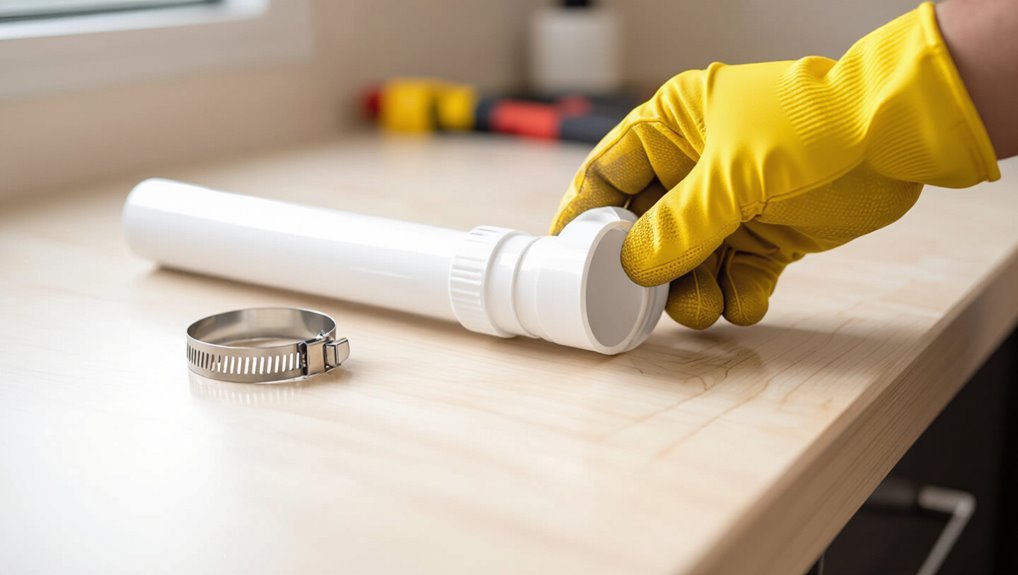
Common causes of misalignment in PVC plumbing include settling foundations, thermal expansion, improper fitting during installation, and stress from nearby fixtures.
Distinguishing a misaligned joint from other leak sources relies on localized wetness, visible gaps or uneven fittings, and tracing the flow back to a specific connection.
Before attempting repairs, the homeowner should consider safety precautions and whether local codes or permit requirements apply, contacting a professional if unsure.
Common causes of misalignment in PVC plumbing
When PVC pipes are misaligned, stress concentrates at joints and seals, increasing the risk of cracks, failed solvent welds, and leaking connections.
Common causes include poor initial layout, thermal expansion, settling or shifting foundations, improper support or hangers, and measurement or cutting errors.
Awareness of these factors informs how to connect misaligned PVC pipe correctly and when to realign or add flexible couplings.
Signs of a misaligned joint vs other leak sources
Although a visible drip or damp patch may suggest a leak, distinguishing a misaligned joint from other sources requires observing specific indicators: check for gap or offset at the fitting, uneven or stressed pipe angles, solvent-weld residue absence, and misaligned coupling seams.
Contrast with pinhole corrosion, cracked sections, or fixture leaks by tracing flow path, feeling for pressurized spray, and isolating sections under pressure.
Safety and permit considerations before repair
Assess potential hazards and regulatory requirements before attempting any repair on misaligned PVC pipes, since improper work can worsen leaks, create water damage, or violate local codes.
Inspect for electrical proximity, structural impacts, and trapped contaminants.
Confirm permit needs for plumbing alterations and notify building management.
When unsure, engage licensed plumbers to guarantee compliance, safe isolation of water, and durable, code-compliant repairs.
Quick assessment: How to evaluate the misalignment and damage
A quick assessment begins with precise measurements of offset, angular gap, and run-out to quantify the misalignment.
The inspector then checks pipe surfaces, joints, fittings, and nearby supports for cracks, deformation, or signs of stress.
Where damage is extensive or corrective alignment would compromise strength, replacement is preferred to repair.
Measuring offset, angular gap, and run-out
Before any repair begins, the technician measures three key parameters—offset, angular gap, and run-out—to quantify misalignment and damage.
Offset is the lateral displacement between pipe centers; measured with a straightedge and tape or calipers.
Angular gap is the degree difference between pipe axes; measured with an angle gauge or digital inclinometer.
Run-out is radial wobble around the circumference; checked with a dial indicator or rotating inspection.
Inspecting pipe condition, fittings, and surrounding supports
Inspection begins with a focused visual and tactile survey of the pipe, fittings, and nearby supports to determine the extent and nature of misalignment and damage.
Note cracks, crazing, soft spots, and deformations. Check fitting sockets for hairline fractures and solvent-weld integrity.
Verify supports, hangers, and fasteners for looseness or corrosion. Document measurements, damage locations, and load paths to guide repair choices.
When replacement is better than repair
Determine whether repair is feasible by quickly weighing misalignment severity, material damage, and system demands.
If offsets exceed connector tolerances, cracks penetrate walls, or multiple joints show degradation, replacement prevents recurrent leaks.
Consider long-term pressures, freeze exposure, and inaccessible locations that complicate future fixes.
Prioritize full replacement when reliability, safety, or cost-effectiveness outweigh temporary alignment remedies.
Tools and materials needed for connecting misaligned PVC pipe
Before starting repairs, a concise inventory of tools and materials guarantees the misalignment can be corrected efficiently.
Consider these essentials:
- Cutting, deburring and measuring tools plus PVC primer;
- Offset fittings such as flex and slip couplings and bell reducers;
- Adhesives, sealants, clamps and pipe supports.
With the right kit on hand, the installation approach and required parts become clear.
Essential tools (saws, deburring tools, measuring tools, primers)
A concise set of tools and materials streamlines connecting misaligned PVC pipe: a fine-toothed PVC or hacksaw for clean cuts, a deburring tool or utility knife to remove burrs and square the ends, a tape measure and marker for accurate alignment and overlap, and PVC primer and solvent cement appropriate for the pipe schedule.
Additional essentials include gloves, rags, a square for perpendicular cuts, and a small brush for primer application.
Fittings and connectors for offsets (flex couplings, slip couplings, bell reducers)
Bridging pipe misalignments requires the right fittings: flexible couplings accommodate slight offsets and angular variation, slip couplings allow for short insertions and adjustments, and bell reducers shift between different diameters while compensating for minor alignment errors.
Choice depends on offset size, pressure rating, and pipe material. Use stainless clamps with flex couplings, measure insertion depths for slip couplings, and verify reducer taper and support.
Adhesives, sealants, and support materials
Select adhesives, sealants, and supporting materials that match the PVC type, service conditions, and the size of the misalignment.
Use solvent cement rated for schedule and pressure, primer where required, and flexible sealants for slight gaps.
Add backing tape or foam for large voids and corrosion-resistant clamps or straps for mechanical support.
Choose materials compatible with temperature, chemicals, and local code.
Step-by-step fixes for common misalignment scenarios
The section outlines targeted repair steps for typical PVC misalignment problems and what each situation requires.
Key approaches include:
- Small axial offsets — flexible couplings.
- Angular misalignment — swivel/repair couplings.
- Significant offsets — elbow plus short-run replacement.
A final note addresses slip-fit and telescoping repairs for mismatched joints.
Fix A Small axial offset using PVC flexible couplings
For a small axial offset, the procedure begins with cutting the pipe square and deburring the ends to guarantee proper seating.
A flexible PVC coupling is then slipped over both ends, positioned to span the gap, and aligned to follow the pipe axis.
The coupling’s clamps or screws are tightened according to the manufacturer’s torque or tightening instructions to secure a leak-free joint.
Cut and prepare pipe ends
Measure and mark both pipe ends to expose clean, square faces before cutting; accurate preparation guarantees the flexible coupling can bridge a small axial offset without leaking or stressing the joints.
Use a fine-tooth saw or PVC cutter, maintain 90° cuts, deburr and chamfer edges, and remove dirt, grease, and old primer.
Dry-fit components to confirm alignment and required insertion depth.
Install coupling and tighten per manufacturer
Slide the flexible coupling onto one pipe end, aligning its sleeve so the clamp bands sit clear of any burrs or debris.
Center the coupling over the gap, push the second pipe into the sleeve until proper engagement.
Evenly tighten manufacturer-specified clamps or worm gears, alternating sides to compress the gasket uniformly.
Verify alignment, torque to spec, then inspect for leaks under pressure.
Fix B Angular misalignment using swivel or repair couplings
For angular misalignment, the installer selects a swivel or repair coupling sized for the pipe and pressure rating.
The two pipe ends are aligned within the coupling’s swivel range, adjusted for angle, and held steady.
Once positioned, the joint is primed, glued per manufacturer instructions, and clamped or fastened until cured.
Choose correct swivel fitting
Select a swivel or repair coupling sized to the pipe diameter and rated for PVC applications, ensuring the fitting’s angular tolerance matches the observed misalignment.
Confirm material compatibility (CPVC vs PVC), pressure rating, and temperature limits.
Choose a nipple length that accommodates end preparation without stressing the joint.
Prefer fittings with corrosion-resistant clamps or stainless hardware for longevity in exposed or damp environments.
Align, glue, and secure the joint
Begin by dry-fitting the swivel or repair coupling onto both pipe ends to verify angular correction and required insertion depth, making small adjustments until the pieces sit square without binding.
Once aligned, mark insertion depths, disassemble, clean and prime per manufacturer instructions.
Apply PVC cement evenly, reassemble to marked positions, rotate slightly for even spread, hold until set, then secure with straps or clamps as needed.
Fix C Significant offset using elbow and short-run replacement
For significant offsets, the technician first measures and marks precise cut points to remove the misaligned section.
Short runs of pipe and appropriately angled elbows are then fitted to bridge the gap and restore the correct alignment.
Careful dry-fitting and final solvent welding guarantee a snug, leak-free replacement.
Plan and mark new cuts
Measure the offset and visualize the new route before marking cuts: determine the exact lateral and vertical displacement, choose an appropriate 90° elbow and short-run coupler to bridge the gap, and calculate the required cut lengths including insertion depths.
Mark cut lines on both pipe ends, accounting for socket depths and chamfers. Label pieces, double-check measurements, and guarantee clear, accessible cut locations for clean removal.
Install elbows and short pipe sections for realignment
Cut the prepared pipe ends square, dry-fit a 90° elbow and a short-run coupler on each side, and verify that the assembled pieces bridge the measured lateral and vertical offset without binding.
Once fit is confirmed, mark orientations, disassemble, apply primer and solvent cement to sockets and spigots, reassemble in marked positions, hold for set time, then inspect alignment and test for leaks.
Fix D Misaligned slip-fit joints and telescoping repairs
The procedure outlines how to fabricate a sleeve splice to bridge misaligned slip-fit joints and telescoping sections.
Instructions emphasize proper cleaning, priming, and solvent-welding technique to achieve a watertight bond.
Careful sizing and overlap measurements are highlighted to guarantee mechanical strength and leak-free performance.
Creating a sleeve splice and ensuring a watertight bond
Begin by selecting a sleeve whose outer diameter matches the larger of the two mating pipes. Cut pipe ends square, deburr, and dry-fit to confirm alignment.
Apply primer, then PVC cement to sleeve interior and pipe ends. Insert pipes fully, twisting slightly for even adhesive distribution. Hold until set, wipe excess, and test for leaks after cure time stated by the adhesive manufacturer.
Using specialty fittings and adapters for tricky alignments
Specialty fittings and adapters can salvage awkward PVC alignments when standard couplings fail, offering different trade-offs in flexibility, seal type, and ease of installation. A concise comparison helps select between flexible couplings, Fernco fittings, ball-and-socket joints, and push-fit options based on movement tolerance and permanence. The following table summarizes key characteristics for quick reference.
| Fitting type | Notes |
|---|---|
| Flexible coupling | Elastic sleeve with clamps; good for minor misalignment and vibration |
| Fernco fitting | Rubber sleeve with multiple sizes; reliable for repairs and variable diameters |
| Ball-and-socket | Articulating joint; allows angular adjustment but may require supports |
| Push-fit | Tool-free connection; fast installation but limited for significant offset |
Comparison of flexible couplings, Fernco fittings, ball-and-socket, and push-fit options
A practical comparison of flexible couplings, Fernco fittings, ball-and-socket joints, and push-fit connectors highlights how each addresses misalignment: flexible couplings use rubber sleeves and clamps for modest offsets and vibration isolation; Fernco (rubber-to-metal) fittings offer broad diameter tolerance and ease of retrofit; ball-and-socket assemblies permit angular movement and rotation for larger misalignments; and push-fit options deliver rapid, tool-free connections best suited to small offsets and repair work.
| Type | Best use |
|---|---|
| Flexible coupling | Modest offset, vibration |
| Ball-and-socket | Large angle, rotation |
Gluing, priming, and sealing techniques for leak-free PVC joints
Proper priming and solvent cement application are outlined step‑by‑step to guarantee full coverage and correct joint assembly.
For situations where adhesive joints are impractical, rubber sleeves and gasketed couplers are described as reliable alternative seal methods.
Curing time guidelines and a recommended pressure‑testing procedure are provided to verify leak‑free performance before putting the line into service.
Proper priming and solvent cement application steps
Begin by preparing clean, dry surfaces and confirming correct fit before any primer or solvent cement is applied; this guarantees the joint will bond properly and prevents trapped contaminants.
Apply primer to pipe and fitting evenly, allow to soften PVC briefly, then swiftly coat with solvent cement.
Insert pipe with a quarter-turn, hold alignment until set, wipe excess, and follow manufacturer cure times before pressurizing.
Alternative sealing methods for non-glue fittings (rubber sleeves, gasketed couplers)
Consider rubber sleeves and gasketed couplers when solvent welding is impractical or joint misalignment prevents a reliable glued bond; these mechanical seals provide flexibility, vibration absorption, and easier disassembly while maintaining pressure integrity when selected and installed correctly.
Choose compatible materials, guarantee clean pipe ends, center sleeves to avoid pinch points, tighten clamps evenly, and verify seal compression without over-tightening to prevent distortion or leaks.
Curing times and pressure-testing recommendations
After selecting a sealing method—whether a flexible rubber sleeve or a solvent-welded joint—attention must turn to curing times and pressure-testing to guarantee a leak-free connection.
Allow solvent-welded joints to cure per manufacturer’s minimum (typically 15–60 minutes initial, 24 hours full strength).
For sleeves, follow recommended clamp torque and 1–2 hours settling.
Perform gradual pressure tests up to working pressure, inspect for seepage.
Supporting the pipes and preventing future misalignment
Proper support prevents joints from reworking and reduces stress on repairs.
Recommendations cover hangers, clamps, and spacing, plus allowances for thermal expansion with movement joints.
Structural causes such as foundation settlement should be assessed and addressed to prevent recurring misalignment.
Proper pipe hangers, clamps, and spacing guidelines
Choose hangers and clamps that match the pipe material and load, and position them to limit movement and distribute weight evenly.
Use cushioned supports for PVC to prevent abrasion.
Space supports according to diameter and orientation: shorter spans for horizontal runs, closer spacing near joints and fittings.
Securely anchor hangers to structure, avoid overtightening, and inspect periodically for sagging or loosening.
Thermal expansion considerations and movement joints
Supports and clamps that control sag and abrasion also influence how PVC will move as temperatures change; designers must account for thermal expansion to prevent future misalignment and stress at fittings.
Allow calculated free length between anchors, install expansion joints or flexible couplings where runs cross temperature differentials, and use sliding supports to accommodate movement.
Periodic inspection guarantees joints remain secure.
Addressing foundation settlement and structural causes
Evaluating and mitigating foundation settlement and structural movement is essential to prevent PVC pipe misalignment and recurring repairs.
Inspect foundations, slabs, and supporting framing for cracks, gaps, and deflection.
Install proper pipe hangers, adjustable supports, and expansion joints.
Address soil compaction, drainage, and footing issues; consult a structural professional for underpinning or repair when movement threatens plumbing alignment and long-term integrity.
Common mistakes and how to avoid them
Common errors include cutting pipe too short or leaving joints under stress, which can cause leaks or failure.
Choosing incorrect fittings or mixing incompatible materials further compromises connections.
Relying on extra sealant instead of correcting alignment masks problems rather than fixing them.
Cutting too short or creating stress at joints
Cutting a PVC pipe too short or forcing joints into alignment often transfers load to fittings and seals, leading to leaks, cracks, or premature failure.
To avoid this, measure twice, leave adequate insertion depth, and use slight offsets or couplings for alignment.
Support pipes to prevent sagging, relieve stress at turns with straps or expansion joints, and test under pressure before finishing.
Using wrong-size fittings or incompatible materials
Select fittings and materials that match the pipe’s size, pressure rating, and chemical compatibility to prevent leaks and failures.
Using undersized or oversized fittings, or mixing PVC with incompatible plastics or metals, causes poor seals, stress, and corrosion.
Verify standards (schedule, SDR), choose compatible solvent-weld, threaded, or mechanical couplings, and replace mismatched components to guarantee durable, leak-free joints.
Overreliance on sealant instead of mechanical correction
Even when fittings and materials match, some installers rely on extra sealant or adhesive to hide misaligned joints rather than correcting the alignment itself.
This practice masks gaps, stresses fittings, and accelerates failure. Proper mechanical correction—recutting, reaming, using appropriate couplings or realigning supports—yields durable seals.
Use sealant only as recommended, after achieving true fit and alignment, not as a substitute.
Troubleshooting persistent leaks after repair
If a repaired misaligned PVC connection continues to leak, the technician should first isolate the exact source by drying the area, pressurizing the line, and inspecting joints and fittings under light.
If re-inspection shows a flawed socket, inadequate solvent weld, or damaged pipe, the choice between redoing the joint and replacing the entire run depends on the extent of damage, number of compromised fittings, and access constraints.
If the leak persists after a proper rework or the problem involves multiple joints or hidden runs, a professional plumber should be called.
Isolating the leak source and re-inspection steps
Begin by shutting off the water and drying the area around the repair to create a controlled environment for inspection.
The technician then re-pressurizes briefly, watches for active drips, and uses dye or tissue to trace moisture.
Connections and nearby fittings are checked for hairline leaks.
Any remaining seepage is documented, photographed, and isolated to determine targeted corrective steps without disturbing unaffected sections.
When to redo the joint vs replace the run
Decisive judgment hinges on the extent and persistence of the defect: when a repaired PVC joint continues to weep despite correct cleaning, priming, and solvent-cement application, the problem typically lies beyond surface-level technique and warrants replacing the entire run rather than redoing the joint.
Replacing is advised for multiple failing joints, cracked or warped pipe, systemic misalignment, or inaccessible fittings; isolated glue failures may merit a redo.
When to call a professional plumber
When repeated attempts to reseal a misaligned PVC joint fail or surrounding runs have been replaced due to persistent defects, a professional plumber should be consulted to troubleshoot ongoing leaks.
A plumber evaluates hidden damage, pressure issues, improper fittings, or settlement that DIY fixes miss. They can perform leak detection, recommend rerouting or replacement, obtain permits, and guarantee durable, code-compliant repairs.
Cost, time, and materials checklist for DIY vs professional repair
A concise comparison of DIY versus professional repairs helps readers weigh time, cost, and materials before proceeding.
Consider these quick reference points to frame the decision:
- Estimated DIY time and material costs by repair type.
- Typical professional service costs and response time.
- When hiring a pro is more cost-effective than DIY.
The following checklist will guide whether a homeowner can reasonably tackle the job or should call a licensed plumber.
Estimated DIY time and material costs by repair type
Several common misalignment repairs vary widely in required time, cost, and materials depending on severity and access.
Small realignments with couplings: 30–60 minutes, $10–25 for coupling, primer, cement.
Short replacement sections: 1–3 hours, $20–60 for pipe, fittings, adhesive.
Offset repairs with flexible connectors: 45–90 minutes, $15–40.
Minor support/bracing: 15–30 minutes, $5–15.
Tools may add cost.
When professional service is cost-effective
After outlining typical DIY time and material ranges for common misalignment fixes, it is useful to identify circumstances where hiring a professional is more cost-effective than a homeowner attempt.
Professionals are recommended when access is restricted, multiple joint failures exist, specialized tools or permits are required, water damage or mold is present, or estimated DIY labor and replacement parts approach quoted service costs plus warranty and liability coverage.
Visual guide and measurement templates for common repairs
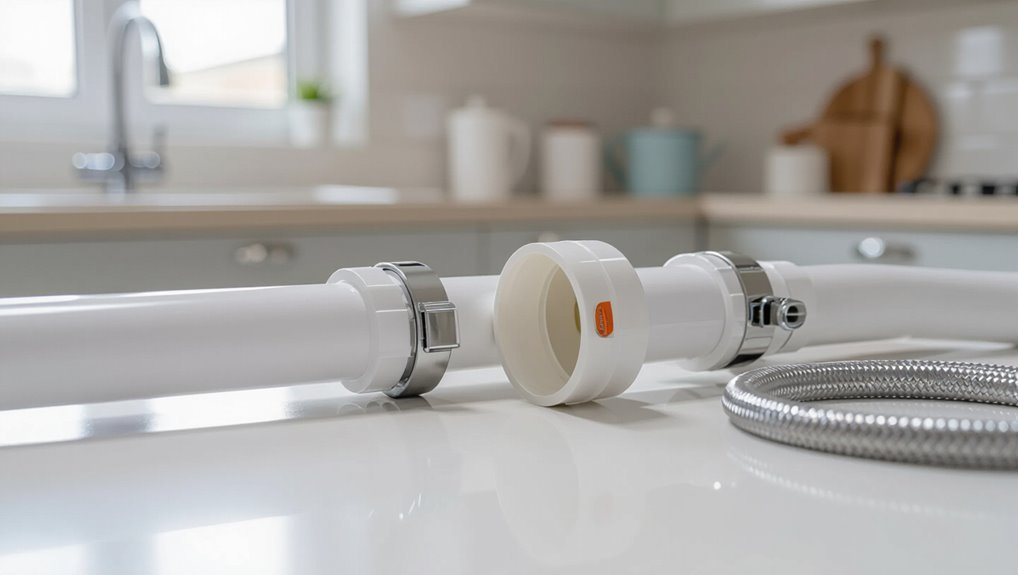
When pipes sit out of alignment, clear visual references and simple measurement templates guide accurate cuts and fittings; diagrams show offset types, elbow placements, and spacer locations.
Printable templates display centerline offsets, angle markings and trim lengths for common diameters. A straightedge, protractor and labeled cut-list enable repeatable results.
Photographs of finished joints confirm alignment and glue coverage for reliable, leak-free repairs.
Conclusion
A concise wrap-up underscores that addressing misaligned PVC pipes promptly prevents small gaps from becoming costly floods. With basic assessment, the right tools, and fittings, most faults can be repaired reliably; specialty adapters serve as the safety net when geometry refuses to cooperate. Avoiding common mistakes and methodically testing joints keeps leaks at bay. Like tuning a stringed instrument, careful alignment restores smooth function and silence to plumbing systems.
