How to Tell If a Drain Pipe Is Broken: 9 Signs, Causes, and Quick Fixes
If you suspect your drain pipe is broken, look for these key signs: slow or blocked drains, gurgling noises, foul sewage odors, wet spots around your foundation, visible cracks or corrosion, persistent clogs, mold, peeling paint, sudden drops in water pressure, and unexpected increases in your water bill. To quickly assess the situation, perform a visual inspection, conduct dye or water tests, and listen for leaks. Temporary solutions such as using a drain snake, applying patch kits, or shutting off the water can help mitigate damage. For more detailed information on signs, causes, and repair options, continue reading.
What a broken drain pipe looks and feels like
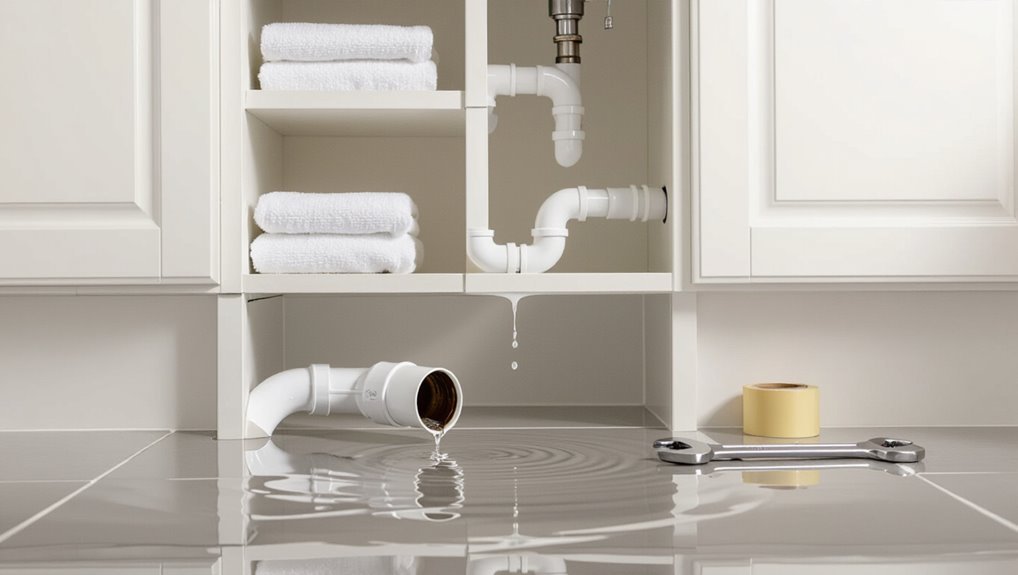
The section outlines the visible signs and tactile cues that can indicate a broken drain pipe, starting with external damage such as cracks, corrosion, and displaced joints.
It then covers common internal failures—blockages, corrosion pits, and collapsed sections—and how those typically present as slow drainage, gurgling, or unexpected leaks.
Finally, it contrasts hairline cracks, larger fractures, and complete breaks by their appearance, leak patterns, and urgency for repair.
Visible external damage to check for
Visible signs on a drain pipe give the most immediate clues to a break: cracks, splits, or crushed sections are often accompanied by rust, flaking material, or wet stains where water has escaped.
Observers checking how to tell if a drain pipe is broken should note misaligned joints, bulges, corrosion pitting, mineral buildup, visible leaks, and softened insulation—each indicating external failure needing prompt evaluation.
Common internal failures and how they present
While external signs provide immediate evidence of damage, internal failures often manifest differently and require attention to subtle clues.
Slow drainage, intermittent backups, gurgling sounds, foul odors, and unexplained mold or damp spots indicate internal compromise.
Changes in water pressure, persistent clogging despite clearing, or sewer gas smell suggest joint separation, corrosion, or internal collapse.
Professional inspection commonly confirms hidden defects.
Differences between hairline cracks, fractures, and full breaks
A cracked drain pipe can range from a hairline fissure that leaks slowly to a displaced fracture or a complete break that allows free flow of wastewater; each type has distinct visual cues, tactile signs, and functional effects.
Hairline cracks: thin wet streaks, occasional drips, minimal odor.
Fractures: visible gap, seepage under pressure, damp surrounding soil.
Full breaks: separated sections, heavy discharge, strong odors, rapid pooling.
9 clear signs your drain pipe is broken
Signs of a broken drain pipe often appear suddenly or persistently and can indicate serious underlying damage. Homeowners should watch for obvious symptoms like slow or blocked drains, foul odors, and visible wetness near the foundation.
Recognizing these warning signs early can prevent extensive repair costs and health hazards.
- Slow or completely blocked drains that resist plunging or snaking
- Foul sewer or rotten-egg smells and gurgling noises from drains or toilets
- Wet spots, pooling water, or soggy ground near the foundation
Slow or completely blocked drains
Slow or completely blocked drains often indicate a serious issue within the drain pipe rather than a surface clog.
Water that drains extremely slowly or not at all, accompanied by gurgling, odors, or backups in multiple fixtures, suggests internal collapse, crushing, misalignment, or large intrusions.
Professional inspection (camera) is recommended to identify pipe fractures, root intrusion, or severe corrosion requiring repair or replacement.
Recurrent clogs despite plunging or snaking
When persistent backups continue after plunging or snaking, the problem likely lies beyond simple surface blockages and points to damage inside the drain pipe.
Recurrent clogs suggest collapsed sections, root intrusion, severe offset joints, or internal corrosion creating rough edges that trap debris.
Temporary clearing won’t last; video inspection and targeted repair or replacement are typically required to resolve the underlying structural failure.
Foul sewer or rotten-egg smells near drains or outdoors
Why does a persistent rotten-egg odor linger near drains or around the yard? A sulfurous smell usually indicates sewer gas escaping through cracked, disconnected, or clogged drain pipes, failed traps, or damaged venting.
The odor signals organic waste decomposition and possible methane presence. Immediate inspection for leaks and trap integrity is recommended; prolonged exposure suggests worsening pipe failure and requires professional repair to prevent health and structural risks.
Gurgling sounds from drains or toilets
A rhythmic gurgling from a sink or toilet often indicates airflow disruption in the drain system caused by partial blockages, broken pipes, or compromised venting.
Such sounds typically occur when trapped air moves through water seals or when drains struggle to equalize pressure.
Persistent gurgling across multiple fixtures suggests a main drain or vent issue requiring inspection, camera diagnosis, or professional repair.
Wet spots, pooling water, or soggy ground near the foundation
Several wet patches, persistent pooling, or noticeably soggy soil near a building’s foundation strongly indicate a compromised drain pipe.
Water accumulation often follows underground fractures, joint failures, or collapsed sections redirecting flow toward the footing.
This moisture can undermine soil bearing capacity, stain exterior walls, and promote mold.
Prompt inspection with a camera or probe and targeted repairs prevent structural damage and escalating remediation costs.
Unexplained spikes in water or sewage bills
Moisture near the foundation can be accompanied by less obvious signs indoors, including unexplained spikes in water or sewage bills that indicate a failing drain pipe.
Sudden increases without changed usage suggest leaks, ground infiltration, or sewer line breaks.
Tracking meter readings, comparing past bills, and inspecting for persistent dampness can confirm suspicion.
Prompt professional diagnosis prevents escalation and higher costs.
Mold, mildew, or peeling paint on walls/ceilings near plumbing
When mold, mildew, or peeling paint appears on walls or ceilings near plumbing, it often signals a compromised drain pipe allowing persistent dampness that feeds microbial growth and degrades finishes.
Inspect adjacent fixtures, joints, and seams for leaks; smell musty odors and note recurring stains.
Promptly address source moisture to prevent structural rot, health risks, and spreading contamination; consult a plumber for confirmation and repair.
Foundation cracks or sinkholes near sewer lines
Persistent dampness that causes mold or peeling paint can also signal deeper problems beneath the surface: failing drain pipes can erode soil around sewer lines, leading to foundation cracks or even sinkholes near the home.
Visible footing or slab fissures, doors or windows that stick, and small depressions in the yard near sewer runs indicate undermining soil and warrant immediate inspection by a plumber or structural engineer.
Sewage backup into sinks, tubs, or toilets
Sewage backing up into sinks, tubs, or toilets is a direct and unmistakable sign that a drain pipe is blocked, damaged, or collapsed.
Persistent backups, gurgling drains, slow drainage, and multiple fixtures affected indicate a main sewer obstruction or break.
Immediate professional inspection is advised to locate the failure, prevent contamination, and determine whether spot repairs, pipe replacement, or sewer line excavation is necessary.
How to quickly confirm a broken drain pipe yourself
A homeowner can perform a few quick, safe checks—visual inspection of wet spots, listening for running water, and monitoring water usage—to spot likely pipe damage.
Simple tests like a dye or targeted water-run test help localize leaks, while tools such as a plunger, drain snake, or a rented inspection camera can confirm blockages or breaks.
If results are ambiguous or tests fail to reproduce symptoms, professional diagnostics are recommended because home methods can miss hidden or intermittent failures.
Simple observational checks to perform safely
Several quick visual and sensory checks can help confirm a broken drain pipe without specialized tools.
Inspect accessible piping for wet spots, corrosion, or misalignment.
Smell for persistent sewage odors near drains or walls.
Check ceilings, floors, and baseboards for discoloration, soft spots, or bubbling paint.
Listen for unusual gurgling or constant running when fixtures are idle.
Note dampness and document findings.
Dye test and water-run tests for locating leaks
One straightforward way to pinpoint a drain leak is to use dye and controlled water-run tests that trace flow paths and reveal where water escapes.
A nonstaining food dye or commercial tracer is added to upstream fixtures while others stay dry. Observe exposed pipes, joints, ceilings, and walls for colored seepage.
Repeat with individual fixtures to isolate the failing section.
Using a plunger, drain snake, and camera rental basics
If dye and controlled runoff tests indicate a probable source but visible signs remain unclear, basic tools can confirm whether the problem is a clog or a broken pipe.
A plunger can dislodge simple blockages; a hand or motorized drain snake reaches deeper obstructions.
For uncertain cases, short-term drain camera rental lets users inspect joints and cracks visually before choosing repair or professional evaluation.
When home tests are unreliable and why
When simple home tests produce inconsistent results, homeowners need a rapid, reliable method to distinguish between a temporary clog and an actual pipe break.
Use successive isolation: shut off fixtures, run one drain at a time, and observe water levels and noises.
Combine with dye or food coloring tests and brief camera inspection.
Persistent flow anomalies or sudden pressure loss indicate likely pipe damage requiring professional repair.
Common causes of drain pipe breaks
Drain pipe failures commonly stem from a combination of material aging and environmental stresses, with older PVC, cast iron, and clay pipes becoming brittle or cracked over time.
External forces such as tree root intrusion, soil movement, freezing and thaw cycles, and physical impacts from construction can break seals or fracture pipe walls.
Corrosion, chemical attack, improper installation, and excessive internal pressure further increase the likelihood of leaks and collapses.
Age and material deterioration (PVC, cast iron, clay)
Over time, pipes weaken as their materials degrade, making age a primary factor in failures of PVC, cast iron, and clay systems.
PVC becomes brittle and cracks; cast iron corrodes, develops pinholes and joint failures; clay pipes fracture at brittle joints and wear from abrasion.
Older installations lack modern fittings and backups, so gradual material breakdown eventually leads to leaks, blockages, and collapse.
Tree root intrusion and soil movement
Although often gradual and invisible, tree roots and shifting soil are among the most frequent causes of buried drain pipe failure.
Roots seek moisture, infiltrate joints or cracks, then expand, deforming or crushing pipes.
Soil movement from erosion, settling, or nearby excavation alters pipe alignment and stresses connections.
Combined, these forces cause blockages, leaks, and fractures requiring inspection, root removal, and targeted repairs or replacement.
Freezing and thaw cycles
Freezing and thaw cycles exert repeated mechanical stress on buried drain pipes by expanding moisture in soil and within pipe defects as ice forms, then contracting during melt.
Repeated freeze–thaw shifts shift bedding, displace joints, crack brittle materials and exacerbate existing hairline fractures.
Surface runoff and frost heave can expose or misalign sections, increasing leak and collapse risks unless addressed promptly.
Corrosion, chemical damage, and improper installation
Many drain pipe failures stem from corrosion, chemical attack, or poor installation practices.
Corrosion thins metal or degrades joints over time, causing leaks and collapse. Harsh cleaners, industrial chemicals, or acidic waste accelerate deterioration in metal and plastic.
Improper slope, unsupported runs, or incompatible fittings create stress points and misalignment, leading to fatigue, joint separation, and eventual failure if uncorrected.
Excessive pressure, physical impact, or construction damage
Beyond slow deterioration and installation flaws, drain pipes also fail suddenly when subjected to forces they were not designed to bear.
Excessive internal pressure from blockages or misapplied chemicals can burst joints. External impacts—heavy equipment, dropped tools, or soil movement during construction—crack or displace lines.
Such damage causes abrupt leaks, misalignment, and contamination, often requiring immediate excavation and pipe replacement.
Short-term quick fixes to reduce damage
When a drain pipe shows signs of failure, prompt temporary measures can limit water and sewage damage until professional repair is possible.
Simple fixes—rubber patches, epoxy putty, or a hose clamp—can slow leaks, while immediate steps like stopping sewage backups, carefully clearing clogs with a plunger or snake, and isolating fixtures reduce risk.
The following points highlight quick actions and safety priorities to protect property and health.
- Use a temporary patch to seal visible leaks and buy time.
- Stop sewage backups now and isolate affected fixtures to prevent contamination.
- Clean and unclog cautiously to avoid making the break worse.
Temporary patching materials and methods (rubber, epoxy putty, clamp)
Temporary patching materials such as rubber sheets, epoxy putty, and band clamps provide quick, short-term repairs to slow or stop leaks until a permanent fix can be made.
Rubber wraps seal hairline cracks; epoxy putty bonds and fills holes after drying; adjustable band clamps compress patches for pressure.
These methods reduce water damage temporarily but require follow-up assessment and professional repair for reliability.
How to stop sewage backups immediately
Act quickly to limit damage and health risks when a sewage backup occurs: shut off the main water supply to prevent further flow, avoid using drains and toilets, and turn off electricity to affected areas if water is present near outlets.
Contain spread with towels, mops, or sandbags; block thresholds and vents; divert flow with temporary hoses or buckets; call a plumber and, if needed, emergency cleanup services.
Safe cleaning and unclogging techniques to avoid worsening damage
After stopping water flow and containing sewage, immediate safe cleaning and unclogging steps can limit further damage while professional help is arranged.
Wear gloves and eye protection; remove visible debris with disposable tools and seal in bags.
Use a plunger gently, a hand auger for short clogs, and avoid chemical drains or high-pressure methods that can worsen cracks.
Document conditions for the plumber.
When to shut off water or isolate plumbing fixtures
In many cases, shutting off the water or isolating specific fixtures is the fastest way to limit flooding and sewage spread until a professional arrives.
Locate main shutoff and individual valves for sinks, toilets, and appliances. Turn off affected fixtures, drain lines by opening faucets, and use appliance isolation valves.
Notify occupants, avoid electrical hazards, and call a plumber to assess and repair the break.
Permanent repair and replacement options with pros and cons
Permanent solutions range from targeted spot repairs and trenchless relining to full excavated replacement or pipe bursting, each with distinct trade-offs in cost, lifespan, and disruption. The homeowner must weigh short-term savings against long-term durability and site disturbance when choosing a method. Below is a concise comparison to clarify suitability and emotional stakes.
| Option | Pros / Cons |
|---|---|
| Spot repairs | Low cost, minimal disruption / May be temporary if surrounding pipe is degraded |
| Pipe liners (trenchless) | Fast, preserves landscaping / Higher material cost, limited to certain damage types |
| Traditional excavation | Longest lifespan, complete replacement / Highest disruption and labor cost |
| Pipe bursting | Replaces pipe without full trench / Can be costly and requires access pits |
| Cost vs. lifespan vs. disruption | Cheaper options often shorten lifespan; permanent fixes cost more but reduce future stress |
Spot repairs and pipe liners (trenchless methods)
Spot repairs and pipe-lining techniques offer trenchless solutions for addressing localized damage or aging sections of drain pipes without full excavation.
They include epoxy patching for small cracks and cured-in-place pipe (CIPP) liners to reinforce entire runs.
Advantages: faster, less disruptive, often cost-effective.
Limitations: reduced diameter, suitability depends on pipe condition, and liners may not fix severe collapses or root intrusion requiring full replacement.
Traditional excavated pipe replacement
When trenchless options prove unsuitable—due to severe collapse, extensive root intrusion, or pipe misalignment—a full excavated replacement becomes the reliable remedy.
Crews dig to expose damaged runs, remove and replace sections or entire lines with modern materials.
Pros: complete access, durable results, corrected pitch and joints.
Cons: higher cost, longer disruption, landscaping and pavement restoration required after completion.
Pipe bursting and relining alternatives
Although trenchless methods do not suit every situation, pipe bursting and relining offer durable, less disruptive alternatives to open excavation for replacing or rehabilitating sewer and drain lines.
Pipe bursting fractures the old pipe while pulling a new one in, providing full replacement.
Relining inserts a cured-in-place liner to seal leaks and smooth flow.
Each method has material, access, and defect-type limitations.
Cost, lifespan, disruption, and suitability comparison
After considering trenchless options such as pipe bursting and relining, homeowners and contractors must weigh cost, lifespan, disruption, and suitability to choose between permanent repair and full replacement. Decision factors include budget, expected longevity, site access, and future-proofing. Comparison summary:
| Option | Cost | Disruption |
|---|---|---|
| Repair | Lower | Minimal |
| Replacement | Higher | Significant |
How professionals diagnose and fix broken drain pipes
Professionals typically begin with a camera inspection to pinpoint breaks, blockages, and pipe condition. Homeowners can expect a brief on-site review of the footage.
After diagnosis, technicians outline a repair workflow and timeline—ranging from trenchless patching to full excavation—so clients know the expected duration and disruption.
If excavation or major repairs are required, the contractor will address permits and code compliance and arrange any necessary municipal inspections.
What to expect during a professional video inspection
Many homeowners hire a professional video inspection to pinpoint leaks, cracks, and blockages inside drain pipes without destructive digging.
Technicians feed a waterproof camera through access points, recording real-time footage and marking defect locations and pipe orientation.
The report includes stills, video timestamps, pipe material, defect severity, and recommended repair options, enabling informed decisions and accurate quotes from contractors.
Typical repair workflow and timeline
Once the video inspection identifies the defect type and location, the repair workflow moves from assessment to action with a predictable sequence: confirm scope and access points, select the appropriate repair method (spot repair, pipe lining, section replacement, or full excavation), procure materials and permits if required, and schedule crews.
Technicians prepare site protection, execute repair, test flow and seals, backfill or restore finishes, and provide documentation and warranties.
Permits, codes, and when excavation requires inspections
Permits, codes, and inspections dictate much of the repair path for broken drain pipes, especially whenever digging is involved. Local building departments set rules about when a simple patch is sufficient versus when an excavation, structural tie-in, or sewer connection change requires a permit and an inspector’s sign-off.
Contractors verify jurisdictional requirements, submit plans if needed, schedule inspections at rough and final stages, and document compliance to avoid fines or rework.
Deciding between DIY repair and hiring a pro
The decision to attempt a DIY fix or call a plumber hinges on risk factors such as sewer access, structural damage, or health hazards that typically require professional intervention.
A concise cost-benefit checklist helps homeowners weigh material and tool costs, time, and potential repair escalation against hiring fees.
Before hiring, homeowners should ask plumbers about licensing, insurance, estimated repairs and timelines, warranties, and references.
Risk factors that mandate professional help
Several clear risk factors indicate a homeowner should call a professional rather than attempt a DIY drain repair.
Persistent backups, foul sewage odors, visible structural damage, recurrent leaks after previous fixes, mold growth, compromised foundation or floor subsidence, and involvement of main sewer lines or municipal connections require trained assessment.
Electrical hazards, inaccessible pipe runs, or lack of proper permits also mandate professional intervention.
Cost-benefit checklist for homeowners
When weighing DIY repair against hiring a professional, a homeowner should compare immediate costs, time investment, skill requirements, and potential long-term liabilities to determine the most economical and safe course of action.
Assess damage severity, tool and material expenses, warranty and insurance differences, personal confidence level, and downstream risks like mold or structural harm.
Estimate total cost and recovery time before deciding.
Questions to ask a plumber before hiring
Why ask targeted questions before hiring a plumber?
Homeowners should verify licensing, insurance, and experience with drain repairs.
Ask for written estimates, warranty details, timeline, and inspection methods (camera, leak detection).
Request references and clarify hourly versus flat rates, permit handling, and cleanup responsibilities.
Comparing answers helps decide between DIY risks and professional reliability.
Preventing future drain pipe failures
Preventing future drain pipe failures focuses on routine maintenance, sensible use, and smart planning.
A regular maintenance schedule with seasonal checks, clear rules about what not to flush or pour, and landscaping practices that keep tree roots away from lines all reduce risk.
When pipes are old, upgrading proactively—based on age, material, and repair history—can prevent recurring problems.
Maintenance schedule and seasonal checks
Routine inspection and timely maintenance form the backbone of a reliable drainage system.
Homeowners should inspect visible pipes quarterly, clear debris after heavy storms, and schedule professional camera inspections biennially.
Seasonal checks before freeze/thaw cycles and after prolonged wet periods catch early damage.
Keep records of repairs, dates, and findings to guide future maintenance and prioritize vulnerable sections.
Best practices for what not to flush or pour down drains
Several common household items should never be flushed or poured down drains because they accelerate clogs, corrode pipes, and can cause costly failures.
Oils, grease, and fat solidify and trap debris.
Coffee grounds, eggshells, and fibrous food form blockages.
Paper towels, wipes (even “flushable”), and sanitary products expand and obstruct flow.
Harsh chemicals can damage seals and septic ecosystems.
Tree and landscaping guidelines to protect sewer lines
A few simple landscaping choices can greatly reduce the risk of sewer line damage by minimizing root invasion, soil movement, and excess surface water that stress underground pipes.
Plant trees and shrubs at recommended distances from sewer mains, choose shallow-rooted species near lines, use root barriers and gravel trenches, grade yards for proper drainage, and avoid heavy equipment or structures above sewer easements to prevent future failures.
Upgrading pipes proactively: when and why
Because aging materials, soil shifts, and changing usage patterns quietly increase the likelihood of failure, homeowners and property managers should consider proactive pipe upgrades before persistent problems appear.
Replacing old clay, cast iron, or corroded metal with PVC, HDPE, or trenchless relining prevents leaks, blockages, and costly repairs.
Prioritize sections with repeated issues, nearby tree roots, or high traffic loads for inspection and replacement.
Signs of emergency and immediate steps to take
Visible flooding, strong sewage odors, rapid loss of water pressure, or signs of structural compromise all indicate the need to call an emergency plumber immediately.
The person should avoid contact with contaminated water, shut off the main water supply if safe, and evacuate areas at risk of collapse or electrical hazard.
A concise emergency contact checklist—including plumber, utility company, insurer, and time-stamped photos and notes—facilitates prompt response and documentation.
Indicators that require calling emergency plumbing now
Several clear signs indicate the need to call emergency plumbing immediately: rapidly rising water levels, foul sewage odors, gushing leaks that cannot be contained, sewage backing up into fixtures, or discolored, pressurized water coming from taps.
The occupant should shut off main water if safe, isolate affected areas, avoid using drains or appliances, and contact a licensed emergency plumber for immediate assessment and remediation.
Safety precautions for sewage exposure and structural risks
Any contact with sewage or rapid onset structural damage should be treated as an immediate hazard: raw sewage can carry pathogens and chemicals that pose acute health risks, while saturated floors, swollen joists, or bulging walls can indicate imminent collapse.
Evacuate occupants, keep clear of affected areas, ventilate if safe, avoid contact, and prevent electricity use.
Wear PPE and await professionals.
Emergency contact checklist and documentation tips
After evacuating occupants and securing the scene, identify signs that require immediate external help—active sewage flow, strong sewer gas odor, standing contaminated water, rapid structural movement, exposed live wiring, or visible sinkholes.
Contact emergency services, utility companies, and a licensed plumber.
Photograph damage, timestamp videos, record witness statements, and log calls.
Preserve evidence, avoid repairs before inspections, and store receipts for remediation.
Visual aid suggestions for the article
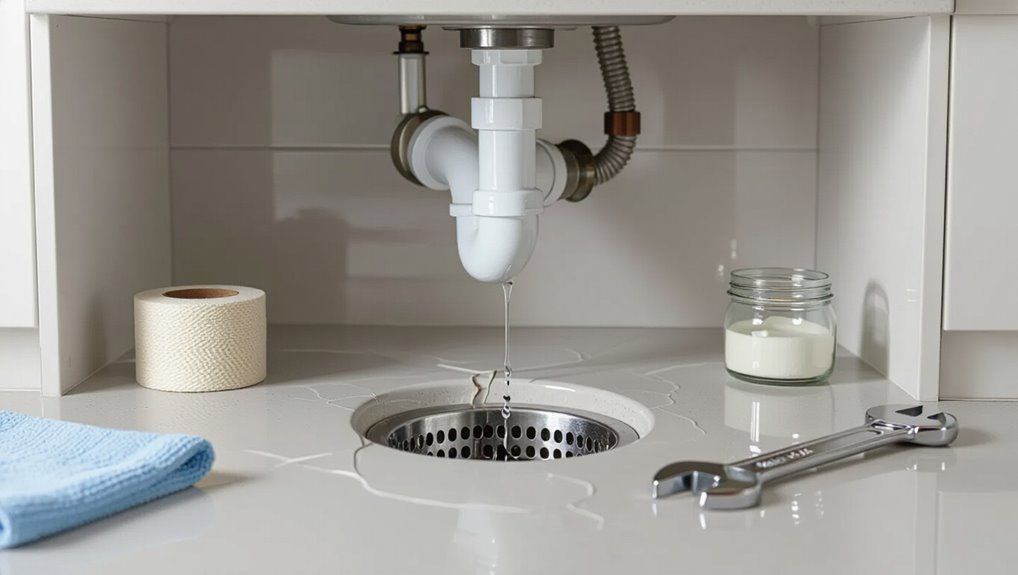
The author should consider including clear photos of visible pipe cracks, pooling ground, and mold-stained walls to help readers recognize real-world symptoms.
A labeled diagram showing common break locations and typical causes would clarify where problems most often occur.
An infographic summarizing the nine key signs at a glance can serve as a quick reference for emergencies.
Photo ideas: visible pipe cracks, pooling ground, mold-stained walls
When illustrating signs of a broken drain pipe, include clear close-ups of hairline and wider fractures in exposed sections, wide-angle shots of pooling water around foundations or yard depressions, and images of interior walls or ceilings showing mold staining and water lines to give readers immediate, visual cues of common failure modes.
Also capture soggy soil texture, displaced gravel, and damp baseboards to reinforce severity and context.
Diagram: common break locations and causes
Although often unseen, a clear diagram pinpointing typical break locations—joint connections, pipe bends, trench bedding zones, and sections under driveways or tree roots—helps readers quickly identify likely failure points and their common causes.
The visual should label causes (corrosion, ground movement, root intrusion, poor bedding, freeze-thaw), show depth profiles, flow direction, and include scalable icons for repair complexity and inspection priority.
Infographic: 9 signs at-a-glance
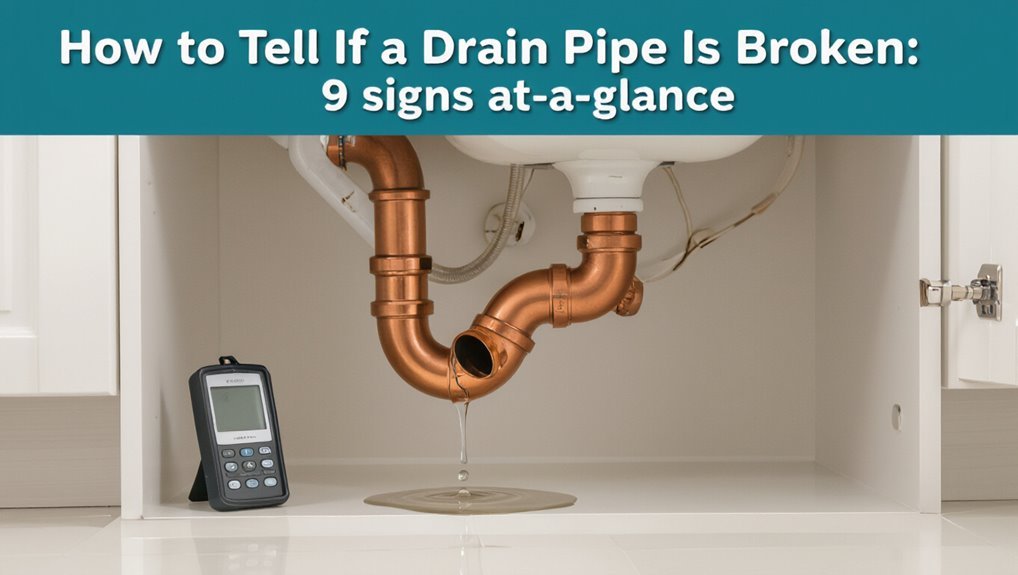
Following the diagram’s pinpointed failure zones, an at-a-glance infographic can quickly communicate the nine most common signs of a broken drain pipe for homeowners and inspectors.
Compact icons represent slow drains, gurgling, foul odors, wet spots, sinkholes, sudden lush patches, sewage backup, low water pressure, and unexplained bills.
Use clear labels, color-coded severity, and simple action steps with contact info for professionals.
Conclusion
In sum, a damaged drain pipe is not a sudden catastrophe but a quiet whisper of trouble beneath the floorboards—an understated sigh in the home’s plumbing. Recognizing those subtle hints and tending to them promptly keeps small grievances from becoming full-blown scandals. With timely patchwork, preventative rituals, and the right professional touch when needed, the household’s hidden circulatory system can be nudged back toward steady, unremarkable function and continued peace of mind.