How to Stop a Sump Pump From Overflowing: Quick Fixes and Lasting Solutions
To prevent a sump pump from overflowing, immediately cut the power, redirect overflow with hoses or sandbags, and use a wet vac to remove pooled water. Next, inspect the breaker, discharge line, check valve, intake screen, and float switch for clogs or failures. Test the pump for proper operation, watching for rapid cycling or unusual noises. For ongoing issues, consider routine inspections, a backup pump, a high-water alarm, or professional service. Detailed fixes and cost estimates are provided below.
How to Stop a Sump Pump From Overflowing: Immediate Actions to Prevent Water Damage
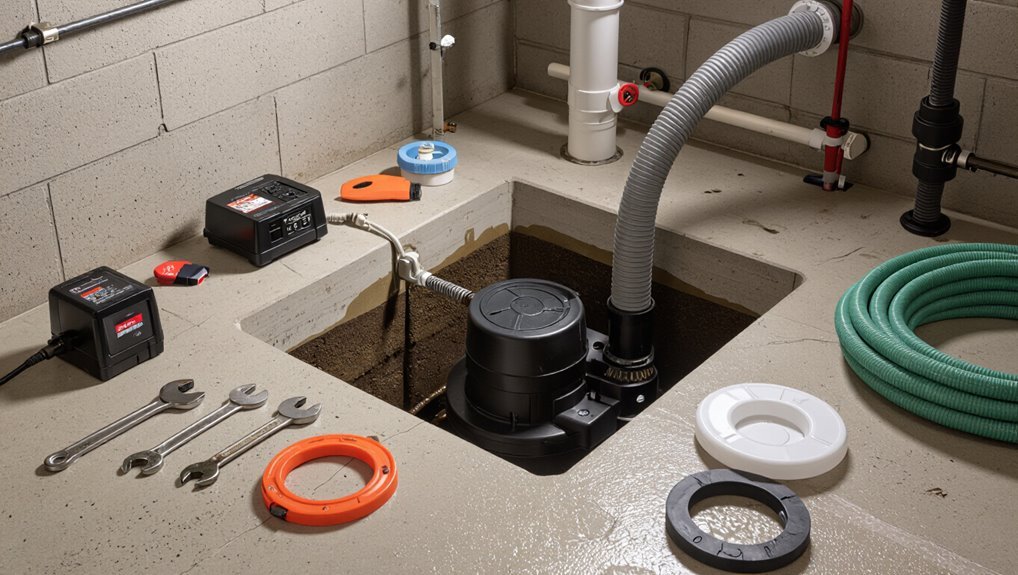
First, power to the sump pump and nearby electrical circuits should be shut off safely to reduce shock and fire risk while evaluating immediate danger.
Next, temporary measures such as directing water away with hoses, building barriers with sandbags, or removing water with a wet vac can limit damage until a fix is in place.
If water continues to rise, enters living spaces, or electrical hazards are present, contact emergency services or a licensed plumber promptly.
Shut off power safely and assess immediate risk
Cut power to the sump pump circuit immediately and evaluate electrical and structural hazards before touching any equipment.
The responder should confirm breaker or unplug status, wear insulated gloves, and avoid standing in water near outlets.
Inspect visible wiring, ceiling and floor stability, and note overflow sources.
Record conditions and contact a qualified electrician or plumber if risks persist to address how to stop sump pump from overflowing.
Use temporary measures to divert water (hoses, sandbags, wet vac)
Diverting excess water with temporary measures can limit damage while a permanent fix is arranged.
Use hoses to route overflow away from the foundation, ensuring secure connections and downhill discharge.
Place sandbags or barriers to block and redirect seepage.
Employ a wet vacuum to remove pooled water indoors, emptying it safely outside.
Monitor continuously and adjust placements as levels change.
When to call emergency services or a professional plumber
If the sump pump continues to overflow despite temporary measures, it is time to call for professional help or emergency services to prevent structural damage and health risks.
Contact a licensed plumber when pumps fail, electrical faults occur, or backup systems are inactive.
Call emergency services for rapid flooding, contaminated water, electrical hazards, or threatened occupants.
Document conditions and follow technician instructions.
Quick Troubleshooting Checklist
A concise troubleshooting checklist helps identify common causes of sump pump overflow quickly.
It should include verifying power and the circuit breaker, clearing the discharge pipe and check valve, and removing debris from the pump intake and float switch.
The checklist also recommends testing and resetting the float, and confirming proper pump placement and pit condition.
Check power supply and breaker
Start by verifying that the sump pump is receiving power and that the circuit breaker or fuse serving it has not tripped or blown.
Confirm the outlet is live with another device or a non-contact tester.
Inspect the pump’s power cord for damage and guarantee connections are secure.
Reset the breaker if tripped and replace a blown fuse; consult an electrician for repeated failures.
Inspect and clear the discharge pipe and check valve
Inspect the discharge line and check valve for blockages, kinks, or failed seals that can cause backflow or slow drainage.
Visually trace the pipe to the exterior, clear visible clogs, and straighten bends.
Test the check valve by running the pump briefly to confirm one-way flow.
Replace damaged valves or collapsed sections to restore proper discharge and prevent sump basin repeat filling.
Remove debris from the pump intake and float switch
Remove debris from the pump intake and float switch to restore reliable operation and stop intermittent overflows. A clogged intake or entangled float prevents proper activation and reduces flow.
With power off, remove the pump, clear mud, gravel, and fibers from the intake screen and housing.
Detach and gently clean the float mechanism, ensuring free movement before reinstalling and restoring power.
Test the float switch and reset or reposition if stuck
Lift the float manually and watch whether the switch engages and the pump runs; if it fails to move freely or the pump doesn’t activate, power should be cut and the float reset or repositioned to clear any binding.
After restoring power, cycle the float several times to confirm consistent activation.
Replace worn clips or adjust tether length if intermittent sticking persists.
Verify pump placement and pit condition
One quick checklist helps determine whether the pump sits correctly and the pit is functioning as designed: confirm the pump rests level on the pit floor, the inlet is unobstructed, and the pump is centered to prevent contact with the pit walls.
Inspect for debris, sediment buildup, corrosion, cracks, or standing water.
Verify the cover seals, check drainage around the pit, and reposition or replace as needed.
Common Causes of Sump Pump Overflow
Sump pump overflow typically results from a handful of identifiable failures that compromise the system’s ability to move water.
Common causes include mechanical wear or broken components, clogged or frozen discharge lines, malfunctioning float switches or sensors, undersized pumps for sudden heavy inflow, and loss of power without backup.
Identifying which of these issues is present guides the appropriate repair or preventive measure.
Mechanical failure or worn components
Mechanical failure and worn components are frequent culprits behind basement flooding when a pump fails to operate as designed.
Bearings, seals, impellers, float switches, and motors degrade over time or suffer manufacturing defects. Loss of power, intermittent operation, or decreased discharge capacity results.
Regular inspection, timely replacement of worn parts, and adherence to service intervals reduce the risk of malfunction-induced overflows.
Clogged or frozen discharge line
Inspecting the discharge line reveals a common and often overlooked cause of sump pump overflow: blockages or freezing that prevent water from exiting the system.
Debris, sediment, ice, or collapsed piping restrict flow, causing backups and continuous pump cycling.
Clearing obstructions, insulating exposed sections, and ensuring proper slope and routing restore discharge capacity and reduce overflow risk.
Regular inspection prevents recurrence.
Faulty float switch or sensor
Check the float switch and electronic sensor for signs of wear or misalignment, since a malfunctioning actuator is a frequent cause of overflow when it fails to signal the pump to start or stop.
Inspect wiring, connections, and mounting for corrosion, kinks, or obstruction.
Replace a buoyant or sticky float, recalibrate the sensor, or swap the switch to restore reliable on/off operation and prevent basin overrun.
Inadequate pump capacity for heavy inflow
A properly functioning float or sensor cannot compensate when the sump pump itself lacks the flow rate or head to handle sudden heavy inflow.
Undersized or worn pumps struggle during intense runoff, rising faster than discharge capacity.
Proper sizing for peak inflow, checking pump curves, replacing degraded impellers, and selecting higher-capacity models prevent overflow when groundwater or stormwater rates exceed an inadequate pump’s capability.
Power outages and lack of backup systems
When storms knock out electricity or a home’s circuit trips, sump pumps stop functioning unless a reliable backup is in place.
Without battery backups, generator connections, or secondary pumps, basements are vulnerable to rapid flooding during prolonged outages.
Regular testing of backup systems, maintaining charged batteries, and ensuring automatic transfer switches reduce overflow risk and provide continuity when primary power fails.
Improper pit size, installation errors, or poor maintenance
Beyond backup power, physical and installation factors frequently cause sump pump overflow.
Incorrect pit dimensions prevent proper float operation, while misaligned discharge lines or insufficient slope impede outflow.
Poorly seated pumps or clogged intakes reduce capacity.
Neglected maintenance allows debris buildup and wear.
Regular inspection, correct pit sizing, proper installation, and routine cleaning prevent many overflow incidents and extend pump life.
Diagnosing the Problem: How to Identify the Root Cause
A focused inspection begins with a visual checklist—confirming float clearance, discharge pipe condition, and intake screen cleanliness.
Simple tests of pump operation and flow rate, using a stopwatch and measuring container, reveal whether the unit moves water at expected speed.
Unusual noise, rapid cycling, or persistent odors point to specific failures, and basic tools like a multimeter or hose gauge can quantify performance for accurate diagnosis.
Visual inspection checklist for homeowners
Several quick visual checks can reveal common causes of a sump pump overflow.
Inspect for standing water, debris-clogged inlet screens, dislodged or kinked discharge pipes, visible cracks in the basin, and loose or corroded electrical connections.
Verify float switch clearance and position, check for sediment buildup, and note unusual odors or rust stains that indicate mechanical wear or past leaks needing repair or cleaning.
How to test pump operation and flow rate
One clear way to confirm whether a sump pump is functioning properly is to run a controlled test and measure both activation behavior and discharge flow.
Fill the pit with water until the switch triggers, time pump run duration, and observe discharge volume and velocity.
Compare against manufacturer specs. Note interruptions, weak flow, leaks, or reduced lift to identify performance issues needing repair or replacement.
When noise, cycling, or odor indicate specific failures
Many audible or olfactory signs point directly to particular sump pump failures: grinding or rattling often indicates bearing or impeller damage. Rapid on‑off cycling suggests float switch or overload issues, and persistent sewage or musty odors can signal a clogged or damaged discharge line or a failed check valve allowing backflow.
Technicians correlate sounds and smells with visual inspection: loose mountings, obstructed impellers, worn floats, or line breaches guide targeted repairs.
Using simple tools to measure pump performance
Audible and olfactory clues narrow likely causes, but confirming the root problem requires measuring pump performance with simple tools.
A multimeter verifies switch and motor voltage; a clamp meter measures current draw for overload or binding; a bucket and stopwatch estimate flow rate and cycle time; a tire pressure gauge checks float arm travel resistance.
Record readings, compare to specifications, and pinpoint faults.
Permanent Fixes and Upgrades to Prevent Recurrence
Long-term prevention focuses on addressing equipment, controls, and site layout to stop repeat overflows.
This can include replacing or upsizing the pump, installing or repairing check valves and proper discharge piping, and adding backup pumps with battery or water-powered backups plus a high-water alarm with alerts.
Improvements to the pit design, drainage, and surrounding landscaping further reduce inflow and strain on the system.
Replace or upgrade the pump: selecting correct capacity and type
When a sump pump repeatedly overflows, replacing or upgrading it with the correct capacity and type is often the most reliable permanent fix.
Selecting a pump matched to the pit size, expected inflow rate, and discharge conditions prevents underperformance and premature failure.
Evaluate horsepower, head (lift), and GPM at operating head.
Choose submersible versus pedestal based on space and debris, and prefer reliable seals and vendor support.
Install or repair check valves and proper discharge piping
Inspecting and correcting check valves and discharge piping guarantees water removed from the sump pit cannot return or spill onto the property, a common cause of repeat overflows.
Confirm valves are correctly oriented, sized, and free of debris or corrosion. Replace damaged piping, add rigid sections to prevent sagging, and secure joints.
Proper grading and extensions direct discharge away from foundations.
Add a backup sump pump and battery or water-powered backup
If a primary pump fails or power goes out despite having correct check valves and discharge lines, installing a backup sump pump provides a reliable second layer of protection.
Battery backup units activate automatically during outages; choose appropriate battery capacity and maintenance schedule.
Alternatively, a water-powered backup uses municipal pressure and requires no electricity.
Proper installation, testing, and periodic battery replacement guarantee dependable operation during emergencies.
Install a high-water alarm and automatic alerts
Install a high-water alarm to provide immediate, actionable warnings before a sump pit overflows.
A reliable alarm detects rising water, triggers audible/visual alerts, and can integrate with smart systems to send texts or push notifications.
Combined with notifications, it enables prompt manual intervention or remote activation of backups.
Regular testing and battery replacement guarantee functionality and reduce overflow risk.
Improve pit design, drainage, and landscaping to reduce inflow
Reducing the volume of water that reaches the sump pit is the most reliable way to prevent future overflows.
Regrading soil, adding French drains, extending downspouts, and installing perimeter drains divert surface and foundation water.
Resize or deepen the pit, add a proper basin and gravel, and seal foundation cracks.
These permanent measures decrease inflow, reduce pump cycling, and lower overflow risk.
Maintenance Plan to Keep Your Sump Pump Reliable
A clear maintenance plan prevents most sump pump failures and overflows.
It should outline a seasonal checklist, how and when to test the unit, which parts to inspect or proactively replace, and when to call a professional.
Recommended intervals balance simple DIY checks monthly or seasonally with annual professional service for more thorough inspection and repair.
Seasonal maintenance checklist
Create a seasonal maintenance checklist that outlines quarterly and storm-season tasks to keep the sump pump reliable.
It lists inspections, cleaning, and preparations to prevent overflow and guarantee readiness before heavy rains.
Prioritize simple, repeatable steps and document dates and observations for service history.
- Inspect pump and float
- Clean basin and inlet
- Check discharge line
- Verify backup power
- Replace worn components
How often to test and recommended procedures
How often should a sump pump be tested to verify reliability?
Monthly manual tests and annual full inspections are recommended.
Monthly: lift float to confirm activation and listen for motor sound; ascertain discharge flows away.
Annually: simulate heavy flow, check backup system operation and power source, clear basin and test alarms.
Record results and schedule repairs promptly to prevent overflow.
Parts to inspect and replace proactively
Several critical components should be inspected and replaced proactively to maintain sump pump reliability.
Check the float switch for free movement and corrosion; replace if sticky.
Inspect the check valve to prevent backflow and replace worn units.
Examine discharge piping and fittings for cracks or clogs.
Replace old or noisy pumps nearing lifespan.
Test and replace backup battery and alarms as needed.
DIY maintenance vs. professional service frequency
Distinguish routine DIY upkeep from scheduled professional inspections to guarantee consistent sump pump performance and avoid costly failures.
Homeowners should perform monthly checks: test operation, clear debris, verify float movement and outlet discharge.
Schedule a professional inspection annually or before heavy seasons to assess wiring, motor wear, and backup systems.
Document service dates and replace components per technician recommendations to maintain reliability.
Costs and Materials: What to Expect for Repairs and Upgrades
Typical cost ranges for common repairs and replacements—such as float switch replacement, impeller cleaning, or full pump replacement—help homeowners plan budgets.
The cost-benefit of adding battery backup systems or alarm alerts is considered alongside anticipated repair frequency and local flood risk.
A concise list of required tools and materials for common DIY fixes sets expectations for time, skill, and additional expense.
Typical cost ranges for common repairs and replacements
Repair and replacement costs for sump pump systems vary with part complexity, labor rates, and local market conditions; homeowners can expect basic repairs like float switch adjustments or check valve replacements to run from about $75 to $250, while motor replacements or installing a new pump typically range from $300 to $1,200, and more extensive work—such as relocating the pump, adding a battery backup, or upgrading to a larger-capacity unit—can push total expenses into the $1,000–$3,000+ range depending on materials and site-specific challenges.
| Repair | Typical range |
|---|---|
| Float/check valve | $75–$250 |
| Motor/new pump | $300–$1,200 |
| Relocation/upgrade | $1,000–$3,000+ |
Cost-benefit of backup systems and alarms
Because basement flooding can cause costly structural and content damage, homeowners should weigh the upfront expense of backup systems and alarms against potential loss and repair bills.
Backup pumps, battery or water-powered, and monitored alarms reduce risk of catastrophic damage.
Evaluate installation, maintenance, battery replacement and monitoring fees versus estimated repair/replacement costs and insurance premium impacts to determine net value.
Required tools and materials for DIY fixes
A basic toolbox, a few plumbing-specific items, and several consumables usually cover most DIY sump pump fixes and modest upgrades.
Essential tools include pliers, adjustable wrench, screwdriver set, utility knife, and a multimeter.
Plumbing items: PVC pipe, fittings, hose clamps, check valve, Teflon tape.
Consumables: silicone sealant, plumber’s putty, replacement gaskets, and spare float switch or impeller as needed.
Safety Precautions and Best Practices During Repairs
When addressing sump pump repairs, attention to electrical safety — including power shutoff and use of GFCI protection — is essential to prevent shock.
Technicians should also take measures to control contamination and mold after overflows by drying affected areas and using appropriate disinfectants.
Damaged pump components must be disposed of or recycled according to local regulations to avoid environmental harm.
Electrical safety when working with sump pumps
Several straightforward precautions can prevent electrocution and equipment damage during sump pump work.
Power should be disconnected at the circuit breaker and the pump unplugged before inspections.
Use a GFCI-protected outlet, insulated tools, and dry footwear.
Verify absence of voltage with a tester.
Avoid DIY electrical modifications beyond one’s competence; hire a licensed electrician for wiring, grounding, or control panel issues.
Preventing contamination and mold after overflow
Contain contamination promptly to reduce health risks and structural damage: after a sump pump overflow, occupants should isolate affected areas, remove standing water with pumps or wet vacuums, and ventilate spaces to speed drying while wearing gloves, eye protection, and respirators rated for mold and bioaerosols.
Surfaces must be cleaned with appropriate disinfectants, porous materials assessed for replacement, and humidity monitored until safe levels are restored.
Proper disposal of damaged pump components
Dispose of damaged sump pump components responsibly to protect health and the environment: corroded metals, electrical parts, oil-contaminated seals, and plastics should be segregated and routed to appropriate recycling or hazardous-waste facilities rather than regular trash.
Label containers, neutralize fluids per local guidelines, and wear PPE when handling. Document disposal for warranty or contractor records and contact local waste authorities for specific disposal protocols.
Real-World Scenarios and Recommended Solutions
Common scenarios that lead to sump pump overflow include heavy storms causing repeated backups, power outages during floods, and aging systems that cycle frequently.
For each, practical short-term measures and longer-term solutions are outlined to restore reliable operation and prevent recurrence.
Recommended approaches cover temporary fixes, standby power and backup pumps, and diagnosis with clear replacement criteria.
Heavy rainstorm causing repeated overflows short- and long-term fixes
When a heavy rainstorm overwhelms a sump system, repeated overflows can occur within hours as inflow exceeds pump capacity and discharge pathways become compromised.
Immediate actions include clearing debris from discharge lines, raising discharge outlets, and diverting surface runoff.
Short-term alternatives: add a temporary second pump or portable transfer pump.
Long-term solutions: upgrade pump capacity, enlarge drainage, install perimeter drains, and improve grading away from the foundation.
Power outage during flood backup strategies
Prepare for power loss by establishing backup strategies that keep a sump pump operational during outages caused by flooding.
Install a reliable battery backup system sized for anticipated run time, test batteries regularly, and keep spare charged units.
Consider a generator with automatic transfer switch rated for pump load.
Guarantee safe fuel storage, routine maintenance, and clear operating instructions for emergency responders or household members.
Old system with frequent cycling diagnosis and replacement steps
Investigate frequent sump pump cycling promptly, as rapid on-off cycles indicate underlying issues that accelerate wear and increase overflow risk.
Diagnose float switch binding, short-cycling due to incorrect pit size, or a failing check valve. Test runtime under load, inspect electrical connections, and measure amp draw.
Replace aging pumps with appropriately sized, variable-capacity or dual-pump systems and install a reliable check valve to prevent recurrence.
Signs You Need Professional Help Immediately
If the sump pump continues to overflow after basic troubleshooting, a professional should be contacted immediately.
Visible electrical burning, smoke, or exposed/dangerous wiring requires urgent expert intervention to prevent fire or electrocution.
Significant foundation cracks, repeated large-scale water intrusion, or other structural concerns also warrant prompt assessment by a qualified contractor.
Persistent overflow despite troubleshooting
Recognize that persistent sump pump overflow after basic troubleshooting indicates a problem beyond routine fixes and calls for professional intervention.
Continued backup suggests internal pump failure, blocked or damaged discharge lines, collapsed check valves, or inadequate system capacity.
A licensed plumber or basement waterproofing specialist should inspect, diagnose hidden mechanical faults, assess basin integrity, and recommend repair or replacement to prevent recurring flooding and property damage.
Electrical burning, smoke, or dangerous wiring issues
When overflow persists despite basic repairs, attention must immediately turn from mechanical faults to electrical hazards that can pose life-threatening risks.
Smell of burning, visible smoke, scorch marks, tripped breakers, or repeatedly overheated cords indicate wiring failure. Power should be cut and occupants evacuated.
A licensed electrician must inspect and repair damaged wiring, replace the pump’s power supply, and verify safe grounding before restoration.
Structural foundation concerns or extensive water intrusion
Because persistent water saturation or shifting soil can undermine a home’s structural integrity, signs of foundation distress or severe intrusion require immediate professional assessment.
Visible cracks in walls or floors, doors and windows binding, sloping floors, or standing water despite pump operation indicate systemic failure.
A qualified structural engineer or waterproofing specialist should inspect, diagnose underlying causes, and recommend repairs to prevent collapse or escalating damage.
Conclusion
When a sump pump threatens to overflow, the homeowner must act swiftly yet calmly, addressing immediate risks with simple checks before pursuing durable repairs. Practical troubleshooting, correct diagnosis, and targeted upgrades spare basements from cascades of water and endless anxiety. Investing in reliable components, routine maintenance, and professional help when indicators escalate guarantees peace of mind. With diligence, the nuisance is stopped — not merely managed, but conquered beyond measure.