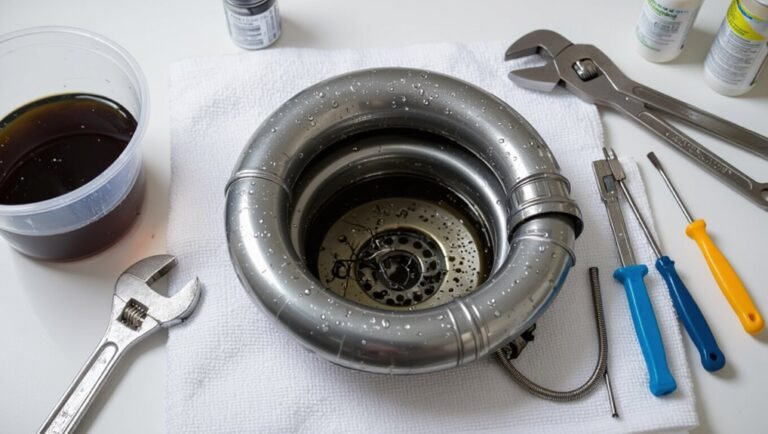
How to Apply Thread Sealant Properly: Step-by-Step Guide for Leak-Free Pipes
To apply thread sealant properly and ensure leak-free pipes, start by choosing the right sealant for your pipe material and the fluid it will carry. Clean the threads thoroughly to remove any old sealant, oil, or debris. If using PTFE tape, wrap it 2–4 snug turns in the direction of the thread rotation; for pipe dope, apply a thin, even coat to the male threads. Hand-start the fittings, torque them to the manufacturer’s specifications, and allow adequate curing time. Always check for safety and compatibility. For further detailed steps, tips, and troubleshooting advice, continue reading.
What Thread Sealant Is and Why It Matters for Leak-Free Pipes
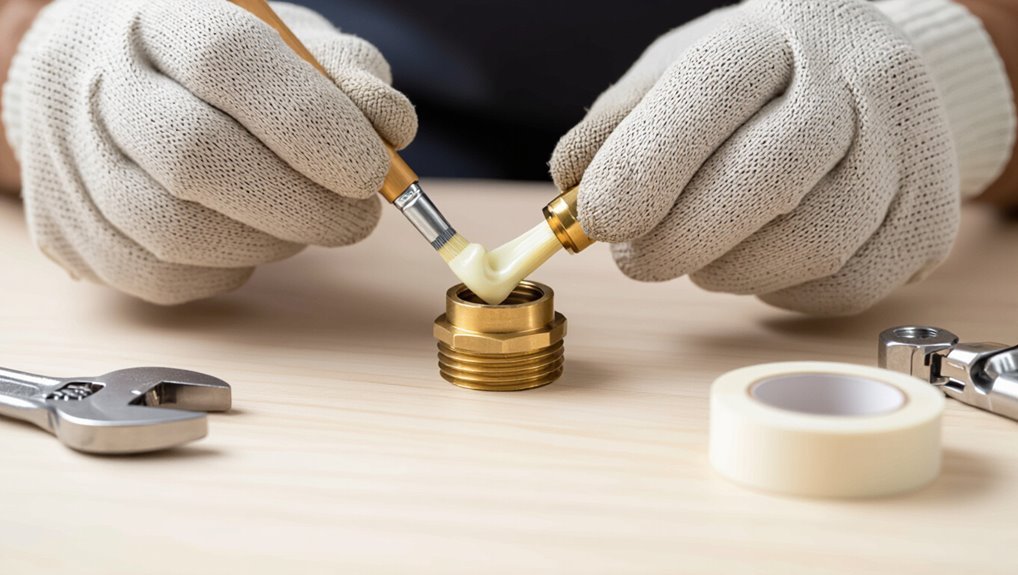
Thread sealant refers to products used to fill gaps and seal threaded pipe connections, commonly including pipe dope, PTFE tape, and anaerobic compounds.
Selection depends on factors such as pipe material, fluid type, pressure, and joint design—some fittings require sealant while others rely on metal-to-metal contact or preformed gaskets.
Each sealant has advantages and limits: PTFE is clean and inert but less gap-filling, pipe dope offers good lubrication and sealing on many metals, and anaerobic sealants create rigid bonds but need closely fitted threads and cure conditions.
Definition and types of thread sealant (pipe dope, PTFE tape, anaerobic sealants)
A thread sealant is a material applied to pipe threads to fill gaps, prevent leakage, and protect against corrosion.
Types include PTFE tape for general sealing, pipe dope (paste) offering lubrication and gap filling, and anaerobic sealants that cure in metal-to-metal threads.
Guidance on how to apply thread sealant varies by type, surface, and pressure requirements to guarantee reliable, leak-free joints.
When to use thread sealant vs. when not to (material compatibility and joint types)
When joining threaded fittings, deciding whether to use a sealant depends on the materials involved, the joint type, and the service conditions.
Metal-to-metal tapered threads typically require sealant or tape to fill crevices and prevent leaks, whereas parallel threads with a dedicated gasket or O-ring are designed to seal without paste or tape.
Use sealant on dissimilar metals prone to galvanic corrosion only if compatible; avoid sealant on flanged, compression, or pre-sealed fittings.
Advantages and limitations of common sealant types
Choosing whether to seal a joint leads naturally to selecting the right type of thread sealant, since different products balance sealing performance, compatibility, and ease of use.
PTFE tape offers cleanliness and chemical resistance but can slip on tapered threads.
Pipe dope provides strong, long-lasting seals yet may be messy and incompatible with some plastics.
Anaerobic sealants cure for metal but require precise application and cure time.
Quick Checklist: Tools, Materials, and Safety Before You Start
Before beginning, a concise checklist guarantees the job proceeds smoothly and safely.
Essential items include tools, consumables, PPE and ventilation, and surface-prep and inspection supplies:
- Pipe wrenches, tape measure, and applicator tools
- Thread sealant tape or paste and spare fittings
- Safety glasses, gloves, and a respirator plus a ventilated workspace
- Wire brushes, solvent, and thread gauges for inspection
The technician confirms availability and condition of each item before starting.
Essential tools and consumables
A concise checklist of tools, materials, and safety items guarantees thread sealant application proceeds smoothly and without unexpected delays.
Necessary tools include adjustable wrenches, pipe wrenches, thread gauges, and wire brushes.
Consumables: PTFE tape, anaerobic or pipe joint compound, thread cleaning solvent, rags, and replacement fittings.
Have thread locker, spare seals, and a disposal bag for used rags and solvents.
Personal protective equipment and ventilation
Personal protective equipment and adequate ventilation are essential to prevent inhalation of fumes and contact with skin when applying thread sealants.
Workers should wear chemical-resistant gloves, safety goggles, and long sleeves. Use respirators rated for organic vapors if ventilation is limited.
Guarantee work areas have cross-ventilation or local exhaust. Keep first-aid supplies and an eyewash station readily accessible.
Surface preparation supplies and thread inspection tools
With protective gear and ventilation in place, attention turns to the supplies and inspection tools needed to prepare pipe and fitting threads correctly.
Required items include solvent wipes, thread-cleaning brushes, wire brushes, lint-free cloths, and degreaser.
Inspection tools: magnifier, thread gauge, calipers, and straightedge.
Confirm proper lighting and a clean workspace.
Replace damaged fittings; document irregularities before sealing.
Step-by-Step Guide to Applying PTFE Tape for Pipe Threads
Before applying PTFE tape, the threaded surfaces should be inspected and cleaned to remove debris, corrosion, or old sealant.
The tape must be wrapped in the correct direction with consistent overlap and an appropriate number of turns for the pipe size to guarantee a snug seal without excess buildup.
Care should be taken when installing the fitting to avoid contaminating the tape, and fittings should be tightened to the manufacturer’s torque or until properly seated without over-torquing.
Inspecting and cleaning threads
Begin by visually inspecting both male and female threads for damage, corrosion, or debris that could prevent a proper seal.
Remove loose material with a stiff brush or nylon scrub pad.
Use a clean cloth and solvent if oil or grime is present.
Confirm threads are dry and free of nicks, burrs, or distortion before proceeding to tape application.
Correct tape orientation and wrapping technique
Having confirmed that threads are clean, dry, and undamaged, the installer should orient the PTFE tape so it will wind in the same direction the male thread will be turned into the fitting.
Hold tape taut, start at the thread shoulder, and overlap evenly without covering the first thread crest.
Smooth layers with finger pressure, maintaining tension and avoiding wrinkles or gaps for a uniform seal.
Number of wraps and overlap guidelines for different pipe sizes
The appropriate number of PTFE tape wraps varies with pipe diameter and thread pitch: small threads (1/8″–1/4″) typically require 3–4 tight turns, medium threads (3/8″–1/2″) 4–6 turns, and larger pipes (3/4″ and up) 6–8 turns, with coarser threads near the higher end to fill greater voids.
Overlap should be consistent, about 50% per wrap, avoiding excessive buildup that hinders fit.
Installing the fitting without contaminating the tape
With the correct number of PTFE tape wraps applied and overlapped, attention shifts to threading the fitting on without contaminating the sealant.
The installer aligns threads, starts by hand to guarantee smooth engagement, maintaining steady pressure to avoid bunching or dislodging tape.
If tools are required, they contact only the fitting body, not the tape surface, preserving the sealant for a clean joint.
Torque and seating: how tight is tight enough
How tight should a taped pipe joint be to guarantee a leak-free seal without damaging threads? The installer should hand-tighten, then apply a measured additional wrench turn—typically 1 to 2 full turns for male NPT into female fitting.
Over-tightening risks thread galling, distortion, and seal failure; under-tightening permits leaks.
Verify seating, test under pressure, and adjust minimally if leaks appear.
Step-by-Step Guide to Applying Liquid Thread Sealant (Pipe Dope)
When applying liquid thread sealant (pipe dope), the technician first selects a formulation rated for the specific materials and service—metal, plastic, or gas.
Then, the technician inspects and cleans threads, using a primer if the product requires it. The sealant is applied in the manufacturer’s recommended amount and pattern, fittings assembled, and allowed to cure the specified time.
Finally, the installer conducts initial pressure testing per guidelines to verify a leak-free joint.
Choosing the right liquid sealant for metal, plastic, and gas lines
Selecting the correct liquid thread sealant depends on the material of the pipes and the service they will carry: metal pipes need a sealant rated for metal-to-metal joints, plastic requires a non-reactive, plastic-compatible formula, and gas lines demand a sealant explicitly listed for fuel service and appropriate pressure.
Choose petroleum-free or low-solvent products for plastics, anaerobic or PTFE-enhanced formulas for metals, and certified gas-rated compounds for fuel systems.
Preparing threads: cleaning and primer if required
With the appropriate sealant chosen for the materials and service, attention turns to preparing the threads so the compound can form a reliable bond.
Threads must be free of old sealant, oil, dirt, and corrosion; use a wire brush, solvent, and lint-free cloth.
For certain plastics or contaminated metal, apply manufacturer’s recommended primer and allow full flash time before sealing.
Applying the correct amount and pattern of sealant
Apply liquid thread sealant sparingly and deliberately so it fills thread crests and roots without excess that can squeeze into the system. A thin, continuous bead applied from the thread root toward the end, covering two to three full threads, guarantees proper coverage.
Avoid globbing or coating beyond necessary area; remove stray sealant. Match amount to thread size and joint type for consistent sealing performance.
Assembly, cure time, and initial pressure testing
Assemble components carefully, hand-starting threads to guarantee proper alignment before tightening to avoid cross-threading.
Torque fittings to manufacturer specs using proper tools.
Allow sealant to cure per product instructions—typically 15 minutes to several hours for handling, full cure up to 24 hours.
Perform initial pressure testing at low pressure, inspect for leaks, then increase to operating pressure while monitoring for seepage or failure.
Using Anaerobic/Permanent Thread Sealants and Primer
Anaerobic (permanent) thread sealants are recommended for high-pressure or vibration-prone joints where a long-lasting, leakproof bond is required, but their permanent nature affects future disassembly.
Proper use requires surface activation or primer on inactive metals, careful application within the specified assembly window, and adherence to the manufacturer’s full cure schedule.
The trade-offs—extremely secure seals versus more difficult removal or need for heat/chemical methods to disassemble—should be weighed before selection.
When to select anaerobic sealants (high-pressure, permanent joints)
When a connection must withstand sustained high pressures, prevent leakage permanently, and resist vibration or thermal cycling, anaerobic thread sealants are the appropriate choice. They cure in the absence of air between closely mated metal threads to form a durable, gap-filling polymer that locks the joint.
Use them for critical hydraulic lines, high-pressure gas systems, long-term buried piping, and assemblies where disassembly is rare.
Surface activation and primer application
Prepare mating surfaces before applying anaerobic thread sealant by removing oils, dirt, corrosion, and machining residues that can inhibit cure and adhesion.
After cleaning, lightly abrade and apply an appropriate primer when specified for passive metals or contaminated substrates.
Primer promotes wetting and initiates polymerization on difficult surfaces.
Allow primer tack time per manufacturer instructions before proceeding to sealant application.
Application, assembly window, and full cure schedule
Apply the primer and sealant following manufacturer instructions, then assemble components within the specified assembly window to guarantee proper flow and cure.
This window—typically minutes to an hour depending on product, gap size, temperature, and substrate—defines the time during which the liquid sealant can fill threads and wet surfaces before skinning or significant viscosity increase occurs.
Full cure may require 24–72 hours; temperature and anaerobic conditions control final strength.
Pros and cons for future disassembly
Using anaerobic or permanent thread sealants and primers offers reliable vibration resistance, leak prevention, and corrosion protection.
However, it also creates challenges for future disassembly: cured anaerobic compounds form strong, gap-filling bonds that can require high torque, heat, or solvents to break and may damage threads or mating surfaces during removal.
Careful selection, controlled application, and documented service intervals mitigate permanence but may still necessitate component replacement.
Special Situations and Material-Specific Guidance
Special situations and material-specific guidance address the unique requirements of different piping materials and service conditions.
Recommendations cover plastic fittings (PVC, CPVC, PEX), metallics such as stainless steel, brass, and galvanized steel, and the regulatory and safety requirements for gas and fuel systems including approved products and testing.
Guidance also highlights selection of sealants rated for high temperatures and aggressive chemicals to guarantee long-term integrity.
Working with plastic (PVC, CPVC, PEX) fittings
When sealing threads on plastic fittings such as PVC, CPVC, and PEX, select products and techniques compatible with the material to prevent degradation, leaks, or impaired joint performance.
Use PTFE tape rated for plastics or non-solvent, plastic-safe thread sealants. Avoid solvent-based pipe dope and excessive tape layers.
Hand-tighten then apply recommended torque; test joints under pressure before burying or insulating.
Stainless steel, brass, and galvanized steel considerations
For stainless steel, brass, and galvanized steel fittings, choose sealants and application methods that account for metal type, thread fit, and corrosion risk.
Use PTFE tape for tight metal threads; select pipe dope rated for dissimilar metals to prevent galvanic corrosion. Avoid fiber tapes on metal threads.
Clean threads of oil, rust, and debris; apply sealant sparingly to male threads, then assemble to recommended torque.
Gas lines and fuel systems: codes, approved materials, and testing
Gas and fuel lines require strict adherence to codes, approved materials, and validated testing procedures to guarantee safety and compliance.
Installers must use listed sealants and fittings rated for gas or fuel, following manufacturer and local code specifications. Thread sealants incompatible with hydrocarbons are prohibited.
After assembly, conduct pressure testing and leak detection per code, document results, and correct any failures before commissioning.
High-temperature and chemical-exposure environments
Beyond fuel systems, applications exposed to high temperatures or aggressive chemicals demand different thread-sealing strategies and materials.
Select sealants rated for the specific temperature range and chemical compatibility—high-temp anaerobic compounds, PTFE variants, or specialized fluoropolymers.
Guarantee proper surface preparation, minimal curing time, and periodic inspection.
Avoid standard silicone or generic tapes; consult manufacturer data sheets and industry standards for safe, durable joints.
Common Mistakes That Cause Leaks and How to Avoid Them
Typical failures in sealing stem from avoidable application and handling errors that compromise threads and joints.
Common examples include:
- Over-application or under-application of sealant
- PTFE tape wrapped the wrong way or too few turns
- Mixing incompatible sealants or using damaged fittings
- Incorrect torque, cross-threading, and overtightening
Identifying these mistakes early and following proper procedures prevents most leaks.
Over-application and under-application of sealant
Applying the correct amount of thread sealant is a precise balance: too little leaves gaps that permit leaks, while too much can clog fittings, contaminate systems, or interfere with proper joint seating.
Proper application uses manufacturer-recommended quantity and uniform coverage. Excess should be wiped away; insufficient layers must be reapplied.
Inspect joints before pressurizing and test under low pressure to confirm a reliable seal.
Wrong direction or insufficient PTFE tape wraps
Wrap PTFE tape in the same direction as the thread’s rotation so the tape tightens as the fitting is screwed together; wrapping against the thread’s turn can cause the tape to bunch, unravel, or migrate into the flow path.
Insufficient wraps fail to fill thread gaps, while excess creates bulk. Apply 2–4 snug, overlapping turns, press tape into threads, and trim cleanly before assembly.
Mixing incompatible products
Mixing different sealant types—such as PTFE tape with anaerobic liquid sealants, thread compounds with pipe dope, or incompatible silicone and polyurethane adhesives—can prevent proper curing, cause chemical reactions, or create soft layers that shear under torque, all of which increase leak risk.
Manufacturers’ instructions should be followed; use one compatible product per joint, verify surfaces are clean and fully cured before assembly, and discard unknown leftovers.
Improper torque, cross-threading, and using damaged fittings
Failing to apply the correct torque, forcing misaligned threads, or reusing damaged fittings are common installation errors that directly compromise seal integrity.
Over-torquing cracks fittings or squeezes sealant out; under-torquing allows movement and leaks.
Cross-threading strips threads and prevents proper engagement.
Inspect fittings, align carefully, and use a calibrated torque tool.
Replace any damaged components before sealing to guarantee reliable joints.
Testing, Inspection, and Troubleshooting After Assembly
After assembly, the guide outlines pressure testing methods appropriate for water and gas systems and techniques for detecting slow leaks and pinhole seepage.
It then summarizes practical steps to repair a leaking joint without replacing the entire system and criteria for when a licensed plumber or inspector should be called.
Readers are encouraged to follow safety protocols and regulatory requirements during testing and repairs.
Pressure testing methods for water and gas systems
Begin by selecting the appropriate pressure-testing method—hydrostatic for water systems or pneumatic for gas—based on system type, safety considerations, and applicable codes.
Each method requires specific equipment, test pressures, isolation procedures, and leak-detection techniques to verify joint integrity after applying thread sealant.
Perform controlled pressurization, monitor gauges for pressure decay over a prescribed interval, inspect accessible joints, and document results and corrective actions.
Detecting slow leaks and pinhole seepage
Detecting slow leaks and pinhole seepage requires systematic inspection and sensitive testing because these defects often escape cursory checks yet can cause gradual pressure loss, corrosion, or contamination.
Technicians should perform prolonged pressure-hold tests, use bubble solutions and electronic gas detectors, inspect joints under light and magnification, and monitor pressure trends.
Document findings, mark suspect areas, and schedule targeted rechecks to confirm persistence.
Steps to repair a leaking joint without full system replacement
Once slow leaks or pinhole seepage have been located and recorded, technicians can proceed to repair leaking joints without replacing entire sections by following a structured testing, inspection, and troubleshooting sequence.
Isolate the circuit, depressurize, and dry the joint. Remove fitting, clean threads, inspect seats and O-rings, reapply correct thread sealant, reassemble, pressurize gradually, and verify leak-free operation with pressure and visual tests.
When to call a licensed plumber or inspector
When should a licensed plumber or inspector be contacted after reassembly and testing?
A professional should be called if leaks persist, if visible corrosion or joint movement occurs, if water pressure anomalies or unexplained noises continue, or if work involves gas lines, backflow devices, or code-required permits.
Also contact a plumber for complex assemblies, mold signs, or when homeowner confidence or warranty requirements demand certified inspection.
Maintenance, Longevity, and Record-Keeping
Different thread sealants have characteristic lifespans and observable failure modes, such as hardening, cracking, or loss of adhesion, which should guide replacement decisions.
Regular inspections at manufacturer-recommended intervals and simple preventive checks—leak tests, visual examination, and torque verification—help detect degradation early.
Clear records of sealant types, application procedures, inspection dates, and any corrective actions guarantee consistent future service and traceability.
Expected lifespan of different sealants and signs of failure
Because environmental conditions, mechanical stress, and chemical exposure vary widely, the expected lifespan of thread sealants ranges from months to decades and must be assessed by sealant type and service conditions.
PTFE tapes last decades in dry, inert systems; anaerobic liquid sealants endure years under compression; combustible or solvent-exposed systems shorten longevity.
Failure signs: seepage, brittle or gummy residue, thread corrosion, and loss of torque retention.
Recommended inspection intervals and preventive checks
How often should threaded connections be inspected depends on sealant type, service conditions, and risk tolerance; inspection intervals should be defined in maintenance plans and adjusted after initial field experience.
Recommended checks include visual leak detection, torque verification, sealant condition assessment, and checking for corrosion, vibration damage, or thermal cycling effects.
High-risk systems require more frequent inspections and prompt corrective action when anomalies appear.
Documenting materials and procedures for future service
Establish clear, accessible records that list the exact sealant product, manufacturer batch or lot number, application method, thread preparation steps, cure times, and applied torque values so future technicians can reproduce the original installation and assess its condition.
Include inspection dates, observed defects, and replacement history. Store records digitally with versioning and backups, link to safety data sheets, and note any deviations from standard procedures.
Comparison Table: PTFE Tape vs. Liquid Pipe Dope vs. Anaerobic Sealant
A concise comparison clarifies how PTFE tape, liquid pipe dope, and anaerobic sealants differ in performance, typical applications, cure time, disassembly ease, and cost. The table below summarizes key distinctions to guide selection. Further commentary will interpret these trade-offs for common plumbing and industrial scenarios.
| Property | PTFE Tape | Liquid Pipe Dope |
|---|---|---|
| Typical use/cure | Quick, no cure | Moderate, sets as solvents evaporate |
Performance, best uses, cure time, disassembly ease, and cost comparison
When choosing between PTFE tape, liquid pipe dope, and anaerobic sealants, consider their relative performance, typical applications, cure times, ease of future disassembly, and overall cost to match product properties to the task.
PTFE tape is cheap, fast, removable, suited for low-pressure plumbing.
Pipe dope balances sealing and disassembly for water/gas.
Anaerobic cures rigid, costly, best for permanent, high-pressure metal joints.
Practical Examples and Application Scenarios
Practical examples clarify which sealant suits specific service conditions and risks. The following scenarios frame common choices and precautions:
- Residential water supply line repair with potable-water safe materials
- Installing a new gas appliance connection requiring gas-rated sealants and tightness checks
- Industrial piping with chemical exposure and high-temperature considerations
- A quick-fit backyard irrigation joint where ease of application matters
Each example highlights selection criteria, surface prep, and testing steps appropriate to the situation.
Residential water supply line repair
Begin by evaluating the damaged section of the residential water supply line to determine whether thread sealant, pipe dope, or a mechanical repair (such as a slip coupling) is appropriate.
Factors include pipe material, access, water pressure, and whether the leak is at a threaded joint or a cut pipe.
For threaded leaks, clean threads, apply compatible sealant, hand-tighten then wrench.
For cut pipes, use compression or push-fit fittings per manufacturer instructions.
Installing a new gas appliance connection
Install a new gas appliance connection only after confirming the correct gas type, pipe material, and local code requirements, and ensuring the supply is shut off and the area is ventilated.
Use gas-rated thread sealant or joint compound per manufacturer and code, apply to male threads only, hand-start fittings, tighten to specified torque, test with approved leak detection solution, and document the installation and test results.
Industrial piping with chemical exposure
Many industrial piping systems that handle corrosive or reactive chemicals require specialized thread sealants and installation practices to secure long-term integrity.
Selection must match chemical compatibility, temperature and pressure.
Application requires clean threads, correct cure time, and proper torque to prevent stress.
Regular inspections and documentation facilitate early detection of degradation.
Compatibility testing and vendor certifications reduce failure risk.
Quick Reference: Do’s and Don’ts for Leak-Free Threaded Joints
Follow a few clear do’s and don’ts to guarantee threaded joints remain leak-free: apply thread sealant sparingly and only to the male threads, avoid coating the first one to two threads to prevent contamination of the flow path, hand-start fittings to detect cross-threading before tightening, use the correct sealant type for the material and media, and tighten to the manufacturer’s recommended torque rather than over-torquing.
- Inspect threads for damage
- Clean before sealing
- Avoid excess sealant
- Verify compatibility and cure time
Conclusion
The guide leaves one final hinge: proper preparation and sealant choice quietly decide whether a joint will whisper or howl. With tools ready, threads clean, and technique observed, the connection often holds—yet a single missed turn or stray fiber can betray it. Readers who follow the steps and respect materials will usually avoid leaks, but a lingering question remains: will the next inspection reveal perfection… or an unexpected drip?