How to Repair a Catch Basin: Step-by-Step Guide for Homeowners
To repair a catch basin, begin by assessing the damage and clearing any debris or standing water. Confirm utility locations and obtain necessary permits. For moderate repairs, stabilize the base with compacted gravel, patch concrete or masonry, and replace corroded frames and grates. Always use proper PPE, shoring for unstable soil, and consider a camera inspection for hidden pipe issues. For complex structural repairs or sewer connections, hire a licensed contractor. After repairs, conduct follow-up testing to ensure proper drainage. Additional sections provide detailed tools, steps, and timelines for the process.
What a catch basin is and why repairs matter
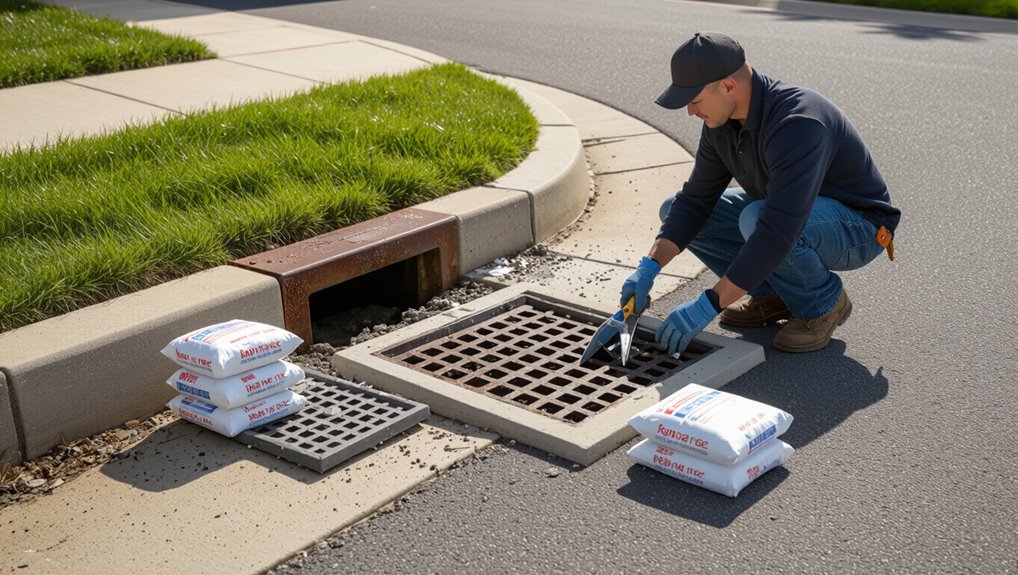
A catch basin is a recessed stormwater inlet designed to collect surface runoff and trap sediment before water enters the drainage system.
Visible signs of damage—cracked concrete, standing water, collapsed grates, or sediment buildup—indicate a threat to property and effective drainage.
If repairs are postponed, erosion, localized flooding, and safety hazards can escalate, increasing repair complexity and cost.
Definition and common functions of a catch basin
Catch basins are underground structures designed to capture surface runoff, remove debris and sediment, and direct stormwater into the drainage system. Their proper function prevents localized flooding, protects infrastructure, and reduces pollutant loads entering waterways.
They collect solids, trap sediment, and allow water conveyance. Understanding these functions informs maintenance priorities and guides homeowners learning how to repair a catch basin to restore flow and filtration.
Signs a damaged catch basin threatens property or drainage
When blocked or broken, a catch basin can quickly shift from a routine component of stormwater management to an immediate threat to property and drainage.
Observable signs include pooling water near the grate, slow surface drainage, sinking or displaced pavement, exposed or cracked concrete, foul odors from standing water, and excessive debris accumulation.
Prompt assessment prevents worsening damage.
Risks of delayed repairs (erosion, flooding, safety)
Neglected catch basins accelerate soil erosion, undermine pavement, and increase the likelihood of localized flooding and hazards to people and property.
Delays in repair widen voids, destabilize foundations, and allow sediment buildup that clogs systems. Increased runoff floods yards and basements, damages landscaping and structures, and creates slipping or collapse risks.
Prompt attention prevents escalating infrastructure costs and reduces injury and liability exposure.
Quick checklist: Can you repair it yourself or call a pro?
A brief checklist helps determine whether a homeowner can tackle a catch basin repair or should call a professional.
Simple tasks with limited scope, basic tools, and adequate physical ability are suitable for DIY, while structural failures, work on sewer connections, or jobs requiring permits warrant a licensed contractor.
DIY costs are typically low (materials and rental tools), whereas professional services can range much higher depending on scope and local rates.
When DIY is appropriate (scope, tools, physical ability)
Deciding whether to tackle a catch basin repair personally depends on damage extent, available tools, and the individual’s comfort with confined, potentially wet work.
DIY suits minor issues: cracked grates, clearing debris, replacing simple liners, or resealing joints.
Required tools include shovels, gloves, basic masonry or PVC repair kits, and a shop vacuum.
Adequate strength, balance, and basic plumbing familiarity are essential.
When to hire a professional (structural failure, sewer connections, permits)
After covering minor fixes suitable for a homeowner, attention shifts to conditions that require professional intervention: visible structural failure, any work involving sewer connections, or projects that trigger local permit requirements.
Hire a licensed contractor or plumber when walls, base, or grates crack or collapse, when altering sewer lines, or when local codes mandate inspections or permits.
Prioritize safety, code compliance, and liability coverage.
Estimated cost ranges: DIY vs. professional service
Several common variables — extent of damage, materials needed, local labor rates, and whether permits are required — determine whether a homeowner can tackle a catch basin repair or should hire a professional. DIY kits: $50–$400; minor labor and time. Professional: $300–$2,500+, warranty and insurance. Choose pros for structural or sewer issues.
| Option | Typical cost range |
|---|---|
| DIY kit | $50–$400 |
| Hand tools | $0–$150 |
| Minor pro repair | $300–$800 |
| Major pro repair | $800–$2,500+ |
Tools, materials, and safety gear needed
The following section lists the essential tools typically required for catch basin repairs, from shovels and pry bars to concrete mixers and pipe cutters.
It also covers common materials and replacement parts such as concrete, patching compounds, grates, and seals.
Safety precautions and required PPE—gloves, eye protection, high-visibility clothing, and respiratory protection when cutting or mixing—are noted to prevent injury and contamination.
Essential tools for most repairs
A concise kit of hand tools, materials, and protective gear allows most catch basin repairs to proceed safely and efficiently.
Essential items focus on access, cleaning, basic disassembly, and worker protection.
- Screwdrivers, adjustable wrench, pry bar, and channel locks for fastener and grate work.
- Portable pump, heavy-duty brush, and shop vacuum for debris and water removal.
- Gloves, safety glasses, knee pads, and high-visibility vest.
Common materials and replacement parts
Common replacement parts and materials for catch basin work include grates, frames, brick or concrete risers, catch basin liners, sealants, and PVC or cast-iron pipe fittings.
The homeowner should also have mortar, concrete patch, pipe adapters, and replacement fasteners.
Select parts by size and flow capacity; match materials to existing system.
- Grates, frames, risers
- Liners, sealants, patching
- Pipe fittings, adapters, fasteners
Safety precautions and PPE
Several basic precautions reduce risk when working on a catch basin: assess the site for traffic, underground utilities, and standing water before beginning, then set up barriers and signage.
Workers should wear gloves, safety glasses, hard hats, high-visibility vests, steel-toe boots, and respiratory protection if dust or fumes exist.
Use grounding tools, lockout-tagout for nearby equipment, and carry a first-aid kit.
Preparing the site before repair
Before beginning work, the technician locates the catch basin, performs a visual and hands-on inspection to identify blockages, structural damage, and flow patterns.
Temporary measures to divert surface water and control runoff are implemented to keep the site dry and safe during repairs.
Required permits are confirmed and utility lines or local code restrictions are checked to guarantee compliance before excavation or major work begins.
How to locate and assess the basin (inspection steps)
Where is the catch basin located and what condition is it in?
The inspector notes placement relative to driveway, lawn, and downspouts, checks visible grate damage, settled surround, and nearby erosion.
Lift the grate safely, observe debris, standing water, and structural cracks.
Record measurements, photos, and any odor.
Confirm access points and utility locations before planning repairs.
How to divert water and control runoff
When preparing to repair a catch basin, the site must be secured and flow diverted so workers can access the structure without active runoff undermining the work area.
Temporary measures include installing sandbags, diversion berms, or flexible drain hoses to reroute surface flow.
Block upstream drains, deploy sediment traps, and use pumps for standing water.
Maintain stable, safe access until permanent repairs are complete.
Permits, utility checks, and local codes
After runoff is controlled and the work area secured, attention shifts to permits, utility verification, and adherence to local codes to guarantee legal and safe excavation around the catch basin.
Homeowners must contact local permitting offices, request utility locates, and review municipal drainage regulations.
Obtain required permits, mark buried lines, schedule inspections, and follow setback, disposal, and erosion-control rules before beginning repairs.
Step-by-step guide: Repairing a catch basin (standard concrete/brick basin)
The repair sequence begins by emptying and thoroughly cleaning the basin to expose all damage.
Next, damaged grates, bricks, or concrete are removed, the soil and base are assessed and stabilized, and cracks or spalls are patched with appropriate compound.
The process concludes with the grate and frame being reset or replaced and the area checked for proper alignment and drainage.
Step 1 Emptying and cleaning the basin
Begin by removing standing water and visible debris from the catch basin using a submersible pump or a heavy-duty wet/dry vacuum.
Next, scrape silt, leaves, and sediment from walls and the sump with a stiff brush and hand trowel.
Rinse surfaces with clean water, flushing solids toward the outlet.
Collect and dispose of waste per local regulations before inspection.
Step 2 Removing damaged grates, bricks, or concrete
Remove the grate and any loose masonry to expose the damaged areas, taking care to support adjacent bricks or concrete to prevent further collapse.
Carefully pry out broken bricks, concrete fragments, and corroded hardware. Collect debris for disposal.
Inspect remaining units for cracks or instability. Label salvageable pieces.
Keep work area clear and use proper tools and protective gear to avoid injury.
Step 3 Assessing and repairing the surrounding soil and base
Once the grate and loose masonry are cleared, inspect the soil and base for erosion, voids, soft spots, and undermining that could compromise the repaired basin.
Remove contaminated or unstable material, compact native soil in layers, and add crushed stone or gravel for drainage and support.
Ascertain leveling and proper slope toward the inlet, then settle and recheck for firmness before rebuilding adjacent masonry.
Step 4 Repairing cracks and spalls with patching compound
Prepare to repair cracks and spalls by selecting a compatible patching compound and gathering tools: wire brush, chisel, hammer, trowel, bonding agent, and a mixing bucket.
Clean damaged areas, remove loose material, and undercut edges for mechanical bond.
Apply bonding agent, mix patch per instructions, press into voids, and smooth to match surrounding surface.
Cure per manufacturer recommendations before resuming use.
Step 5 Replacing or resetting the grate and frame
Reinstalling the grate and frame restores the catch basin’s function and secures the surrounding pavement.
The old frame is inspected for corrosion, straightness, and mating surfaces. Replace damaged frames or reset existing ones on a mortar or concrete bed, ensuring level alignment and correct elevation.
Tighten anchor bolts, seal joints with nonshrinking mortar, and verify grate seating and drainage flow before final cleanup.
Step 6 Restoring surrounding paving and compaction
Begin restoring the pavement immediately after the mortar or concrete bed has cured to the manufacturer’s recommended strength.
Surrounding material is trimmed, compacted in 50–75 mm lifts using a plate compactor, and checked for level and slope toward the basin.
Reinstall pavers or pour patch concrete, match joints and jointing sand, compact again, and clean the surface.
Allow proper curing before light use.
Step 7 Testing drainage and final inspection
Verify the repaired catch basin’s function by conducting a systematic drainage test and final visual inspection.
Pour water slowly to simulate runoff, observing flow into inlet, checking for pooling, slow seepage, or overflow.
Inspect joints, grouting, and frame seating for leaks or movement.
Confirm grate alignment and surrounding paving stability.
Document findings and address any minor adjustments before completing the job.
Repair variations for common basin types and issues
Different basin materials and failure modes require tailored repair methods.
Prefabricated plastic units often need seam sealing or connection reinforcement, while brick or modular block basins typically require re-mortaring and resetting of displaced units.
Cast-iron grates may be welded, bolted, or replaced, and collapsed or undermined basins demand decisions between rebuilding the foundation or full replacement.
Prefabricated plastic basins: seam and connection fixes
Evaluating prefabricated plastic basins for seam and connection failures requires focusing on common stress points—molded joints, adhesive seams, and inlet/outlet collars—because these areas account for most leaks and structural separations.
Inspect cracks, warped collars, and failed adhesive bonds. Clean and dry surfaces, apply compatible epoxy or plastic-welding techniques, reinforce with exterior-rated sealant, and replace damaged fittings to restore watertight integrity.
Brick or modular block basins: re-mortaring and resetting
Repairing brick or modular block catch basins typically begins with evaluating mortar joints, displaced units, and the integrity of the surrounding bedding; these elements dictate whether re-mortaring, partial resetting, or full reconstruction is required.
Cleaning joints, removing loose mortar, and inspecting for undermining follow.
Repoint with appropriate mortar, reset shifted blocks on solid bedding, guarantee proper slope and compaction, and restore surrounding pavement to prevent recurrence.
Cast-iron or heavy-duty grates: welding, bolting, and replacement
Addressing cast-iron or heavy-duty grates begins with evaluating their structural condition, attachment method, and compatibility with the basin frame to determine whether welding, bolting, or full replacement is appropriate.
Minor cracks or loose bolts can be repaired by welding or replacing fasteners; severely corroded grates require full replacement with matching dimensions and load rating.
Guarantee proper sealing, alignment, and corrosion protection after installation.
Collapsed or undermined basins: rebuilding foundation vs. full replacement
When a catch basin has collapsed or the surrounding soil has been undermined, determining whether to rebuild the foundation or replace the entire structure hinges on the extent of structural damage, soil stability, and the basin type.
Small localized failures with intact walls and frames often respond to underpinning, backfill compaction, and grout or concrete pocket repairs, while widespread crushing, warped castings, or compromised joints usually necessitate full replacement to restore load-bearing capacity and hydraulic performance.
Evaluation should include soil testing, camera inspection, and cost-benefit analysis.
Temporary shoring, drainage correction, and matching materials guide the chosen repair path.
Dealing with connected piping and underground issues
Before beginning basin repairs, the connected inlet and outlet pipes should be inspected for clogs, misalignment, and visible damage.
Damaged sections may require cutting out and replacing pipe or applying compatible repair couplings to restore flow and alignment.
If problems are not evident from the surface, camera inspection can locate obstructions or breaks, and trenchless methods may be considered for repairs with minimal excavation.
Inspecting inlet/outlet pipes for clogs and misalignment
Inspect the inlet and outlet pipes for blockages, root intrusion, and signs of misalignment that can restrict flow or cause backups.
Visual inspection, a hand-held flashlight, and a plumber’s snake can reveal debris, sediment, insect nests, or displaced joints.
Note offsets, crushed sections, and unusual smells indicating stagnation.
Record findings, take photos, and mark pipe locations before any excavation or professional intervention.
Repairing or replacing damaged pipe sections
Address damaged pipe sections promptly to prevent further drainage failure and surrounding soil erosion.
Assess visible cracks, crushed areas, and joint separation.
Excavate only as needed to expose defects, then cut out compromised runs.
Match replacement pipe diameter and slope, using appropriate couplings and solvent or gasketed joints.
Backfill with compacted granular material and restore surface grading to guarantee proper flow and stability.
When to use camera inspection or trenchless repairs
When is a camera inspection or trenchless repair warranted for connected catch basin piping and underground issues?
A camera inspection is recommended when blockages, offsets, root intrusion, or unknown pipe condition are suspected.
Trenchless repairs suit localized cracks, collapsed joints, or corrosion where excavation is impractical.
Both diagnostics minimize disruption, guide decisions, and confirm repair adequacy before restoring surface landscaping or pavement.
Preventive maintenance to extend basin life
Routine seasonal cleaning and debris management keep sediment and blockages from shortening a basin’s service life.
Controlling nearby vegetation and stabilizing banks prevents root intrusion and erosion that undermine structures.
Installing guards, sediment traps, or leaf filters reduces maintenance frequency and protects downstream piping.
Seasonal cleaning schedule and debris management
Seasonal cleaning of a catch basin should follow a predictable schedule keyed to local climate and vegetation cycles to prevent blockages and extend the structure’s service life.
The homeowner should inspect grates monthly during leaf fall and after storms, remove sediment and floatables, and document conditions for trend tracking.
- Inspect monthly during high-debris seasons.
- Remove sediment and surface debris promptly.
- Record inspections and maintenance actions.
Vegetation control and erosion prevention
Why is vegetation managed proactively around a catch basin?
Vegetation is trimmed to prevent root intrusion, reduce sediment buildup, and maintain access. Groundcover and mulch stabilize soil, slowing runoff and limiting erosion near inlet edges.
Periodic inspection removes invasive species and replaces failing plants with deep-rooted, noninvasive varieties.
Proper grading and occasional riprap protect exposed banks and extend basin lifespan.
Installing guards, sediment traps, or leaf filters
After managing surrounding vegetation and stabilizing banks, attention shifts to hardware that directly limits debris and sediment entry.
Guards, sediment traps, and leaf filters are selected for fit and flow capacity. They are installed to deflect leaves, retain sediment, and permit inspection.
Secure attachment, periodic cleaning, and seasonal removal if ice forms guarantee continued drainage performance and prolong catch basin lifespan.
Common mistakes and how to avoid them
Common mistakes in catch basin repairs include improper grading and backfill errors, which compromise drainage and structural integrity.
Use of wrong or incompatible materials and patch products can cause premature failure or chemical reactions with existing components.
Skipping permits, inspections, or utility locates risks code violations, safety hazards, and costly rework.
Improper grading and backfill errors
Improper grading and backfill around a catch basin undermines its function by diverting surface water, creating ponding, and stressing the structure’s walls and frame.
Owners should guarantee positive slope away from the basin, compact backfill in layers, and use stable, permeable material to prevent settlement.
Inspect finished grade, regrade where necessary, and maintain vegetation to reduce erosion and avoid future misalignments.
Using wrong materials or incompatible patch products
Choosing incorrect repair materials or mixing incompatible patch compounds can quickly compromise a catch basin repair, causing premature failure, poor adhesion, or chemical reactions that weaken the structure.
Homeowners should match patch products to substrate (concrete, brick, plastic), follow manufacturer instructions, avoid solvent-on-cement mixes, test small areas, and use corrosion-resistant anchors.
When uncertain, consult a professional to select compatible materials.
Skipping permits, inspections, or utility locates
Many homeowners underestimate the importance of permits, inspections, and utility locates before repairing a catch basin.
But skipping these steps can create safety hazards, legal liabilities, and costly rework.
Professionals advise confirming local permit requirements, scheduling utility locates to avoid buried lines, and arranging inspections to verify compliant work.
Document approvals and follow codes to prevent fines, delays, and unsafe conditions.
Cost-saving tips and material alternatives
The article outlines when salvaging existing components is cost-effective versus when full replacement is safer and more economical in the long run.
It compares affordable material options—such as PVC, concrete patch, or recycled plastics—and notes the associated lifespan and maintenance trade-offs.
Practical DIY shortcuts that maintain structural and safety standards are suggested to reduce labor costs without increasing risk.
When to salvage parts versus replace entirely
When is it worth salvaging components of a catch basin rather than replacing them outright?
Inspection should guide decisions: salvage grates, bolts, and intact castings showing minimal corrosion or distortion.
Replace fractured concrete, heavily corroded metal, or compromised seals.
Consider labor complexity, long-term reliability, and safety; salvaging saves cost only when remaining parts meet performance and code requirements.
Affordable material options and lifespan trade-offs
Several cost-effective materials can be selected for catch basin repair, each balancing upfront price against expected service life and maintenance needs.
Concrete patch mixes are affordable but may crack sooner.
Polymer-modified mortars resist freeze-thaw longer at moderate cost.
HDPE liners offer corrosion resistance and quick installation though UV exposure can limit lifespan.
Metal grates save initially but may rust without coating.
DIY shortcuts that don’t compromise safety
If cost pressures demand shortcuts, prioritize methods that preserve structural integrity and worker safety while trimming labor or material expenses.
Homeowners should favor labor-saving tools, staged repairs, and modular replacement parts over improvised fixes.
Reuse undamaged components, choose tested patching compounds, and rent specialty equipment.
Avoid cutting corners on shoring, PPE, or drainage grading; failure risks greater expense and liability.
When repair is not enough: signs you need a full replacement
Persistent cracking, collapsed walls, or successive repairs that fail indicate structural failure and the need for full replacement.
Wider drainage patterns, recurring surcharging, or site changes may require a long-term redesign rather than another patch.
Planning should consequently include scope definition, timeline, and a realistic budget that accounts for excavation, new materials, and any required permit or regrading work.
Structural failure indicators and repeated failures
A failing catch basin exhibits specific structural signs that indicate repairs will no longer suffice and a full replacement is necessary.
Cracked, separating walls, collapsed or undermined invert, persistent sinkage, and widespread corrosion of metal components signal fundamental integrity loss.
Repeated failures after multiple repairs, progressive widening of defects, or recurring blockages tied to structural collapse justify complete replacement rather than continued patching.
Long-term drainage redesign considerations
When repair attempts repeatedly fail or structural damage extends beyond isolated components, long-term drainage redesign becomes necessary to restore reliable function and prevent recurring collapse.
Homeowners should evaluate system capacity, inlet/outlet alignment, grading, subsoil infiltration, and connectivity to broader stormwater networks.
Consider durable materials, access for maintenance, erosion control, and regulatory compliance to guarantee a sustainable, low-maintenance replacement that prevents future failures.
How to plan and budget for replacement
Recognize clear indicators that warrant full catch basin replacement rather than repeated repairs: severe structural cracking or collapse, recurring clogging despite cleaning, chronic water pooling or washouts around the inlet, mismatched capacity for current runoff, and evidence of undermining or sinkhole formation.
Estimate scope, obtain multiple contractor quotes, factor permits and disposal, plan temporary drainage, allocate contingency (15–25%), and schedule during dry season.
Example repair scenarios and estimated timelines
The section outlines typical repair scenarios and estimated durations to help plan work and costs.
- Minor crack and grate replacement: quick inspection, sealing or patching, and grate swap — often completed within a few hours to a day.
- Rebuilding an undermined basin: excavation, formwork, concrete or block rebuild, backfill and curing — commonly 1–3 days.
- Pipe replacement or reconnection: trenching, pipe removal and installation, testing and restoration — usually one day to several days depending on access.
Minor crack and grate replacement typical steps and time
Minor cracks in a catch basin and a damaged grate can usually be repaired with short, targeted work that restores structural integrity and safety.
Typical steps: clean debris, inspect and measure, chip loose concrete, apply epoxy or hydraulic cement, replace or bolt a new grate, and cure.
Total time: 2–6 hours for minor cracks; 1–2 hours additional for grate replacement, weather permitting.
Rebuilding an undermined basin scope and timeline
When localized repairs prove insufficient because soil erosion or pipe washout has compromised the foundation, rebuilding an undermined catch basin requires a broader scope and longer timeline.
Scope includes excavation, shoring, bedding replacement, possible regrading, concrete or precast basin installation, backfill, and surface restoration.
Typical timelines range from two to five days for straightforward sites to one to two weeks for complex access, permitting, or stabilization needs.
Pipe replacement or reconnection expected duration
A typical pipe replacement or reconnection project for a catch basin varies by pipe size, access, and damage severity; straight swaps of short runs with good access often finish within a single day, while longer runs, collapsed sections, or complicated ties to existing infrastructure can extend work to three days or more.
Minor reconnections: 4–8 hours.
Moderate repairs: one to two days.
Major replacements: two to five days.
Resources and next steps
The article provides guidance on locating qualified contractors and the key questions to ask when hiring for catch basin work.
It also points readers to practical reference guides, instructional videos, and relevant local code resources.
A concise checklist of actions to complete immediately after repair is included to guarantee compliance and long-term performance.
How to find qualified contractors and ask the right questions
How should a property owner identify qualified contractors and evaluate bids for catch basin repair?
A homeowner should verify licensing, insurance, local references, and specialty experience with drainage systems.
Request detailed written estimates, scope, materials, timeline, permits, and cleanup.
Compare warranties and payment terms.
Ask for proof of past comparable projects and contactable clients.
Prioritize clear communication and transparent cost breakdowns.
Helpful reference guides, videos, and local code resources
Because catch basin repair intersects technical, regulatory, and safety concerns, property owners benefit from consulting authoritative guides, instructional videos, and local code resources before hiring or permitting work.
- Manufacturer installation manuals and municipal stormwater handbooks for standards and materials.
- Short how-to videos from reputable trade organizations demonstrating inspection and minor repairs.
- Local building department codes, permit requirements, and approved contractor lists to guarantee compliance.
Checklist to follow immediately after completing repair
Complete a short, systematic checklist immediately after finishing a catch basin repair to confirm functionality, document the work, and set up any required follow‑up.
The homeowner or inspector verifies drainage, records observations, and schedules maintenance or permits as needed.
- Inspect flow, seals, and surrounding grading; test with water.
- Photograph repairs, note materials, times, and signatures.
- File documents, notify authorities if required, set next inspection date.
Conclusion
A homeowner stands beside the repaired catch basin like a Victorian inspector admiring a well-polished clockwork: the basin now diverts water, prevents erosion, and prolongs pavement life. Small repairs often restore function and save money, while major structural failure signals replacement. With proper tools, safety, and timely action, seaside rains or spring thaws pose less threat. Keep records, inspect seasonally, and call a pro when doubts or persistent leaks remain.