How to Switch From City Water to Fresh Water Tank in Your RV: Step-By-Step Guide
To switch your RV from city water to the onboard fresh water tank, begin by ensuring the campsite water hose is turned off and then disconnect the city water inlet. Next, close the city water valve. Adjust the interior valves to the tank setting or open the 3/4-way selector. Prime the freshwater pump and open a faucet to remove any air, confirming a steady flow. Finally, check for leaks, test the water quality, and monitor tank levels. For further assistance, refer to detailed valve diagrams, troubleshooting tips, and maintenance steps.
Why and When to Switch from City Water to Your RV’s Fresh Water Tank
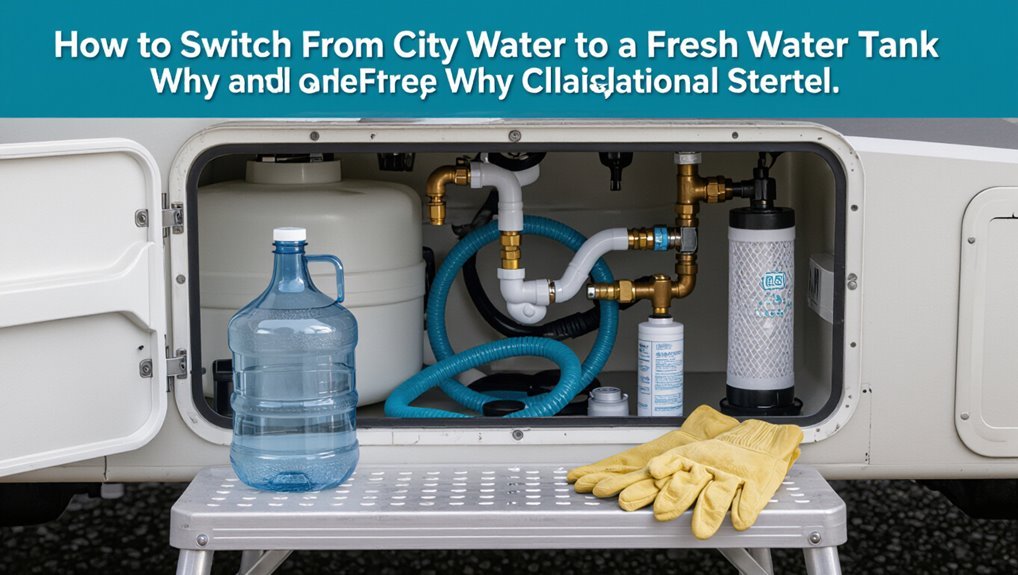
Typical situations prompting a switch from city water to the RV’s fresh water tank include leaving a campground hookup, preparing for winterization, or when campground water quality is questionable.
Using the onboard tank can protect plumbing from contaminants and pressure spikes but introduces limits on supply and the need for careful sanitation.
Campground rules and local regulations may also mandate or restrict which water source is used, so owners should check policies before changing over.
Common scenarios that require switching (campground hookup end, winterizing, water quality concerns)
Three common situations prompt switching from campground city water to the RV’s fresh water tank: when the campsite hookup ends, before winterizing the plumbing, and whenever water quality is uncertain.
RVers should know how to switch from city water to fresh water tank quickly: close the inlet, switch supply valves, engage the onboard pump, and monitor pressure and seals to guarantee safe, temporary freshwater use.
Benefits and risks of using the onboard fresh water tank vs. city water
After closing the campground inlet and activating the onboard pump, RVers should also weigh the advantages and risks of using the coach’s fresh water tank versus remaining on city water.
Benefits include mobility, control over treatment and pressure, and protection from contaminated hookups.
Risks involve limited capacity, need for monitoring levels and sanitation, potential pump or plumbing failure, and occasional taste or stagnation issues.
Legal or campground rules that affect water source choice
When campground regulations restrict continuous use of the hookup or require shutoff during certain hours, RVers must switch to the coach’s fresh water tank to comply and avoid fines or service interruptions.
Local ordinances, park-specific conservation rules, and boil-water advisories also dictate source choice.
Operators should consult posted policies, reservation terms, and utility notices, and keep documentation to resolve disputes or prove compliance.
Quick Checklist: What You Need Before Switching
Before switching to the fresh water tank, the reader should confirm they have the necessary tools and supplies: wrenches, a freshwater hose, a water pressure regulator, and any potable hose adapters.
They should also gather safety items such as sanitizer, gloves, and a bucket to contain spills and sanitize fittings.
Finally, a quick system check of the RV water pump, tank capacity, and valve positions will help prevent problems during the switch.
Tools and supplies (wrenches, hose, freshwater hose, water pressure regulator, potable hose adapter)
A concise checklist of tools and supplies guarantees the fresh water tank switch goes smoothly.
Essential items include adjustable wrenches for fittings, a standard hose for draining, a dedicated freshwater hose for filling, a water pressure regulator to protect plumbing, and a potable hose adapter for secure connections.
Each item confirms proper fit, flow control, and contamination prevention during the switch.
Safety items (sanitizer, gloves, bucket)
Alongside the hardware and hoses, basic safety items protect both the user and the new water supply during the switch.
Include a food-grade sanitizer for tank and hose disinfection, disposable or nitrile gloves to prevent contamination, and a clean bucket for flushing or mixing sanitizer.
Pack paper towels, a small brush, and a labeled container for used sanitizer solution to keep procedures sanitary and traceable.
RV system checks to perform first (pump condition, tank capacity, valves)
Inspect the RV’s water system components to verify readiness: check the fresh tank’s usable capacity and fill level, test the water pump for proper pressure and leak-free operation, and ascertain all inlet, outlet, and bypass valves move smoothly and seat fully.
Confirm tank vents and level sensors function, inspect hoses for cracks or blockages, and ensure electrical connections to the pump are secure and fused correctly.
Step-by-Step Guide to Switching to Fresh Water Tank
The following step-by-step guide outlines the practical actions required to switch an RV to its fresh water tank.
It begins with confirming campsite hookups and removing the city water hose.
Then, it moves through setting interior valves and priming the freshwater pump.
Finally, running faucets and appliances is explained to purge air and fill the lines from the tank.
Step 1 Confirm campsite hookups are disconnected and city water hose is off
Before switching to the fresh water tank, confirm that all campsite water hookups are disconnected and the city water hose is turned off.
Visually inspect the connection point and surrounding ground for residual moisture.
Verify any inline pressure regulators are depressurized.
Ascertain interior faucets remain closed. This prevents backflow, unexpected pressure, and contamination before proceeding with internal valve changes or hose removal.
Step 2 Close the city water inlet and remove external hose safely
Close the city water inlet valve fully and then disconnect the external hose, taking care to release any trapped pressure before removal.
Inspect the hose and inlet for leaks, debris, or damage. Cap the inlet if available to prevent contamination.
Coil and store the hose properly, keeping fittings clean and dry.
Log any issues for repair before next hookup.
Step 3 Verify and set interior water valves to tank position
After securing and storing the external hose, attention turns to the interior plumbing controls: each valve that routes water must be inspected and set to draw from the onboard fresh water tank.
Locate selector valves at the water manifold, under sinks, and near appliances.
Confirm positions visually and by feel, switching all relevant valves to “tank” or the equivalent setting to prevent accidental city water flow.
Step 4 Turn off shore power if recommended and prime the freshwater pump
Switch off shore power if the RV manufacturer or pump instructions recommend it, then prepare to prime the freshwater pump to prevent dry running.
Confirm battery voltage if pump runs on DC. Close any unnecessary valves, open the pump access or priming port, and introduce water per pump instructions until flow is steady and air-free.
Restore power only if safe and instructed.
Step 5 Run faucets and appliances to purge air and fill lines from the tank
Begin by opening each faucet and running appliances one at a time to allow trapped air to escape and to draw water from the fresh tank into the lines.
Start with the closest fixtures, then progress outward. Run until steady, bubble-free flow appears.
Cycle hot water to purge its loop. Close faucets in reverse order.
Monitor pump noise for consistent operation.
Step 6 Check for leaks and proper water pressure after switching
Inspect the plumbing and fittings immediately after the system is pressurized, observing joints, valves, pump connections, and appliance inlets for drips or wetness.
Confirm the pump cycles normally and that faucets deliver steady flow without sputtering.
Check pressure at an accessible tap or gauge, ensuring it stays within the pump’s rated range.
Tighten or replace any leaking fittings and recheck.
Step 7 Restart water heater and refrigerator water systems as needed
With the system verified for leaks and steady pressure, attention turns to reactivating onboard appliances that rely on the fresh water supply.
The water heater should be refilled, bled of air, then powered according to manufacturer instructions.
The refrigerator’s ice maker and water dispenser require flushing and a brief test cycle.
Monitor for leaks and proper operation before regular use.
How to Identify and Operate Common RV Valve Types
The section explains how to recognize manual 3-way and 4-way valve positions and markings to guarantee correct routing to the fresh water tank.
It outlines how automatic or electronic switching systems operate and provides simple override methods for manual control.
It also lists visual cues and quick tests to confirm valve positions before running water.
Manual 3-way and 4-way valves positions and markings
Manual 3-way and 4-way valves use simple lever positions and molded or stamped markings to indicate flow paths, allowing an operator to route water between city, tank, and bypass lines without tools.
Visual symbols (arrows, letters) and lever alignment show active ports. Operators align levers to match desired connection, verify by feeling detent positions, and label unfamiliar valves for quick, reliable switching.
Automatic or electronic switching systems how they work and how to override
Several RVs employ automatic or electronic valve systems that detect water source, pressure, or pump activity and route flow accordingly, reducing the need for manual lever changes.
These systems use sensors, solenoid valves, or motorized actuators controlled by a panel or controller.
Override methods include manual switch, fuse removal, or mechanical bypass; consult manufacturer instructions to safely force fresh tank selection without damaging electronics.
Visual cues and tests to confirm valve positions
Identify valve positions by observing physical indicators and performing a few quick tests to confirm flow paths.
Check handles: inline indicates open, perpendicular indicates closed on ball valves; gate valves show stem position.
Turn slightly while listening for water movement and watch gauges or tank level lights.
Run a faucet briefly and inspect faucets and exterior outlets to verify designated supply source.
Troubleshooting Common Problems During the Switch
Common issues when switching to the fresh water tank include no flow after switching due to pump priming, clogged filters, or mispositioned valves.
Low pressure may stem from pump faults or regulator confusion, while leaks at fittings or valves require inspection and temporary sealing.
If water tastes or smells off, flushing and sanitizing the tank and lines should be performed before continued use.
No water flow after switching pump priming, clogged filters, valve misposition
When no water flows after switching to the fresh water tank, the issue usually traces to pump priming failure, a clogged in-line filter, or a mispositioned valve.
Inspect and re-prime the pump per manufacturer steps, remove and clean or replace sediment screens, and verify all valves are aligned for tank feed.
Recheck fittings for air leaks and repeat priming until steady flow resumes.
Low pressure on tank water pump issues, pressure regulator confusion
Check the pump and regulator settings first: low pressure from the fresh water tank often stems from a weak or failing pump, a misadjusted or malfunctioning pressure regulator, or blocked inlet or outlet passages.
Inspect pump performance, listen for unusual noise, verify correct voltage and wiring, and test flow with tank recirculation disabled.
Adjust or replace the regulator per manufacturer specs; clean screens and lines.
Leaks at fittings or valves inspection points and temporary fixes
Inspect fittings and valves visually and by touch for dampness, corrosion, or mineral buildup, since most fresh-water switching leaks originate at threaded joints, hose clamps, or gate/check valves.
Tighten loose clamps, hand-snug threaded connections, and replace cracked hoses.
Apply plumber’s tape to threaded fittings as a temporary seal.
For leaking valves, close main shutoff and replace or bench-repair before resuming use.
Contaminated taste or odor flushing and sanitizing steps
Flush and sanitize the fresh water system promptly if water develops an off taste or odor, as lingering contaminants and biofilm are common culprits.
Drain tanks, run clean water to flush lines, then prepare a bleach solution (1/4 cup household bleach per 15 gallons).
Fill tank, circulate through faucets, wait several hours, flush thoroughly until chlorine smell disappears, and replace filters.
Maintaining Your Fresh Water System for Reliable Switching
Maintaining the fresh water system guarantees reliable switching by preventing contamination, clogs, and winter damage.
Topics to cover include a regular sanitizing schedule with clear steps, filter maintenance and replacement intervals, the effects of winterizing and de-winterizing on switching procedures, and a concise inspection checklist before every trip.
Clear, routine maintenance reduces surprises and keeps the fresh tank ready when it’s needed.
Regular sanitizing schedule and how to sanitize the tank
Establishing and following a regular sanitizing schedule guarantees the RV’s fresh water tank and lines remain safe and free of microbial buildup between uses.
Monthly checks and quarterly full sanitizes are recommended; use a bleach solution, flush thoroughly, and rinse until chlorine is undetectable. Record dates and observations to track effectiveness.
- Monthly inspection of fittings and water clarity
- Quarterly bleach sanitization
- Flush until clear and odorless
- Run hot and cold taps during rinse
- Log service dates and results
Filter maintenance and replacement intervals
After quarterly sanitizing and routine inspections, attention turns to the filters that protect the tank and distribution lines; they trap sediment, chlorine, and biological contaminants that would otherwise shorten component life and compromise water quality.
Replace sediment pre-filters every 3–6 months, carbon cartridges every 6–12 months, and inline/point-of-use filters per manufacturer intervals or after visible fouling.
Keep spare cartridges and record dates.
Winterizing and de-winterizing impact on switching procedures
Winterizing and de-winterizing procedures alter valve positions, drain points, and the presence of antifreeze in lines, all of which must be accounted for when switching to the fresh water tank.
Before switching, confirm all winter valves returned to normal, purge antifreeze from pumps, lines, and fixtures, and refill the potable tank.
Failure to clear antifreeze risks contamination and malfunction when using onboard water.
Recommended inspection checklist before every trip
Having confirmed winter valves, cleared antifreeze, and refilled the potable tank, a concise pre-trip inspection checklist helps guarantee the fresh water system will switch reliably on the road.
Inspect seals and hose connections for leaks. Verify tank vent is clear. Test pump operation and pressure. Flush a cup of water to check taste. Confirm valve positions and exterior access panels.
- Check for leaks
- Clear tank vent
- Test pump/pressure
- Flush and taste
- Verify valve positions
Safety and Health Considerations
Safe potable-grade hoses and fittings should be used to prevent contaminants from entering the RV’s fresh water system.
Careful procedures are required to avoid cross-contamination between city water hookups and the onboard tank.
Regular testing and treatment of the tank water when taste, odor, or source changes occur will protect occupant health.
Using potable-grade hoses and fittings
Choose only potable-grade hoses, fittings, and connectors when switching an RV to its fresh water tank because non-potable materials can leach contaminants, impart tastes or odors, and introduce bacteria.
Inspect markings (NSF/ANSI 61 or food-grade), replace cracked or discolored parts, and use stainless steel or approved plastic clamps.
Store hoses cleanly, cap ends when not in use, and replace annually or after extended exposure.
Preventing cross-contamination between city water and tank
Prevent cross-contamination between city water and the RV fresh water tank by maintaining separate, clearly labeled connections and by following strict cleaning and backflow-prevention procedures; failing to do so can introduce bacteria, chemicals, or tastes that compromise potable water.
Use dedicated hoses, closed-valve transfers, and a certified backflow preventer. Rinse and sanitize fittings after switching, store equipment separately, and visually inspect seals for wear before each use.
When to treat or test tank water quality
After ensuring fittings and hoses are isolated to avoid cross-contamination, owners should establish a routine for testing and treating RV fresh water to protect health and equipment.
Test upon filling, after stagnant storage over a week, after repairs, or when taste/odor changes.
Use EPA-approved test strips or labs and disinfect with household bleach or RV-safe sanitizers per manufacturer instructions.
Comparing Options: When to Use City Water vs. Fresh Water Tank
When deciding between city water and the fresh water tank, the choice often balances cost, convenience, water quality, and long-term system wear. A clear comparison helps the reader determine which source best fits their trip length, campsite amenities, and maintenance tolerance. The table below summarizes key trade-offs to guide that decision.
| Factor | City Water | Fresh Water Tank |
|---|---|---|
| Cost | Low (usually included) | Higher per-gallon/limited supply |
| Convenience | Immediate, continuous | Requires filling and monitoring |
| System Wear & Quality | Potential for pressure/contaminants | Controlled quality, less pressure stress |
Cost, convenience, water quality, and system wear comparison
Weighing cost, convenience, water quality, and system wear reveals distinct trade-offs between using city water and the RV’s fresh water tank. City supply saves pump wear and offers constant pressure; tank use gives control over quality and mobility but requires pump and treatment.
| Factor | City Water | Fresh Tank |
|---|---|---|
| Cost | Low | Moderate |
| Convenience | High | Moderate |
| Quality | Variable | Controlled |
| System wear | Lower | Higher |
Practical Tips and Best Practices for Smooth Switching
A concise set of habits at hookup and pack-up streamlines the switch between city water and the fresh water tank.
Packing a few essentials—such as a potable water hose, pressure regulator, and a clear valve marker—makes the process repeatable and reduces errors.
Practical tips from experienced RVers, including a quick checklist and common pitfalls to avoid, further minimize surprises.
Quick habits to adopt at hookup and pack-up
Adopt a short checklist mindset at hookup and pack-up to make switching to the fresh water tank routine and reliable:
Inspect fittings and valves, confirm city connection is closed, switch to tank supply, open a faucet to purge air, monitor tank pressure, secure caps and hoses, note meter/readings, and log any anomalies.
Repeat consistently to avoid surprises and maintain water system integrity.
Packing essentials to ensure repeatable switching
Several compact items make switching to the RV fresh water tank repeatable and trouble-free: a labeled short hose for tank fill, a reliable pressure/regulator gauge, extra hose clamps and O-rings, a quick-connect adaptor for the city hookup, a small funnel or inline filter, and a waterproof checklist card.
Pack these in a designated pouch; include basic tools, replacement fittings, and a marker to label connections for consistent, fast setup.
Pro tips from experienced RVers to avoid common mistakes
After packing the short hose, regulator, clamps, O-rings, and checklist pouch, experienced RVers emphasize a handful of practical habits that prevent common errors when switching to the fresh water tank.
They recommend routine checks, clear labeling, staged valve operation, and sanitation steps to avoid contamination and surprises.
- Verify tank valves and fittings for leaks
- Label hoses clearly
- Flush before use
- Monitor pressure
- Sanitize regularly
Conclusion
Switching from city water to the RV’s fresh water tank becomes a simple, reliable ritual when approached with preparation and knowledge. Like shifting gears on a familiar road, the user follows clear steps, verifies valves, and anticipates hiccups to keep the system flowing. Regular maintenance, thoughtful safety checks, and the right supplies guarantee potable water on demand. With practice, the change feels seamless, preserving comfort and health on every trip.