How to Remove a Frost-Free Spigot: Step-by-Step Guide for Safe, Leak-Free Removal
To safely and effectively remove a frost-free spigot, start by shutting off the water supply and draining the line. Access the valve from the exterior or interior wall, then identify the type of connections: threaded, sweat, compression, or PEX. Support the spigot, remove any mounting screws, and use the appropriate tools to disconnect the fittings. Clean and deburr the stub, then cap it or install a replacement with sealant or solder as needed. Finally, test for leaks and insulate the line. Follow specific connection methods for best results and troubleshooting tips.
What a Frost-Free Spigot Is and Why You Might Remove It
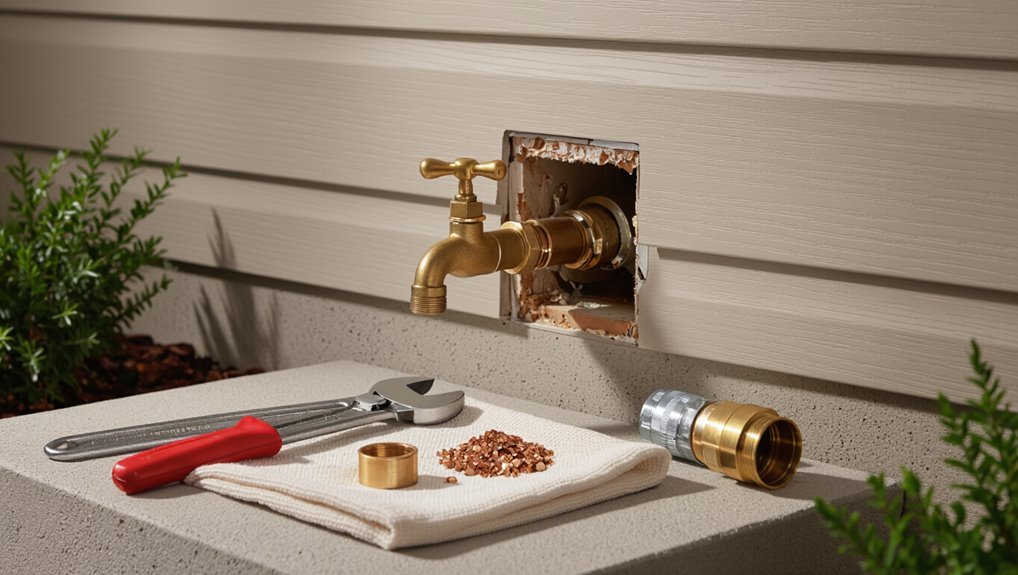
A frost-free spigot extends its shutoff valve inside the heated wall so water drains away from the exterior, with common designs including long-shank and vacuum-breaker models.
Homeowners may remove one for replacement, repair, remodeling, or to stop persistent leaks that standard fixes cannot cure.
The choice between hiring a professional and tackling the task as a DIY depends on access, soldering or pipe-cutting skills, and local plumbing codes.
How frost-free spigots work and common designs
Because frost-free spigots locate the valve several inches inside the heated wall cavity, they prevent water from freezing in the exposed portion and reduce burst-pipe risk.
These spigots use an extended stem connecting the exterior handle to an interior shutoff valve. Common designs include straight-through and angled stems, threaded or flanged mounting, and integrated vacuum breakers.
Also explains how to remove frost free spigot safely.
Reasons to remove a frost-free spigot (replacement, repair, remodel, leak)
When a frost-free spigot fails to function or no longer suits a property’s needs, removal is often the practical next step.
Common reasons include permanent leaks, internal freeze damage, corrosion or seizing, planned exterior remodels that relocate fixtures, and upgrading to more efficient or secure valves.
Replacement corrects malfunction; repair may be impossible.
Removal also prevents future water damage and simplifies retrofit installations.
When to call a professional vs. DIY suitability
Deciding whether to call a professional or tackle removal as a DIY project depends on the specific failure mode and the homeowner’s skills.
Simple tasks—loose mounting, minor leaks, or straightforward replacement—suit competent DIYers with basic plumbing tools.
Call a pro for busted supply lines, corroded fittings, frozen breaks, inaccessible valves, or when permits, soldering, or wall repairs are required to guarantee code compliance and leak-free results.
Tools, Materials, and Safety Preparations
The section lists the essential tools and replacement parts needed to remove and, if desired, replace a frost-free spigot, plus optional tools that can speed the job.
It also outlines required safety gear and precautions for working near water lines and freeze-prone walls, and provides clear steps for shutting off and depressurizing the line.
Readers are reminded that proper preparation reduces risk of leaks, injury, and structural damage.
Required tools and replacement parts
Gather essential tools and parts before beginning work on a frost-free spigot to guarantee efficiency and safety.
Required items include the basics for removal and replacement; verify sizes and materials match the existing plumbing.
Recommended checklist:
- Adjustable wrench, pipe wrench, channel locks
- Replacement frost-free spigot (correct length and thread)
- Thread sealant tape, pipe dope, or plumber’s paste
- Safety gloves, goggles, and rags
Optional tools that make the job easier
Several additional tools can streamline removal and installation of a frost-free spigot and reduce effort and risk.
Useful optional items include:
- Ratcheting socket set for quick fastener removal.
- Tubing cutter for clean copper or PEX cuts.
- Adjustable basin wrench for hard-to-reach nuts.
- Heat-resistant sealant tape and a torch for stubborn fittings.
These save time and improve fit quality.
Safety gear and precautions for working with water lines and freeze-prone walls
After listing helpful optional tools, attention turns to safety gear and precautions for working with water lines and freeze-prone walls.
Protective equipment and sensible precautions minimize injury and property damage.
- Wear gloves, safety glasses, and knee pads.
- Use a dust mask when cutting drywall or insulation.
- Protect nearby finishes with drop cloths.
- Keep a flashlight and a phone nearby for emergencies.
How to shut off water and depressurize the line safely
Before any cutting or loosening of fittings, the water to the spigot must be shut off and the line depressurized to prevent flooding and injury.
Locate and close the indoor or outdoor shutoff valve feeding the spigot.
Open the spigot and a nearby tap to drain remaining water.
Use a wrench to verify valve closure; place a bucket or towels to catch residual drips.
Inspecting the Spigot and Surrounding Plumbing Before Removal
Before beginning removal, the spigot and immediate plumbing should be inspected to identify the connection type—threaded, sweat/solder, PEX, or compression.
The inspector should check for corrosion, signs of previous freezing, or hidden damage along the run that could complicate removal.
Finally, they should determine whether an interior shutoff valve exists and trace the supply line to locate and verify its function.
How to identify connection type (threaded, sweat, solder, PEX, compression)
A clear inspection of the spigot and its immediate plumbing reveals the type of connection to be disconnected—threaded, sweat/soldered, PEX, or compression—so the correct tools and removal method can be chosen.
Threaded fittings show visible threads; sweat/solder joints have smooth, brazed seams on copper.
PEX uses plastic tubing with crimped or push-fit rings, while compression fittings feature a nut and ferrule.
Checking for corrosion, frozen lines, or hidden damage
Inspect the spigot and nearby piping for corrosion, frost buildup, or visible damage that could complicate removal or indicate a leak path.
Note green or white mineral deposits, pitting, hairline cracks, bulges, or flaking paint.
Tap joints gently to detect brittleness.
If frost extends along the line, presume frozen water; document damaged sections and plan for controlled thawing or replacement before disconnecting to prevent rupture.
Determining whether the interior shutoff valve exists and how to locate it
Where is the interior shutoff valve and does one exist at all?
The technician inspects the house side of the wall, tracing the supply line from the spigot inward. Common locations include basement walls, crawlspaces, utility rooms, and near the main water line.
If absent, a shutoff may be at the house main; document its position before proceeding to prevent accidental flooding.
Step-by-Step Removal Process for Exterior Frost-Free Spigots
The removal process begins with shutting off the water supply and draining the line to prevent leaks or residual pressure.
Next, access to the spigot is gained through the wall panel, siding, or an interior access point so connections and mounting hardware can be reached.
Finally, fittings are disconnected by type, mounting screws removed, the spigot body extracted, and the remaining pipe inspected and prepared for a cap or replacement fitting.
Step 1 Turn off supply and drain the line
Shut off the water supply at the main outdoor valve or house shutoff to isolate the frost-free spigot before any disassembly begins.
Open the spigot to relieve pressure and confirm no flow.
Drain the riser by leaving the handle open and, if accessible, loosen a nearby bleed or low point fitting.
Place a bucket or towel to catch residual water.
Step 2 Access the spigot: wall panel, siding, or interior access point
Begin by locating the spigot’s entry point through the exterior wall—either behind a removable wall panel, through siding, or via an interior access plate—and prepare the area for removal by clearing trim, insulation, or cladding that conceals the pipe.
Expose enough of the pipe to see connections and flange seating. Protect finished surfaces, collect fasteners, and note surrounding framing for reassembly.
Step 3 Disconnect fittings by connection type (threaded, sweat/solder, compression, PEX)
Disconnect the spigot from the house plumbing by working methodically through the specific connection type—threaded, sweat (soldered), compression, or PEX—so the correct tools and techniques are used for each.
For threaded, use two wrenches and back off fittings.
For sweat, cut and remove soldered tubing.
For compression, loosen the nut and slide off ferrule.
For PEX, release the ring or crimp and detach tubing.
Step 4 Remove mounting screws and extract the spigot body
Turn attention to the spigot’s mounting screws and fasteners, as their removal releases the body from the wall.
Using the appropriate screwdriver or socket, back out each fastener while supporting the spigot to prevent sudden drops.
Once all screws are removed, gently wiggle and pull the spigot body straight out, taking care not to damage the surrounding siding or the internal pipe stub.
Step 5 Inspect remaining pipe and prepare for cap or new fitting
With the spigot body removed, attention shifts to the exposed pipe stub and surrounding opening.
The remaining pipe is inspected for corrosion, fractures, mineral buildup, or split insulation.
Measure and clean the stub end, deburr cut edges, and verify thread condition or solder integrity.
Assess wall penetration for rot or gaps and note necessary repairs before fitting a replacement or preparing a cap.
Step 6 Temporary cap or plug installation to prevent leaks
Install a temporary cap or plug over the exposed pipe stub to stop water and debris from entering the supply line while repairs or replacement proceed.
Select a compatible cap (threaded, compression, or push-fit) sized to the pipe material.
Clean threads or tubing, apply appropriate sealant or tape, and tighten securely.
Verify there are no leaks before leaving the site.
Step 7 Restore insulation and wall finishes after the job
After confirming the temporary cap holds and no leaks occur, attention shifts to restoring insulation and wall finishes.
The void is filled with appropriate insulation (foam, batt, or spray) to prevent drafts and thermal bridging. Seal gaps with expanding foam or caulk.
Replace vapor barrier if present, patch drywall or siding, and reinstall trim. Finish with paint or exterior sealant for weatherproofing.
Alternative Procedures for Specific Connection Types
The article outlines alternate removal steps tailored to common connection types, including sweat-soldered, threaded, PEX, and compression fittings.
For sweat joints, the procedure covers cutting and re-sweating.
For threaded spigots, it explains sealing and pipe replacement.
For PEX and compression connections, it describes crimp/expander removal and nut/ferrule handling respectively.
Removing a sweat-soldered frost-free spigot (cutting and re-sweating)
When a frost-free spigot is sweat-soldered to copper piping, removal requires cutting the tailpiece and preparing the joint for re-sweating rather than attempting to pull the fixture out intact.
This method minimizes damage to the wall and existing pipe while allowing for a controlled removal and reinstallation.
Cut cleanly behind the fitting, deburr and clean pipe and spigot surfaces, flux, then sweat a new joint or install a replacement tailpiece per code.
Removing a threaded spigot (sealing and pipe replacement)
Begin by shutting off water to the line and draining any residual pressure before working on a threaded frost-free spigot; this prevents leaks and water damage while allowing safe disassembly.
Unscrew the spigot with two wrenches, inspect threads, remove old thread sealant, and install new pipe tape or compound.
Replace damaged pipe section with compatible threading and fittings, test for leaks under pressure.
Removing a PEX-connected spigot (crimp/expander removal and reconnection)
Remove the PEX-connected frost-free spigot by first isolating the water supply and relieving pressure.
Then cut the PEX ahead of the fitting to expose the crimp ring or expansion connection.
Remove the crimp ring with appropriate cutters or pry off the expander sleeve per tool instructions.
Replace or install a new fitting using correct crimp or expansion tools.
Then pressure-test and check for leaks before restoring service.
Removing a compression-style connection (nut removal and ferrule handling)
Loosen the compression nut using an appropriately sized wrench while the supply remains isolated and depressurized; this releases the ferrule and stem so the spigot can be withdrawn.
Support the pipe to prevent twisting, then slide the nut and ferrule off the tubing.
Inspect the ferrule for deformation and replace if damaged.
Reassemble with a new ferrule and tighten to manufacturer torque, checking for leaks.
How to Replace or Reinstall a Frost-Free Spigot Correctly
When replacing a frost-free spigot, the installer must select a length and body style that match the wall thickness so the valve sits flush and operates freely.
Proper alignment is critical to preserve the slight downward pitch that drains water away from the interior, and joints should be sealed with appropriate methods—PTFE tape, pipe dope, or solder—for long-term leak prevention.
Finally, the assembly and surrounding cavity should be insulated or otherwise protected to maintain freeze prevention at the connection.
Choosing the correct length and style for your wall thickness
Although wall depth and exterior finish vary, selecting a frost‑free spigot of the proper shaft length and valve style is essential for reliable performance.
Measure wall thickness including sheathing and siding, then choose a shaft that positions the valve seat inside conditioned space.
Match thread type, inlet diameter and handle orientation to existing plumbing.
Prefer stainless or brass bodies for durability and leak resistance.
Proper alignment to maintain downward slope and prevent trapped water
After confirming shaft length and valve style match the wall assembly, attention shifts to aligning the spigot body so its bore slopes gently downward toward the interior.
The installer verifies pitch by sighting along the shaft or using a small level, adjusting mounting flange and shims as needed.
Proper alignment prevents pockets where water can collect, freeze, and damage the valve or wall.
Sealing methods for long-term leak prevention (PTFE tape, pipe dope, solder)
Choose the correct sealing method and apply it precisely to guarantee a durable, leak-free connection between the spigot and supply line.
For threaded brass or PVC fittings, wrap PTFE tape clockwise or apply pipe dope rated for potable water.
For sweat fittings, clean, flux, and solder joints properly.
Match sealant to material, cure or set fully, then test under pressure to confirm no leaks before finishing.
Insulation and freeze-prevention details during installation
With the sealant set and the joint tested, attention shifts to protecting the spigot and supply line from freezing.
The installer fits foam insulation sleeves or closed-cell pipe wrap around the in-wall tube, seals exterior gaps with low-expansion foam, and installs a frost-free box or insulated escutcheon.
Slope and backflow prevention are verified; heat tape is optional where temperatures regularly drop below −10°C.
Testing and Verifying a Leak-Free Result
After reinstallation, a systematic pressure test and close visual inspection confirm the spigot holds under normal supply pressure.
The inspector should watch for slow weeps at joints, minute drips from the valve stem, and hairline cracks or corrosion that indicate future freeze damage.
A follow-up check after the first freeze/thaw cycle is recommended to catch issues that only appear under temperature stress.
Step-by-step pressure test and visual inspection
Begin the pressure test by isolating the spigot line and connecting a garden hose to the downstream side while attaching a pressure gauge to the supply side.
This setup allows controlled pressurization and immediate reading of system pressure.
Slowly pressurize to normal household pressure, monitor the gauge for drop, inspect all joints, fittings, wall penetrations and repair clamps.
Record readings and photograph suspect areas for documentation.
How to detect slow leaks and signs of future freeze damage
A careful combination of extended pressure monitoring, dye testing, and thermal inspection helps reveal slow leaks and early signs of freeze-related deterioration.
Monitor pressure over several hours for gradual drops, apply food-grade dye to fittings to spot seepage, and use an infrared thermometer or thermal camera to find cold spots indicating insulation gaps, cracks, or compromised seals that may fail during freezing conditions.
When to re-check after first freeze/thaw cycle
Having confirmed no obvious seepage or temperature anomalies during initial inspections, the homeowner should schedule a re-check once the pipe has experienced at least one complete freeze and thaw cycle.
Inspect fittings, joints, and surrounding insulation for hairline leaks, corrosion, or movement.
Monitor for moisture accumulation over 24–48 hours after thaw.
Document findings and tighten, replace, or reseal components if any deterioration appears.
Common Problems, Troubleshooting, and How to Fix Them
Common issues encountered during spigot removal include seized or corroded fixtures, leaks at the wall penetration or behind the spigot, and damaged interior shutoff valves.
Troubleshooting should begin with identifying the source—stuck threads, failing seals, or compromised piping—and applying appropriate fixes such as penetrating lubricant and heat, targeted seal or valve repairs, or localized pipe patching.
If removal reveals significant pipe damage, evaluate repair versus full replacement based on corrosion extent, material condition, and the cost and accessibility of repairs.
Dealing with stuck or corroded spigots
When a frost-free spigot becomes stuck or shows signs of corrosion, the issue usually stems from mineral buildup, frozen residual water, or deteriorated internal components that prevent smooth operation.
Inspect exterior threads, handle, and packing nut. Apply penetrating oil, work handle gently, and tap body to break corrosion.
If frozen, warm with a hair dryer. Replace seized valve assembly or entire spigot if movement won’t restore.
Fixing leaks at the wall penetration or behind the spigot
Inspect the wall penetration and behind the spigot for water stains, mold, or wet insulation to pinpoint leak origins quickly.
Remove trim and inspect pipe connections, saddle fittings and flashing.
Tighten or replace corroded fittings, reseal gaps with plumber’s putty or elastic exterior-grade sealant, and replace damaged insulation.
Test for leaks and verify proper slope and backer support before reinstalling spigot and exterior trim.
Repair options for damaged interior shutoff valves
Begin by identifying symptoms such as leaks, difficulty turning, or inability to fully shut off the water; these indicate worn seats, corroded stems, or seized packing in interior shutoff valves.
Repair options include replacing packing or bonnet gaskets, cleaning and lubricating stems, seat reconditioning with a grinding tool, or swapping cartridge/washer assemblies.
If corrosion is extensive, replace the valve assembly.
When removal reveals damaged piping: repair vs. replace decision guide
Remove the spigot and examine the exposed pipework for cracks, corrosion, thinning, or deformations; these tell whether a local repair (patch, sleeve, or short replacement) will suffice or whether full section replacement and possibly rerouting are required.
Assess leak history, water pressure, pipe material age, and accessibility. Choose repair for isolated, structurally sound areas; replace when multiple defects, extensive corrosion, or future freeze risk exist.
Preventive Tips to Avoid Future Removal or Damage
Preventive measures reduce the likelihood of future spigot removal and freeze damage.
Regular seasonal maintenance, choosing durable materials or upgraded frost-resistant valves, and ensuring proper insulation and drainage around exterior walls all contribute to longer service life.
The following tips outline practical steps for each area.
Seasonal maintenance for frost-free spigots
Regular seasonal maintenance keeps frost-free spigots functioning properly and reduces the risk of freeze damage or the need for future removal.
The homeowner should perform checks and simple tasks each season:
- Inspect for leaks and replace washers promptly.
- Operate the valve to clear sediment.
- Drain connected hoses before winter.
- Verify insulation and wall penetrations are sealed to prevent drafts.
Best materials and upgrades to minimize freeze-related issues
After seasonal checks and simple repairs, upgrading materials and adding targeted insulation can further reduce the risk of freeze damage and the likelihood of future spigot removal.
Recommend replacing corroded valves with brass or stainless steel, using frost-free models with longer stems, installing backflow-resistant hose bibs, and applying heat-trace tape on exposed piping.
Choose durable fittings and professional-grade seals to prevent leaks.
Insulation and drainage practices around exterior walls
When exterior walls are properly insulated and drained, the risk of ice forming around spigots and penetrating wall cavities is greatly reduced.
Focusing on continuous insulation, sealed penetrations, and directed runoff keeps moisture—and the freeze-thaw cycles that damage pipes—away from vulnerable fixtures.
Exterior grading, flashing, gutters, and downspouts should divert water; ventilation prevents trapped moisture.
Seal and insulate around spigot sleeves and service lines.
Cost, Time Estimates, and When to Hire a Plumber
Typical DIY removal of a frost-free spigot often takes 1–3 hours and costs mainly for basic tools and a replacement part, while more complex situations add labor or specialty fittings.
Indicators that a professional is needed include significant corrosion, frozen or leaking supply lines, or inaccessible shutoffs, with contractor rates typically ranging from $100–$250 per hour plus parts.
Before hiring, homeowners should ask about licensing, insurance, an estimated total price, warranty on work, and expected timeline.
Typical DIY time and cost breakdown
Cost and time considerations determine whether a homeowner can tackle removing a frost-free spigot as a DIY project or should call a plumber. Typical DIY: 1–3 hours, basic tools, $20–$80 parts. Complex cases add time or require pros.
| Task | Typical Cost/Time |
|---|---|
| Tools | $0–$30 |
| Parts | $10–$50 |
| Labor (DIY) | 1–3 hrs |
| Contingency | +30–90 mins |
| Disposal | $0–$10 |
Signs the job requires a professional and expected contractor costs
If unexpected complications arise—such as corroded fittings, frozen or damaged piping, a hidden shutoff valve, or water leaking inside walls—the job should be handed to a professional.
Signs warranting a plumber include persistent leaks, deteriorated supply lines, complex framing access, or lack of a local shutoff.
Expect contractor fees typically ranging $150–$500 for diagnostics and minor repairs, higher for extensive plumbing or wall repairs.
Questions to ask a plumber before hiring
When signs point to a professional—stubborn leaks, corroded fittings, or extensive wall repairs—homeowners should prepare specific questions about price, timeline, and scope before hiring.
Ask for written estimates, hourly versus flat fees, permit responsibilities, and parts warranty.
Request start and completion dates, contingency plans for hidden damage, proof of licensing and insurance, and references or recent similar-job examples.
Visual Aids and Quick Reference Checklists
A concise set of visual aids and checklists helps guarantee a safe, efficient spigot removal.
The text should include a quick removal checklist for DIYers, a parts-and-tools checklist for replacement jobs, and clear diagrams showing wall penetration, slope, and pipe connections.
These resources allow readers to confirm readiness and follow each step with minimal confusion.
Quick removal checklist for DIYers
Begin by laying out a compact checklist and clear visuals that guide the DIYer through each removal step: shut off water and drain the line, relieve remaining pressure, disconnect the exterior spigot from the supply, remove mounting fasteners, extract the spigot assembly, and inspect the cavity for debris or corrosion.
- Photograph connections before disassembly.
- Label parts and fasteners.
- Verify valve fully closed.
- Note any corrosion for further attention.
Parts and tools checklist for replacement jobs
Gather a compact, clearly labeled kit of parts and tools tailored to frost-free spigot replacement so the job proceeds without interruptions.
Essential items include reliable replacement spigot, compression fittings, pipe sealant, and mounting hardware.
Suggested tools and supplies:
- Adjustable wrench and pipe wrench
- Tubing cutter and deburring tool
- Plumber’s tape and thread sealant
- Safety glasses and gloves
Diagram suggestions for wall penetration, slope, and pipe connections

With the replacement kit assembled, attention shifts to clear diagrams showing how the spigot penetrates the wall, the required slope for drainage, and the pipe connections.
Include front, side, and sectional views with dimensions, slope degree (1/8″–1/4″ per foot), sealing detail, shutoff valve location, and pipe material labels.
Provide a quick-reference legend and a short checklist for leak and alignment checks.
Conclusion
The final wrench turn hushes the echo of winter’s promise, yet something waits unseen within the wall. One can breathe relief at a dry, leak-free flange, but a cautious eye lingers on the pipe’s dark throat. If corrosion, hidden cracks, or an old valve haunt that hollow, the trouble might only reveal itself later. Best to test, watch, and, if doubt remains, call a professional before the quiet becomes a costly surprise.