How to Make Tap Water Colder Fast: 9 Simple Tricks That Work
If you want to chill tap water quickly, you can use simple methods that enhance heat transfer. Start by pouring the water into a metal container or bottle. Submerge this in an ice-water slurry or an ice-and-salt bath to speed up cooling. Agitating the water or briefly stirring it will help it lose heat faster. Using crushed ice and shaking the container can further reduce chilling time without diluting your drink. Additionally, pre-chill your glassware or use frozen bottles to keep the water cold without adding extra ice. By following these steps, you can effectively chill your tap water in no time.
How to Make Tap Water Colder Fast Quick Overview
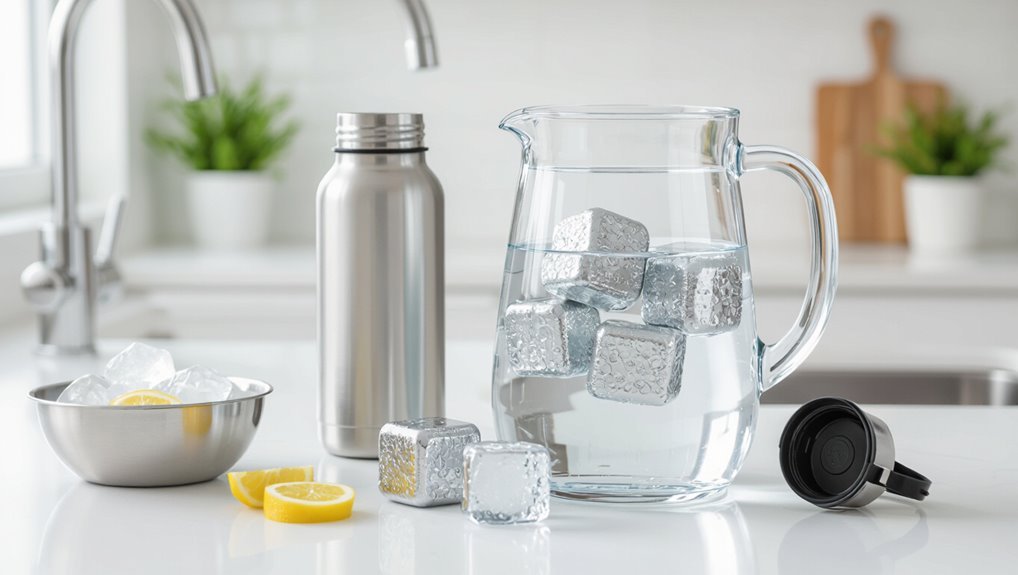
A single quick method to chill tap water immediately is to pour it into a metal container and submerge that container in an ice-water slurry while stirring.
For situations requiring the fastest cooling, active techniques like ice slurries or salt-and-ice baths outperform passive refrigeration.
When gradual chilling is acceptable, placing water in the refrigerator or freezer for a longer period is more convenient and energy-efficient.
One-sentence quick method to chill tap water immediately
Place a container of tap water in an ice bath with a pinch of salt and stir briefly to chill it within minutes.
This single-step, practical tactic demonstrates how to make tap water colder rapidly by lowering freezing point and improving heat transfer.
It suits immediate needs, requires minimal equipment, and delivers noticeably cooler water faster than refrigeration or simple ice cubes alone.
When you need fast cooling vs. gradual chilling
The ice-bath-with-salt trick is ideal for immediate needs, but different situations call for different approaches to cooling.
For urgent chilling, use ice, salt, or metal conduction for rapid temperature drop.
For planned cooling, refrigerate overnight or pre-chill bottles for gradual, energy-efficient results.
Choose methods based on time, container type, and desired final temperature to balance speed and practicality.
Safe Principles Behind Rapid Cooling
The section outlines the basic physics of rapid cooling—conduction, convection, and evaporation—and how each method affects heat transfer from tap water.
It also highlights safety considerations such as avoiding fragile glass, preventing cold burns or frostbite, and maintaining food and microbial safety.
Finally, it notes situations when quick chilling is inappropriate, including certain medical needs and equipment limitations.
How temperature transfer works (conduction, convection, evaporation)
Many everyday cooling methods rely on three basic heat-transfer mechanisms: conduction, convection, and evaporation.
Conduction moves heat directly from warmer water to a cooler surface.
Convection circulates cooler fluid or air to replace warmed layers, speeding heat loss.
Evaporation removes latent heat as water molecules escape, cooling remaining liquid.
Combining mechanisms yields fastest temperature reduction.
Safety considerations (glass, frostbite, food safety)
Consider safety risks before attempting rapid cooling. Glass containers can crack from thermal shock; use tempered glass or metal.
Avoid skin contact with ice-salt slurries or very cold surfaces to prevent frostbite.
Rapid chilling may affect food safety by slowing bacterial growth but won’t reverse prior contamination; cool cooked items promptly and cover to prevent recontamination.
Supervise children and pets around cooling setups.
When not to chill water quickly (medical, equipment limits)
Following the safety caveats about containers, frostbite, and food handling, attention should turn to scenarios where rapid chilling is inappropriate.
Rapid cooling can harm vulnerable patients (cold-induced vasospasm, triggering migraines), compromise medical samples, or stress fragile equipment (glass, old plastics, seals).
Avoid sudden temperature shifts for newborns, the elderly, certain illnesses, and sensitive instruments; prefer gradual cooling when risks exist.
9 Fast Ways to Cool Tap Water
The section outlines nine quick techniques for lowering tap water temperature, emphasizing practical, fast-acting options.
Each method exploits basic physics—adding ice, using salt to lower freezing point, agitation in a chilled bath, pre-made ice, or conductive metal vessels paired with cold water baths.
Examples below highlight a few accessible approaches readers can try immediately.
- Add ice wisely to avoid excessive dilution
- Use salt with ice for faster cooling
- Shake a sealed container in an ice bath
Method 1 Add Ice Wisely
The section outlines which ice types—crushed, cubed, or ice packs—and approximate amounts cool tap water most effectively.
It also covers simple techniques, such as using chilled pre-made ice or ice baths and adding ice gradually, to maximize cooling speed.
Practical tips to minimize dilution, like using frozen water bottles or cold metal objects, are provided.
Best ice types and amounts
When rapid cooling is required, selecting the right ice type and amount makes a measurable difference: crushed ice chills water faster because its greater surface area increases heat exchange, while larger cubes or spheres melt more slowly and dilute liquid less.
Ideal quantities depend on starting temperature and container size; a 1:1 ice-to-water volume ratio cools quickly. Adjust upward for faster drops or larger volumes.
How to prevent dilution
Many users can cool tap water with minimal dilution by choosing ice forms and placement that maximize surface-area contact without directly melting into the drink.
Use chilled stones or reusable metal cubes to absorb heat without adding water. Pre-chill glassware and water before serving.
Float larger, slow-melting ice spheres near the rim to cool efficiently while reducing melt into the beverage.
Method 2 Use Salt and Ice for Rapid Cooling
Adding salt to an ice bath lowers the freezing point of water, which accelerates heat transfer from a container of tap water and cools it faster.
Practical guidance on salt-to-ice ratios helps optimize cooling while avoiding overly salty mixtures that can corrode containers or contaminate beverages.
Safety tips include using food-grade salt when the cooled water is for drinking, avoiding metal containers prone to corrosion, and rinsing items after use.
Why salt speeds freezing point depression
Because salt lowers the temperature at which water solidifies, a mixture of ice and salt creates a colder bath than ice alone.
Salt dissolves in the thin liquid layer on ice, disrupting hydrogen-bond networks and reducing the chemical potential of water. This lowers its freezing point, so more ice melts while absorbing latent heat, rapidly extracting heat from containers and their contents.
Salt ratios and safety tips
When using ice and salt to chill tap water quickly, precise salt-to-ice ratios and basic safety precautions help maximize cooling while minimizing risks.
Use roughly 1–2 tablespoons of salt per cup of crushed ice, stir gently, and avoid direct contact with skin to prevent cold burns.
Rinse containers afterward to remove residue and keep salts away from pets and corrosion-prone surfaces.
Method 3 Shake in a Sealed Container with Ice (Cooler Bath)
The method involves sealing the filled bottle and agitating it in an ice-filled cooler bath to speed heat transfer from the water to the ice.
Instructions cover how long and how vigorously to shake for best results without splashing or damaging the container.
Recommendations specify sturdy, leak‑proof containers with good thermal contact, such as metal or thick plastic bottles with tight caps.
Step-by-step shaking technique and timing
Place the sealed bottle or jar into a cooler filled with ice and a little water.
Then grasp it firmly and begin rapid, controlled shaking to transfer heat from the liquid to the cold bath.
Shake in 10–20 second bursts, pause 10 seconds to check temperature, and repeat three to five cycles.
Avoid splashing, maintain seal integrity, and stop when desired chill is reached.
Best containers to use
A sturdy, leakproof container with a wide neck makes the cooling-through-shaking method safest and most effective.
Prefer stainless steel or BPA-free plastic bottles with secure screw caps to withstand agitation and cold. Avoid thin glass or loosely sealed lids.
Insulated bottles slow cooling but prevent condensation. Choose sizes that fit the ice bath, leave some air space for mixing, and seal tightly before shaking.
Method 4 Freeze a Portion of Water into Ice Cubes Beforehand
Pre-freezing a portion of tap water into ice cubes offers a quick, controllable way to chill a drink without diluting it excessively.
The article will explain how to size and place cubes for maximum cooling efficiency and when to add them to achieve desired temperature.
Practical tips include using insulated trays, clear water for faster freezing, and reserving extra cubes for repeated use.
How to use pre-frozen ice cubes strategically
Keep a stash of small, dense ice cubes ready and add them to a glass to chill tap water quickly without excessive dilution.
Arrange cubes against the glass sides, using metal tongs or a spoon to maximize contact.
Pre-freeze in shallow trays for faster freezing; use insulated containers to store cubes.
Replace melted cubes promptly to maintain temperature and avoid stale taste.
Method 5 Use a Metal Container and Cold Water Bath
Metal conducts heat much faster than glass or plastic, so a metal container transfers warmth from tap water to a cold bath more efficiently.
To set up an ice-water bath, combine ice and cold water in a larger vessel to maximize surface contact around the metal container.
Submerging the metal vessel up to its lid and stirring the water inside speeds cooling further.
Why metal chills faster
Thermal conductivity explains why a metal container cools water faster: metals transfer heat much more efficiently than glass or plastic, allowing heat from the water to move quickly into the colder external bath.
High conductivity reduces thermal resistance, speeding energy flow. Thin metal walls and large surface area increase cooling rate.
Convection in the surrounding bath then carries heat away from the container.
How to set up an ice-water bath
A simple ice-water bath can drop tap water temperature much faster than ice alone by combining conductive contact with vigorous convective cooling.
Place the metal container holding tap water into a larger tub. Add crushed ice and enough cold water to surround the metal sides, not cover the rim.
Stir intermittently and replace melted ice to maintain low temperature until desired chill is reached.
Method 6 Use an Instant Chiller or Rapid Beverage Chiller
Instant chillers rapidly extract heat from water using metal coils, plates, or a refrigerant loop that provides high surface contact and fast conduction.
Consumers can choose between ready-made commercial units that guarantee speed and safety, or DIY setups that use cooled coils or ice baths for lower cost but require careful construction.
Each option trades off convenience, initial expense, and reliability.
How instant chillers work
Rapid chillers extract heat from water by forcing it through a cold-walled coil or chamber while circulating refrigerant or chilled fluid nearby, creating a large temperature gradient that speeds heat transfer.
Flow rate, coil surface area, and thermal conductivity determine cooling efficiency. Heat is absorbed into the refrigerant, then rejected by a condenser.
Short contact time and turbulence enable rapid temperature drop without dilution.
Buying vs. DIY options
Having explained how rapid chillers extract heat and the factors that govern their speed, the next decision is whether to buy a ready-made unit or build a DIY solution.
Commercial chillers offer reliability, safety certifications, and compact engineering but cost more.
DIY setups can be cheaper and customizable yet require tools, thermal knowledge, and may risk inefficiency or safety issues.
Choose based on budget, skill, and use frequency.
Method 7 Evaporative Cooling with a Wet Cloth and Fan
This method is most effective in low-humidity, warm environments where evaporation can occur quickly.
The setup is simple: wrap the bottle or glass in a damp cloth, place it in front of a fan, and leave until the water reaches the desired temperature.
Timing and cloth saturation are adjusted based on air flow and ambient conditions to maximize cooling speed.
When this works best and step-by-step setup
Evaporative cooling with a wet cloth and fan works best in dry, warm environments where air humidity is below about 60% and there is decent airflow to carry evaporation away; under these conditions, evaporation pulls heat from the water fastest.
Steps: wet a thin cloth, wring until damp, wrap it around the container, position a fan to blow across the cloth, and wait 10–30 minutes, checking temperature.
Method 8 Place Water in the Coldest Part of Refrigerator/Freezer Briefly
Placing a sealed container in the coldest section of a refrigerator or briefly in the freezer can chill tap water rapidly without significant dilution.
Timing is important: refrigerate for 10–20 minutes or use the freezer for 3–8 minutes, checking frequently to prevent ice formation.
Position the container near the back or on the coldest shelf, leaving space around it for airflow to maximize cooling efficiency.
Timing guidelines to avoid freezing
When using the coldest section of a refrigerator or the edge of a freezer compartment, monitor the container closely and limit exposure to minutes rather than hours to prevent freezing or ice formation.
Check every 5–10 minutes depending on starting temperature and container size. Remove once desired chill is reached.
Note that thin-walled or small-volume containers cool and freeze faster; adjust timing accordingly.
Best container placement
Choosing the coldest spot inside a refrigerator or the freezer edge maximizes heat transfer and shortens chill time.
The container should be narrow, metal or glass, and placed upright on a cold shelf or near airflow vents. Avoid door shelves and crowded areas.
Monitor to prevent freezing. Small lids reduce evaporation; rotate once for even cooling and faster temperature equalization.
Method 9 Use Pre-chilled Frozen Bottles as Ice Substitutes
Using pre-chilled frozen bottles as ice substitutes offers a quick way to cool tap water without diluting it.
One method is to freeze water in sturdy, sealable bottles and wrap them if needed to prevent condensation and maintain temperature.
When placed in a pitcher or cooler, these frozen bottles chill the water while remaining sealed, allowing liquids to stay full strength.
How to prepare and use frozen bottles without dilution
If frozen bottles are prepared and handled correctly, they provide immediate cooling without watering down beverages.
Select durable, BPA-free bottles, fill them mostly full leaving air for expansion, and freeze upright.
Wrap in thin towels to prevent condensation and chipping.
Rotate frozen bottles as needed; thawed sections can be refrozen.
Sanitize bottles regularly and label dates to avoid freezer burn and contamination.
Comparison of Methods Speed, Dilution, Convenience, and Equipment
A concise comparison helps readers pick the fastest or most practical cooling method based on time-to-cool, dilution risk, cost, and proposed use. The table below summarizes representative trade-offs across techniques to aid quick selection. Following the table, each method is briefly contrasted for clarity.
| Time-to-cool | Dilution risk | Ideal use case |
|---|---|---|
| Very fast | Low | Emergency cooling (ice bath, frozen bottle) |
| Moderate | High | Flavor-sensitive drinks (pre-chill, chilling stones) |
| Slow | None | Low-cost, equipment-free cooling (refrigerator) |
Readable table comparing all 9 methods by time-to-cool, dilution risk, cost, and ideal use case
Below is a concise comparison of all nine cooling methods, organized so readers can quickly judge speed, dilution risk, cost, and best situations for each approach.
A compact table summarizes:
- ice bath (fast, high dilution, low cost, batch chilling);
- frozen bottles (fast, low dilution, low cost, portable);
- freezer (moderate, no dilution, zero cost if available, planned);
- salt+ice (very fast, medium dilution, low cost, emergency);
- chill sticks, rapid stirring, refrigerated coil, cooling sleeve, and aeration are similarly compared for trade-offs.
Step-by-Step: Fastest Two-Method Routine to Get Very Cold Water in Under 5 Minutes
The article outlines a rapid two-method routine that first pairs a salt-ice bath with vigorous shaking of a sealed container, emphasizing timing and agitation to maximize heat transfer.
It then presents an alternative combination using a metal container surrounded by pre-frozen bottles for fast conductive cooling with minimal dilution.
Each approach is framed with clear steps and expected cooling times to guide practical execution under five minutes.
Combining salt-ice bath with shaking equipment and timing
Combine a salt-ice bath with vigorous shaking to exploit both rapid conductive cooling and convective mixing:
Place the sealed bottle in a salted ice slurry, ensuring full contact. Shake vigorously for 30–45 seconds, pause to reposition, then repeat.
Salt lowers freezing point and increases heat transfer; shaking circulates warmer core water to the chilled surface, achieving very cold water in under five minutes.
Alternative combo: metal container + frozen bottles
Moving from a salted ice slurry and shaking, an alternative rapid approach pairs a conductive metal container with pre-frozen bottles to cool tap water in under five minutes.
The metal transfers heat quickly; arranging frozen bottles around and inside the vessel maximizes contact.
Pour water, swirl gently, and rotate bottles periodically.
Expect significant temperature drop fast without dilution or special tools.
Practical Tips to Maximize Cooling Efficiency
To maximize cooling efficiency, smaller volumes and compact containers are recommended because they lose heat faster and chill more uniformly.
Pre-chilling glassware and keeping the setup out of warm drafts and direct sunlight further reduces heat gain.
A quick-read thermometer or infrared gun helps monitor temperature changes precisely and avoid overcooling.
Use smaller volumes or smaller containers
Using smaller volumes or narrower containers increases cooling speed because less thermal mass and greater surface-area-to-volume ratios let heat leave the water faster.
Dividing water into multiple smaller portions or choosing slim bottles and cups shortens chill time.
Reduced depth improves contact with cold air or ice, and thinner walls transfer heat more efficiently, delivering colder water quicker without extra equipment.
Pre-chill containers and glassware
Chill containers and glassware ahead of time to shave minutes off cooling and maintain lower temperatures when water is poured in.
Refrigerated or frozen bottles, pitchers and glasses reduce initial heat transfer, preserving chill longer.
Store appropriate items flat or upright to avoid spills.
Match container material to needs—metal chills faster, insulated tumblers retain cold.
Rinse briefly with cold water before use.
Avoid warm room drafts and sunlight
Although often overlooked, minimizing exposure to warm drafts and direct sunlight is essential for maintaining the coldest possible tap water.
Place filled containers away from vents, drafty windows, and sunlit countertops. Use shaded, insulated areas or close blinds during peak sun.
Reducing radiant and convective heat transfer preserves chill, speeds cooling retention, and prevents rapid temperature rebounds before consumption.
How to monitor temperature quickly (thermometer tips)
Measure water temperature quickly with a compact digital thermometer or infrared gun to confirm coldness before serving.
For accuracy, insert the probe into the center of the liquid, avoid touching container walls, and wait for a stable reading.
Calibrate periodically, use waterproof models for ice baths, and aim for consistent placement when comparing methods to evaluate cooling tricks reliably.
Common Mistakes and How to Avoid Them
Common errors when trying to cool tap water quickly include accidentally freezing the water, over-diluting it with too much ice, using unsafe containers or materials, and misapplying salt.
Each mistake can undermine taste, safety, or equipment longevity if not recognized. The following section outlines how to avoid these pitfalls with simple, practical fixes.
Freezing instead of chilling
Mistaking rapid chilling techniques for proper cooling can lead to water beginning to freeze around the edges or forming ice crystals, which compromises texture, dilutes flavor as it thaws, and can crack glass containers.
To avoid inadvertent freezing, monitor temperature, use shorter blast chilling intervals, remove containers before solidification, and prefer chilled metal or insulated vessels that lower temperature without crossing the freezing point.
Over-dilution with ice
Use ice deliberately to chill water without turning it into watered-down liquid; excessive ice melts and dilutes flavor, making the drink bland and altering its desired strength or mineral balance.
To avoid over-dilution, pre-chill the water, use larger or chilled ice cubes, add ice briefly before serving, or employ an ice bath for the container.
Monitor melt time and adjust quantity.
Using unsafe containers or materials
Many people unknowingly chill water in containers that leach chemicals, rust, or odors, compromising safety and taste.
Using old paint‑lined cans, nonfood plastics, or corroded metal risks contamination and off‑flavors.
Choose food‑grade stainless steel, glass, or BPA‑free bottles, clean and dry containers regularly, and discard damaged items.
Proper material selection preserves water quality while cooling quickly and safely.
Misusing salt (corrosion and taste issues)
A common shortcut is to add salt to ice or water to speed chilling, but improper use can corrode metal containers and impart a saline taste.
Salt left in contact with metal or concentrated on surfaces accelerates rust and pitting; dissolved salt alters flavor.
To avoid problems, use plastic or glass, rinse thoroughly after use, or add ice rather than salting the water directly.
When to Use Each Method Scenario-Based Recommendations
The article outlines specific cooling techniques suited to different situations: quick chills and ice baths for home kitchens and parties, insulated bottles and portable coolers for camping and outdoors, and rapid, reliable methods for emergencies and medical needs.
Each scenario emphasizes trade-offs between speed, portability, and safety. Recommendations will match the method to the priority of the situation.
For home kitchens and parties
For home kitchens and parties, choosing a rapid cooling method depends on volume, speed required, available equipment, and aesthetic priorities; small batches destined for immediate use suit ice-water baths or chilled metal pitchers, while large quantities for gatherings favor pre-chilling in the refrigerator or using large ice-filled coolers with circulation.
Hosts should match method to guest count, presentation needs, and available prep time.
For camping and outdoors
When camping or spending time outdoors, method choice hinges on group size, mobility, and available gear: solo hikers prioritize lightweight, fast options like immersion in cold streams or using insulated bottles with evaporative cooling, while car campers and larger groups can rely on ice chests, frozen jugs, or pre-frozen water containers to keep volumes chilled longer.
Choose based on transport limits, refill access, and duration.
For emergencies and medical needs
Guidance for emergencies and medical needs shifts priorities from convenience to speed, reliability, and contamination control.
Recommendations favor methods that rapidly lower temperature without introducing contaminants: ice packs or frozen bottles in sealed containers, chilled saline or IV-compatible coolers, and pre-chilled sterile water.
Avoid unvalidated cooling techniques and open containers.
Prioritize sterile handling, monitoring, and using methods compatible with medical equipment and protocols.
Tools, Materials, and Simple DIY Alternatives
The section outlines recommended containers, chillers, and thermometers suited to different cooling needs and budgets.
It also describes simple DIY chiller setups using common household items and notes inexpensive ready-made products that perform well.
Readers will get practical options to compare effectiveness, cost, and ease of use.
Recommended containers, chillers, and thermometers
Several practical items make chilling tap water faster and more consistent: insulated bottles, shallow wide containers, ice packs or bowls of ice, and a simple thermometer to monitor temperature.
Stainless steel or double-walled bottles reduce heat gain. Wide pans increase surface area for faster cooling.
Reusable gel packs and sealed ice reduce dilution. A basic digital or probe thermometer guarantees target temperature without guesswork.
DIY chiller setups using common household items
How can everyday household items be repurposed into effective DIY chillers for tap water? A few simple setups include wrapping bottles in wet cloth and placing them in a freezer, using ice-filled resealable bags around containers, immersion of metal utensils chilled in ice, and creating salt-ice slurry baths for faster cooling.
Tools needed: freezer, ice, resealable bags, cloth, metal containers, and salt.
Cheap ready-made products worth buying
A handful of inexpensive, purpose-built items can cut cooling time and simplify DIY chillers: insulated bottle sleeves, silicone ice molds, reusable gel ice packs, compact beverage chillers (immersion or sleeve-style), and inexpensive digital thermometers.
These items offer predictable performance, portability, and durability. Users can combine them—ice molds plus sleeves or gel packs plus immersion chillers—to speed cooling without complex setups or expensive appliances.
Quick Troubleshooting Guide
If the water remains warm despite following the methods, check ice quality, container insulation, and room temperature to identify the limiting factor.
If chilling produces a strange taste or odor, consider residual cleaning agents, plastic leaching, or mineral/municipal source issues and try a glass container or brief aeration.
Simple fixes and what to test next are outlined to quickly resolve common problems.
Water still warm after methods what to check
Confirm basic conditions before repeating cooling steps: check incoming tap temperature, recent hot-water use in the building, and whether the faucet was run long enough to clear warmed pipe water.
If water remains warm, inspect hose attachments, aerator, and mixer valves for cross-connection.
Verify cold supply valves are fully open and ice or chilled containers are sufficiently cold.
Consider plumbing faults or municipal source variations.
Strange taste or odor after chilling causes and fixes
When chilled water develops an unusual taste or smell, potential causes range from trapped organic matter and bacterial growth in the cooling container to residual odors from ice trays, filters, or plumbing materials.
Identifying the source quickly directs the appropriate fix. Clean and sanitize containers and ice trays, replace or flush filters, purge stagnant plumbing, discard suspect ice, and consider activated-charcoal filtration for persistent odors.
Closing Checklist Fast Cooling Action Plan
The closing checklist summarizes immediate steps that yield the fastest cooling results, such as using ice, chilled bottles, or cold packs in direct contact with the container.
It then outlines quick backup options if the primary method underperforms, including transferring water to a metal container or applying a salt-ice slurry.
The plan emphasizes order of actions and simple decision points to achieve cold water reliably and rapidly.
Immediate steps for the fastest result
Execute a concise checklist that prioritizes immediate, high-impact measures:
- Run cold water briefly to flush warm mains.
- Cycle any connected hot-water taps off.
- Open nearby cold-only faucets to increase flow.
- If available, engage an inline water chiller or ice-exchange unit.
Then close faucets to allow chilled supply stabilization.
Check outlet temperature after 30–60 seconds, and repeat short flushes until desired coldness is achieved.
Backup options if first method fails
If the rapid-flush checklist fails to produce sufficiently cold water, a concise backup action plan should be followed to close out efforts efficiently.
The plan recommends using ice from the freezer, adding chilled water from a secondary container, or employing a metal vessel in an ice bath.
If time allows, pre-chill bottles in the fridge.
Record what worked for future reference.
Conclusion
When time is short, the reader can choose from several reliably fast cooling methods that balance speed, dilution, and convenience. Simple ice-and-salt tricks, chilled metal containers, or high-surface-area tumblers each suit different priorities. Which quick tactic best fits a hurry and available tools? By weighing speed against taste and equipment, one can consistently achieve very cold tap water safely and efficiently without needless complexity.