How to Switch RV Water Heater From Propane to Electric: Step-By-Step Conversion Guide
To switch your RV water heater from propane to electric, you’ll need to remove gas components, drain and prepare the tank, and install an electric heating element or replacement unit. Ensure your RV has a dedicated 120/240V circuit with the correct breaker and appropriately sized wiring, which should be installed by a qualified electrician. After sealing and refilling the system, conduct leak tests and check the thermostat’s operation. Remember to prioritize safety checks, code compliance, and surge/noise mitigation throughout the process. Follow the full step-by-step guide for detailed instructions and considerations.
Overview of Converting an RV Water Heater from Propane to Electric
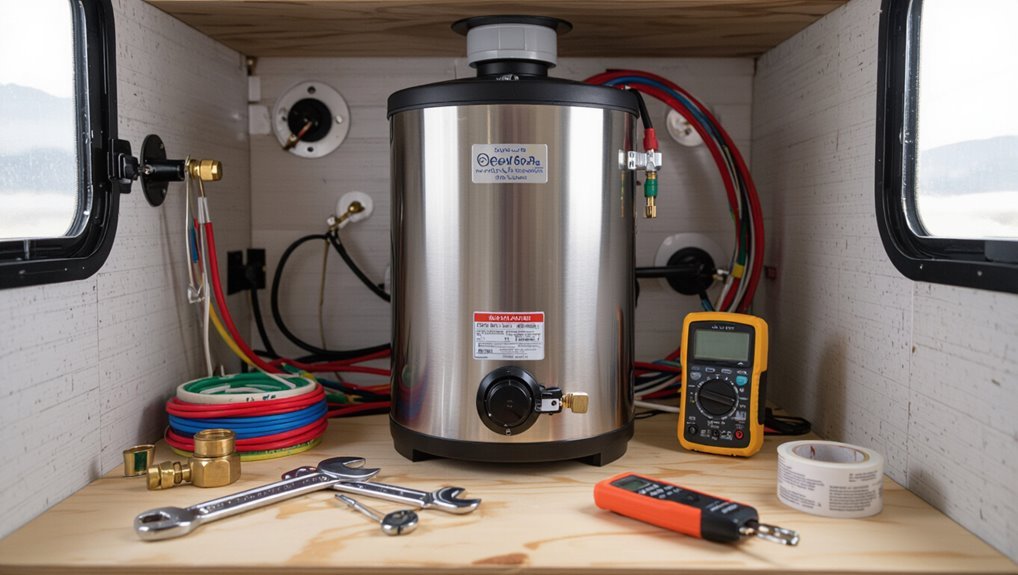
Converting an RV water heater from propane to electric typically involves removing or disabling the gas components, installing an appropriate electric heating element or dedicated electric unit, and ensuring the electrical system can supply the required power.
Owners may choose conversion for quieter operation, lower fuel dependency, or reduced emissions, while accepting higher electrical demand and possible reduced recovery rates.
Before proceeding, the conversion should be checked for code compliance, inspected for safety, and reviewed for impacts on manufacturer warranties.
Quick summary of the conversion process
Begin by removing the propane components and preparing the tank and electrical access for installation: the conversion requires draining the water heater, disconnecting the propane line and gas valve, and verifying venting and clearance.
Then fit an electric element flange or replacement unit, install a dedicated 120/240V circuit with appropriate breaker and wiring, and seal all connections before refilling and testing for leaks and operation.
Following steps outline how to switch RV water heater from propane to electric concisely.
When and why to convert: benefits and trade-offs
After outlining the mechanical steps to remove propane components and fit an electric element, the conversation shifts to why an owner might choose that route.
Benefits include quieter operation, simpler fuel logistics, and potential campsite electrical availability.
Trade-offs involve reliance on shore or generator power, possible need for electrical upgrades, and different heating response.
Owners weigh convenience, cost, and energy access when deciding.
Legal, safety, and warranty considerations
Any owner considering the swap should first assess regulatory, safety, and warranty implications to avoid costly mistakes or voided coverage.
Compliance with local electrical codes, RV manufacturer guidelines, and campground rules is required. Qualified electricians should perform wiring and breaker upgrades.
Documentation of approved parts preserves warranties. Inspect for CO and fire risks, label modifications clearly, and retain records for resale or insurance claims.
Types of RV Water Heaters and Compatibility
The article outlines common RV water heater types—tank, tankless, and combination—and highlights key differences among propane-only, electric-only, and dual-fuel units.
It explains how to assess whether an existing heater is convertible by checking model specifications, burner/electric element accessibility, and mounting constraints.
It also summarizes the electrical demands and typical RV power sources that affect conversion feasibility.
Common RV water heater types (tank, tankless, combination)
Understanding RV water heater types helps owners choose, maintain, and replace units effectively.
Tank models store and heat a limited water volume, offering simplicity and lower initial cost.
Tankless units heat on demand, saving space and weight but requiring higher power or fuel.
Combination units integrate gas and electric sources for flexibility.
Compatibility depends on space, power availability, and installation constraints.
Differences between propane-only, electric-only, and combination units
After outlining tank, tankless, and combination formats, attention turns to how fuel and power sources affect performance and fit. Propane-only heats fast off-grid; electric-only requires shore or inverter capacity; combination offers flexibility but adds weight and complexity. Choice depends on availability, power limits, and space.
| Type | Power Source | Trade-off |
|---|---|---|
| Propane | LP gas | Fast, off-grid |
| Electric | Shore/inverter | Quiet, limited by amperage |
| Combo | Both | Versatile, heavier |
How to determine if your current heater can be converted
Assess whether a heater can be converted by first identifying its format—tank, tankless, or combination—and its existing power inputs, mounting constraints, and ventilation arrangements.
Verify manufacturer model and service manual for conversion kits or electric element options.
Check access panel, anode and drain compatibility, and space for an element or electric unit.
Confirm exhaust or flue removal feasibility and secure mounting points.
Electrical system requirements and RV power sources
Distinguish the electrical demands and available power sources before selecting or converting an RV water heater: residential-style 120V electric elements, 12V DC systems, shore power connections, onboard inverter capacity, and generator output all dictate compatibility.
Assess shore amperage, inverter continuous and surge ratings, battery bank size, and generator wattage. Match element wattage to supply; consider energy efficiency, shore-only limitations, and necessary wiring or breaker upgrades.
Tools, Materials, and Parts Needed
A clear list of required tools—wrenches, screwdrivers, multimeter, pipe sealant, and a soldering or crimping kit—prepares the installer for the conversion.
Replacement parts and kits typically include electric heating elements, thermostats, and sacrificial anode rods, with optional upgrades such as tank insulation, smart controllers, or an inverter/charger available for improved performance.
Estimated costs and reputable sources (RV parts retailers, manufacturer OEM kits, and online marketplaces) should be cited so readers can compare prices and compatibility before purchasing.
Required tools for the conversion
Before beginning the conversion, gather a concise set of tools, materials, and replacement parts to guarantee the job proceeds without interruptions:
- basic hand tools (wrenches, screwdrivers, pliers)
- a multimeter for electrical checks
- pipe fittings and appropriate sealant for plumbing connections
- Teflon tape
- copper or PEX supply lines as required
- a replacement heating element or burner assembly matching the RV model
- temperature/pressure relief valve
- dielectric unions or adapters
- electrical connectors and heat-shrink
- hose clamps
- a bucket and rags
- safety gear (gloves and eye protection).
Essential tools include adjustable and pipe wrenches, needle-nose pliers, wire strippers, crimpers, a drill with bits, tubing cutter, soldering kit or PEX crimper, flashlight, and a non-contact voltage tester.
Replacement parts and kits (electric elements, thermostats, anode rods)
Select replacement parts and kits that match the RV water heater’s make, model, and fuel type to guarantee proper fit and function.
Source compatible electric heating elements, thermostats, and sacrificial anode rods rated for the tank size and water chemistry.
Prefer OEM or high-quality aftermarket components.
Verify element wattage, thermostat temperature range and probe type, and anode material (magnesium or aluminum) before purchase.
Optional upgrades (tank insulation, smart controllers, inverter/charger)
After choosing compatible replacement elements and anode rods, attention can shift to optional upgrades that improve efficiency, control, and off-grid capability.
Add insulating blanket or foam jackets to reduce standby heat loss.
Install a smart controller or Wi‑Fi thermostat for scheduling and diagnostics.
Consider an inverter/charger or dedicated inverter powering the element for boondocking, ensuring proper power ratings and safety interlocks.
Estimated costs and where to buy parts
A concise budget for tools, materials, and replacement parts helps plan a water heater swap:
Basic hand tools and safety gear typically cost $30–$100. A replacement electric or gas heating element runs $20–$120 depending on type and amperage. Thermostats and anode rods are $10–$60.
Full tank assemblies or combined gas/electric units range from $200 to $900 or more for OEM RV models.
- Local RV dealers
- Marine/RV supply stores
- Online retailers (Amazon, eBay)
- Specialty parts suppliers and salvage yards
Preparation Steps Before Starting Work
Before beginning, the technician must follow safety precautions: shut off propane, disconnect batteries, and relieve system pressure.
Next, the water heater should be drained and purged using the manufacturer’s recommended procedure to prevent scalding or leaks.
Finally, the unit and adjacent components should be inspected for damage or corrosion that could affect replacement or require repairs.
Safety precautions (shut off propane, disconnect batteries, relieve pressure)
Shut off the propane supply, disconnect the RV batteries, and relieve water-system pressure before any work begins to minimize fire, electrical, and scald risks.
Verify propane valves are closed and appliances off. Remove battery cables from terminals, securing them to prevent contact.
Open a hot faucet and a pressure-relief valve to reduce system pressure.
Use personal protective equipment and work in a well-ventilated area.
How to drain and purge the water heater safely
Prepare the water system for draining by isolating the heater, relieving residual pressure, and protecting the work area.
Close inlet valves, open a hot faucet to vent lines, then attach a hose to the heater drain and direct discharge to a safe drain.
Open the pressure-relief valve, fully drain the tank, flush with fresh water until clear, and close valves before proceeding.
Inspecting the unit and surrounding components for damage or corrosion
A careful visual and tactile inspection of the water heater and its nearby fittings helps identify damage, corrosion, and wear that could compromise safety or performance.
Examine tank, anode rod, burners, gas lines, electrical connections, vents, mounting brackets, and surrounding cabinetry.
Note leaks, pitting, rust, brittle hoses, frayed wiring, loose fasteners, and water stains.
Document findings and plan repairs or part replacements.
Step-by-Step Conversion Process
The conversion begins with safely removing or disabling the propane components and preparing the tank for electric installation.
Next steps cover fitting the electric heating element and thermostat, making correct wiring connections to shore power, the converter, or an inverter, and ensuring proper grounding, fusing, and breaker sizing for safe electric operation.
The process concludes with reassembling the unit, refilling and repressurizing the system, and testing for leaks and proper function.
Removing or disabling the propane components
Begin by ensuring all propane supply is shut off and the RV is parked in a well-ventilated area before any work begins; this prevents leaks and limits fire risk.
Next, disconnect the propane line at the heater, cap or plug the supply fitting, remove the burner assembly and gas valve, and detach pilot components.
Inspect for leaks, secure loose lines, and store or dispose of parts per local regulations.
Installing the electric heating element and thermostat
Install the electric heating element and thermostat methodically to guarantee safe, efficient operation after removing propane components. The tank is drained and cleaned; an appropriate element and gasket are fitted, torqued, and sealed. The thermostat mounts per manufacturer specifications and is adjusted to desired temperature. Verify seals and element seating before restoring water.
| Item | Action |
|---|---|
| Element | Fit & seal |
| Gasket | Replace |
| Thermostat | Mount & set |
| Torque | Apply specified |
| Inspect | Leak check |
Wiring the heater to the RV electrical system (shore power, converter, inverter)
With the electric element and thermostat secured and the tank sealed, attention shifts to integrating the heater into the RV electrical system so it can run from shore power, the converter, or an inverter.
The heater’s hot and neutral leads are routed to a dedicated 120V circuit, connected at the control panel or subpanel, and switched to allow shore, converter, or inverter sources to supply the element.
Grounding, fusing, and breaker sizing for electric operation
Evaluating grounding, fusing, and breaker sizing guarantees the converted electric water heater operates safely and reliably under RV power sources.
The heater’s chassis must be tied to the RV earth ground with correct gauge wire.
Install an inline fuse or thermal cutoff and match breaker amperage to element draw and wire capacity.
Verify protections meet RV electrical code and manufacturer specifications.
Reassembling, refilling, and repressurizing the system
Begin reassembly by confirming all electrical and gas connections previously modified or disconnected are secure and correctly routed, ensuring seals, grounds, and fuses remain accessible. Reinstall panels, fittings, and insulation. Close drain, open water inlet, and bleed air via hot faucets. Slowly refill, check for leaks, then repressurize to normal RV water pressure before final inspection.
| Item | Action |
|---|---|
| Panels | Reinstall |
| Fittings | Tighten |
| Fill | Open inlet |
| Bleed | Open faucets |
Initial power-up and testing procedures
After confirming the system is refilled, sealed, and repressurized, power-up and testing procedures can commence to verify safe, correct operation of the newly installed water heater.
Energize the RV’s shore or inverter power, switch the water heater to electric mode, and monitor for correct element activation.
Check for leaks, proper thermostat response, and stable voltage/current.
Record final readings and restore panels.
Troubleshooting Common Issues After Conversion
After conversion, common problems include no or insufficient heat, tripped breakers or blown fuses, leaks after reassembly, and electrical noise affecting other systems.
The technician should methodically check fuel/electric connections, reset and test protective devices, inspect seals and fittings, and verify grounding and shielding.
If basic checks do not resolve the issue, professional diagnostic testing is recommended.
No heat or insufficient heat
No heat or weak heat from a converted RV water heater is a common, often fixable problem that can stem from electrical, fuel, or component issues.
Technicians should check element continuity, thermostat settings, wiring connections, and proper voltage at the heater.
Also inspect the mixing valve, sediment build-up, and tank bypass valves.
Replace faulty elements or thermostats and flush the tank to restore performance.
Tripped breakers or blown fuses
Once electrical checks have ruled out failed heating elements, attention should shift to the vehicle’s electrical protection devices: tripped breakers and blown fuses.
Inspect the breaker panel and accessory fuse block for tripped switches or melted elements. Reset breakers only after isolating faults; replace blown fuses with correct amperage types.
Persistent trips indicate wiring short, loose connections, or a faulty thermostat requiring professional diagnosis.
Leaks after reassembly
Inspect the water heater and surrounding plumbing immediately when leaks appear after reassembly. The technician should tighten fittings, verify gasket seating, and confirm proper thread sealant use. If leaks persist, isolate sections to locate the source and replace faulty components. Document findings and retest under pressure to guarantee permanent repair.
| Checkpoint | Action |
|---|---|
| Fittings | Tighten |
| Gaskets | Inspect/replace |
| Sealant | Reapply |
| Isolation | Test sections |
| Retest | Pressure check |
Electrical noise or interference with other systems
After verifying mechanical integrity and stopping leaks, attention should turn to electrical noise or interference that can arise after conversion. Stray currents, poor grounding, or inadequate shielding may cause erratic behavior in vehicle electronics, audio systems, or sensors.
Inspect wiring routes, secure grounds, add ferrite clamps or twisted pairs, and separate power and signal cables. Test systems under load and correct identified noise sources promptly.
Alternatives to Full Conversion
Rather than committing to a full conversion, the author suggests considering portable electric or instant tankless water heaters as simpler alternatives.
Another option is to retain the combination LP/electric unit and selectively disable propane when desired.
For electric-dependent choices, adding solar, inverter capacity, or generator support can supply the needed power without removing existing systems.
Using a portable electric water heater or instant tankless unit
Consider portable electric or instant tankless units as a low-impact alternative to converting an RV’s built-in water heater.
These plug-in devices provide on-demand hot water without modifying existing plumbing. They require appropriate shore power or a robust inverter, proper flow rates, and safe electrical connections.
Installation is temporary and reversible, offering flexibility for campers who want electric hot water without a full appliance conversion.
Keeping a combination (LP/electric) unit and disabling propane selectively
Keeping the factory combination (LP/electric) water heater while selectively disabling propane operations lets an RV owner maintain backup fuel flexibility without committing to a full conversion.
The approach involves isolating or capping the propane supply, locking out the gas pilot or thermostat, and labeling controls.
This preserves electric function and retains propane as an emergency option with minimal permanent modification.
Adding solar, inverter, or generator support for electric heating {comparison}
After isolating propane while preserving electric function, owners often evaluate ways to reliably power the heater electrically without relying solely on campground shore power.
Options include adding roof solar with adequate array and MPPT charge controller, installing a pure sine inverter sized for element load, and carrying a portable or built-in generator.
Each choice requires wiring, battery capacity planning, and safety devices to handle startup and continuous draw.
Maintenance and Long-Term Tips
Routine maintenance for electric units—regular flushing and periodic anode inspections—maintains efficiency and prevents premature failure.
Implementing energy-saving practices, such as scheduling heating cycles during off-peak hours and using thermostatic controls, reduces power draw and operating costs.
Before cold weather, the owner should fully winterize an electric-only water heater by draining, bypassing the tank if possible, and ensuring no water remains to freeze.
Routine maintenance for electric water heaters (flushing, anode checks)
Regular maintenance preserves performance and extends the life of an electric RV water heater; two key tasks are flushing the tank to remove sediment and inspecting or replacing the sacrificial anode to prevent corrosion.
Flushing quarterly or biannually removes buildup that reduces efficiency.
The anode should be checked annually and replaced when heavily depleted to protect the tank from rust and leakage.
Energy-saving practices and timing for heating cycles
When should heating cycles run to balance comfort and efficiency? The guide recommends short, timed cycles during peak use (mornings, evenings), lower thermostat overnight, and setback schedules when away. Smart timers and insulated tanks reduce runtime. Monitor energy draw and adjust.
| Time | Setting | Purpose |
|---|---|---|
| Morning | High | Quick recovery |
| Day | Low | Standby |
| Night | Lower | Save energy |
Winterizing an electric-only water heater in an RV
Several straightforward steps protect an electric-only RV water heater from freeze damage during winter storage: drain and flush the tank, open pressure relief and drain valves, and guarantee all water lines that feed the heater are drained or blown out.
Disconnect and insulate electrical supply, remove or bypass inline filters, add non-toxic RV antifreeze where needed, then recheck seals and store the unit dry and ventilated.
Cost-Benefit Analysis and Decision Checklist
A straightforward cost-benefit review compares upfront expenses (new heater, installation) with ongoing costs like propane refills or electricity and any added equipment.
The evaluation should also weigh weight, space, and performance trade-offs that affect payload and living area.
A concise checklist—budget, fuel availability, installation complexity, and expected savings—helps determine whether conversion is worthwhile.
Upfront vs ongoing costs (propane refills, electricity, equipment)
Although initial purchase and installation costs can be decisive, evaluating ongoing expenses such as propane refills, electricity use, and maintenance is essential to determine the true long-term cost of an RV water heater.
Calculate fuel versus electricity rates, expected refill frequency, and estimated kilowatt-hour consumption.
Factor equipment lifespan, replacement parts, and service costs to compare total cost of ownership over a chosen time horizon.
Weight, space, and performance considerations
Beyond upfront and operating costs, weight, space, and performance often determine whether a particular RV water heater is practical for a given rig. Heavier propane units affect payload and fuel economy; electric options save weight but demand shore or inverter capacity.
Physical dimensions, mounting location, recovery rate, and insulation efficiency influence usability. Matching heater specs to vehicle limits and travel style optimizes benefit versus compromise.
Checklist to decide whether to convert
When weighing a conversion, owners should run a focused cost-benefit analysis that quantifies upfront expenses, ongoing operating costs, and non-monetary impacts like weight, space, and reliability.
A concise checklist helps decide:
- Estimate conversion and installation costs.
- Compare propane vs. electric operating expenses.
- Assess available space, weight limits, and power capacity.
- Evaluate reliability, maintenance, and resale impact.
When to Hire a Professional
Certain tasks—such as gas line removal and advanced electrical work—are generally best left to certified technicians due to safety and code requirements.
Readers should learn how to vet a technician by checking certifications, asking about experience with RV water heaters, requesting references, and confirming insurance and written estimates.
Typical service costs, warranty coverage, and satisfaction guarantees vary regionally and should be requested up front to compare value.
Tasks best left to certified technicians (gas line removal, complex wiring)
If work involves the RV’s gas supply or intricate electrical systems, a certified technician should handle it to prevent leaks, fires, or code violations.
Tasks like gas line removal, sealing, pressure testing, complex 120/240V wiring, circuit upgrades, and compliance inspections require licensed skills and tools.
Incorrect work risks carbon monoxide, explosion, electrical fires, insurance denial, and failed safety inspections.
How to vet a technician and what questions to ask
After outlining tasks that require licensed skills, the next step is choosing the right professional to perform them.
Verify licenses, insurance, and RV experience. Request references and recent work photos.
Ask about specific credentials for gas and electrical systems, turnaround time, and required permits.
Confirm diagnostic approach and safety inspections.
Obtain a written scope of work before hiring.
Typical professional service costs and guarantees
Typical professional service costs for RV water heater work vary by task complexity, parts required, and regional labor rates; basic inspections or diagnostics often run $75–$150.
Burner or element replacements commonly total $200–$450 including parts, and full unit replacement can range from $800 to $2,500 when factoring labor, disposal, and any necessary plumbing or gas-line modifications.
- Warranty length
- Labor guarantee
- Parts coverage
- Service exclusions
Conclusion
Converting an RV water heater from propane to electric can simplify fuel logistics and reduce odor and flame-related risks, but it requires careful assessment of heater type, electrical capacity, and safety. Weighing costs, time, and RV electrical upgrades is essential. For many owners, the extra work is worth the peace of mind, though sometimes swapping horses midstream by choosing a combined or hybrid unit makes more sense—consult a professional when in doubt.