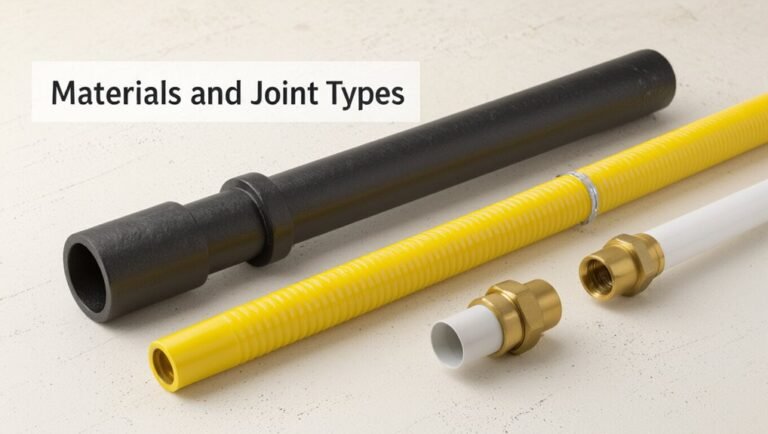
How to Fix a Broken Water Pipe Underground: Step-by-Step Repair Guide and Cost Estimates
If you suspect a broken underground water pipe, start by shutting off the main water supply to prevent further damage. Next, document any wet areas and contact 811 to locate underground utilities before proceeding with repairs. For small pinhole leaks, you can apply a patch, but localized ruptures will require excavation and replacement of the damaged section. Extensive damage may necessitate a full service-line replacement or trenchless repair methods. Minor leaks can often be fixed the same day, while localized repairs may take 1–3 days, and complete replacements could take up to two weeks. Costs will vary based on access and the type of pipe. Continue reading for detailed repair steps, necessary tools, and cost estimates.
What to Do Immediately When You Suspect an Underground Pipe Is Broken
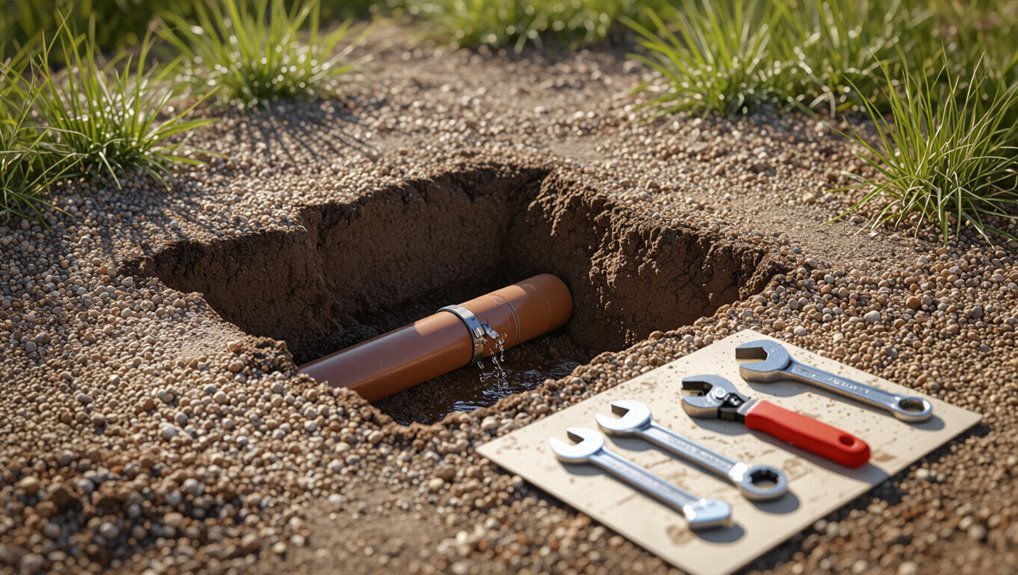
Visible pooling, soggy patches, reduced water pressure, or unusual gurgling noises often indicate an underground water pipe break.
The immediate response should focus on safety: shut off the main water supply, avoid contact with standing water near electrical sources, and evacuate the area if flooding is severe.
If the leak is large, poses electrical or structural danger, or cannot be contained with temporary measures, contact a licensed plumber; minor, accessible breaks may be managed temporarily by a competent DIYer until professional help arrives.
How to recognize signs of an underground water pipe break
When a homeowner suspects an underground water pipe has broken, immediate assessment should focus on clear, observable signs that indicate a leak below ground.
Look for soggy or sunken lawn areas, unusually lush vegetation, sudden pooling, muddy water, reduced water pressure, or unexplained spikes in the water bill.
Document locations and photos to aid contractors addressing how to fix a broken water pipe underground.
Immediate safety steps (shut off main, electrical precautions, evacuate area)
After identifying likely signs of an underground water pipe break, the next priority is immediate safety: shut off the property’s main water supply, keep people and pets away from saturated or sinking ground, and take electrical precautions to prevent shock or fire.
Inspect for exposed wiring; if present, cut power at the main breaker. Notify occupants, cordon off the area, and contact emergency services if collapse or flooding threatens structures.
When to call a professional vs. when to attempt a DIY response
How should one decide between calling a professional and attempting a DIY fix for a suspected underground pipe break?
Assess leak severity, water flow, and access.
Call a professional for large flows, unclear source, frozen or sewer lines, gas proximity, or structural risk.
Consider DIY for minor, accessible leaks with basic tools and confidence.
Always prioritize safety and insurance requirements.
Quick Answer: Typical Steps to Repair an Underground Water Pipe
A concise repair sequence typically includes locating the break, stopping the water, excavating to expose the damaged section, and replacing or patching the pipe before testing and backfilling.
Scenarios vary by severity: a minor leak may require a clamp or short splice, a major rupture often needs a pipe replacement and more extensive excavation, and a burst after freezing can demand removal of compromised lengths and inspection for further damage.
The discussion will compare these typical responses and their expected time, tools, and safety considerations.
One-sentence summary of the repair process
Shut off the water, expose the damaged section, remove and replace or patch the pipe using appropriate materials, then test for leaks and backfill the trench to restore the site.
The process involves diagnosing the break, selecting compatible fittings or sleeve repairs, ensuring proper jointing and bedding, pressure-testing the repair, disinfecting if potable, and restoring soil and surface to prevent future movement or contamination.
Typical repair scenarios by severity (minor leak, major rupture, burst after freeze)
Assess typical repair scenarios by severity to match response methods and materials to the leak type.
Minor leaks: locate, expose small section, clamp or sleeve, replace short pipe segment; quick, low-cost.
Major ruptures: excavate, cut out extensive damaged pipe, install new length with proper fittings, pressure-test.
Burst after freeze: thaw cautiously, inspect for splits, replace brittle sections, insulate or reroute to prevent recurrence.
Identify the Problem: Diagnosing an Underground Pipe Leak
A systematic assessment begins with the right tools and equipment for locating underground leaks, from basic sound detectors and pressure gauges to inspection cameras.
Both visual signs (wet spots, sinkholes) and non-visual methods (acoustic listening, pressure testing, camera inspection) guide the search and narrow the suspected area.
Identifying the pipe material and age—copper, PVC, PEX, galvanized, or clay—helps determine likely failure modes and appropriate repair options.
Tools and equipment for locating underground leaks
When underground pipe damage is suspected, technicians rely on specialized tools and equipment to pinpoint leaks quickly and minimize excavation.
Typical gear includes acoustic correlators, ground microphones, leak detection correlating units, tracer gas kits, and electronic pipe locators.
Support items comprise sondes, induction clamps, handheld receivers, and soil probes.
Portable pumps, valves, and safety equipment facilitate controlled testing and secure worksite operations.
Visual and non-visual detection methods (wet spots, sinkholes, sound detection, camera, pressure test)
After locating potential leak zones with specialized instruments, technicians turn to both visual cues and non-visual tests to confirm and narrow the problem area.
They inspect wet spots, soggy turf, and sinkhole formation, listen with leak correlators and ground microphones, perform pressure tests to detect drops, and deploy inspection cameras or sondes to visually verify pipe breaches or joint failures before excavation and repair.
Determining pipe material and age (copper, PVC, PEX, galvanized, clay)
How can the exact material and approximate age of an underground pipe be determined quickly and reliably?
A technician inspects exposed sections, reads visible markings, and notes joint types and fittings.
Magnetic tests distinguish ferrous metals; density and flexibility help separate PVC, PEX, and clay.
Records, installation date tags, municipal maps, and corrosion patterns refine age estimates for accurate repair planning.
Preparing for Repair: Permits, Utilities, and Site Prep
Before any digging begins, the site must be checked for buried utilities and 811 must be contacted to locate gas, electric, and communication lines.
The responsible party should verify permit requirements and comply with local excavation and waterline codes to avoid fines and guarantee safety.
Finally, the excavation area must be marked, shored as needed, and protected against erosion and runoff during the repair.
Checking for utility lines and calling 811
Where should one start when a suspected underground water line break is discovered?
One should contact 811 or the local utility notification center to request marking of buried lines.
Wait the required period for markups, respect flags and paint, and avoid mechanical digging until confirmation.
Document marked locations, inform the utility companies of proposed excavation, and follow safe hand-digging practices near marked utilities.
Permit requirements and local codes for excavation and waterline work
Because excavation and waterline repairs intersect public safety, property rights, and municipal infrastructure, contractors and property owners must verify permit requirements and applicable codes before digging.
Local jurisdictions may require permits, inspections, licensed plumbers, backflow prevention, and restoration standards.
Verify setback, depth, and material specifications, obtain utility clearances, submit plans if needed, and schedule inspections to guarantee compliance and avoid fines or work stoppages.
Preparing the excavation site: marking, shoring, and erosion control
A clear, methodical site preparation plan streamlines excavation and minimizes hazards by combining accurate marking, proper shoring, and effective erosion control. Markings identify underground utilities and boundary limits. Shoring prevents trench collapse and protects workers. Erosion controls preserve soil stability and nearby drainage.
The crew verifies utility locates, installs engineered supports or sloping, sets sediment barriers, and documents conditions before digging to guarantee compliance and safety.
Step-by-Step Repair Methods by Situation
The following section outlines practical repair approaches tailored to common underground pipe failures, ranging from minor leaks to full replacements.
Each method lists the typical steps, required tools, and situational considerations to help choose the appropriate tactic. Readers are advised to follow safety precautions and local regulations before proceeding.
- Method A: Repairing a small crack or pinhole leak without full excavation
- Method B: Repairing a ruptured pipe via localized excavation and coupling
- Method C: Full replacement of an underground service line
- Method D: Trenchless options: pipe bursting and pipe lining
Method A Repairing a small crack or pinhole leak without full excavation
The section lists required tools and materials, then outlines a quick four-step repair for small cracks or pinhole leaks without full excavation.
First the line is isolated and depressurized, then the damaged area is cleaned and dried.
A repair clamp or epoxy putty is applied, the repair is tested for leaks, and the trench is backfilled if the fix holds.
Tools and materials needed
For repairing a small crack or pinhole leak in an underground water pipe without full excavation, essential tools and materials include a pipe locator or probe, adjustable wrench, pipe cutter or hacksaw (if a short section must be removed), emery cloth or sandpaper, cleaning solvent or alcohol wipes, rubber repair sleeve or self-fusing silicone tape, stainless steel hose clamps or repair coupling, epoxy putty or pipe patch compound rated for potable water, protective gloves, and a flashlight or headlamp.
Additional items: measuring tape, marker, disposable rags, bucket, and a utility knife.
Step 1: Isolate and depressurize the line
After gathering the listed tools and materials, attention turns to shutting off and depressurizing the affected pipe.
The technician locates the nearest shutoff valve, closes it, and opens a downstream tap to relieve pressure. For systems without local valves, the main shutoff is used.
Confirm zero flow and pressure with a gauge or by observation before proceeding to temporary patch application.
Step 2: Clean and dry the pipe
Begin by removing all loose dirt, corrosion, and moisture from the damaged area so repair materials can adhere properly.
Use a wire brush or clean rag to scrub exposed metal or plastic, then dry with lint-free cloths or compressed air.
Confirm surrounding soil is cleared to prevent recontamination.
Inspect for remaining contaminants and repeat cleaning until the surface appears uniformly clean and dry.
Step 3: Apply repair clamp or epoxy putty
Select the appropriate repair method based on the damage: a purpose-made pipe clamp for linear cracks or a fast-setting epoxy putty for pinholes and small surface fractures.
For clamps, position gasket, align saddle and tighten bolts evenly to compress seal.
For epoxy, knead to uniform color, press into cleaned defect, shape flush with pipe and allow full cure per manufacturer instructions before restoring pressure.
Step 4: Test and backfill
Verify the repair by slowly restoring water pressure and observing the patched area for leaks or seepage; any sign of moisture, damp soil, or dripping indicates the repair needs rework before backfilling.
Once dry and leak-free after an appropriate test period, gradually refill the hole with compacted soil in layers, avoiding sharp rocks near the repair.
Reinstall surface materials, monitoring periodically for delayed leaks.
Method B Repairing a ruptured pipe via localized excavation and coupling
Method B outlines the tools and materials required before beginning a focused excavation to reach the ruptured section.
After exposing the break, the damaged segment is cut out, measured, and replaced with a new pipe piece secured by couplings or compression fittings.
The repair is completed by pressure testing, disinfecting if necessary, and backfilling the trench correctly.
Tools and materials needed
For localized excavation and coupling of a ruptured underground water pipe, the required tools and materials include items for safe access, clean cuts, secure fittings, and leak-proof sealing:
a shovel or mini-excavator, utility knife and pipe cutter or reciprocating saw with appropriate blade, coupling or repair sleeve sized to the pipe material (PVC, copper, or copper-clad), stainless-steel or rubber repair clamps, primer and solvent cement for PVC or soldering kit for copper as applicable, emery cloth or sandpaper, replacement pipe sections, pipe supports, torque wrench or adjustable pliers, protective gloves and eye protection, a tarp or containment tray for debris, and pipe locator or probe if needed to precisely expose the rupture.
Step 1: Expose the damaged section
Begin by carefully removing soil above and around the suspected break to fully expose the damaged section while minimizing disturbance to surrounding utilities and landscaping.
Hand-dig close to the pipe to avoid tool strikes. Clear sediment until the full rupture and adjacent joints are visible.
Remove loose debris, document pipe orientation and depth, and verify no additional fractures are present before proceeding to cutting and measuring.
Step 2: Cut out damaged section and measure replacement
Cut out the damaged pipe section by marking clean, square cut points on sound pipe at least 2–3 inches beyond visible cracks or deformation.
Use a suitable cutter to make straight cuts, deburr edges, and remove corrosion or jagged material.
Measure the gap accurately between cut faces, accounting for coupling insertion depth and any required alignment offsets before selecting the replacement length.
Step 3: Install new pipe segment with couplings or compression fittings
Slide the replacement pipe into position and prepare the joints for coupling or compression fittings, ensuring the excavation offers clear access and the pipe is supported to maintain alignment.
Cut pipe ends square, deburr and clean surfaces.
Install appropriate couplings or compression fittings per manufacturer torque/assembly specs.
Verify straight engagement, tighten evenly, and secure any support or anchors to prevent movement during later operations.
Step 4: Pressure test, disinfect if needed, and backfill properly
After the new segment is secured, perform a controlled pressure test to confirm joint integrity. Disinfect the repaired section if the system supplies potable water, and backfill the excavation to restore support and prevent future movement.
Record test pressures and inspect for leaks. Use clean water and appropriate chlorine dose for disinfection, allow contact time, then flush.
Backfill in layers, compacting to prevent settling.
Method C Full replacement of an underground service line
Method C outlines a full service line replacement and lists required tools and materials such as a trencher, piping, valves, bedding, and insulation.
The procedure begins with route planning and permit procurement, followed by excavation to remove the old pipe and installation of the new line with correct slope, bedding, and insulation.
The final steps cover pressure testing, disinfection, reconnection, and surface restoration.
Tools and materials needed (trencher, piping, valves)
A clear inventory of tools and materials is essential before beginning a full replacement of an underground service line.
Required items include a trencher or excavator, shovels, safety gear, appropriate piping (PEX, HDPE, or copper), fittings, isolation and shutoff valves, corrosion protection, tracer wire, connectors, bedding and backfill material, pipe clamps, pressure testing equipment, and basic plumbing hand tools.
Step 1: Plan new routing and obtain permits
Begin by surveying the property to determine the ideal new route for the service line, balancing shortest practical length with avoidance of existing utilities, obstacles, tree roots, and future landscaping plans.
Verify local codes, setback and depth requirements, and call utility-locate services.
Prepare permit applications with drawings and specs, estimate costs, and schedule inspections and approvals before any excavation or replacement work begins.
Step 2: Excavate and remove old pipe
Excavate carefully to expose the failed section and create working space for removal and reconnection.
Soil is removed to reach undamaged pipe ends, preserving tracer lines and utilities.
Shoring and dewatering prevent collapse and maintain access.
Cut and detach fittings, minimize disturbance to surrounding infrastructure, and remove compromised segments and debris.
Document exposed conditions and measure replacement lengths before backfill.
Step 3: Install new pipe with proper slope, bedding, and insulation
Install the new service line by first confirming pipe alignment and slope requirements.
Then, lay a uniform bedding layer to support the conduit and prevent point loads.
Position pipe on bedding, maintain specified fall for drainage, and secure joints per manufacturer specs.
Add screened sand or pea gravel surround, apply thermal insulation where freeze risk exists, and compact backfill in controlled lifts to prevent settlement.
Step 4: Test, disinfect, reconnect, and restore surface
Pressure-test the new line to confirm integrity before introducing potable water—then disinfect, reconnect to the service, and restore the surface according to local codes.
After successful pressure and leak checks, chlorinate per utility guidelines, flush until clear, and sample for bacteriological safety.
Reattach meters and valves, verify system operation, backfill with approved material in layers, compact, and reinstate pavement or landscaping to original condition.
Method D Trenchless options: pipe bursting and pipe lining
When trenchless repairs are appropriate—typically where minimal surface disruption is desired or access trenches are impractical—two main approaches are commonly used: pipe bursting and cured-in-place pipe (CIPP) lining.
Pipe bursting replaces the old pipe by fracturing and pulling through a new one, but it can be limited by soil conditions, nearby utilities, and pipe material.
CIPP creates a resin-saturated liner inside the existing pipe, useful for cracks and leaks but limited by severe obstructions or diameter changes.
Both methods often reduce excavation time and overall cost compared with full replacement, though exact savings depend on pipe length, site conditions, and required permits.
When trenchless methods are appropriate
Under what conditions do trenchless methods offer the best solution for an underground broken water pipe?
Trenchless is appropriate when access is limited, surface disruption must be minimized, linear run is continuous, existing pipe layout is well-mapped, and soil conditions permit directional work.
It suits long, inaccessible runs, aging but largely intact mains, or where landscaping, driveways, or utilities make open excavation impractical.
Overview of pipe bursting: process and limitations
Pipe bursting is a trenchless replacement technique that fractures an existing pipe while simultaneously pulling a new pipe into place through the resulting cavity.
It suits brittle or collapsed lines, minimizing surface disruption and restoring full diameter.
Limitations include need for access pits, obstacles like roots or heavy bedding, soil collapse risk, size mismatches, and higher cost versus simple spot repairs; utility mapping is essential.
Overview of cured-in-place pipe (CIPP) lining: process and limitations
While pipe bursting replaces a damaged line by fracturing and extracting the old pipe, cured-in-place pipe (CIPP) lining repairs from within by creating a new structural layer inside the existing conduit.
Resin-saturated felt or fiberglass is inverted or pulled in, cured to form a seamless liner, then trimmed.
CIPP suits many materials and shapes but is limited by severe deformation, large diameters, tight bends and long collapsed sections.
Typical cost and time advantages
Efficiency is a primary driver when choosing between trenchless repairs: both pipe bursting and CIPP lining typically reduce excavation time and restore service faster than open-cut methods.
Costs vary: trenchless often lowers labor, surface restoration, and landscaping expenses, offsetting higher equipment and material fees.
Typical savings range 20–50% in total project time and 10–40% in overall cost, depending on access and pipe condition.
Materials, Tools, and Supplies Checklist
A concise checklist helps guarantee the right materials and tools are on hand before excavating for a broken underground water pipe.
The list should cover common pipe types with compatible fittings, the essential hand and power tools for DIY repairs, and necessary safety and excavation supplies. Proper preparation reduces delays and minimizes risk during the repair.
- PVC, copper, PEX and their compatible fittings
- Pipe cutters, wrenches, soldering or crimp tools, and a trench box or shoring
- Safety gear: gloves, eye protection, hard hat, and respirator if needed
- Excavation supplies: shovels, tarps, backfill material, and a water pump if the trench floods
Common pipe materials and compatible fittings
Understanding the pipe material and its compatible fittings is essential before attempting any underground repair, because incorrect matches can cause leaks, corrosion, or joint failure.
Common materials include PVC, CPVC, copper, PEX, galvanized steel, and cast iron, each requiring specific connectors, solvents, solder, or crimping tools.
Match fittings: PVC/CPVC solvent cement; copper solder or compression; PEX crimp or push-fit; steel/cast iron threaded, mechanical couplings, or flange adapters.
Essential tools for DIY repairs
Before digging in, assemble a concise kit of materials, hand tools, and safety gear tailored to the pipe type and repair method. Having the right items on hand reduces delays and prevents makeshift fixes that can fail underground.
Include pipe cutters, tubing wrenches, adjustable wrench, coupling kits, replacement pipe, primer and solvent or soldering kit, leak clamps, plumber’s tape, and a flashlight.
Safety gear and excavation supplies
When working on an underground pipe repair, proper safety gear and excavation supplies protect both the worker and the surrounding property.
The checklist should prioritize personal protective equipment, shoring and bracing, and tools that prevent soil collapse and utility strikes.
Required items include hard hat, safety glasses, gloves, steel-toe boots, high-visibility vest, trench shields or boxes, timber/bracing, shovels, pry bars, utility locators, and first-aid kit.
Testing, Disinfection, and Restoring Service
Following repair, the work should proceed to pressure testing to confirm system integrity, using specified pressures and holding times consistent with local codes.
Once tests pass, the potable lines must be flushed and disinfected to remove debris and sanitize the system before service is restored.
Finally, appliances and fixtures are reconnected and sampled or tested to verify water quality and proper operation.
Pressure testing procedures and acceptable thresholds
A single, controlled pressure test verifies pipe integrity and detects leaks or weak joints before backfilling and restoring service.
The procedure pressurizes the repaired section to specified psi—typically 1.5 times working pressure or a code-specified value—maintains it for a set duration (15–30 minutes), then monitors for pressure loss.
Acceptance criteria: no pressure drop and no visible leaks; document readings and duration.
Flushing and disinfecting potable water lines after repair
After pressure testing confirms mechanical integrity, attention shifts to flushing and disinfecting the potable water line to remove debris and microbiological contaminants introduced during repair.
Technicians purge lines using steady high-flow flushing until clear. A measured chlorine solution is applied per local guidelines, dwell time observed, then lines are flushed again to reach acceptable residuals.
Final documentation records concentrations and actions taken.
Reconnecting appliances and verifying water quality
Begin by methodically reconnecting appliances and fixtures only once water quality tests confirm the system is free of contaminants and pressure holds steady.
Then inspect seals, valves, and supply lines for leaks. Run each appliance through a full cycle, observe for abnormal odors or discoloration, and retest water after 24–48 hours.
Document results and advise occupants on any follow-up treatment needed.
Backfilling, Compaction, and Surface Restoration
After service is restored, attention turns to proper bedding and backfill materials to protect the repaired pipe and prevent damage.
Controlled compaction in layers is required to minimize future settling and maintain pipe alignment.
Finally, landscaping, pavement, and other hardscapes are reinstated to match existing grades and surface conditions.
Proper bedding and backfill materials
Select bedding and backfill materials that protect the pipe, promote load distribution, and allow proper compaction.
Use clean, granular sand or pea gravel around the pipe to cushion and prevent point loading.
Gradually place native or engineered fill in layers, avoiding large rocks or organic matter.
Cap with suitable material to restore profile and facilitate surface restoration while ensuring drainage away from the pipe.
Compaction best practices to avoid future settling
With proper bedding and backfill in place, attention turns to compaction practices that prevent future settling and protect the repaired pipe.
Compaction should proceed in uniform lifts, using suitable equipment for trench width and soil type. Achieve specified density with moisture control, testing (proctor/DCP) as required, and avoid over-compaction near pipe haunches.
Document results and allow stabilization before final surface work.
Restoring landscaping, pavement, and hardscapes
Begin restoring landscaping, pavement, and hardscapes by sequencing work to protect the repair and match existing conditions: place specified backfill in uniform lifts around the pipe, compact to required density while protecting pipe bedding and haunches, and gradually rebuild subsurface layers to original elevations.
Replace subbase, install geotextile where required, repave or reseed, trim edges, and monitor for settling before final finish work.
Cost Estimates and Timeframes
Costs and time expectations vary widely depending on the repair type and site conditions. The following table summarizes typical cost categories, key factors that drive price, and average timelines from detection to completion. A clear understanding of these elements helps prioritize repairs and anticipate permits, access needs, and potential delays.
| Repair Type | Primary Cost Drivers | Typical Timeline |
|---|---|---|
| Minor leak | Access, pipe material, localized fittings | Same day–3 days |
| Localized repair | Excavation depth, soil conditions, labor | 1–3 days |
| Full replacement / Trenchless | Pipe length, permits, restoration needs | 2 days–2 weeks |
Cost breakdown for common repairs (minor leak, localized repair, full replacement, trenchless)
Repairing an underground water pipe can range from a quick patch to a full replacement, and each option carries distinct material, labor, and equipment costs as well as different timeframes for completion.
Minor leak patches: low materials, minimal labor, hours;
localized repairs: moderate parts, half-day to a day;
full replacements: high materials, days, significant labor;
trenchless: premium equipment, faster restoration, higher cost.
Factors that affect cost (pipe depth, material, access, permits, soil conditions)
Although the basic repair type influences price, several site-specific factors ultimately determine final cost and schedule:
Pipe depth increases excavation and restoration expenses; material type (copper, PVC, HDPE) affects part cost and labor; access constraints raise labor/time or require specialized equipment; permit fees and inspection requirements add administrative costs; and soil conditions (rocky, sandy, contaminated) influence digging difficulty, disposal, and mitigation measures.
Typical project timelines from detection to completion
When a broken underground water pipe is discovered, the timeline typically follows a predictable sequence—from diagnosis and permitting through excavation, repair or replacement, testing, and site restoration—though each stage’s duration varies with complexity.
Initial assessment and emergency shutoff: hours to a day.
Permits: days to weeks.
Excavation and repair: one to several days.
Testing and restoration: one to three days.
Total: 1–21+ days.
Common Problems, Risks, and How to Avoid Them
Common problems and risks during underground pipe repair can lead to repeat leaks, safety hazards, and contaminated water if not addressed properly.
Typical mistakes include poor joint preparation and improper backfill compaction, while excavation poses dangers such as striking buried utilities, trench collapse, and soil or water contamination.
Recognizing persistent wet spots, pressure loss, or discolored water indicates a failed repair and signals when a specialist should be contacted.
- Poor sealing or mismatched materials causing reoccurring leaks
- Utility strikes, cave-ins, and exposure to contaminated soil or groundwater
- Persistent soggy ground, low water pressure, or rusty/odorous water as warning signs
- Call a licensed plumber or utility locator if repairs fail or safety risks appear
Mistakes that lead to reoccurring leaks
Repeated underground pipe failures often stem from avoidable errors in diagnosis, materials selection, and installation practices.
Common mistakes include misidentifying leak source, using incompatible pipe or fitting materials, poor joint preparation, inadequate bedding or compaction, and neglecting corrosion protection.
Overlooking pressure testing and poor trench drainage also contribute.
Addressing these prevents repeat leaks and reduces long-term repair frequency and cost.
Risks during excavation (utility strikes, cave-ins, contamination)
Numerous hazards arise during excavation for underground pipe repairs, chiefly utility strikes, trench cave-ins, and soil or groundwater contamination; each can cause injury, service disruptions, costly repairs, and regulatory penalties.
Proper utility locating, shoring or benching trenches, controlled dewatering, and containment of contaminated soils reduce risk.
Permit compliance, trained crews, and immediate shutdown procedures for hits further mitigate consequences.
Signs a repair failed and when to call a specialist
Watch for persistent wet spots, declining water pressure, new sinkholes, or unexplained utility bills—these are clear indicators that an underground pipe repair may have failed.
Additional signs include muddy water, recurring repairs at the same location, and audible leaks.
If DIY fixes recur, soil instability appears, or contaminants are suspected, contact a licensed plumber or utility specialist promptly to diagnose, perform durable repairs, and prevent property damage.
When to Hire a Professional vs. DIY: Decision Checklist
The decision checklist compares the homeowner’s skills, available tools, and safety limits against the complexity of the underground repair.
It outlines key contractor questions and bid-evaluation criteria, and highlights warranty, insurance, and permit requirements that can shift a job from DIY to professional.
Clear thresholds help determine when to proceed alone and when to retain licensed expertise.
Skill, tool, and safety thresholds for DIY eligibility
When evaluating whether to attempt an underground pipe repair, assess skills, available tools, and safety risks against the complexity of the job.
Simple repairs like replacing an exposed joint with accessible shutoffs may suit a competent DIYer, while corroded mains, buried valves, gas-line proximity, or unclear utility locations typically demand professional expertise.
DIY eligibility requires plumbing experience, trenching tools, leak-detection gear, PPE, and confidence in diagnostics.
Questions to ask a contractor and how to evaluate bids
Why ask specific questions before hiring a contractor?
Prospective homeowners should request experience with underground pipe repair, references, a written scope, timeline, materials, and payment breakdown.
Compare multiple bids for completeness and realism.
Evaluate warranties, cleanup responsibilities, and subcontractor use.
Prioritize contractors who explain alternatives, potential complications, and cost drivers clearly, demonstrating transparency and relevant project history.
Warranty, insurance, and permit considerations
After confirming a contractor’s experience, references, and clear bid details, attention should shift to warranty, insurance, and permits—factors that determine financial risk and legal compliance.
Verify contractor liability and workers’ compensation insurance, obtain written warranty terms on labor and materials, and confirm permit requirements with local authorities.
DIYers should assess permit feasibility, warranty loss, and homeowner insurance coverage before proceeding; otherwise hire a licensed professional.
Preventive Measures to Reduce Future Underground Pipe Failures
Preventive measures focus on reducing corrosion, thermal damage, and mechanical wear to extend underground pipe life.
Routine inspections and targeted upgrades can catch problems early and lower long-term costs. Implementing insulation, cathodic protection, and smart routing choices helps minimize future failures.
- Proper insulation and freeze-prevention techniques
- Cathodic protection to control corrosion
- Regular inspection and monitoring schedules
- Material upgrades and rerouting to reduce maintenance
Best practices for insulation, cathodic protection, and freeze prevention
Many underground pipe failures can be avoided by systematically applying insulation, cathodic protection, and freeze-prevention measures tailored to soil, climate, and pipe material. Each technique addresses specific failure modes—thermal loss and freezing, electrochemical corrosion, and temperature-induced stresses—and should be integrated into a coordinated maintenance plan that balances cost, effectiveness, and site constraints.
Use closed-cell foam or mineral wool, sacrificial anodes or impressed-current systems, and heat tracing with proper drainage and burial depth.
Regular inspection and monitoring strategies
Building on insulation, cathodic protection, and freeze-prevention measures, a structured program of regular inspection and monitoring provides the feedback needed to detect emerging issues before they become failures.
Scheduled visual inspections, leak detection surveys, pressure and flow logging, and periodic CCTV or sonar assessments identify corrosion, joint stress, and soil shifts.
Establishing thresholds, automated alerts, and documented response protocols guarantees timely maintenance and minimizes disruptive failures.
Upgrades that reduce long-term maintenance (material swaps, rerouting)
A range of targeted upgrades—material replacements, rerouting, and component standardization—can greatly lower long-term maintenance demands on underground water systems.
Switching to corrosion-resistant pipes (HDPE, PVC, ductile iron with coatings), simplifying layouts to minimize bends and low spots, and consolidating fittings and valve types reduce leak risks, ease inspections, and cut repair time.
Prioritize interventions based on soil, load, and budget.
Real-World Examples and Scenario-Based Estimates
Three concise case studies illustrate typical responses and costs: a small yard leak fixed with a clamp including steps, cost, and time; a service line replacement under a driveway highlighting challenges and price; and a trenchless renewal for an aging main showing the process and outcome.
Each scenario presents realistic estimates and trade-offs to help guide decision-making. The following examples contrast scope, disruption, and likely budgets for common underground pipe problems.
Case 1 Small yard leak repaired with clamp: steps, cost, time
For a small yard leak that can be reached without extensive excavation, a plumber typically isolates the section, cleans the pipe, and secures a stainless-steel repair clamp over the breach.
This straightforward approach often restores service within one to three hours and is commonly chosen when the pipe is intact aside from a localized crack or pinhole.
Typical costs range $150–$450 including labor, materials, and minor pit work.
Case 2 Service line replacement under driveway: challenges and price
When a localized clamp repair is not feasible because the service line runs beneath a driveway, replacement becomes more complex: contractors must assess slab thickness, utility crossings, and driveway material before choosing excavation methods (jackhammering vs. trenchless boring).
Costs vary: full jackhammer replacement often runs higher due to concrete removal, restoration, and permits; directional boring reduces surface repair but raises equipment and access costs.
Case 3 Trenchless renewal for aging main: process and outcome
Many municipalities and utilities now favor trenchless renewal for aging mains because it minimizes surface disruption while extending pipe life by 30–50 years.
Projects use cured-in-place pipe (CIPP) or pipe-bursting methods, requiring access pits, flow bypass, and camera inspection.
Typical outcomes: restored capacity, reduced leaks, 20–40% lower surface restoration costs versus open-cut.
Typical municipal project costs vary widely by diameter and length.
Useful Resources and Tool Recommendations
Practical repair work benefits from reliable information and the right equipment, especially when locating leaks and complying with local codes. This section points readers to professional locator and leak-detection services, homeowner-grade tools and trusted brands, and authoritative permit and code resources.
Clear links and tool recommendations help homeowners plan repairs safely and avoid costly mistakes.
- Professional locator and leak-detection services (what to expect and typical costs)
- Recommended tools and brands for homeowners (shovels, pipe cutters, plungers, repair kits)
- Links to code resources and local permit offices (how to find and contact them)
- Safety gear and testing equipment (gloves, pressure gauges, and shutoff tools)
Locator and leak detection services
A reliable locator and leak detection service is essential for pinpointing underground pipe failures without unnecessary excavation.
Professionals use acoustic correlators, ground microphones, thermal imaging, and tracer gases to locate leaks and assess severity.
Service selection should prioritize certification, local experience, and clear reporting.
Accurate detection reduces repair scope, time, and overall cost, guiding informed decisions between repair or replacement.
Recommended tools and brands for homeowners
Several essential tools and a few trusted brands make underground water pipe diagnosis and basic repairs feasible for homeowners with moderate DIY skills.
Recommended items include a quality shovel, compact trenching spade, adjustable wrenches, pipe cutters, compression fittings, and rubber repair couplings.
Brands favored for reliability: Ridgid, Milwaukee, SharkBite, and DeWalt for tools; Fernco and Oatey for connectors and seals.
Links to code resources and permit offices
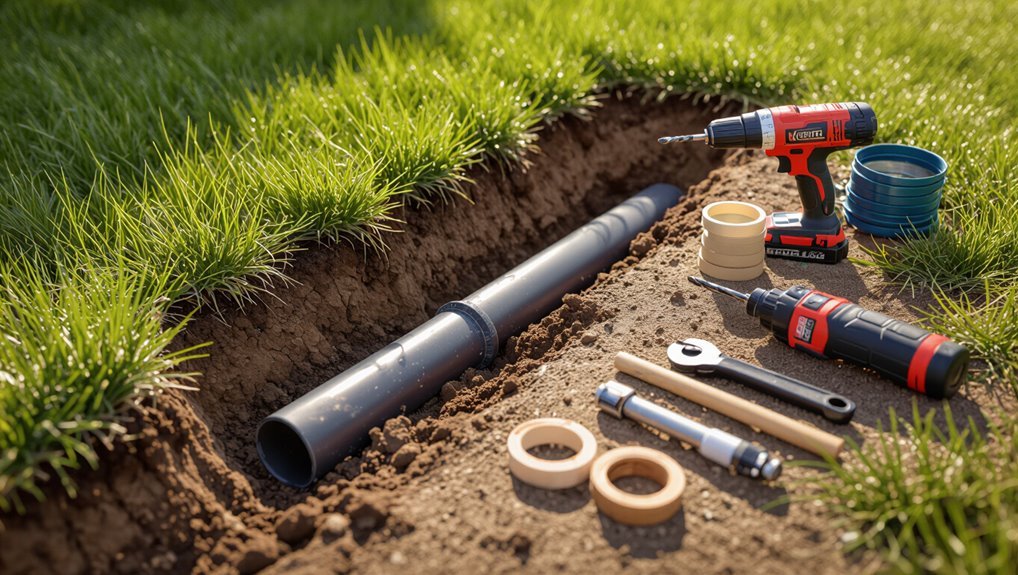
Many homeowners will need to consult local building codes and obtain permits before beginning underground pipe work.
Links to municipal code libraries, state plumbing statutes, and local permit offices provide definitive requirements and application procedures.
Include authoritative resources: municipal websites, state contractor licensing boards, plumbing code PDFs (IPC/UPC), online permit portals, and contact info for inspections.
Encourage verifying fee schedules, required inspections, and submission checklists before starting.
Conclusion
An estimated 10 million homes in the U.S. experience plumbing leaks annually, and underground failures cause disproportionately costly damage. Prompt, informed action—shutting off water, calling utilities, and evaluating options—can prevent a small leak from becoming a major expense. Whether DIY patching or hiring excavators and licensed plumbers, weighing safety, local regulations, and long‑term reliability matters. Proactive inspection and preventive upgrades greatly reduce risk and financial shock from buried pipe breaks.