How to Plumb Water Supply Lines: Step-by-Step Guide for DIYers and Pros
If you’re looking to plumb water supply lines effectively, this step-by-step guide is designed for both DIYers and professionals. It outlines how to create leak-free residential supply lines using materials like copper, CPVC, or PEX. Key steps include ensuring safety by obtaining necessary permits, shutting off and draining the main water supply, measuring and cutting pipe, preparing joints with the appropriate methods (soldering, solvent welding, or crimping), installing shutoff valves, securing pipes with hangers, and conducting pressure tests. The guide also addresses insulation and troubleshooting common issues such as leaks, air, and corrosion. While simple repairs are manageable for competent DIYers, more complex tasks or code compliance should be handled by a licensed plumber. Additional sections provide detailed explanations of materials, procedures, and testing methods.
How to Plumb Water Supply Lines: What This Guide Covers
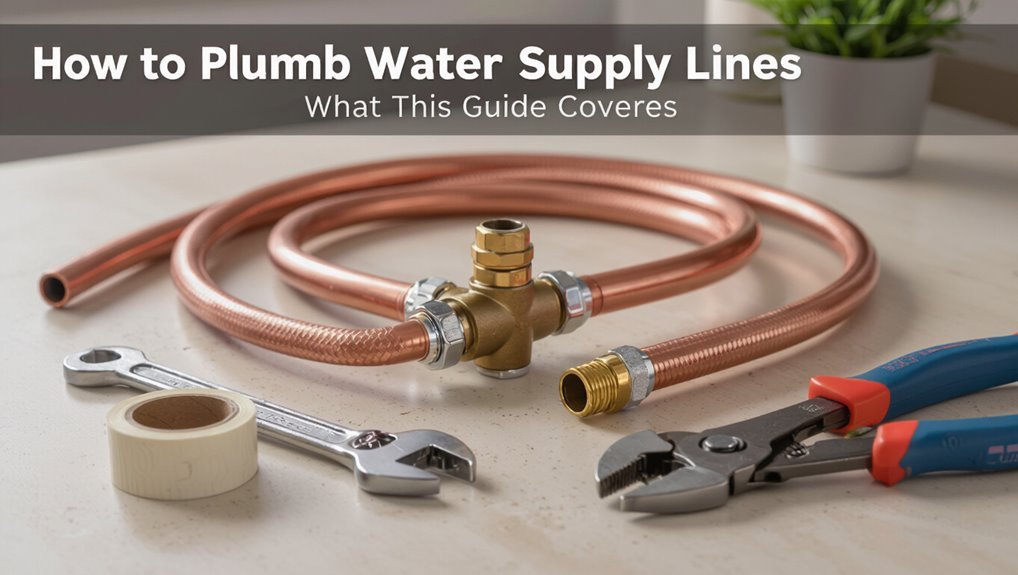
The guide outlines the expected outcome—a safe, leak-free supply line—and identifies who should attempt the project based on skill level and basic plumbing knowledge.
It summarizes the common types of supply lines (copper, PEX, CPVC, and braided stainless) and the situations each is best suited for.
A concise tools-and-materials list for each type is provided so readers can prepare before starting.
Clear outcome and who should attempt this project
A successful water-supply installation delivers reliable, code-compliant service to fixtures without leaks or pressure loss.
This guide on how to plumb water supply lines aims to produce neat, accessible piping runs, proper shutoffs, and tested, durable joints.
Suitable for competent DIYers with plumbing basics and for professionals; homeowners should defer complex relocations or code-sensitive repairs to licensed plumbers.
Tools and materials overview for common supply line types
Plumbing projects require a concise set of tools and specific materials matched to the chosen supply-line type—copper, PEX, CPVC, or flexible braided stainless—so installers can plan fittings, shutoffs, and testing without surprises.
Essential tools: tubing cutter, deburring tool, pipe wrench, adjustable wrench, crimp/expander or soldering kit, torch, flux, primer, fittings, compression adapters, shutoff valves, Teflon tape, pressure gauge, and safety gear.
Basics of Residential Water Supply Systems
A clear understanding of how cold and hot water lines are routed—from the main supply and water heater to branch runs—helps inform layout and pressure considerations.
Common pipe materials such as copper, CPVC, PEX, and galvanized each have distinct advantages and typical applications based on cost, durability, and local code.
Typical fittings, shutoff valves, and fixture connections used in residential systems will be described to show how installations are joined and controlled.
How cold and hot water lines are arranged in a home
Most residential systems run two parallel networks—one for cold water and one for hot—so fixtures receive the correct temperature and pressure without cross-contamination.
Cold lines branch directly from the main supply to fixtures and appliances.
Hot lines originate at the water heater and mirror cold runs, often in shorter loops or trunks to reduce wait time.
Valves, vents and shutoffs are placed for service access.
Common pipe materials (copper, CPVC, PEX, galvanized) and when to use each
Home water supply systems commonly use four materials—copper, CPVC, PEX, and galvanized steel—each with distinct strengths, limitations, and ideal applications.
Copper is durable and heat-resistant; CPVC is affordable and easy to glue; PEX is flexible and freeze-tolerant; galvanized is antiquated and prone to corrosion.
Consider:
- Lifespan and corrosion risk
- Ease of installation and repairs
- Budget and local code requirements
Typical fittings, valves, and fixtures you’ll encounter
Several common fittings, valves, and fixtures make up residential water supply systems and determine how water is routed, controlled, and connected to appliances.
Typical components include couplings, elbows, tees, ball and gate valves, pressure regulators, check valves, shutoffs, hose bibs, and appliance connectors.
Key considerations:
- Function
- Material compatibility
- Accessibility for maintenance
Safety, Codes, and Preparatory Steps
Before any work begins, the installer reviews required safety precautions and dons appropriate personal protective equipment.
They confirm local plumbing codes and permit needs, then shut off and drain the main water supply to prevent accidents.
Finally, they plan the pipe routes, measure runs accurately, and prepare a detailed materials list.
Safety precautions and personal protective equipment
Proper preparation begins with evaluating hazards specific to the job—identifying potential chemical exposure, pressurized lines, sharp edges, and confined spaces—and selecting appropriate personal protective equipment (PPE) and controls accordingly.
Gloves, eye protection, hearing protection, and respiratory protection must match identified risks. Use durable footwear, knee pads, and tool guards.
Guarantee adequate ventilation, lockout/tagout of water supplies, and keep a first-aid kit nearby.
Checking local plumbing codes and permit requirements
Why check local plumbing codes and permits? Local codes dictate materials, pipe sizing, fixture placement and backflow prevention; permits guarantee inspections and compliance.
Verifying requirements prevents fines, rework and safety hazards. Consult municipal code, building department or a licensed plumber before purchasing materials or starting work.
Record permit approvals and inspection dates to demonstrate compliance and protect property value.
Shutting off and draining the main water supply
Shut off the main water supply to isolate the system and eliminate pressure before any cutting or disassembly; this reduces the risk of flooding and injury and is often required by local code.
Verify shutoff by opening a downstream faucet, then drain lines using lowest valves and indoor taps.
Relieve remaining pressure, close drain valves, and tag the shutoff to prevent accidental reopening during work.
How to plan route, measure runs, and create a materials list
Begin by mapping the planned route on paper and in the space, noting fixture locations, wall and floor cavities, and access panels to determine the most direct, code-compliant runs.
Measure linear distances along walls, through studs, and between fittings; add allowances for bends and service loops.
List pipe types, diameters, fittings, shutoffs, supports, insulation, and connectors.
Include contingency spare parts.
Step-by-Step: Installing New Water Supply Lines (General Workflow)
The installer begins by measuring, marking, and laying out the pipe run to confirm lengths and clearances.
Pipes are then cut and prepared for joints, using the appropriate joining method for each material—soldering for copper, solvent welding for CPVC, crimp or expansion fittings for PEX, and threaded connections for galvanized pipe—while shutoff valves and connection points are installed at fixtures.
Finally, lines are secured with hangers, supported to maintain proper slope, and checked for alignment before pressure testing.
Measuring, marking, and laying out the run
Measure twice and plan once: accurately measuring, marking, and laying out the run guarantees pipe lengths, joints, and fixture locations align with the installation plan and local codes.
Using a tape, level, and chalk or pencil, map routes, note offsets, clearances, and supports. Mark mounting points, valve locations, and fixture inlets.
Verify access panels and maintain slope for drainage where required.
Cutting and preparing pipes for joints
With the layout confirmed and mounting points marked, attention moves to cutting and prepping pipe ends for secure, leak-free joints.
Appropriate cutters produce square, burr-free cuts; deburr inside and outside. Measure twice, cut once, then recheck length.
Clean and dry surfaces; remove oxidation, oil, and debris.
For compression or push-fit fittings, verify smooth edges and full insertion depth prior to final assembly.
Joining methods by material: soldering copper, solvent welding CPVC, crimp/expansion for PEX, threaded galvanized
Select the joining method that matches the pipe material and application to guarantee a durable, code-compliant connection.
For each material use the appropriate technique:
- solder copper with flux and heat;
- solvent-weld CPVC with primer and cement;
- use crimp or expansion fittings for PEX;
- apply tapered PTFE tape and properly mated fittings for threaded galvanized joints.
- Match material
- Use correct tools
- Test connections
Installing shutoff valves and connection points
Begin by identifying the appropriate shutoff valve types and connection points for the system layout and planned fixtures.
Install isolation valves at branch origins and fixture supply lines, using compatible fittings and correct orientations.
Verify valve access and label locations.
Choose sweat, threaded, compression, or PEX-specific valves matching pipe material.
Test connections for leaks after installation and before final insulation or concealment.
Securing lines, supporting with hangers, and maintaining slope
After installing and testing shutoff valves and connection points, attention turns to securing the supply runs so they remain stable, accessible, and properly graded.
Fasten pipes with appropriate hangers at manufacturer-recommended intervals, isolating from vibration and wood-to-metal contact with pads.
Maintain a slight slope for drainage where required, avoid sharp bends, and leave service access for future inspection and repairs.
Pressure testing and leak-check procedures
Perform a systematic pressure test to verify the integrity of the new supply runs before enclosing walls or finishing fixtures.
Isolate sections, connect a calibrated pressure gauge and pump, then pressurize to code-required test pressure (usually 50–100 psi for residential cold/warm lines or as local code dictates).
Hold pressure, inspect all joints and fittings for drops or visible leaks, document results, and repair any failures before proceeding.
Insulating lines and finishing wall penetrations
Seal and insulate exposed runs and wall penetrations to prevent heat loss, condensation, and air infiltration while maintaining fire and code requirements.
Use closed-cell foam, pipe sleeves, or fiberglass with appropriate vapor barrier; apply firestop sealant where required.
Confirm insulation thickness matches climate and pipe type.
Trim and finish drywall or access panels neatly, label shutoffs, and verify no compression or strain on fittings before restoring finishes.
Detailed Procedures by Pipe Type
The guide now turns to pipe-specific procedures, comparing copper, PEX, CPVC, and older galvanized systems.
For copper, it covers required tools, soldering techniques, and frequent errors.
For PEX, it explains crimp versus expansion systems, necessary fittings and tools, and manifold layouts.
It also outlines CPVC solvent-welding steps and cure times, plus considerations for replacing or tying into galvanized lines.
Copper pipe installation: tools, soldering tips, common mistakes
Copper pipe installation requires the right mix of tools, careful soldering technique, and attention to common pitfalls to guarantee leak-free joints and long-lasting supply lines.
Essential tools include tubing cutter, deburring tool, flux brush, torch, and fitting brush.
Clean, flux, heat evenly, apply solder by capillary action.
Common mistakes: overheating, insufficient cleaning, using wrong flux, poor support, and inadequate joint engagement.
PEX installation: types (crimp vs. expansion), tools, manifold systems
PEX offers versatile, durable options for modern water supply lines, with the two dominant connection methods—crimp (or clamp) and expansion—requiring distinct tools and techniques and often paired with manifold-based distribution for centralized control.
Crimp uses rings, a caliper and cutter; expansion needs expander heads sized to tubing.
Manifolds simplify zoning, include shutoffs and require secure mounting and labeled runs for leak-free, serviceable systems.
CPVC installation: solvent welding technique and cure times
Several steps define proper CPVC solvent-weld installation, each critical to a leak-free joint.
Surfaces are cut square, deburred, and cleaned.
Primer softens the material; solvent cement is applied to pipe and fitting interfaces.
Insert fully with a quarter-turn to distribute cement.
Hold briefly, wipe excess, then allow specified fixture and full cure times per manufacturer before pressurizing system.
Replacing or working with older galvanized lines
Begin by evaluating the existing galvanized system for corrosion, thread condition, and pipe diameter to determine the appropriate replacement method and materials.
Document runs, identify shutoffs, and isolate affected segments.
Cut out severely corroded sections; use dielectric unions when connecting to copper.
Replace threaded joints with new tapered-thread fittings or switch to copper/PVC with proper adapters.
Pressure-test and flush before restoring service.
Connecting to Fixtures and Appliances
Connection to fixtures and appliances requires attention to fitting types, supply shutoffs, and proper sealing to prevent leaks.
Standard sink and lavatory hookups use flexible supply lines and shutoff valves, while washing machines, dishwashers, and ice makers require specific hose connections and, often, air gaps or check valves.
Water heater connections demand correct inlet/outlet orientation, adequate isolation valves, and consideration of expansion and pressure relief.
Standard sink and lavatory supply connections
A typical sink or lavatory is supplied by two flexible or rigid lines—hot and cold—terminated with shutoff valves and fittings sized to match the fixture’s inlets.
Connections use compression, flare, or female threaded nuts with neoprene or rubber washers as required.
Install shutoffs near the fixture, route lines without kinks, secure supports, pressure-test for leaks, and trim excess tubing for a neat, accessible installation.
Washing machine, dishwasher, and ice maker hookups
One or more dedicated supply lines and matching shutoff valves are required for washing machines, dishwashers, and ice makers, with installation emphasizing correct sizing, secure attachment, and accessible shutoffs.
Flexible braided hoses or copper lines are common; use appropriate connectors, compression fittings, or union fittings.
Install air gaps or high loops where required, support lines, test for leaks, and label shutoffs for quick isolation.
Water heater inlet/outlet connections and considerations
Several key considerations govern water heater inlet and outlet hookups when tying the heater into the home’s fixtures and appliances.
Proper cold supply connection, dedicated shutoff valve, dielectric unions to prevent corrosion, and T&P relief routing are essential.
Install isolation valves, check flow orientation, and use appropriate capacity fittings.
Verify expansion tank and pressure regulation comply with local codes for safety and longevity.
Troubleshooting and Common Problems
The troubleshooting section covers common issues encountered after installation, including identifying and repairing leaks at joints and fittings and addressing corrosion or pinhole failures that may require replacing sections.
It also examines causes and remedies for low water pressure and air in the lines.
Finally, it reviews how to detect and correct cross-connections and other backflow risks to protect potable water.
Identifying and repairing leaks at joints and fittings
Start by inspecting visible joints and fittings for dampness, corrosion, mineral buildup, or water stains, since these signs reliably indicate where leaks originate.
Tighten compression nuts or replace failed ferrules on copper and PEX connections. For threaded fittings, reseat with plumber’s tape; for soldered joints, cut out and resolder or replace sections.
Test under normal pressure and monitor for recurrence.
Dealing with low water pressure and air in lines
After fixing visible joint leaks, attention should turn to flow and air issues that often present after repairs or with aging systems.
Inspect supply valves, strainers, and fixture aerators for debris; partially closed valves or clogged screens cause low pressure.
To purge air, open highest and lowest fixtures sequentially until steady flow appears.
If pressure remains low, check mains and consider pressure regulator adjustment or professional diagnosis.
Corrosion, pinhole leaks, and when to replace sections
Inspecting for corrosion and pinhole leaks begins with visual and tactile checks along exposed runs, fittings, and solder joints where metal discoloration, rust flakes, greenish deposits on copper, or wet spots indicate deterioration.
Small weeps and staining signal pinholes; test suspicious areas with dry paper towels.
Replace sections showing multiple leaks, thinning walls, or active corrosion; prioritize supply mains and concealed piping.
Fixing cross-connections and backflow risks
Corroded or leaking sections not only weaken supply integrity but can also mask or worsen cross-connection and backflow hazards elsewhere in the system.
Identify illegal or accidental cross-connections between potable and nonpotable lines; install or replace approved backflow preventers and air gaps; test assemblies per local codes; repair valves and check for reverse flow during pressure changes.
Document fixes and schedule periodic inspections.
Time-Saving Tips and Professional vs. DIY Decision Factors
The section outlines when a licensed plumber should be called based on safety risks, job complexity, and permit requirements.
It then points to specific tools and tricks that speed installation for competent DIYers.
Finally, it provides rough cost estimates to compare material expenses against hiring a pro for budgeting decisions.
When to call a licensed plumber: safety, complexity, and permits
Many homeowners can handle simple valve replacements or faucet installs, but tasks that involve gas connections, main shutoff work, structural alterations, complex rerouting, or local permit requirements should prompt hiring a licensed plumber.
A professional guarantees code compliance, proper sealing, pressure testing, and safe shutoffs.
Call one for persistent leaks, water damage, contaminated supply, or when inspections and permits are mandated.
Tools and tricks that speed up installation
After recognizing when a job requires a licensed plumber, attention turns to speeding installations that homeowners can tackle safely.
Efficient tools and methods reduce time without compromising quality. Recommended accelerants include:
- PEX tubing and push-fit fittings for fast, reliable joints.
- Rotary tubing cutters and compact crimpers for clean, quick prep.
- Portable press tools for professional-grade, leak-free connections.
Cost estimates and budgeting for materials vs. hiring pros
Budgeting balances material costs, labor, and risk when deciding between DIY and hiring a pro for water supply lines. Estimated DIY: pipe, fittings, tools, permits; pro: labor, warranty, speed. Consider time value, skill, and potential repair costs. Choose based on confidence and complexity.
| DIY | Pro |
|---|---|
| Savings | Assurance |
| Time | Speed |
| Risk | Warranty |
Final Checklist Before Restoring Water
Before restoring water, a concise final checklist verifies the system is safe and compliant.
It should cover leak test confirmation steps, proper operation and clear labeling of shutoff valves, and completion of post-installation documentation with any required permit sign-off.
Each item should be verified and recorded before turning the supply back on.
Leak test confirmation steps
Bring the system to test pressure and walk the route methodically, inspecting each joint, valve, and fitting for visible leaks, dampness, or weeping.
Monitor the pressure gauge for drop over the specified hold time. Check hidden areas with paper towels or tissue.
Tighten or rework suspect connections, depressurize, retest after repairs. Document results and only restore supply when stable with no evidence of leakage.
Valve operation and labeling
Operate each valve through a full cycle to confirm smooth function and correct orientation, then label them clearly for future identification.
Check for leaks, unusual resistance, or wobble. Use durable labels indicating zone, fixture, and shutoff direction. Mark emergency and main shutoffs distinctly.
Record valve types and locations on a simple schematic kept with household maintenance documents.
Restore water only after verification.
Post-installation documentation and permit sign-off if required
Why confirm paperwork and permits now?
The installer should verify all required inspections are completed, retain receipts, submit as-built diagrams, and obtain official sign-off before restoring water.
Documentation guarantees code compliance, warranty validity, and future resale clarity.
If permits are outstanding, schedule final inspection; do not pressurize system or conceal work until authorities approve and records are filed.
Maintenance Schedule and Long-Term Care
A clear maintenance schedule helps preserve water supply lines and prevent costly failures.
Regular inspections should note seasonal issues such as leaks, insulation gaps, and early corrosion, while preventive steps—like insulating exposed pipes and flushing lines—reduce freezing and mineral buildup.
Guidance should also cover performance upgrades, including when material replacement or larger-diameter lines will improve flow and reliability.
Routine inspections and what to look for seasonally
Because seasonal temperature swings and shifting usage patterns directly affect pipes and fittings, a concise, regular inspection routine is essential to catch small issues before they become costly failures.
Inspect visible joints, valves, hoses, and exposed connections for leaks, stains, or mineral buildup. Check water pressure changes, listen for drips, and note dampness or mold.
Log findings and schedule repairs promptly.
Preventive steps to avoid freezing and corrosion
Routine inspections naturally lead into preventive measures that protect supply lines from freezing and corrosion.
Apply insulation to exposed pipes, seal drafts in crawlspaces and basements, and maintain consistent heat during cold spells.
Flush lines seasonally, remove sediment with routine flushing, and use corrosion-inhibiting fittings or dielectric unions where dissimilar metals meet.
Document maintenance dates and address minor issues promptly to prevent deterioration.
When to upgrade supply lines for better performance
When should supply lines be replaced rather than repaired: when age, material, or persistent problems compromise flow, safety, or water quality.
Upgrades are advised for galvanized, lead, or deteriorated rubber lines; recurring leaks, low pressure, discoloration, or contamination; before major remodels or after seismic events.
Choose modern materials (copper, PEX) sized correctly, document installation, and schedule inspections every 5–10 years for long-term performance.
Conclusion
Properly installed water supply lines reduce leak-related damage: studies show hidden leaks waste an average household 10,000 gallons annually, underscoring the stakes of quality plumbing. This guide summarized system basics, safety, stepwise installation, materials-specific techniques, troubleshooting, timing considerations, and maintenance. Whether a DIYer or professional, following code, testing joints, and using the right materials minimizes risk. Regular inspections and a final checklist help guarantee reliable service and protect homes from costly water loss.