How to Turn Off Water to a Stuck Sink Faucet: Quick Fixes for Homeowners
To turn off water to a stuck sink faucet, first locate the under-sink shutoff valves and turn them off. If they are inaccessible, shut off the main water supply to your home. Open the faucet slightly to relieve any pressure and use towels to catch any residual water. If the faucet handles are stuck, gently turn them with pliers or apply penetrating oil to the seized components. For valves that won’t budge, shut off the main water and consider removing the bonnet to access the cartridge. If issues persist or you notice damaged parts, it’s best to contact a plumber for assistance.
How to Quickly Stop Water Flow to a Stuck Sink Faucet
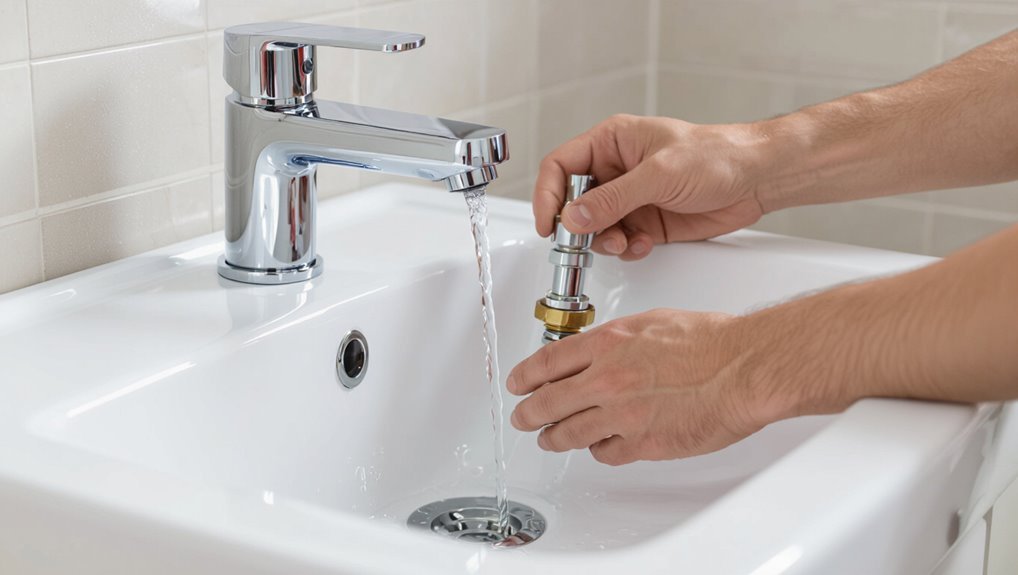
The immediate priority is to stop the flow by shutting the nearest shutoff valve under the sink or, if that fails, turning off the house’s main water supply.
If water continues or valves are inaccessible, the main shutoff should be used immediately to prevent flooding.
A quick assessment of valve accessibility and the leak’s severity determines whether a local or main shutoff is appropriate.
Immediate steps to stop water right now
Act quickly: locate and shut off the nearest shutoff valve under the sink or, if inaccessible, turn off the household main water supply to stop flow immediately.
Then relieve pressure by opening the faucet slightly, place towels to catch residual water, and use pliers to secure a stuck handle if safe.
These steps explain how to turn off water to sink when stuck and limit damage.
When to shut off the main water supply versus local valves
When should one shut off the main water supply instead of using the local shutoff valves?
The main should be used if local valves are inaccessible, seized, leaking, or malfunctioning, or if multiple fixtures are affected.
For emergencies with rapid, uncontrollable flow or suspected pipe failure, stop the main immediately.
Otherwise, use local shutoffs for targeted, quicker isolation and minimal disruption.
Identify Why the Faucet Is Stuck
A stuck faucet handle can result from seized hardware, mineral buildup, a failing cartridge or valve stem, or an issue in the supply line.
Determining the source requires observing whether the handle itself resists movement, whether water stops when the handle moves slightly, and whether visible corrosion or leakage is present.
These quick checks guide whether to focus on the handle, cartridge/valve stem, or the supply line.
Common causes of a stuck faucet handle
Though a stuck faucet handle may seem like a simple nuisance, several distinct causes can prevent smooth movement.
Common reasons include mineral buildup and corrosion on internal parts, worn or broken splines and set screws, accumulated grime or paint around the base, and seized or dried-out O-rings and seals.
Manufacturing defects or improper installation can also restrict handle operation.
How to tell if the problem is the handle, cartridge, valve stem, or supply line
After ruling out surface causes like mineral buildup or paint around the base, the next step is to determine whether the handle itself, the internal cartridge or valve stem, or the supply line is causing the stiffness.
Test by wiggling the handle to isolate looseness; remove the handle to inspect cartridge movement; observe leaks or low flow suggesting supply blockage; feel for corrosion or binding on the stem.
Tools and Materials You May Need
A concise list of tools and materials can help stop the water quickly and perform basic repairs.
Essential items typically include an adjustable wrench, slip-joint pliers, a screwdriver set, and a shutoff-key or basin wrench for hard-to-reach valves.
Optional supplies for a longer-term fix may include replacement cartridges or washers, plumber’s tape, sealant, and a towel or bucket to catch residual water.
Essential tools for emergency shutoff and basic repairs
Gather essential tools before attempting an emergency shutoff or basic sink-faucet repair to guarantee a swift, safe response.
A compact kit prevents delays and limits damage. Key items include shutoff valve wrench or adjustable wrench, flashlight, and cloths to catch leaks.
- Adjustable wrench or valve tool
- Flashlight or headlamp
- Absorbent cloths and small bucket
Optional supplies for a longer-term fix
Several additional supplies can make a temporary repair into a reliable longer-term fix for a stuck sink faucet.
Consider durable parts and materials to guarantee longevity and prevent recurrence.
Useful options include:
- Replacement cartridge or valve tailored to the faucet model
- Plumber’s silicone grease and thread seal tape for smooth operation and leak prevention
- Small spare supply of mounting screws and O-rings
Step-by-Step: Shut Off Water Using Local Shut-Off Valves
The reader is instructed to identify the shut-off valves beneath the sink and recognize whether each is a compression, quarter-turn, or multi-turn type by its handle and stem.
Next, a clear procedure is given for closing each type—turning quarter-turn handles 90 degrees, rotating multi-turn valves clockwise until tight, and using pliers or an adjustable wrench for stuck compression nuts if needed.
If a valve is seized or leaking, the recommended actions include applying penetrating oil, attempting gentle back-and-forth motion, and preparing to isolate the supply at the main shut-off or call a plumber if the valve will not operate or continues to leak.
Locate under-sink shut-off valves and how they operate
Before attempting any repairs, identify the shut-off valves located beneath the sink: typically two small valves—one for hot and one for cold—mounted on the supply lines or the wall and featuring either a round wheel or a lever handle.
These valves control flow to the faucet. Inspect condition, orientation, and access; note visible corrosion, tape, or braided flex lines to determine how to reach and operate them safely.
Turn-off procedure for compression, quarter-turn, and multi-turn valves
Begin by identifying which valve type is present under the sink—compression (round wheel), quarter-turn (lever), or multi-turn (screw-style)—since each requires a specific motion to stop flow.
Turn a compression valve clockwise several full rotations until tight.
Rotate a quarter-turn valve perpendicular to the pipe.
For multi-turn valves, use a screwdriver or handle, turning clockwise until resistance indicates the shut position.
What to do if local shut-off valves are seized or leaking
If the under-sink shut-off valves cannot be turned or show signs of leaking after attempting the proper motions for compression, quarter-turn, or multi-turn valves, proceed with methods to stop flow without causing further damage.
First, shut main water supply if accessible. If not, place a bucket under fittings, tighten packing nuts, and gently tighten valve bodies.
Call a plumber for seized or leaking valves.
Step-by-Step: Shut Off Water at the House Main Valve
Locate the house main shut-off valve, which may be inside near the water meter or outside at a curb box.
Turn the valve slowly and completely to stop the main supply, using the correct tool and caution to avoid damage.
After repairs, open the main valve gradually while checking fixtures for leaks and bleeding air from low faucets.
How to find the main shut-off valve inside and outside the home
Where is the main shut-off valve and how to recognize it quickly: the valve is the single control point that stops water to the entire house and is usually found near the water meter, at the point where the supply line enters the building.
Inside, check basements, garages, utility rooms; outside, inspect meter boxes at property edge or near sidewalks.
Look for a wheel or lever on a metal pipe.
Safely turning off the main supply
Having identified the main shut-off valve near the water meter or entry point to the home, the next step is to shut off the house water supply safely and methodically.
Close the valve clockwise—use a wrench if stiff—until fully seated.
Open a faucet to relieve pressure and drain remaining water.
Verify no flow at affected fixtures and lock or mark the valve to prevent accidental reopening.
Restoring water after repair
With repairs complete and fittings rechecked for tightness, the homeowner can reopen the house main valve to restore water.
Open the valve slowly to prevent pressure surges.
Observe all fixtures for leaks, starting with the repaired sink.
Run cold then hot taps to purge air and flush residue.
Reinspect connections after full pressure returns and tighten if any seepage appears.
Emergency Alternatives When Valves Won’t Close
If the usual shutoff handles will not move, use appropriate tools such as pliers or a valve key to apply steady, controlled force while protecting the fitting to avoid damage.
As a temporary measure, the water meter’s curb or meter valve can be used to stop flow, but access and local regulations should be considered before attempting this.
If isolation is impossible or a major leak occurs, shutting off the whole house supply may be necessary and should include consideration of turning off electricity to areas at risk of flooding.
Use of tools to close a stuck valve (pliers, valve key) precautions
Reach for the nearest adjustable pliers or a valve key when a faucet shutoff resists manual turning, but proceed deliberately to avoid damaging plumbing.
Protect fittings with cloth, grip near the valve stem, and apply steady, controlled pressure. Avoid excessive force that can shear stems or crack fittings.
If corrosion or binding persists, stop and consult a plumber to prevent leaks or costly repairs.
Temporary shutoff using water meter valve {warning}
Although turning the indoor shutoff fails, the water meter valve outside can serve as a temporary emergency cutoff to stop flow to the entire house.
Locate the meter, remove its cover, and turn the valve clockwise with an appropriate wrench or key.
Use steady pressure, avoid forcing corroded stems, and mark the valve position.
Contact the utility for assistance if resistance prevents safe closure.
When to shut off the whole house’s water and electricity considerations
When should the entire home’s water be shut off, and what about cutting power?
In severe leaks or inaccessible stuck valves, shutting the main water supply prevents major damage.
If electrical fixtures risk water contact, cut power at the breaker to avoid shock or shorting.
Notify occupants, then call a plumber or utility.
Restore systems only after repairs and inspections confirm safety.
Quick Repairs to Free a Stuck Faucet Handle
A stuck faucet handle can often be freed with targeted quick repairs that begin by applying penetrating lubricant to corroded parts and working the handle gently to restore movement.
If lubrication fails, the bonnet nut can be removed to access and replace the cartridge or valve stem.
After reassembly, the faucet should be tested carefully for smooth operation and any leaks.
Lubricating and freeing corroded handles
Loosen stubborn sink handles by targeting the corrosion and mineral buildup that bind moving parts; gentle lubrication and careful manipulation often restore operation without full disassembly.
Apply a penetrating lubricant to joints and splines, let it penetrate, then work the handle back and forth.
Wipe residue, repeat if needed, and use a cloth to protect finishes.
Test motion and confirm smooth operation.
Removing bonnet nut and replacing cartridge or valve stem
If lubrication and gentle manipulation fail to restore smooth movement, the next step is to remove the bonnet nut and inspect the cartridge or valve stem.
After shutting water supply and covering the drain, use appropriate wrenches to loosen the bonnet nut.
Extract the cartridge or stem, compare with replacement parts, then install the correct new component, ensuring seals and O-rings are properly seated.
Reassembling the faucet and testing for leaks
Reassemble the faucet by reversing the disassembly steps: insert the cartridge or stem with its seals seated correctly, tighten the bonnet nut to manufacturer torque, and replace any trim, handles, and decorative caps.
Turn supply valves on slowly, check for drips at the bonnet, spout, and connections.
Cycle the handle to verify smooth operation and observe for leaks under the sink for several minutes.
When to Call a Professional Plumber
If the faucet remains stuck after basic troubleshooting, leaks persist, or there are signs of damaged valves or corrosion, professional service is recommended.
Homeowners should note the faucet type, any visible damage, water shutoff status, and steps already taken before contacting a plumber.
Providing these details will help the plumber diagnose the issue and arrive prepared.
Signs the problem requires professional service
When a simple shutoff and basic troubleshooting fail to resolve a stuck sink faucet, certain signs indicate the situation has moved beyond DIY remedies and warrants a professional plumber.
Indicators include persistent leaks despite shutoff, inability to stop water flow, damaged or corroded valves, unusual noises or pressure loss, visible pipe cracks, or recurrent failures after attempted repairs.
Immediate professional assessment is advised.
What information to give the plumber for faster service
Providing clear, concise details before the plumber arrives speeds diagnosis and repair.
The homeowner should state faucet type, brand, model if known, symptom timeline, recent work or freezes, visible leaks, water shutoff status, and whether multiple fixtures are affected.
Mention accessibility, building type, and any temporary fixes attempted.
Include contact info and preferred arrival window for efficient scheduling and quicker resolution.
Preventive Measures to Avoid Future Stuck Faucets
A concise preventive strategy can reduce the risk of stuck faucets by combining a routine maintenance checklist with water-softening measures to limit mineral buildup.
Regular inspection and a parts-replacement schedule address corrosion and worn components before they seize.
When appropriate, upgrading to easier-to-operate, corrosion-resistant fixtures further minimizes future problems.
Routine maintenance checklist
Although occasional problems are inevitable, a concise routine maintenance checklist prevents most faucets from seizing.
Inspect handles and spouts monthly for looseness or leaks. Clean aerators and remove mineral buildup quarterly. Lubricate moving parts annually with plumber-approved grease.
- Check shutoff valves for smooth operation.
- Tighten loose fittings.
- Replace worn O-rings promptly.
Soft water, corrosion prevention, and part replacements schedule
Following the routine checks and timely part replacements, attention to water chemistry and corrosion control further reduces the risk of seized faucets.
Recommend softening hard water to limit mineral buildup, apply corrosion-resistant lubricants to moving parts, and replace cartridges, O-rings, and valve seats on a predictable schedule—typically every 3–7 years depending on use and water quality—to maintain smooth operation and prevent failures.
Upgrading to easier-to-operate fixtures
Consider replacing older faucets with models designed for ease of use and reduced maintenance to prevent future seizure.
Homeowners benefit from single-lever, ceramic-disk, or touchless fixtures that resist mineral buildup and require less force.
Choose corrosion-resistant finishes and accessible cartridge designs for simple servicing.
Professional installation guarantees proper alignment and warranty coverage, reducing the likelihood of future sticking and emergency shutoff events.
Troubleshooting Table for Common Scenarios
The following troubleshooting table summarizes common symptoms, likely causes, and recommended immediate actions to help readers stop water flow and plan follow-up steps. It presents concise cues for quick identification and safe responses. Refer to the table to determine the appropriate next steps based on the observed symptom.
| Symptom | Likely cause | Immediate action |
|---|---|---|
| Handle won’t move but water flows | Stuck cartridge or mineral buildup | Shut off nearby shutoff valves or main, then relieve pressure |
| Water continues after handle moved | Faulty valve seat or broken internal part | Close main supply and call a plumber |
| No water when handle moved | Closed shutoff or clogged supply line | Check/turn local shutoffs, inspect supply lines for kinks or blockages |
Symptoms, likely causes, immediate action, and next steps
A concise troubleshooting table summarizes common symptoms of a stuck sink faucet, pairs each with likely causes, lists immediate actions to stop damage or flooding, and suggests next steps for repair or professional help.
Symptoms: handle immobile, continuous flow, slow drip, or leaks.
Likely causes: seized cartridge, corroded parts, mineral buildup, or valve failure.
Immediate: shut main/fixture supply.
Next steps: clean, lubricate, replace cartridge or call a plumber.
Safety Precautions and Best Practices
Before attempting any shutoff maneuvers, the user should wear eye protection, gloves, and guarantee adequate lighting and a dry work area to reduce injury risk when working under the sink.
Careful, controlled force should be used on valves and handles, with penetrating lubricant and proper tools preferred over brute force to prevent stripped threads or cracked fittings.
If resistance remains or corrosion is evident, the user should stop and consult a plumber rather than risk damaging plumbing components.
Personal protective steps when working under the sink
When working under a sink, wear properly fitted eye protection, durable gloves, and non-slip footwear to reduce injury risks from splashing water, sharp edges, and dropped tools.
Guarantee adequate lighting, use a dust mask if mold or debris is present, and protect clothing with a waterproof apron.
Keep a clear work area, secure loose hair and jewelry, and have a phone nearby for emergencies.
How to avoid damaging plumbing components while forcing valves or handles
After taking personal protective steps and clearing the workspace, attention should shift to operating valves and handles with care to prevent damage.
Use steady, moderate pressure; avoid sudden force. Apply penetrating lubricant to seized stems, use proper-sized tools, and protect finishes with cloth.
If resistance persists, stop to reassess—forcing can shear fittings, strip threads, or fracture valves, increasing repair scope and cost.
Conclusion
When a stubborn faucet refuses to yield, the homeowner becomes a captain steering a leaking ship toward calm harbor. With valves located, tools at the ready, and patience as a compass, water can be tamed whether at the sink or the house main. If resistance persists, calling a professional anchors safety and prevents greater damage. Regular maintenance keeps the plumbing horizon clear, ensuring future storms end with quiet drips rather than floods.