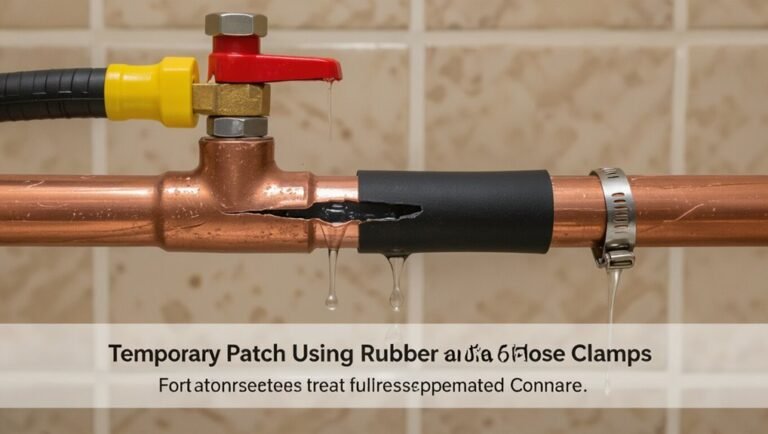
How to Detect Water Leaks in Ceiling: 9 Signs, Causes, and Step-by-Step Fixes
To detect water leaks in your ceiling, look for visible signs such as stains, peeling paint, bulges, musty odors, and increased indoor humidity. Common causes include roof damage, clogged gutters, faulty flashing, plumbing issues, HVAC condensation, and inadequate attic insulation.
To identify the source of the leak, inspect affected rooms, attics, and the roof safely. If necessary, shut off utilities, collect drips, and apply temporary patches. Permanent repairs may involve replacing roof shingles, resealing flashing, or fixing plumbing. Using a systematic checklist and monitoring devices can help manage the situation, and enlisting professionals for significant damage can reduce risks. More detailed steps are provided below.
How to Recognize a Water Leak in Your Ceiling Quickly
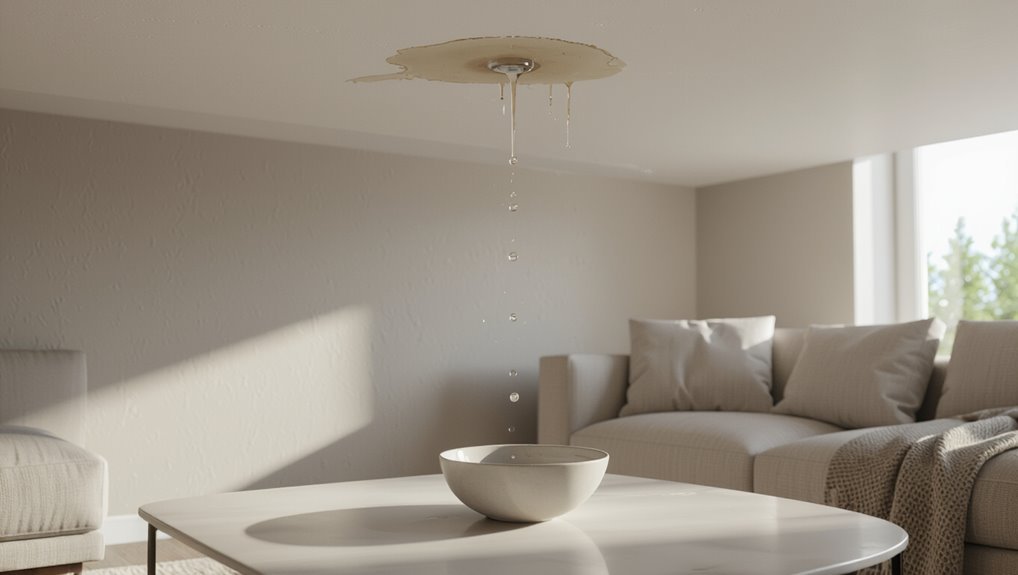
A homeowner can spot obvious signs of a ceiling leak—wet stains, peeling paint, sagging drywall, or active dripping—by scanning rooms and attic spaces.
Less apparent indicators, such as musty odors, unexplained increases in water bills, or darkened insulation, often signal a hidden problem.
Any rapidly spreading stain, bulging area, or persistent moisture should be treated as urgent to prevent structural damage and mold growth.
Visible Signs to Look For
Ceiling stains, sagging drywall, and damp spots are the most immediate visual clues that a leak is present above. Observers checking how to detect water leaks in ceiling should note these clear signals and act promptly.
- Discolored patches spreading outward
- Peeling paint or blistering
- Damp insulation visible in attic
- Dripping or pooled water on fixtures
Hidden Indicators That Suggest a Leak
Although not immediately obvious, subtle signs often betray an unseen leak above, requiring prompt attention before damage escalates.
Occupants may notice musty odors, unexplained humidity, or warm spots on ceilings. Paint may blister, wallpaper loosen, or light fixtures flicker due to moisture.
Recurring pest activity and occasional dripping sounds also indicate hidden water intrusion needing investigation to prevent structural or mold issues.
When a Stain or Spot Warrants Urgent Action
Several telltale features of a ceiling stain indicate it requires immediate attention: rapid enlargement, darkening edges, or active dripping.
Immediate response is needed when surrounding paint bubbles, sagging occurs, or musty odors arise. Such signs suggest ongoing water intrusion or structural compromise.
The occupant should isolate water sources, avoid standing beneath the area, and contact a qualified plumber or roofer for prompt inspection and repair.
9 Common Signs of Ceiling Water Leaks
The following nine signs help identify ceiling water leaks and prioritize repairs.
Observers should note water stains or discoloration, peeling, bubbling or flaking paint, and any sagging or bulging areas.
Persistent musty odors, visible mold growth, and active dripping or water flow further confirm an issue requiring prompt attention.
Water Stains or Discoloration
Water stains or discoloration on a ceiling often present as pale yellow, brown, or rusty patches that spread outward from a central point. Such marks indicate moisture intrusion, often accompanied by slight darkening or shadowing.
Size, shape, and growth rate help localize the source. Fresh stains may feel damp; older ones appear dry and fibrous.
Prompt investigation prevents structural and mold problems.
Peeling, Bubbling, or Flaking Paint
Following discoloration, paint that begins to peel, bubble, or flake is a clear mechanical response to prolonged moisture exposure on a ceiling surface.
The finish separates as underlying plaster or drywall loses adhesion. Small blistering, loose flakes, or sheet-like peeling indicate ongoing dampness.
Inspect nearby fixtures, plumbing runs, and roofing sources promptly; document extent and seek repair to prevent mold growth and structural deterioration.
Sagging or Bulging Ceiling Areas
How can one tell if a ceiling has absorbed enough moisture to compromise its structure?
Sagging or bulging areas appear as localized droops or rounded swellings, often near water stains.
Drywall or plaster feels soft, may crack, and paint can stretch.
Such deformations indicate accumulated water weight and weakened substrate, signaling urgent inspection and load reduction to prevent collapse or further damage.
Musty Odors and Mold Growth
Recognizes musty odors and visible mold as clear indicators of ceiling moisture intrusion: a persistent, damp scent often accompanies dark or fuzzy growth along seams, corners, or around stains, signaling prolonged humidity and organic deterioration that can compromise air quality and structural materials.
Prompt inspection, moisture measurement, and addressing source causes reduce spread; remediation may require cleaning, drying, and professional mold assessment for health and safety.
Dripping or Active Water Flow
Spotting active drips or visible streams of water on a ceiling is the most unmistakable sign of a current leak: puddles, steady drops, or water running along paint and fixtures indicate an immediate breach in plumbing, roofing, or condensation control.
Immediate action prevents escalation; isolate the source if possible, contain runoff with buckets, protect belongings, and contact a qualified professional to assess structural and moisture damage promptly.
Increased Water Bills or Low Water Pressure
Unexplained rises in water bills or a sudden drop in household water pressure can signal hidden ceiling leaks: escaping water from pipes or concealed roof damage often increases consumption while reducing flow at faucets and fixtures.
Occupants should compare meter readings, monitor usage patterns, and test pressure at multiple taps; if anomalies persist without surface stains, a concealed leak inspection or professional assessment is warranted.
Ceiling Cracks Around Fixtures or Vents
When hairline or wider cracks appear radiating from light fixtures, exhaust fans, or HVAC vents, they often indicate moisture-related weakening in the ceiling material rather than simple settling.
Such cracks commonly coincide with staining or musty odors and may track along joint seams or mounting holes.
Prompt inspection of the fixture cavity, attic above, and nearby plumbing helps identify leaks before electrical or structural damage worsens.
Warped or Soft Drywall/Plaster
Alongside cracks near fixtures, warped or soft drywall and plaster are clear physical signs that moisture has compromised ceiling materials.
Panels may bow, sag, or feel spongy when pressed. Edges can separate from joists and paint may bubble or peel.
Such deformation indicates prolonged exposure; prompt inspection can locate source, prevent structural deterioration, and reduce mold growth risk.
Stains Matching Roof or Plumbing Patterns
If stains trace the lines of roof rafters or follow the route of plumbing runs, they often reveal the leak’s origin rather than random surface discoloration.
Such patterned staining aligns with structural or piping layouts, guiding inspection toward specific roof valleys, flashing, or joints and particular pipe segments, fittings, or drain connections.
Prioritize those paths when diagnosing and accessing sources for repair.
Typical Causes of Ceiling Water Leaks
Common sources of ceiling water leaks include compromised roofing or flashing, clogged gutters and downspouts, and failing plumbing pipes.
HVAC condensation problems or overflowing drain pans, along with inadequate attic insulation or ventilation, also frequently contribute.
Identifying which of these causes is present guides targeted inspection and repair.
Roof Damage and Flashing Failures
Inspecting the roof often reveals that damaged shingles, degraded underlayment, and failed flashing are primary contributors to ceiling water leaks.
Compromised flashings around chimneys, vents, and skylights allow concentrated water entry. Wind uplift, age, or improper installation create gaps and channeling.
Timely roof inspections, targeted flashing repairs, and replacing deteriorated roofing materials prevent hidden leaks and ceiling damage.
Clogged or Damaged Gutters and Downspouts
Beyond roof material and flashing failures, problems in the gutter and downspout system frequently produce ceiling leaks by redirecting or pooling water against the building envelope.
Clogged gutters, sagging sections, detached fasteners, or crushed/downspout blockages cause overflow and saturation of eaves, fascia, and soffits.
Prolonged exposure leads to rot, compromised seals, and interior staining; regular cleaning and prompt repairs prevent escalation.
Plumbing Pipe Leaks and Burst Pipes
Plumbing pipe leaks and bursts rank among the most direct causes of ceiling water damage, occurring when supply lines, drainpipes, or fittings fail due to age, corrosion, freezing, pressure surges, or poor installation.
Signs include damp spots, staining, bulging drywall, dripping sounds, and sudden floods.
Immediate isolation of water, inspection of visible piping, and contacting a qualified plumber reduce structural and mold risks.
HVAC System Condensation or Drain Pan Issues
Condensation from HVAC equipment or a clogged/overflowing condensate drain pan frequently causes ceiling leaks, especially where air handlers, ductwork, or chilled-water coils are located above finished spaces.
Signs include localized staining, drips near return grills, or soft ceiling drywall.
Causes: blocked drain lines, damaged pans, improper slope, or frozen coils.
Recommended actions: inspect drains, clear blockages, replace pans, and verify condensate pump operation.
Attic Insulation and Ventilation Problems
Inspecting attic insulation and ventilation often reveals common causes of ceiling water leaks: inadequate insulation allows warm, moist air to reach cold roof sheathing, while poor ventilation traps moisture, promoting condensation and occasional ice dam formation.
Gaps, compressed batts, or missing vapor barriers increase moisture migration. Blocked soffits or insufficient ridge vents prevent airflow, causing persistent dampness, mold growth, and eventual ceiling stains or structural rot.
Appliance Failures (Water Heater, Washer) near Upper Floors
Many ceiling leaks on upper floors originate from failed appliances located above living spaces, particularly water heaters and washing machines.
Corroded tanks, loose fittings, pressure relief valve discharge, and supply hose ruptures produce steady or intermittent seepage.
Overflows, drain pan failures, and clogged lines also cause leaks.
Inspect connections, pans, hoses, and nearby floors; replace compromised components and install drip pans with proper drains to prevent recurrence.
Step-by-Step Diagnostic Checklist to Locate the Leak
A concise checklist guides the inspection from safety precautions to targeted searches, beginning with shutting off electricity and containing any active water.
The procedure moves room by room to document stains and moisture, then progresses to attic or crawlspace checks for tracking paths and to roof assessments for flashing or shingle failures.
Finally, focused plumbing checks in bathrooms, kitchens, and exposed piping confirm or rule out internal sources.
Initial Safety Precautions Before Inspection
Before any diagnostic steps are taken, safety must be established: cut power to the affected area, shut off water supply if a source is suspected, and guarantee stable footing with appropriate ladders and lighting so the inspector can work without introducing new hazards.
Wear eye and respiratory protection for mold or dust, use non-contact voltage tester, place buckets to catch drips, and clear access routes before proceeding.
Inspecting the Ceiling From Inside: Room-by-Room Steps
With safety measures in place, the inspector proceeds to a systematic room-by-room examination of interior ceilings to locate the leak source.
- Scan for stains, discoloration, bulging, and peeling paint.
- Gently press suspected areas for softness and moisture.
- Trace pipe runs, fixtures, and appliances above each ceiling section.
- Note timestamps, progressions, and photograph evidence for comparison and next-step decisions.
Checking the Attic or Crawlspace for Source Clues
Inspecting the attic or crawlspace yields direct clues about ceiling leaks that are not visible from living spaces.
The inspector checks insulation for damp spots, stains, or mold; follows water trails toward rafters, joists, vents, and pipe penetrations; examines sheathing and flashings for wetness; notes odor or active drips; documents locations and timing; and marks suspected source points for targeted repairs or further roof assessment.
Roof Inspection Steps for Homeowners
Findings in the attic or crawlspace guide the next step: a systematic roof inspection to verify sources and trace water entry paths.
Inspect shingles for damage, missing or lifted pieces, and granule loss.
Check flashing around chimneys, vents, and skylights for gaps or corrosion.
Examine roof valleys, gutters, and soffits for blockages or rot.
Note any sealant failures and roof penetrations needing repair.
Plumbing Inspection Steps (Bathrooms, Kitchens, Pipes)
Several focused checks inside the home help determine whether a ceiling leak originates from plumbing.
Inspect bathrooms and kitchens: run faucets, flush toilets, check under sinks for drips, and examine shower/bath seals.
Trace visible supply and drain lines in attic or crawlspaces for corrosion, loose joints, or wet insulation.
Note timing: leaks appearing after fixture use indicate plumbing; constant dampness suggests other sources.
Using Simple Tools: Moisture Meters, Thermal Cameras, and Dyes
After checking fixtures and visible plumbing, proceed to targeted diagnostics using simple tools that help pinpoint moisture pathways and active leaks.
Use a moisture meter to map wet areas, record relative readings, and mark high zones.
Scan with a thermal camera to reveal temperature differentials suggesting moisture.
Apply dye in suspected plumbing or drains to confirm flow paths.
Document findings and plan repairs.
Immediate Temporary Fixes to Stop Damage
When a ceiling leak is active, immediate measures focus on containing drips, protecting belongings, and preventing structural harm.
Simple steps include placing buckets or pans beneath drips, applying temporary patches to small openings, and shutting off water or electrical power when safety requires.
If the leak is extensive or poses electrical risk, contacting an emergency professional is advised rather than relying solely on DIY containment.
How to Contain Active Drips Safely
Contain active ceiling drips immediately to minimize structural and cosmetic damage while preparing a longer-term repair.
Place a bucket or container beneath the drip, using a shallow pan for multiple drops. Protect floors with towels or plastic sheeting.
If water pools on the ceiling, gently puncture the bulge with a screwdriver to release slowly into the container.
Avoid electrical fixtures and stay clear of wet wiring.
Temporary Patching for Small Ceiling Leaks
With active drips managed and pooling released, attention turns to short-term patches that limit further damage until a permanent repair can be made.
Apply waterproof tape or a self-adhesive patch to clean, dry drywall or plaster; use a temporary ceiling brace or backing board for sagging areas; seal small cracks with silicone or quick-setting plaster.
Monitor frequently and schedule permanent repair.
When to Turn Off Water or Power
If water intrusion is active or electrical fixtures are wet, the homeowner should shut off the water supply and power to the affected area immediately to prevent further structural damage and reduce electrocution risk.
After isolating utilities, inspect from a safe distance for active dripping, pooling, or sparking. Record locations, note appliance status, and avoid restoring systems until repairs or professional assessment guarantee safety.
Calling an Emergency Professional vs. DIY Containment
Many homeowners must quickly decide whether to call an emergency professional or implement temporary DIY measures to limit ceiling water damage. The choice depends on the leak’s severity, safety risks, and available skills and tools.
Professionals are necessary for major leaks, electrical hazards, or structural compromise.
For minor leaks, DIY containment—catching water, tarps, temporary plugs—reduces damage until a qualified repairer arrives.
Permanent Repair Options and Step-by-Step Fixes
The section outlines permanent repair options for ceiling leaks, covering roof repairs (shingles, flashing, valleys), plumbing fixes (pipe repair, joint replacement, rerouting), and HVAC/condensation corrections (drain lines, insulation).
It also describes ceiling restoration steps—drywall replacement, mold remediation, and repainting—along with typical cost estimates and timeframes for each repair.
Practical step-by-step guidance and decision points for when to hire a professional are provided.
Repairing Roof Leak Sources: Shingles, Flashing, and Valleys
Begin by locating the precise source of the roof leak—shingles, flashing, or valleys—since permanent repairs depend on accurate diagnosis.
Replace damaged shingles, sealing edges with roofing cement; lift adjacent shingles to reseal or replace flashing at chimneys, vents, and skylights.
Clear and re-seal valley metal or install new valley flashing.
Finish with underlayment replacement and water-testing to confirm repair integrity.
Fixing Plumbing Leaks: Pipe Repair, Joint Replacement, and Rerouting
Address plumbing leaks by first isolating the affected supply or drain line and evaluating whether the issue is a pinhole, corroded section, failed solder joint, or obstructed bend.
This diagnostic step determines whether a spot repair, joint replacement, or complete reroute is the most durable solution.
Perform spot repairs with coupon patches or slip couplings; replace compromised fittings, re-solder or use press fittings, or reroute to bypass damaged sections, testing under pressure.
HVAC and Condensation Corrections: Drain Lines and Insulation
When HVAC-related ceiling leaks stem from clogged condensate drains or inadequate insulation, diagnosing the source narrows the permanent solutions to targeted drain restoration and thermal barrier repair.
Technicians should inspect drain pans, trap lines, and venting for blockages or corrosion, then verify insulation continuity and vapor barriers to eliminate condensation pathways.
Recommended fixes include clearing or replacing drain lines, installing auxiliary condensate pumps, sealing joints, and upgrading insulation.
Ceiling Restoration: Drywall Replacement, Mold Remediation, and Repainting
Restore the ceiling by removing damaged drywall, remediating any mold, and finishing with proper taping, priming, and repainting to return the area to a safe, visually uniform condition.
Inspect structural framing and insulation; replace wet insulation.
Use appropriate PPE and EPA-approved mold treatments; discard contaminated materials.
Install new drywall, tape, mud, sand, prime with stain-blocking primer, and apply matching topcoat for durable, uniform finish.
Cost Estimates and Timeframes for Common Repairs
Following the drywall replacement, mold remediation, and repainting steps, homeowners and contractors can evaluate permanent repair options and expected costs and timelines for completing ceiling leak repairs. Typical repairs vary by scope, materials, and labor; budgets and schedules should reflect inspection findings and permit needs.
| Repair Type | Typical Cost (USD) | Timeframe |
|---|---|---|
| Minor patch | 100–400 | 1 day |
| Roof repair | 300–2,000 | 1–3 days |
| Structural fix | 1,000–5,000+ | 3–14 days |
When to Hire a Professional: Signs You Need an Expert
Signs such as sagging ceilings, widespread mold growth, or repeated leaks indicate the issue has moved beyond basic DIY fixes and warrants professional assessment.
Homeowners should determine whether a roofer, plumber, or restoration contractor is appropriate based on the leak’s source and damage extent.
When consulting pros, it is important to ask about diagnosis methods, proposed repairs, timelines, and a detailed written estimate.
Structural Compromise, Widespread Mold, or Recurrent Leaks
When ceiling stains broaden, sagging appears, or leaks recur despite temporary fixes, it indicates conditions beyond routine DIY repairs and warrants professional assessment.
Structural compromise (soft joists, bowed drywall), pervasive mold colonization, and persistent intrusion demand licensed evaluation.
Experts perform moisture mapping, structural inspection, and remediation planning to prevent collapse, health risks, and repeated damage—outcomes that exceed homeowner tools and expertise.
Choosing Between a Roofer, Plumber, or Restoration Contractor
After widespread damage, structural concerns, or recurrent leaks are identified, determining which professional to call becomes the next practical step.
A roofer addresses roof membrane, flashing, or shingle failures; a plumber handles internal supply, drain, or appliance leaks; a restoration contractor manages drying, mold remediation, and cosmetic repairs.
Choose based on source, scope, and safety—engage specialists when diagnosis or remediation exceeds DIY.
Questions to Ask Pros and What to Expect in an Estimate
What should a homeowner ask a contractor and expect in a written estimate before hiring help for ceiling water damage?
The homeowner should request contractor credentials, insurance proof, detailed scope (diagnosis, repairs, materials), timeline, permit needs, cleanup and mold remediation plans, warranty terms, and payment schedule.
Estimates should be itemized, include contingency allowances, and specify who is responsible for subcontractors and inspections.
Preventive Measures to Avoid Future Ceiling Leaks
Preventing ceiling leaks begins with routine roof and gutter maintenance and regular plumbing inspections, including winterization to reduce pipe freeze risks.
Proper attic insulation, ventilation, and moisture control further lower the chance of condensation-related damage.
Complementing these measures with leak detectors and smart-home alerts provides early warning to address problems before they escalate.
Regular Roof and Gutter Maintenance Schedule
While small repairs address immediate damage, a consistent roof and gutter maintenance schedule is essential to prevent ceiling leaks before they start; inspections at least twice a year—ideally spring and fall—and after major storms guarantee missing shingles, compromised flashing, clogged gutters, and roof penetrations are identified and repaired promptly.
- Inspect shingles and flashings for wear.
- Clean gutters and downspouts.
- Clear debris from valleys and penetrations.
- Schedule professional roof evaluations annually.
Plumbing Inspection and Winterization Tips
Because frozen or deteriorating pipes are common culprits of ceiling leaks, regular plumbing inspections and seasonal winterization are essential to protect a home’s interior.
Inspections should check pipe joints, shutoff valves, water pressure, and visible corrosion.
Winterization includes draining exterior lines, insulating exposed pipes, adding heat tape where needed, and testing backup heat sources to prevent freezing and subsequent ceiling damage.
Attic Insulation, Ventilation, and Moisture Control Strategies
Addressing attic insulation, ventilation, and moisture control reduces the risk that trapped humidity and temperature differentials will lead to condensation, ice dams, and ceiling leaks.
Properly installed insulation seals gaps, vapor barriers limit moisture migration, and balanced ventilation (ridge, soffit, and gable vents) equalizes temperatures.
Routine attic inspections, sealing penetrations, and controlling indoor humidity prevent deterioration and minimize future ceiling water intrusion.
Monitoring Systems: Leak Detectors and Smart Home Alerts
Installations of leak detectors and integrated smart-home alerts provide an active line of defense against ceiling water intrusion by detecting moisture, temperature anomalies, and unusual flow patterns before visible damage occurs.
These systems offer real-time notifications, automatic shutoff integration for plumbing, periodic self-tests, and data logging for trend analysis.
Proper placement and maintenance guarantee early intervention, reduced repair costs, and minimized mold risk.
Common Mistakes to Avoid When Dealing with Ceiling Leaks
Homeowners often dismiss small stains or musty odors until underlying leaks become extensive.
Superficial cosmetic repairs that do not stop the source allow rot and mold to spread.
Attempting unsafe DIY fixes can worsen structural damage and increase repair costs.
Ignoring Small Stains or Odors
Ignoring small stains or musty odors often leads to larger ceiling problems because these signs typically indicate ongoing moisture intrusion.
Homeowners who dismiss them risk mold growth, structural weakening, and hidden pipe or roof failures.
Prompt inspection and moisture measurement can reveal underlying causes before escalation.
Early documentation and timely repairs minimize health risks, repair costs, and the extent of remediation required.
Using Cosmetic Fixes Without Addressing the Source
Painting over stains or patching drywall without finding the leak source only delays the real problem and often increases long-term repair costs.
Cosmetic fixes can hide warning signs, allow mold growth, and permit structural deterioration. Proper assessment, moisture detection, and addressing plumbing or roof failures are necessary before surface repairs.
Otherwise, superficial work results in repeated jobs, higher expenses, and potential health hazards.
Unsafe DIY Repairs That Worsen Damage
Attempting quick fixes without proper diagnosis often compounds ceiling water damage rather than containing it.
Inexperienced homeowners may patch stains, paint over mold, or seal apparent drips while ignoring structural rot, hidden leaks, or electrical hazards.
Such shortcuts mask symptoms, delay proper repairs, increase remediation costs, and risk safety.
Professionals recommend assessment, moisture mapping, and targeted repair instead of improvised DIY patches.
Quick Reference: Decision Flowchart for Responding to a Ceiling Leak
Refer to the decision flowchart to quickly determine immediate actions and escalation steps when a ceiling leak is discovered; it guides assessment of safety, source verification, temporary containment, and whether professional intervention is required. The flowchart prioritizes safety, temporary mitigation, diagnosis, and escalation. Follow clear checkpoints and document observations for repairs or contractor handoff.
| Step | Action |
|---|---|
| 1 | Assess safety |
| 2 | Contain leak |
| 3 | Identify source |
| 4 | Escalate if needed |
Conclusion
When water stains appear, one reminder holds true: “a stitch in time saves nine.” The homeowner who acts promptly can limit damage and expense by recognizing telltale signs, following the diagnostic checklist, and applying temporary fixes while evaluating whether professional help is needed. Preventive maintenance reduces recurrence, and avoiding common mistakes preserves structural integrity. In short, timely attention, informed choices, and routine care turn a crisis into manageable upkeep.